 MySQL 5.7 安装与配置全攻略


 本文详细介绍了如何在CentOS7上安装MySQL 5.7,包括修改配置文件以实现永久修改`@@sql_mode`、远程访问授权、防火墙设置以及数据表操作等关键步骤。此外,还讲解了如何处理数据库连接、事务、笛卡尔积等常见问题。
基础知识
https://www.jianshu.com/p/b83d56d2b6fc
安装mysql5.7
参考文档:
https://dev.mysql.com/doc/mysql-yum-repo-quick-guide/en/
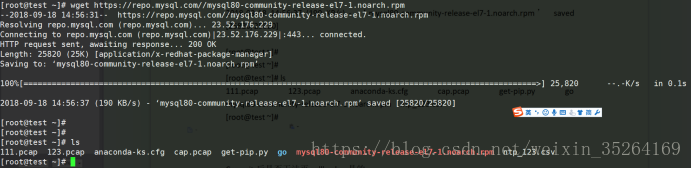
[root@test ~]# wget https://repo.mysql.com//mysql80-community-release-el7-1.noarch.rpm
--2018-09-18 14:56:31-- https://repo.mysql.com//mysql80-community-release-el7-1.noarch.rpm
Resolving repo.mysql.com (repo.mysql.com)... 23.52.176.229
Connecting to repo.mysql.com (repo.mysql.com)|23.52.176.229|:443... connected.
HTTP request sent, awaiting response... 200 OK
Length: 25820 (25K) [application/x-redhat-package-manager]
Saving to: ‘mysql80-community-release-el7-1.noarch.rpm’
100%[=====================================================================>] 25,820 --.-K/s in 0.1s
2018-09-18 14:56:37 (190 KB/s) - ‘mysql80-community-release-el7-1.noarch.rpm’ saved [25820/25820]
[root@test ~]# ls
111.pcap 123.pcap anaconda-ks.cfg cap.pcap get-pip.py go mysql80-community-release-el7-1.noarch.rpm ntp_123.csv
[root@test ~]#
[root@test ~]# rpm -Uvh mysql80-community-release-el6-n.noarch.rpm
error: open of mysql80-community-release-el6-n.noarch.rpm failed: No such file or directory
[root@test ~]# rpm -Uvh mysql80-community-release-el7-1.noarch.rpm
warning: mysql80-community-release-el7-1.noarch.rpm: Header V3 DSA/SHA1 Signature, key ID 5072e1f5: NOKEY
Preparing... ################################# [100%]
Updating / installing...
1:mysql80-community-release-el7-1 ################################# [100%]
[root@test ~]#vim /etc/yum.repos.d/mysql-community.repo
使能安装mysql57,去使能mysql80
# Enable to use MySQL 5.7
[mysql57-community]
name=MySQL 5.7 Community Server
baseurl=http://repo.mysql.com/yum/mysql-5.7-community/el/7/$basearch/
enabled=1
gpgcheck=1
gpgkey=file:///etc/pki/rpm-gpg/RPM-GPG-KEY-mysql
[mysql80-community]
name=MySQL 8.0 Community Server
baseurl=http://repo.mysql.com/yum/mysql-8.0-community/el/7/$basearch/
enabled=0
gpgcheck=1
gpgkey=file:///etc/pki/rpm-gpg/RPM-GPG-KEY-mysql

[root@test ~]#yum -y install mysql-community-server

获取初始密码:
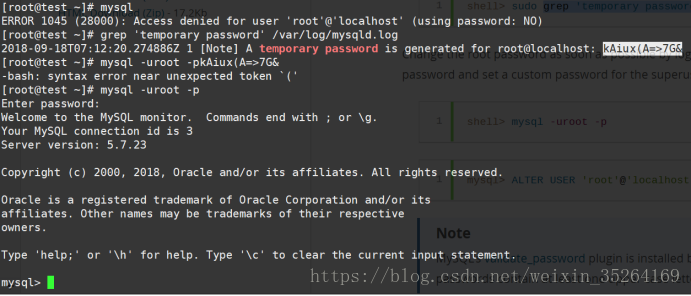
修改密码:
修改db的字符集、开启bin日志功能、修改@@sql_mode的my.cnf配置文件内容:
[root@localhost ~]# cat /etc/my.cnf
# For advice on how to change settings please see
# http://dev.mysql.com/doc/refman/5.7/en/server-configuration-defaults.html
[mysqld]
character-set-server=utf8
#
# Remove leading # and set to the amount of RAM for the most important data
# cache in MySQL. Start at 70% of total RAM for dedicated server, else 10%.
# innodb_buffer_pool_size = 128M
#
# Remove leading # to turn on a very important data integrity option: logging
# changes to the binary log between backups.
# log_bin
#
# Remove leading # to set options mainly useful for reporting servers.
# The server defaults are faster for transactions and fast SELECTs.
# Adjust sizes as needed, experiment to find the optimal values.
# join_buffer_size = 128M
# sort_buffer_size = 2M
# read_rnd_buffer_size = 2M
datadir=/var/lib/mysql
socket=/var/lib/mysql/mysql.sock
# Disabling symbolic-links is recommended to prevent assorted security risks
symbolic-links=0
log-error=/var/log/mysqld.log
pid-file=/var/run/mysqld/mysqld.pid
#binary log(确保logs文件夹已存在,且权限为mysql:mysql)
log-bin=/var/lib/mysql/logs/mysqld-bin
log-bin-index=/var/lib/mysql/logs/binlog_index
server-id = 1
#slow log
#slow_query_log=on
#slow_query_log_file=/var/lib/mysql/logs/slow.log
#long_query_time=1
sql_mode=STRICT_TRANS_TABLES,NO_ZERO_IN_DATE,NO_ZERO_DATE,ERROR_FOR_DIVISION_BY_ZERO,NO_AUTO_CREATE_USER,NO_ENGINE_SUBSTITUTION
[root@localhost ~]#
确保日志存放路径和文件都是mysql的主组权限:
[root@test mysql]# pwd
/var/lib/mysql
[root@test mysql]# ll
total 122952
-rw-r-----. 1 mysql mysql 56 Sep 18 15:12 auto.cnf
-rw-------. 1 mysql mysql 1679 Sep 18 15:12 ca-key.pem
-rw-r--r--. 1 mysql mysql 1107 Sep 18 15:12 ca.pem
-rw-r--r--. 1 mysql mysql 1107 Sep 18 15:12 client-cert.pem
-rw-------. 1 mysql mysql 1675 Sep 18 15:12 client-key.pem
-rw-r-----. 1 mysql mysql 312 Sep 18 15:35 ib_buffer_pool
-rw-r-----. 1 mysql mysql 12582912 Sep 18 15:35 ibdata1
-rw-r-----. 1 mysql mysql 50331648 Sep 18 15:35 ib_logfile0
-rw-r-----. 1 mysql mysql 50331648 Sep 18 15:12 ib_logfile1
-rw-r-----. 1 mysql mysql 12582912 Sep 18 15:35 ibtmp1
drwxr-xr-x. 2 mysql mysql 95 Sep 18 15:35 logs
drwxr-x---. 2 mysql mysql 4096 Sep 18 15:12 mysql
srwxrwxrwx. 1 mysql mysql 0 Sep 18 15:35 mysql.sock
-rw-------. 1 mysql mysql 6 Sep 18 15:35 mysql.sock.lock
drwxr-x---. 2 mysql mysql 8192 Sep 18 15:12 performance_schema
-rw-------. 1 mysql mysql 1675 Sep 18 15:12 private_key.pem
-rw-r--r--. 1 mysql mysql 451 Sep 18 15:12 public_key.pem
-rw-r--r--. 1 mysql mysql 1107 Sep 18 15:12 server-cert.pem
-rw-------. 1 mysql mysql 1679 Sep 18 15:12 server-key.pem
drwxr-x---. 2 mysql mysql 8192 Sep 18 15:12 sys
重启mysql即可
免密登陆mysql
然后重启mysql
[root@test ~]# systemctl restart mysqld.service
[root@test ~]#
[root@test ~]# mysql -uroot -p
Enter password:
Welcome to the MySQL monitor. Commands end with ; or \g.
Your MySQL connection id is 2
Server version: 5.7.23-log MySQL Community Server (GPL)
Copyright (c) 2000, 2018, Oracle and/or its affiliates. All rights reserved.
Oracle is a registered trademark of Oracle Corporation and/or its
affiliates. Other names may be trademarks of their respective
owners.
Type 'help;' or '\h' for help. Type '\c' to clear the current input statement.
mysql>
使用mysql
Mysql架构图

1
修改字符集
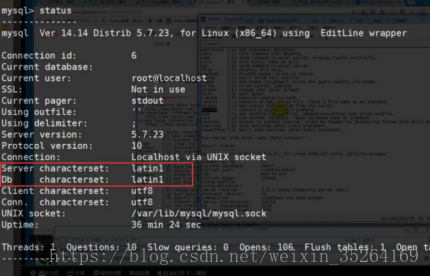
解决:
编辑MySQL的配置文件,把数据库默认的编码全部改为UTF-8。MySQL的配置文件默认存放在/etc/my.cnf
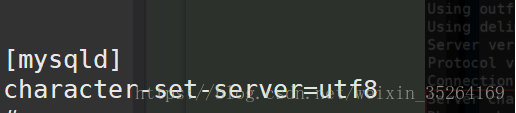
或者/etc/mysql/my.cnf
修改完后重启 mysql
2
开启binlog日志报错:

解决:
开启日志功能
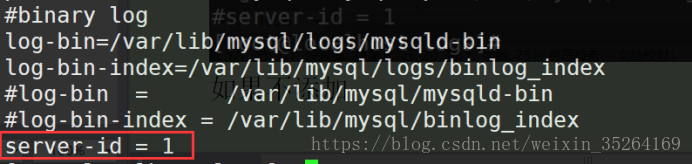
server-id=1 #表示是本机的序号为1,一般来讲就是master的意思
注意:
如果没指定的日志路径,就要创建相应的文件,并将owner和group权限改成mysql
如果不添加最后一行server-id就不行
3
查看binlog日志mysqld-bin.000003时是乱码
解决:
mysqlbinlog /data2/mysqld.bin00001 --查看binlog文件中的内容
4
获取所有表数据的条目数
mysql> select table_name,table_rows from information_schema.tables where TABLE_SCHEMA = '你指定的数据库名' order by table_rows desc;
+------------+------------+
| table_name | table_rows |
+------------+------------+
| t5 | 10 |
| t4 | 1 |
| t2 | 1 |
| t3 | 0 |
+------------+------------+
4 rows in set (0.00 sec)
获取单表数据的条目数
select count(*) from t1;
6
去重,只能针对表中某个字段进行,如果有多个字段,且不同就不会去重
mysql> select distinct id from t1 where name regexp '.*';
+------+
| id |
+------+
| 1 |
| 2 |
| 3 |
| 4 |
| 5 |
+------+
5 rows in set (0.00 sec)
mysql> select distinct id,name,math,english from t1 where name regexp '.*';
+------+----------+------+---------+
| id | name | math | english |
+------+----------+------+---------+
| 1 | zhangsan | 55 | 66 |
| 2 | lisi | 66 | 77 |
| 3 | wangwu | 65 | 30 |
| 2 | li04 | 88 | 99 |
| 3 | wang5 | 75 | 73 |
| 4 | zhao6 | 75 | 73 |
| 5 | liu3 | 85 | 43 |
+------+----------+------+---------+
7 rows in set (0.00 sec)
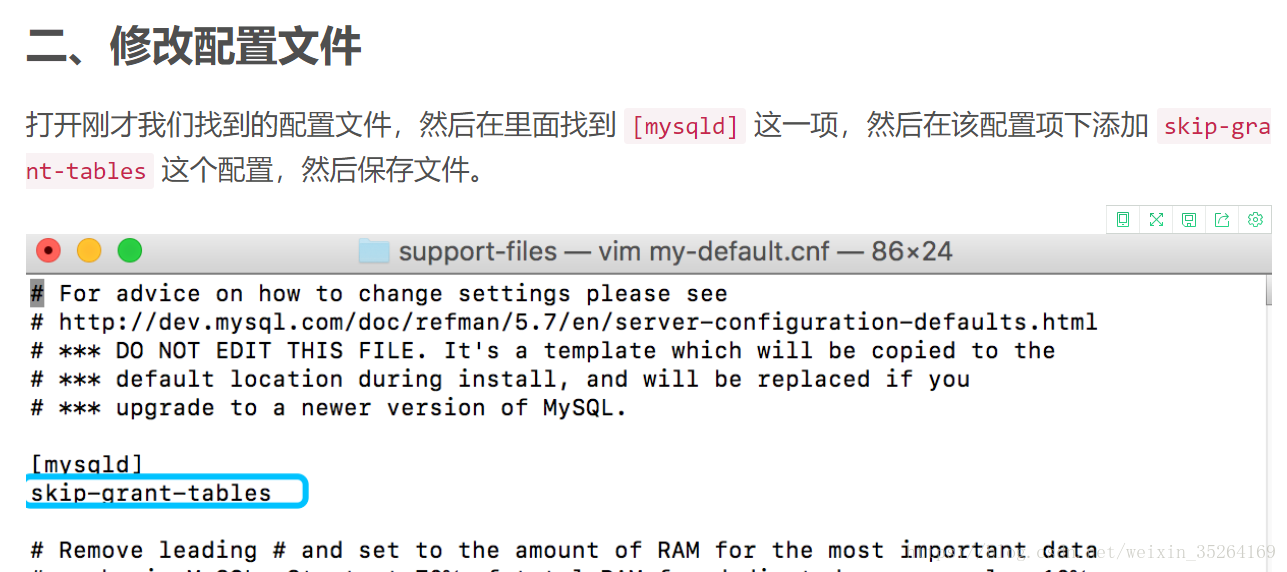
永久修改@@sql_mode方法:
vi /etc/my.cnf
在[mysqld]下面添加如下列:
sql_mode=STRICT_TRANS_TABLES,NO_ZERO_IN_DATE,NO_ZERO_DATE,ERROR_FOR_DIVISION_BY_ZERO,NO_AUTO_CREATE_USER,NO_ENGINE_SUBSTITUTION
重启mysql
systemctl restart mysqld.service
登陆mysql
mysql -uroot -pMysqlpassw0rd.
select @@sql_mode;
+-------------------------------------------------------------------------------+
| @@sql_mode
+------------------------------------------------------------------------------+
| STRICT_TRANS_TABLES,NO_ZERO_IN_DATE,NO_ZERO_DATE,ERROR_FOR_DIVISION_BY_ZERO,NO_AUTO_CREATE_USER,NO_ENGINE_SUBSTITUTION |
+------------------------------------------------------------------------------+
远程连接mysql授权(远程访问mysql授权)
mysql> GRANT ALL PRIVILEGES ON *.* TO 'root'@'%'WITH GRANT OPTION;
Query OK, 0 rows affected (0.00 sec)
mysql> flush privileges;
Query OK, 0 rows affected (0.01 sec)
mysql>
远程连接测试:
mysql -uroot -pMysqlpassw0rd. -h192.168.1.111
Centos7防火墙允许访问mysql的端口
[root@localhost ~]# systemctl start firewalld.service
[root@localhost ~]# firewall-cmd --zone=public --add-port=3306/tcp --permanent
success
[root@localhost ~]# firewall-cmd --reload
success
[root@localhost ~]#
获取表的数据条数
mysql> select count(*) from tbl_udp_123;
+----------+
| count(*) |
+----------+
| 40 |
+----------+
1 row in set (0.00 sec)
mysql>
笛卡尔积
mysql> select * from t1;
+------+-------+
| id | name |
+------+-------+
| 1 | shen |
| 2 | zhang |
| 3 | wan |
+------+-------+
3 rows in set (0.00 sec)
mysql> select * from t2;
+------+-------+
| id | score |
+------+-------+
| 1 | 90 |
| 2 | 100 |
| 3 | 90 |
+------+-------+
3 rows in set (0.00 sec)
(笛卡尔积)
mysql> select * from t1,t2;
+------+-------+------+-------+
| id | name | id | score |
+------+-------+------+-------+
| 1 | shen | 1 | 90 |
| 2 | zhang | 1 | 90 |
| 3 | wan | 1 | 90 |
| 1 | shen | 2 | 100 |
| 2 | zhang | 2 | 100 |
| 3 | wan | 2 | 100 |
| 1 | shen | 3 | 90 |
| 2 | zhang | 3 | 90 |
| 3 | wan | 3 | 90 |
+------+-------+------+-------+
9 rows in set (0.00 sec)
mysql>
复制表结构
create table t3 like t1; --复制表结构
复制表数据
insert into t3 select * from t1;
多表联查
select t1.id,t1.name,t2.score from t1,t2 where t1.id=t2.id;
常规查表:
mysql> select * from t1,t2;
mysql> select * from t1,t2 where t1.id=t2.id;
+------+-------+------+-------+
| id | name | id | socre |
+------+-------+------+-------+
| 1 | lee | 1 | 90 |
| 2 | zhang | 2 | 100 |
+------+-------+------+-------+
2 rows in set (0.00 sec)
mysql> select * from t1;
+------+-------+
| id | name |
+------+-------+
| 1 | shen |
| 2 | zhang |
| 3 | wan |
+------+-------+
3 rows in set (0.00 sec)
mysql> select * from t2;
+------+-------+
| id | score |
+------+-------+
| 4 | 90 |
| 2 | 100 |
| 3 | 90 |
+------+-------+
左连接(以左表为标准连接右表):
letft join=left [outer] join
mysql> select * from t1 left outer join t2 on t1.id=t2.id;
+------+-------+------+-------+
| id | name | id | score |
+------+-------+------+-------+
| 2 | zhang | 2 | 100 |
| 3 | wan | 3 | 90 |
| 1 | shen | NULL | NULL |
+------+-------+------+-------+
3 rows in set (0.00 sec)
右连接(以右表为标准连接左表):
mysql> select * from t1 right outer join t2 on t1.id=t2.id;
+------+-------+------+-------+
| id | name | id | score |
+------+-------+------+-------+
| 2 | zhang | 2 | 100 |
| 3 | wan | 3 | 90 |
| NULL | NULL | 4 | 90 |
+------+-------+------+-------+
3 rows in set (0.00 sec)
内连接:取多表之间的交集
mysql> select * from t1 inner join t2 where t1.id=t2.id;
+------+-------+------+-------+
| id | name | id | score |
+------+-------+------+-------+
| 2 | zhang | 2 | 100 |
| 3 | wan | 3 | 90 |
+------+-------+------+-------+
2 rows in set (0.00 sec)
纵向连接:
mysql> select * from t1 union select * from t2;
+------+-------+
| id | name |
+------+-------+
| 1 | shen |
| 2 | zhang |
| 3 | wan |
| 4 | 90 |
| 2 | 100 |
| 3 | 90 |
+------+-------+
6 rows in set (0.00 sec)
卸载mysql
主要的卸载步骤和内容参考:(谨慎删除相关的库文件)
https://www.cnblogs.com/kerrycode/p/4364465.html
最后加上删除配置文件:
rm -rf /etc/my.cnf
问题集:
什么是事务?
Commit后是否无法再rollback?是的
哪些数据库操作必须使用commit?和DDL、DML是否有关?
sql = "create table db03.t4 like db03.t3;"
result=cur.execute(sql)
print(result)
为什么用pymysql无法执行?
sql = "create table db03.t4 like db03.t3;"
result=cur.execute(sql)
print(result)
什么是SQLAlchemy?
使用聚合函数查询报错?
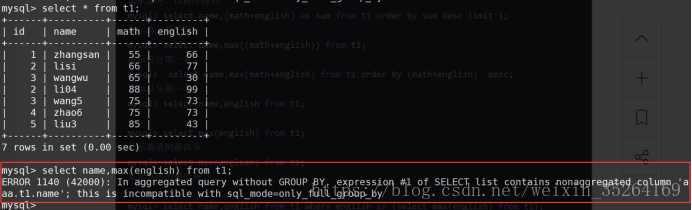
解决:
第一种就是使用group_by使用某个字段进行分组
第二种办法就是修改sql_mode
临时修改方法:
Mysql5.7默认是sql_mode为:
mysql> SELECT @@sql_mode;
+------------------------------------------------------------------------------+
| @@sql_mode
+------------------------------------------------------------------------------+
| ONLY_FULL_GROUP_BY,STRICT_TRANS_TABLES,NO_ZERO_IN_DATE,NO_ZERO_DATE,ERROR_FOR_DIVISION_BY_ZERO,NO_AUTO_CREATE_USER,NO_ENGINE_SUBSTITUTION |
+------------------------------------------------------------------------------------------------------------------------+
1 row in set (0.00 sec)
设置去掉ONLY_FULL_GROUP_BY
mysql>set @@sql_mode='STRICT_TRANS_TABLES,NO_ZERO_IN_DATE,NO_ZERO_DATE,ERROR_FOR_DIVISION_BY_ZERO,NO_AUTO_CREATE_USER,NO_ENGINE_SUBSTITUTION';
Query OK, 0 rows affected (0.00 sec)
mysql> select id,name,math,max(english) from t1;
+------+----------+------+--------------+
| id | name | math | max(english) |
+------+----------+------+--------------+
| 1 | zhangsan | 55 | 99 |
+------+----------+------+--------------+
1 row in set (0.00 sec)
mysql>
永久修改@@sql_mode方法:
vi /etc/my.cnf
[mysqld]
sql_mode=STRICT_TRANS_TABLES,NO_ZERO_IN_DATE,NO_ZERO_DATE,ERROR_FOR_DIVISION_BY_ZERO,NO_AUTO_CREATE_USER,NO_ENGINE_SUBSTITUTION
重启mysql
systemctl restart mysqld.service
登陆mysql
mysql -uroot -pMysqlpassw0rd.
select @@sql_mode;
+-------------------------------------------------------------------------------+
| @@sql_mode
+------------------------------------------------------------------------------+
| STRICT_TRANS_TABLES,NO_ZERO_IN_DATE,NO_ZERO_DATE,ERROR_FOR_DIVISION_BY_ZERO,NO_AUTO_CREATE_USER,NO_ENGINE_SUBSTITUTION |
+------------------------------------------------------------------------------+
参考
作者:知了啊文
链接:https://www.jianshu.com/p/3ce2245bafae
來源:简书
简书著作权归作者所有,任何形式的转载都请联系作者获得授权并注明出处。


 455
455

 被折叠的 条评论
为什么被折叠?
被折叠的 条评论
为什么被折叠?
 到【灌水乐园】发言


