一、命令行使用详解
使用Pytest插件在Playwright 中来编写端到端的测试。
1、命令行执行测试
pytest --browser webkit --headed
2、使用 pytest.ini 文件配置
内容如下:
   [pytest]


   # Run firefox with UI


     addopts = --headed --browser firefox
效果:
运行测试类,可以直接可以按照配置执行
命令行执行,无需指定参数输入pytest即可
3、CLI 参数详解
前提:未使用pytest.ini配置
3.1、在带头模式下运行测试(默认:无头)
pytest --headed
3.2、在不同的浏览器中运行测试
在不同的浏览器 chromium、firefox 或 webkit 中运行测试。可以多次指定(默认:chromium)
pytest --browser chromium --headed
3.3、使用的浏览器通道
pytest --browser-channel chrome --headed
3.4、将 Playwright 操作速度减慢指定的毫秒数
将 Playwright 操作速度减慢指定的毫秒数。很有用,以便您可以查看正在发生的事情(默认值:0)。
pytest --browser chromium --headed --slowmo 5000(5秒)
3.5、记录测试结果
是否为每个测试记录跟踪。on、off或retain-on-failure(默认:off)
pytest --browser chromium --headed --tracing on
3.6、视频录制
是否为每个测试录制视频。on、off或retain-on-failure(默认:off)。
pytest --browser chromium --headed --video on
结果默认保存在test-results目录下,和测试结果文件一样

3.7、截图
是否在每次测试后自动捕获屏幕截图。on、off或only-on-failure(默认:off)
pytest --browser chromium --headed --screenshot on
效果:

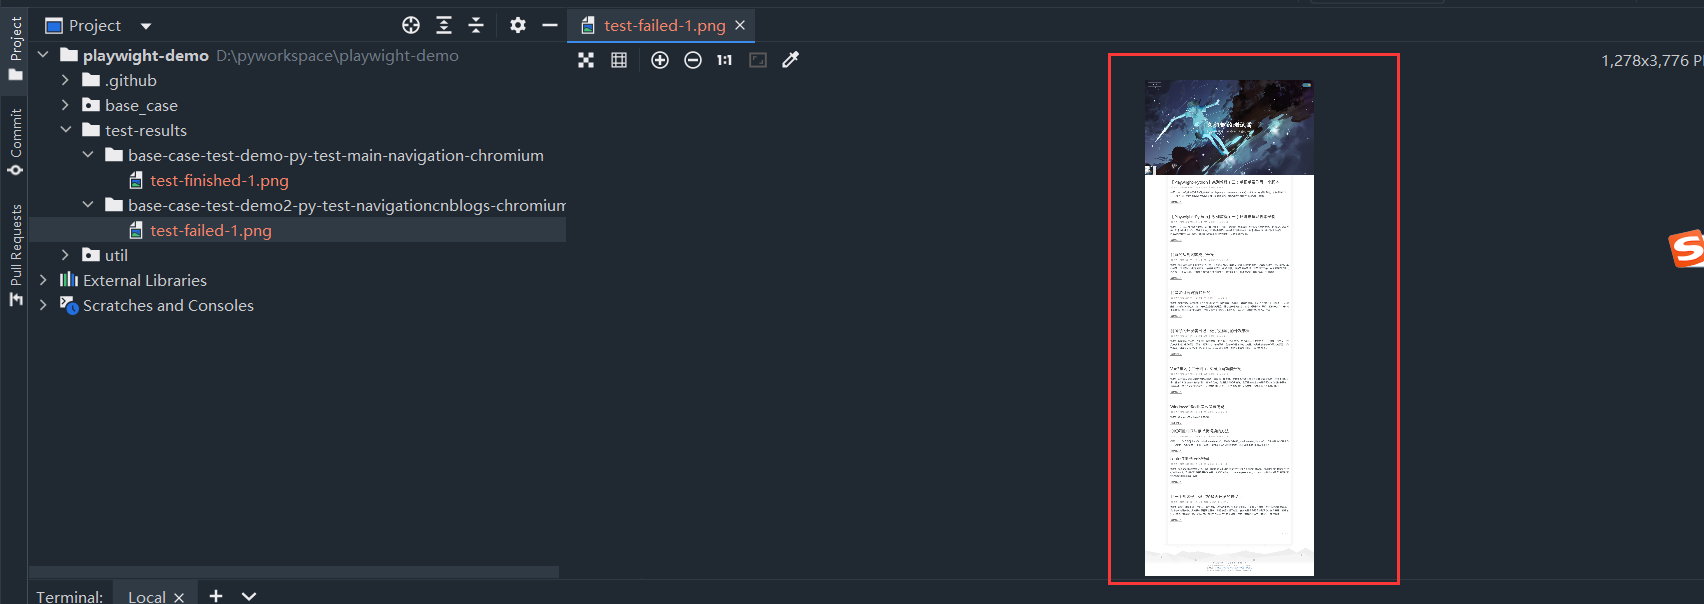
在失败时截取整页截图(长截图)默认情况下,仅捕获视口。需要启用 --screenshot(默认off).
pytest --browser chromium --headed --screenshot on --full-page-screenshot
效果:

二、Fixtures夹具
因为我们使用fixture更加灵活,具体有独立的命名,然后呢,还可以按模块化的方式实现,每个fixture都可以互相调用,并且呢范围可以跨函数、类、模块、还有整个session范围
那fixture怎么使用呢?
1、fixture初步使用
我们直接在函数前定义就可以
@pytest.fixture()
但是这块是有一些注意事项:要定义的函数最好不要以test开头,和用例分开,并且fixture定义的函数是有返回值的,下边的测试用例可以调用fixture的返回值
我们看下实战
   @pytest.fixture()


   def set():


       print("----在用例前执行----")


   def test_01(set):


       print('用例1')
这里我们定义了一个测试夹具,然后再test_01中使用了测试夹具的参数,那么执行结果应该是会先调用这个夹具函数,然后再执行用例函数
2、fixture进一步使用
我们还有一种使用fixture的方式
@pytest.mark.usefixtures(fixture_name)
这样使用,我们如果用在类上呢,这个类下的所有用例都会调用这个fixture
直接看实战:
   @pytest.fixture()


   def set():


       print("----在用例前执行----")


   @pytest.mark.usefixtures('set')


   class Test_Demo():


       def test_01(self):


           print('用例1')


       def test_02(self):


           print('用例2')
每个用例前都执行了测试夹具
那么还有一种只作用在用例上呢
看实战:
   @pytest.fixture()


   def set():


       print("----在用例前执行----")


   class Test_Demo():


       @pytest.mark.usefixtures('set')


       def test_01(self):


           print('用例1')


       def test_02(self):


           print('用例2')
只有用例1前执行了测试夹具
3、fixture作用域
在我们之前用了setupClass和tearDownclass,指的是在每个类前会执行前置,在执行后置
那我们在fixture中,也可以这样使用
并且有好几个:
- unction:默认作用域,每个测试用例都运行一次
- class:每个测试类只执行一次
- module:每个模块只执行一次
- package:每个python包只执行一次
- session:整个会话只执行一次,即运行项目时整个过程只执行一次
如果设置多个的话,会有一个优先级:session > package > module > class > function
那我们以其中的作用域为class做一个实战场景:
   @pytest.fixture(scope='class')


   def set():


       print("----在用例前执行----")


   class Test_Demo1:


       def test_01(self,set):


           print('用例1执行')


       def test_02(self,set):


           print('用例2执行')


   class Test_Demo2():


       def test_01(self,set):


           print('第二个类中的用例1')
我们在夹具函数上定义每个类只执行一次
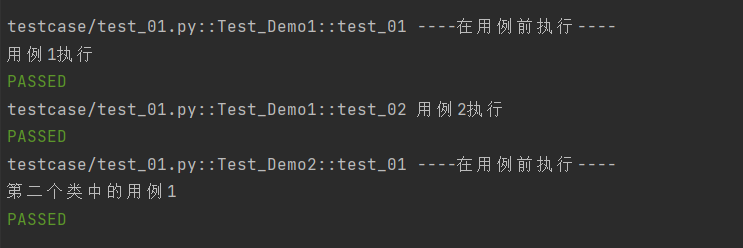
现在猜下执行结果是什么,是不是夹具——>Test_Demo1,夹具——>Test_Demo2
直接看结果:

4、自定义夹具的使用
对于browser和context夹具,请使用以下夹具来定义自定义启动选项。
- browser_type_launch_args:覆盖 browser_type.launch() 的启动参数。它应该返回一个 Dict。
- browser_context_args:覆盖 browser.new_context() 的选项。它应该返回一个 Dict。
示例代码:
    import pytest


    @pytest.mark.browser_context_args(timezone_id="Europe/Berlin", locale="en-GB")


    def test_browser_context_args(page):


        assert page.evaluate("window.navigator.userAgent") == "Europe/Berlin"


        assert page.evaluate("window.navigator.languages") == ["de-DE"]
三、配置测试
1、并行测试
   # install dependency


   pip install pytest-xdist


   # use the --numprocesses flag


   pytest --numprocesses auto
根据测试的硬件和性质,可以将 numprocesses 设置为从 2 到计算机上的 CPU 数量之间的任意值。如果设置得太高,您可能会注意到意外行为。
2、跳过测试
   @pytest.mark.skip("firefox")


   def test_visit_example(page):


       page.goto("https://www.alipansou.com/")
3、配置 base-url执行
使用 base-url 参数启动 Pytest。pytest-base-url 插件用于允许您从配置、CLI arg 或作为固定装置设置基本 url 的插件。
pytest --base-url [http://localhost:8080](http://localhost:8080)
    def test_visit_example(page):


        page.goto("/admin")


        # -> Will result in http://localhost:8080/admin
4、忽略 HTTPS 错误
conftest.py
    import pytest


    @pytest.fixture(scope="session")


    def browser_context_args(browser_context_args):


        return {


            **browser_context_args,


            "ignore_https_errors": True


        }
5、使用自定义视口大小
conftest.py
    import pytest


    @pytest.fixture(scope="session")


    def browser_context_args(browser_context_args):


        return {


            **browser_context_args,


            "viewport": {


                "width": 1920,


                "height": 1080,


            }


        }
6、设备仿真
conftest.py
    import pytest


    @pytest.fixture(scope="session")


    def browser_context_args(browser_context_args, playwright):


        iphone_11 = playwright.devices['iPhone 11 Pro']


        return {


            **browser_context_args,


            **iphone_11,


}使用pytest --device="iPhone 11 Pro" --headed执行脚本
效果:

7、与 unittest.TestCase的使用
与 unittest.TestCase。这有一个限制,即只能指定一个浏览器,并且在指定多个浏览器时不会生成多个浏览器的矩阵。
示例代码:
    # -*- coding: utf-8 -*-


    # @Time    : 2024/07/06 18:10


    # @Author  : longrong.lang


    # @FileName: test_unittest.py


    # @Software: PyCharm


    # @Cnblogs :https://www.cnblogs.com/longronglang


    # @Motto:你只管努力,剩下的交给天意.


    import pytest


    import unittest


    from playwright.sync_api import Page


    class MyTest(unittest.TestCase):


        @pytest.fixture(autouse=True)


        def setup(self, page: Page):


            self.page = page


        def test_foobar(self):


            self.page.goto("https://microsoft.com")


            assert self.page.evaluate("1 + 1") == 2
8、运行调试
在测试代码中使用 breakpoint() 语句暂停执行并获取 pdb REPL。
    def test_bing_is_working(page):


        page.goto("https://bing.com")


        breakpoint()


        # ...
如何进行调试:
- 启动调试:当程序在breakpoint()处暂停时,它会自动进入pdb调试环境。
- 查看状态:在pdb中,你可以使用命令如l(list)来查看当前代码周围的行,p 变量名来打印变量的值。
- 继续执行:要继续执行程序直到下一个断点或程序结束,你可以输入c(continue)命令。
- 如果你只是想在特定点暂停代码执行,但不希望进入pdb环境,可以考虑使用其他方法,比如打印语句(print())或条件断点。
四、关于自动等待的说明
Playwright能自动等页面准备好,但有时你可能想让它等一会儿。别用time.sleep(5)来等,因为它会让程序完全停下来。改用page.wait_for_timeout(5000)吧,这样程序在等待时还能做其他事,更流畅。
__EOF__
- 本文作者: 久曲健的测试窝
- 本文链接: https://www.cnblogs.com/longronglang/p/18288953
- 关于博主: 评论和私信会在第一时间回复。或者直接私信我。
- 版权声明: 本博客所有文章除特别声明外,均采用 BY-NC-SA 许可协议。转载请注明出处!
- 声援博主: 如果您觉得文章对您有帮助,可以点击文章右下角【推荐】一下。


 4942
4942

 被折叠的 条评论
为什么被折叠?


