


 本文详细介绍了如何使用Apache CXF框架配置基于SOAP及REST风格的WebService服务,包括核心包引入、web.xml配置、Spring配置文件设置以及Restful WebService支持的添加等关键步骤。

java 阵营中的Apache-cxf和C#的wcf目前是市场上webservice产品的主流框架。
Web Service技术简单的说就是一种带有跨平台特征的,能够使得应用程序经由web形式交互的一种服务端技术。其标准依据, 无论客户端应用所使用的语言、 平台或内部协议是什么, 都可以相互交换数据,执行具体的业务功能。
web service的描述语言依据风格和标准各不相同,但表示的业务过程并不受太多的影响。目前基于soap(Simple Object Access Protocol)描述语言是xml形式的wsdl(web service define language)web service定义语言;基于REST风格则抛弃了这种方式,采用基于HTTP的资源访问控制,并使用json交互。
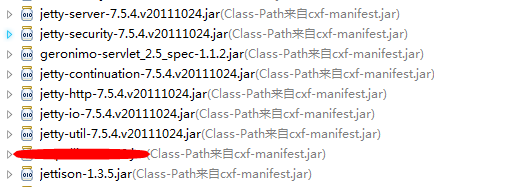
1.在WEB-INF/lib下加CXF核心包
注意,如果发布的是web项目,jar包不易乱放,另外的话jdk版本必须是jdk1.7+

此外,我们要在Tomcat下部署,需要删除一切Jetty相关的包以及和Servlet Api冲突的jar包。
2.然后配置web.xml
注意:如果要和SpringMVC搭配,这个配置必须配置在SpringDispatcherServlet的前面,否则无法拦截到请求。
<?xml version="1.0" encoding="UTF-8"?>
<web-app xmlns:xsi="http://www.w3.org/2001/XMLSchema-instance"
	xmlns="http://java.sun.com/xml/ns/javaee"
	xsi:schemaLocation="http://java.sun.com/xml/ns/javaee http://java.sun.com/xml/ns/javaee/web-app_2_5.xsd"
	version="2.5">
	<listener>
        <listener-class>org.springframework.web.context.ContextLoaderListener</listener-class>
    </listener>

    <context-param>
        <param-name>contextConfigLocation</param-name>
        <param-value>/WEB-INF/applicationContext.xml</param-value>
    </context-param>
 	<!--所有来自/*的请求,都交由 CXFServlet来处理-->
    <servlet>
        <servlet-name>HelloWorldService</servlet-name>
        <servlet-class>org.apache.cxf.transport.servlet.CXFServlet</servlet-class>
        <load-on-startup>1</load-on-startup>
    </servlet>
    <servlet-mapping>
        <servlet-name>HelloWorldService</servlet-name>
        <url-pattern>/WebService/*</url-pattern>
    </servlet-mapping>

</web-app>
3.配置spring applicationContext.xml
注意,我们如果有多个服务,只需要多配制几个<jaxws:endpoint >即可。
<?xml version="1.0" encoding="UTF-8"?>
<beans xmlns="http://www.springframework.org/schema/beans"
    xmlns:xsi="http://www.w3.org/2001/XMLSchema-instance"
    xmlns:jaxws="http://cxf.apache.org/jaxws"
    xsi:schemaLocation="
		http://www.springframework.org/schema/beans http://www.springframework.org/schema/beans/spring-beans.xsd
		http://cxf.apache.org/jaxws http://cxf.apache.org/schemas/jaxws.xsd">

	<import resource="classpath:META-INF/cxf/cxf.xml" />
    <import resource="classpath:META-INF/cxf/cxf-extension-soap.xml" />
    <import resource="classpath:META-INF/cxf/cxf-servlet.xml" />


  	<!-- 用户的Service -->
    <bean id="userService" class="com.tgb.service.impl.UserServiceImpl">
    </bean>

     <bean id="helloWorld" class="com.tgb.service.impl.HelloWorldImpl">
    	<property name="userService" ref="userService"></property>
    </bean>

	<!-- implementor指定webservice的服务提供者 -->
	<!-- address为wsdl的访问地址 -->
    <jaxws:endpoint id="hello" implementor="#helloWorld"  address="/helloWorld"  >
		<!-- 添加了2个In拦截器,如果不添加拦截器,可直接注释掉如下代码 -->
		<jaxws:inInterceptors>
			<bean class="org.apache.cxf.interceptor.LoggingInInterceptor"/>
			<bean class="com.tgb.auth.AuthInterceptor"/>
		</jaxws:inInterceptors>
		<!-- 如果要配置Out拦截器,使用outInterceptors -->
	</jaxws:endpoint>

	 <jaxws:endpoint id="test" implementor="#helloWorld"   address="/userService"  >
		<!-- 添加了2个In拦截器,如果不添加拦截器,可直接注释掉如下代码 -->
		<jaxws:inInterceptors>
			<bean class="org.apache.cxf.interceptor.LoggingInInterceptor"/>
			<bean class="com.tgb.auth.AuthInterceptor"/>
		</jaxws:inInterceptors>
		<!-- 如果要配置Out拦截器,使用outInterceptors -->

	</jaxws:endpoint>

</beans>
address表示在CXFServlet下的一个分路径,也就是说访问 http://hostname:[端口]/WS/webService 便可以访问到此webserice。另外也可以注意到,一个web项目依据这种方式也可以发布多个web服务。
4.访问WebService
然后我们访问页面可以看到如下效果
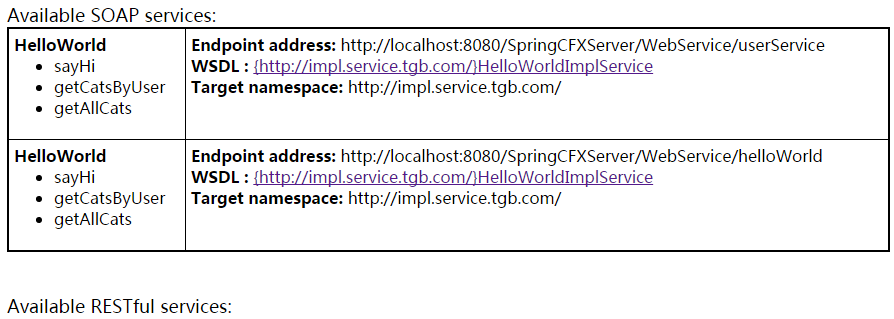
随便点击其中一个服务的连接,便能查看到wsdl的定义,这里我们省略。
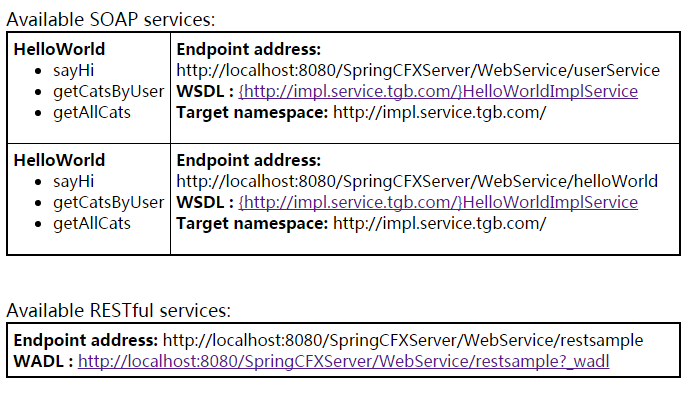
5.添加restful webService支持
如果要实现RestfulService,我们需要如下配置Application.xml
<?xml version="1.0" encoding="UTF-8"?>
<beans xmlns="http://www.springframework.org/schema/beans"
    xmlns:xsi="http://www.w3.org/2001/XMLSchema-instance"
    xmlns:jaxws="http://cxf.apache.org/jaxws"
    xmlns:jaxrs="http://cxf.apache.org/jaxrs"
    xsi:schemaLocation="
		http://www.springframework.org/schema/beans http://www.springframework.org/schema/beans/spring-beans.xsd
		http://cxf.apache.org/jaxws http://cxf.apache.org/schemas/jaxws.xsd
		http://cxf.apache.org/jaxrs http://cxf.apache.org/schemas/jaxrs.xsd">

	<import resource="classpath:META-INF/cxf/cxf.xml" />
    <import resource="classpath:META-INF/cxf/cxf-extension-soap.xml" />
    <import resource="classpath:META-INF/cxf/cxf-servlet.xml" />

  	<!-- 用户的Service -->
    <bean id="userService" class="com.tgb.service.impl.UserServiceImpl">
    </bean>
     <bean id="helloWorld" class="com.tgb.service.impl.HelloWorldImpl">
    	<property name="userService" ref="userService"></property>
    </bean>
    <bean id="resultSample" class="com.tgb.service.impl.MyRestfulServiceImpl">
    </bean>

	<!-- implementor指定webservice的服务提供者 -->
	<!-- address为wsdl的访问地址 -->
    <jaxws:endpoint id="hello" implementor="#helloWorld"  address="/helloWorld"  >
		<!-- 添加了2个In拦截器,如果不添加拦截器,可直接注释掉如下代码 -->
		<jaxws:inInterceptors>
			<bean class="org.apache.cxf.interceptor.LoggingInInterceptor"/>
			<bean class="com.tgb.auth.AuthInterceptor"/>
		</jaxws:inInterceptors>
		<!-- 如果要配置Out拦截器,使用outInterceptors -->
	</jaxws:endpoint>
	 <jaxws:endpoint id="test" implementor="#helloWorld"    address="/userService"  >
		<!-- 添加了2个In拦截器,如果不添加拦截器,可直接注释掉如下代码 -->
		<jaxws:inInterceptors>
			<bean class="org.apache.cxf.interceptor.LoggingInInterceptor"/>
			<bean class="com.tgb.auth.AuthInterceptor"/>
		</jaxws:inInterceptors>
		<!-- 如果要配置Out拦截器,使用outInterceptors -->
	</jaxws:endpoint>
	 <jaxrs:server id="restful" address="/restsample">
        <jaxrs:serviceBeans>
            <ref bean="resultSample" />
        </jaxrs:serviceBeans>
    </jaxrs:server>

</beans>
我们就能看到如下界面


 2519
2519

 被折叠的 条评论
为什么被折叠?
被折叠的 条评论
为什么被折叠?
 到【灌水乐园】发言


