 SpringBoot快速入门


 本文详细介绍如何使用SpringBoot搭建首个Web应用,包括环境配置、项目创建、接口定义及配置文件使用。

最近在学习SpringBoot,用的IDEA进行开发,这个算是入门学习笔记一,希望我这个新手写的个人心得见解能够帮助到你们!
前提:
- 已经安装了JDK,并设置好了环境变量等基本配置;
- 安装了Maven,并设置好了环境变量等基本配置;
- 下载并安装好了IDEA。
注意:没有安装IDEA的童鞋,可以点击这里:https://www.jetbrains.com/idea/ 进行下载,并且建议下载旗舰版,因为旗舰版收费,可以在这里http://idea.iteblog.com/获取注册码;
开发环境:
- JDK:jdk1.8.0_60
- IDEA:ideaIU-2016.2.5
- Maven:apache-maven-3.3.9
好的,准备好所有的开发环境后,我们正式开始:
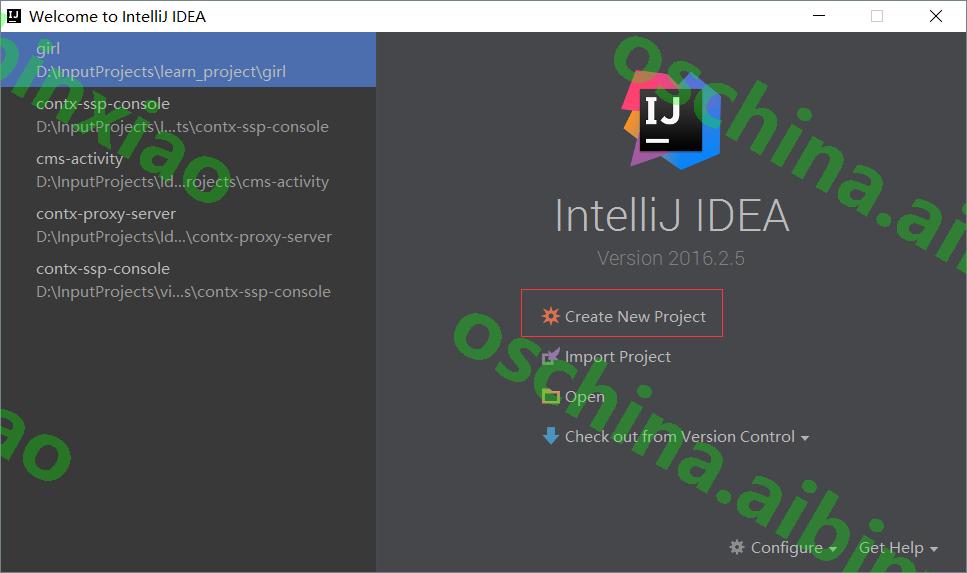
- 打开安装好的IDEA,选择点击Create New Project,如图所示:
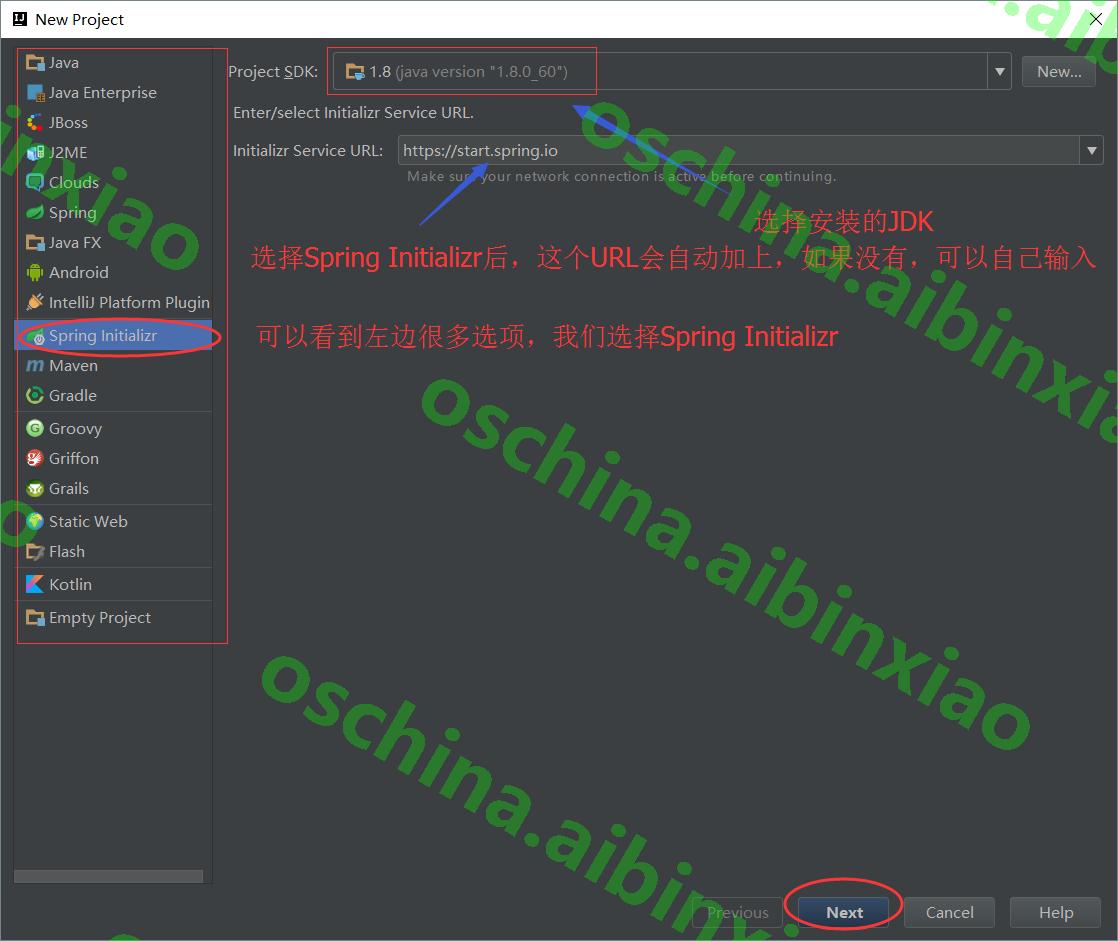
- 点击Create New Project后,如图所示:
 如果没有Spring Initializr,说明安装的时候你没有选中Spring相关的插件,所以我们先关闭点击Cancle,回到Create New Project,然后点击Configure--->选择Setting,如图所示:
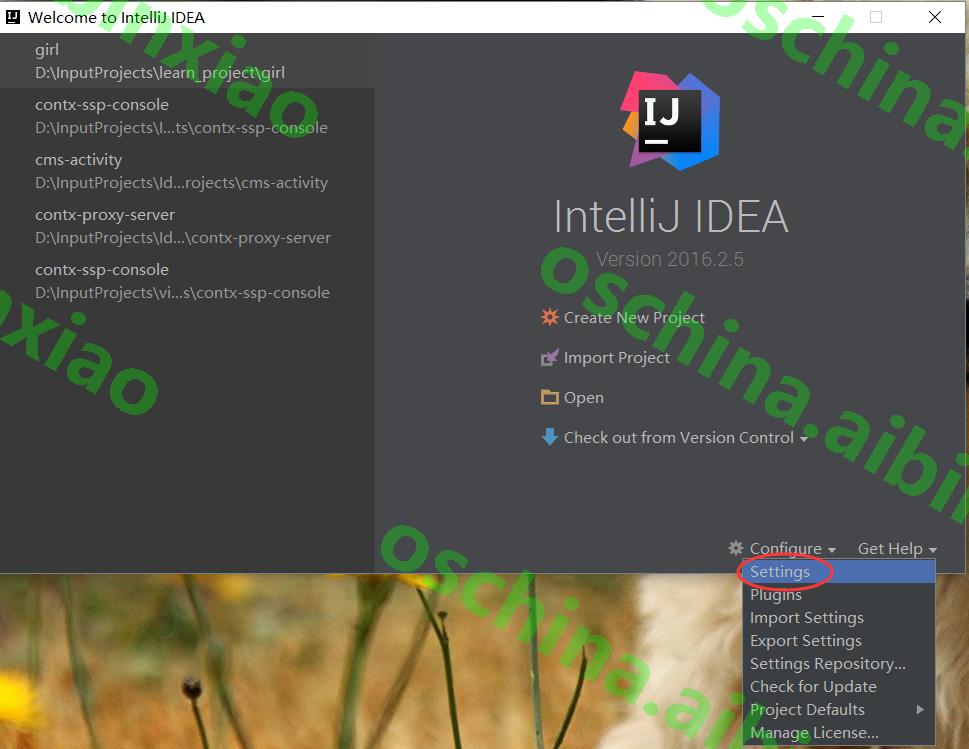 然后出现下图时,点击Plugins,然后将Spring相关的所有插件选中,最后点击OK,我们再次点击Create New Project 时就会出现Spring Initializr这个选项啦!
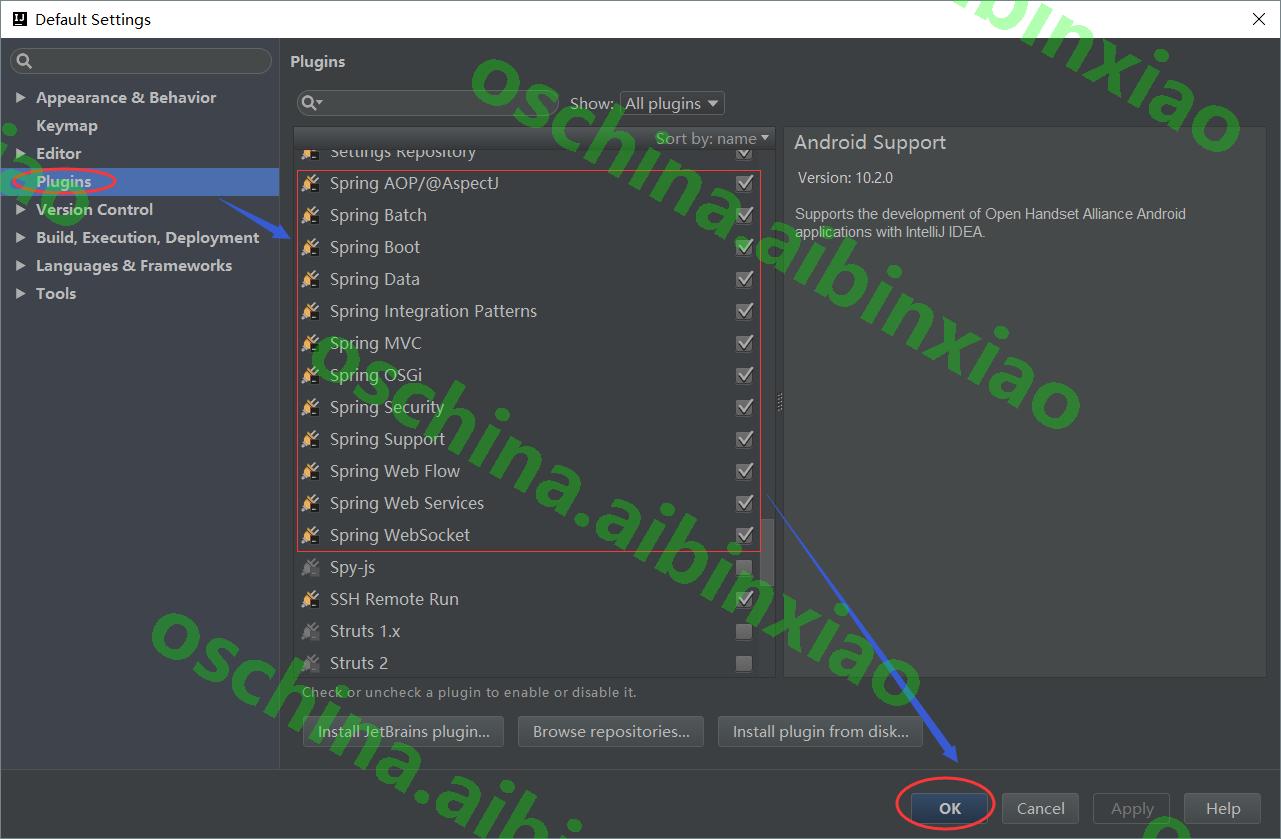
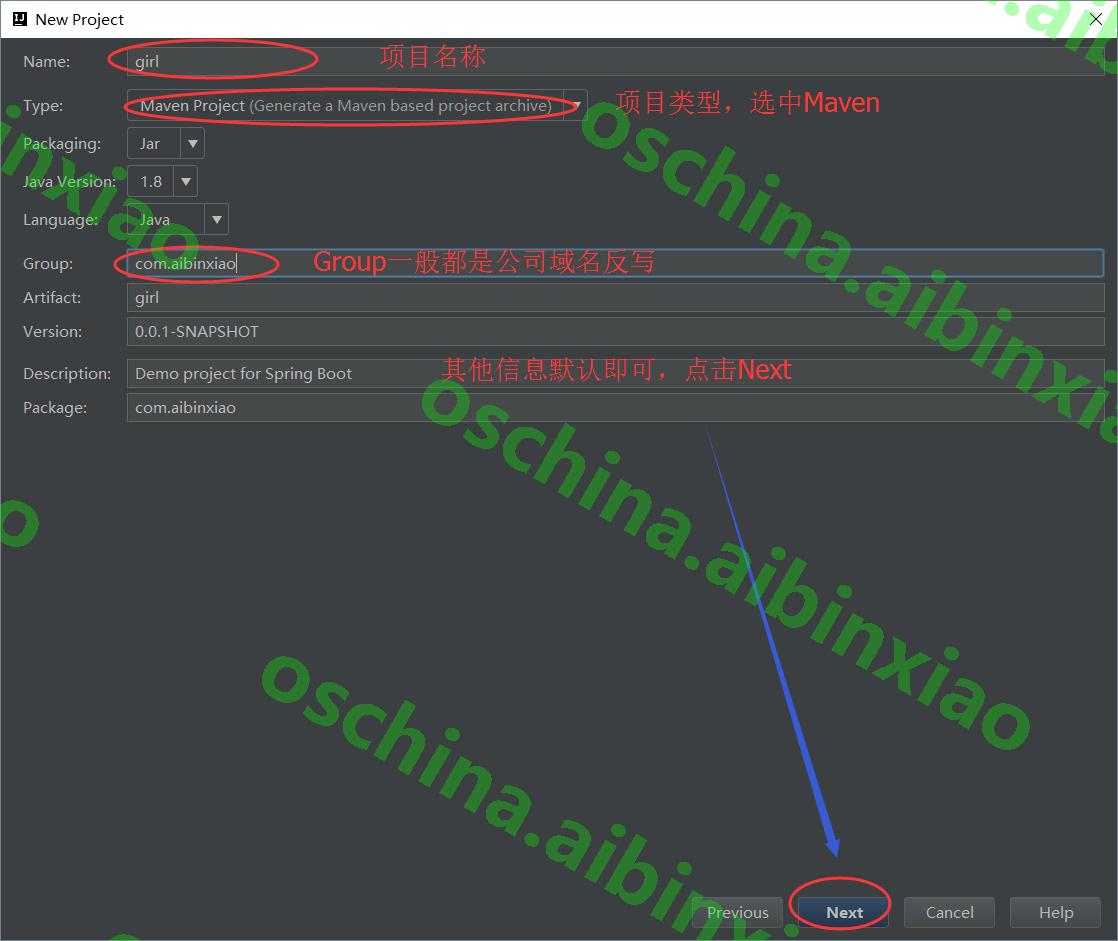
- 成功选择Spring Initializr后会出现下图,你只需要填写项目名称,Type选择Maven,其他项目信息我们保持默认即可,最后我们点击Next!
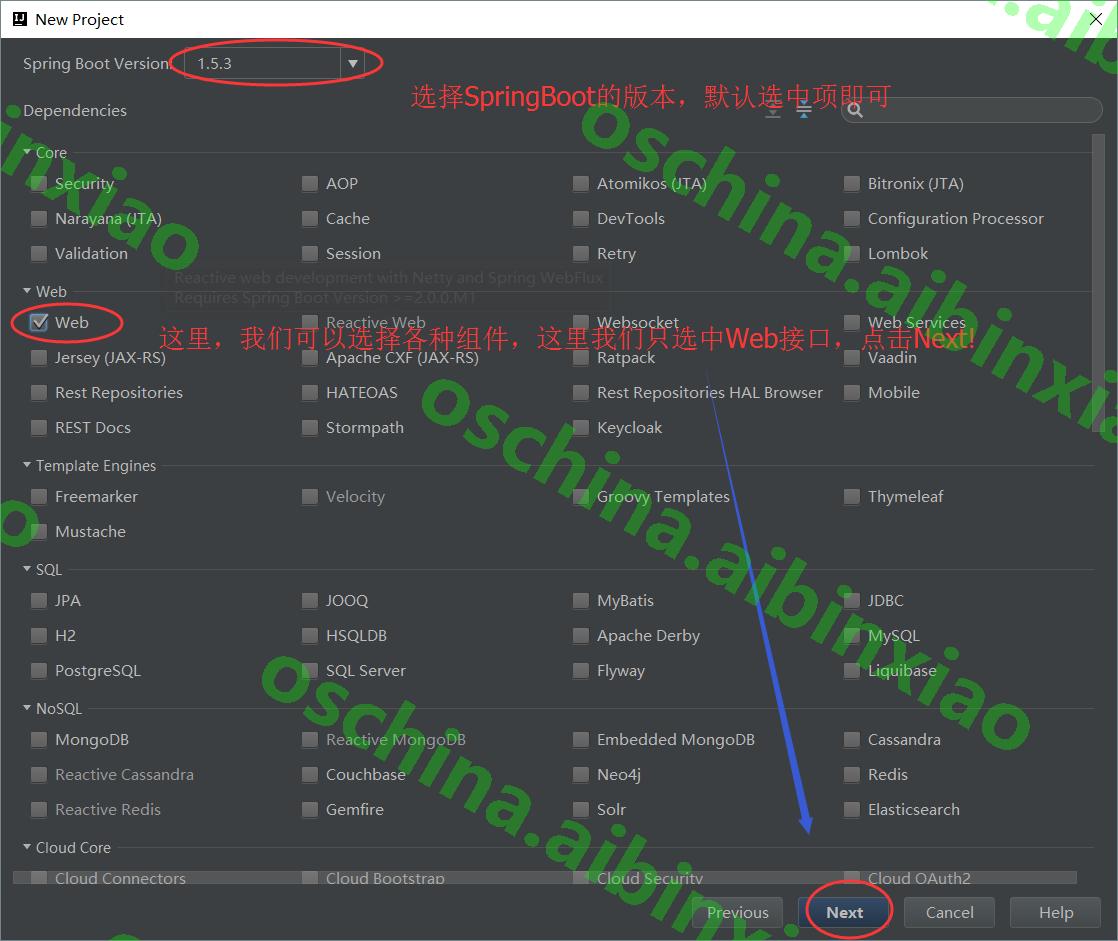
- 接着我们需要选择SpringBoot的版本,以及需要的组件,这里我们默认的SpringBoot版本,组件我们只要选中Web即可,然后我们点击Next!
- 接下来,我们需要确认项目名,以及最后项目的保存路径,我们要注意我们的保存路径最好不要出现中文、空格等非法字符,然后点击Finish即可完成项目创建!

注意:如果你是第一次使用这个SpringBoot,它需要下载大量的jar包,可能会比较慢!
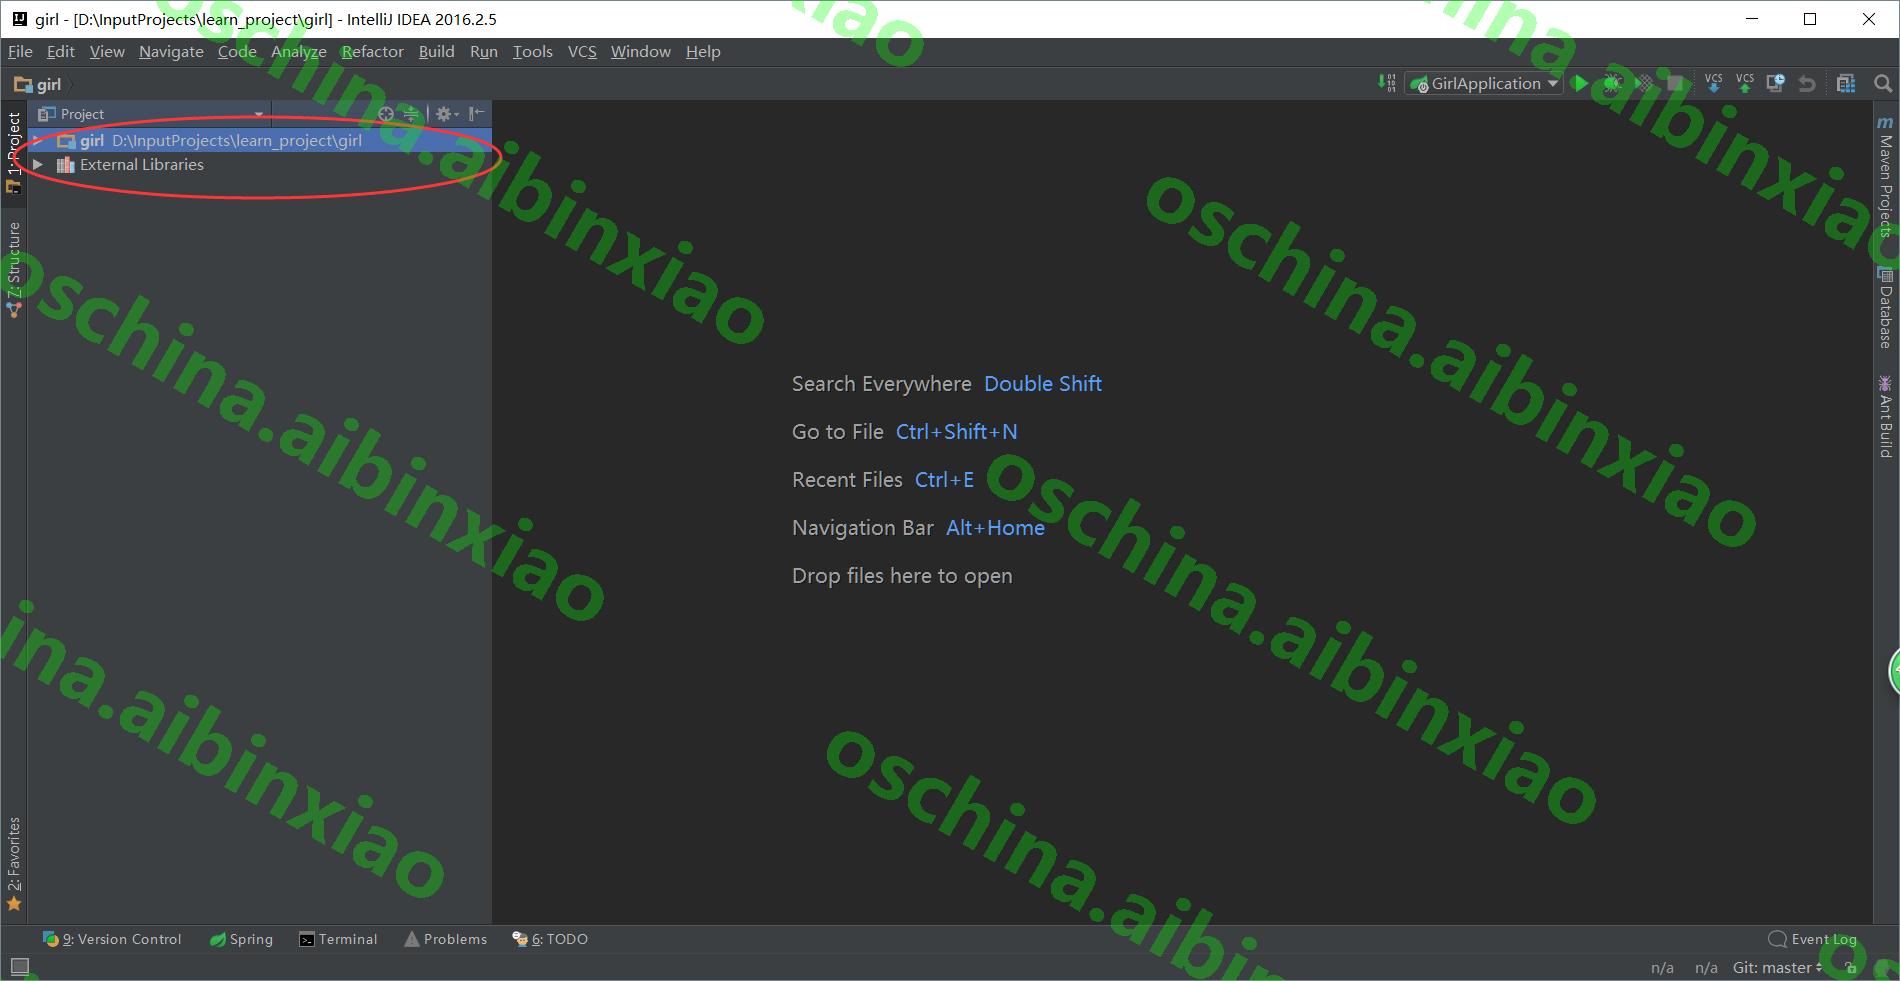
接下来,我们来看看这个项目,做个简单的介绍!
- 首先我们看一下SpringBoot的项目结构:

- 然后是pom.xml文件,学过Maven的童鞋应该了解,没有学过的建议可以先去学习一下:
<?xml version="1.0" encoding="UTF-8"?>
<project xmlns="http://maven.apache.org/POM/4.0.0" xmlns:xsi="http://www.w3.org/2001/XMLSchema-instance"
	xsi:schemaLocation="http://maven.apache.org/POM/4.0.0 http://maven.apache.org/xsd/maven-4.0.0.xsd">
	<modelVersion>4.0.0</modelVersion>

	<!-- 项目的基本属性,包括版本号,打包的方式等 -->
	<groupId>com.aibinxiao</groupId>
	<artifactId>girl</artifactId>
	<version>0.0.1-SNAPSHOT</version>
	<packaging>jar</packaging>

	<!-- 项目的名称与描述 -->
	<name>girl</name>
	<description>Demo project for Spring Boot</description>

	<!-- SpringBoot的parent -->
	<parent>
		<groupId>org.springframework.boot</groupId>
		<artifactId>spring-boot-starter-parent</artifactId>
		<version>1.5.3.RELEASE</version>
		<relativePath/> <!-- lookup parent from repository -->
	</parent>

	<!-- 项目编码设置 -->
	<properties>
		<project.build.sourceEncoding>UTF-8</project.build.sourceEncoding>
		<project.reporting.outputEncoding>UTF-8</project.reporting.outputEncoding>
		<java.version>1.8</java.version>
	</properties>

	<!-- 项目中的依赖 -->
	<dependencies>

		<!-- 这个是我们作为web项目必须引用的依赖 -->
		<dependency>
			<groupId>org.springframework.boot</groupId>
			<artifactId>spring-boot-starter-web</artifactId>
		</dependency>

		<!-- 这个是作为我们单元测试时要用到的 -->
		<dependency>
			<groupId>org.springframework.boot</groupId>
			<artifactId>spring-boot-starter-test</artifactId>
			<scope>test</scope>
		</dependency>

		<!-- 使用SpringBoot data-jpa要用到的依赖,持久层 -->
		<dependency>
			<groupId>org.springframework.boot</groupId>
			<artifactId>spring-boot-starter-data-jpa</artifactId>
		</dependency>

		<!-- 连接mysql需要用到的依赖 -->
		<dependency>
			<groupId>mysql</groupId>
			<artifactId>mysql-connector-java</artifactId>
		</dependency>

	</dependencies>

	<!-- build的插件,使用maven构建项目的一个插件 -->
	<build>
		<plugins>
			<plugin>
				<groupId>org.springframework.boot</groupId>
				<artifactId>spring-boot-maven-plugin</artifactId>
			</plugin>
		</plugins>
	</build>


</project>- 然后,我们看一下源码,源码中只有一个GirlApplication的类,这个类含有一个main方法,包含SpringBoot应用的一个启动,这个项目要启动,这个类上面一定要有@SpringBootApplication这个注解,所以我们要启动这个项目只需要执行这个类的main方法。
package com.aibinxiao; import org.springframework.boot.SpringApplication; import org.springframework.boot.autoconfigure.SpringBootApplication; @SpringBootApplication public class GirlApplication { public static void main(String[] args) { SpringApplication.run(GirlApplication.class, args); } } - 接下来,我们为了这个项目可以显示一点东西,我们写一个类,叫做HelloController,如下
package com.aibinxiao;

import org.springframework.beans.factory.annotation.Autowired;
import org.springframework.beans.factory.annotation.Value;
import org.springframework.stereotype.Controller;
import org.springframework.web.bind.annotation.*;


/**
 * Created by aibin on 2017/6/4.
 */
@RestController
@RequestMapping("/hello")
public class HelloController {

    // @RestController相当于@Controller+@ResponseBody

    // 映射application配置文件中的值
    // 配置文件默认是application.properties,但是因为.yml文件同前缀的可以省略并且也支持yml配置文件,所以推荐使用
    @Value("${cupSize}")
    private String cupSize;

    @Value("${age}")
    private Integer age;

    @Value("${content}")
    private String content;

    @Autowired
    private GirlProperties girlProperties;

    // 使用post请求方式时,我们可以使用chorme中的Postman应用进行测试
   @RequestMapping(value = "/say",method = RequestMethod.POST)
    public String say(){
        return "Hello Spring Boot!";
    }

    // 读取配置文件中的值
    @RequestMapping(value = "/cup",method = RequestMethod.GET)
    public String getCupSize(){
        return cupSize;
    }

    @RequestMapping(value = "/content",method = RequestMethod.GET)
    public String getContent(){
        return content;
    }

    @RequestMapping(value = "/girl",method = RequestMethod.GET)
    public String getGirl(){
        return "Girl:["+"cupSize:"+girlProperties.getCupSize()+" age:"+girlProperties.getAge()+"]";
    }

    // 直接在url后面加参数id,使用@PathVariable
    @RequestMapping(value = "/see/{id}",method = RequestMethod.GET)
    public String see(@PathVariable("id") Integer id){
        // url:http://localhost:8081/girl/hello/see/123
        return "see me id: " + id;
    }

    // 在url前面加参数id,使用@PathVariable
    // 注意@PathVariable中的id要和请求的url一致,但是形参是不需要一致吗比如myId
    @RequestMapping(value = "/{id}/talk",method = RequestMethod.GET)
    public String talk(@PathVariable("id") Integer myId){
        // url:http://localhost:8081/girl/hello/123/talk
        return "talk me id: " + myId;
    }

    // 使用普通加参数方法id,使用@RequestParam
    // 注意@RequestParam中的id要和请求的url一致,但是形参是不需要一致吗比如myId
    @RequestMapping(value = "/watch", method = RequestMethod.GET)
    public String watch(@RequestParam("id") Integer myId){
        // url:http://localhost:8081/girl/hello/watch?id=123
        return "watch me id: " + myId;
    }

    // 我们可以设置是否必须传id, 并且设置默认值
    /*@RequestMapping(value = "/sing", method = RequestMethod.GET)
    public String sing(@RequestParam(value = "id", required = false,defaultValue = "0") Integer myId){
        // url:http://localhost:8081/girl/hello/sing?id=123
        return "sing id: " + myId;
    }*/

    // 比如为了简化代码,我们可以将上面的简化成如下
    @GetMapping(value = "/sing")
    public String sing(@RequestParam(value = "id", required = false,defaultValue = "0") Integer myId){
        // url:http://localhost:8081/girl/hello/sing?id=123
        return "sing id: " + myId;
    }

}
- 不过在我们启动这个项目前,我们需要进行一些配置,默认的配置文件是.properties,但是我更建议使用.yml文件格式,SpringBoot支持.yml文件格式,而且.yml文件可以简化配置,相同前缀的不需要重复书写,我们来对比看看:
#properties文件格式的配置

server.port=8081
server.context-path=/girl
#yml文件格式的配置
server:
port: 8081
context-path: /girl- 完成了基本配置后,我们可以启动项目然后,来访问我们的接口了,因为是Post请求我们可以使用Chrome中的插件PostMan进行测试!(可能有小伙伴使用chrome无法访问,那可以先下载一个Lanter,下载地址:http://pan.baidu.com/s/1kUW8ph1)
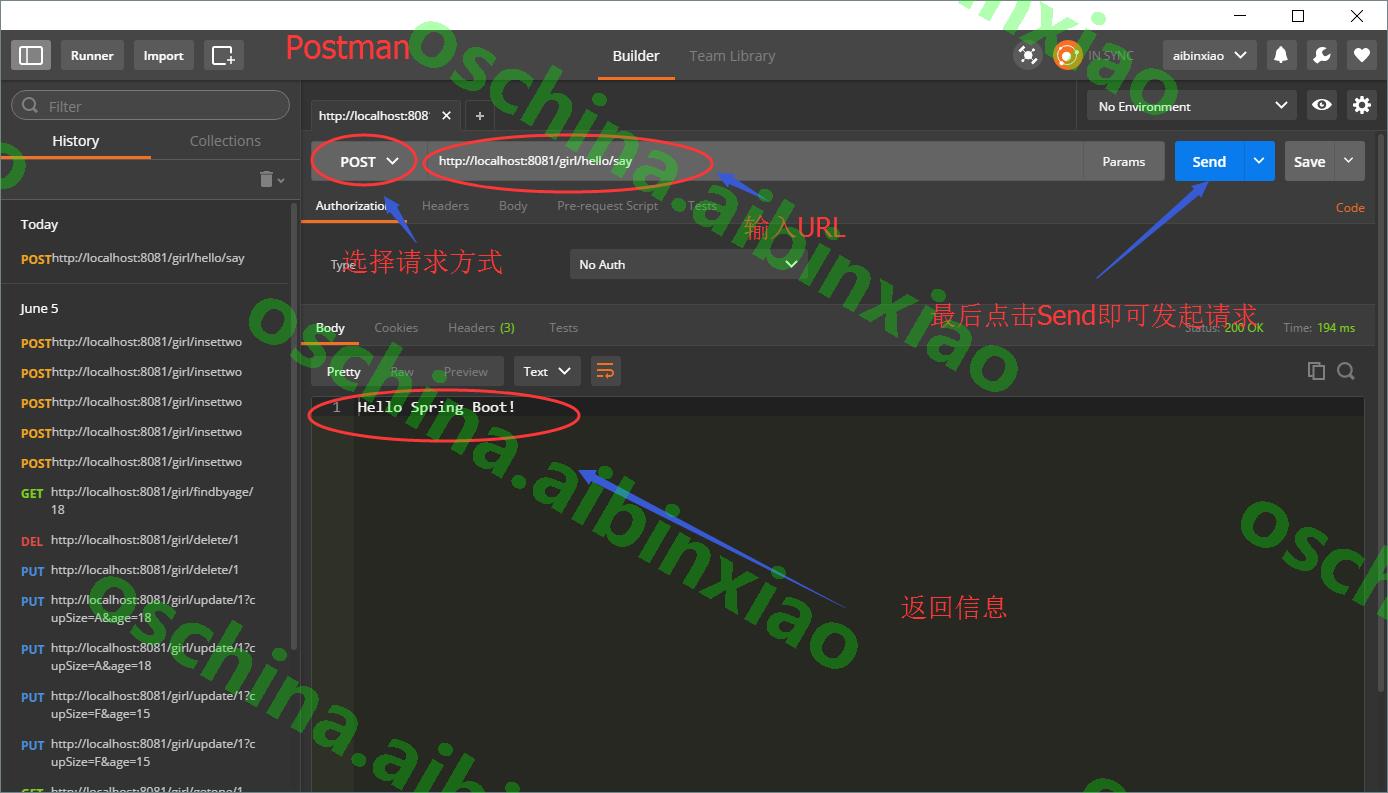
到这里,我们就成功的进行访问了,我们的第一个SpringBoot应用也成功创建!
本文为原创文章,如果对你有一点点的帮助,别忘了点赞哦!比心!如需转载,请注明出处,谢谢!


 1万+
1万+

 被折叠的 条评论
为什么被折叠?
被折叠的 条评论
为什么被折叠?
 到【灌水乐园】发言


