


 本文介绍如何使用Swagger在Spring Boot项目中自动生成接口文档,通过Maven依赖和配置类实现,可动态更新API文档,减少维护成本。

写接口文档并不麻烦,麻烦的是接口的不断变更还要不断的更新接口文档,Swagger通过标准化的注解来解决这个问题
首先引入maven依赖
        <dependency>
            <groupId>io.springfox</groupId>
            <artifactId>springfox-swagger2</artifactId>
            <version>2.6.1</version>
        </dependency>

        <dependency>
            <groupId>io.springfox</groupId>
            <artifactId>springfox-swagger-ui</artifactId>
            <version>2.6.1</version>
        </dependency>
新建配置类
@Configuration
@EnableSwagger2
public class Swagger2 {
@Bean
public Docket createRestApi() {
return new Docket(DocumentationType.SWAGGER_2)//文档类型:DocumentationType.SWAGGER_2
.apiInfo(apiInfo())//api信息
.select()//构建api选择器
.apis(RequestHandlerSelectors.basePackage("com.hmkx.datacenter.rest"))//配置为Controller层的路径
.paths(PathSelectors.any())//api选择器选择包路径下任何api显示在文档中,根据需要配置所有还是用正则过滤
.build();//创建文档
}
private ApiInfo apiInfo() {
return new ApiInfoBuilder()
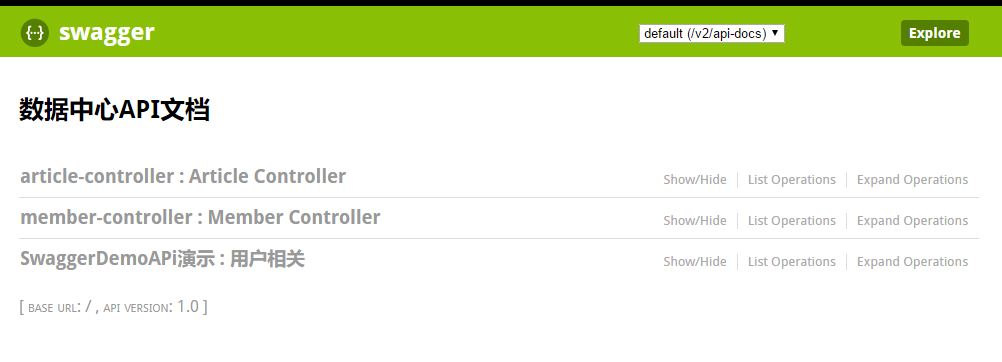
.title("数据中心API文档")
.termsOfServiceUrl("http://blog.youkuaiyun.com/saytime")
.version("1.0")
.build();
}
}
新增测试Controller
@RestController
@Api(description = "用户相关",tags={"SwaggerDemoAPi演示"})
@RequestMapping(value = "swagger")
public class SwaggerDemoController {
    //接口需要的参数,可以有多个,这里只写了一个,它的paramType还有path、query、body、form几种,
    @ApiImplicitParams({
            @ApiImplicitParam(paramType = "header", name = "Token", value = "token", dataType = "String", required = true,defaultValue = "123")})
    //接口功能描述
    @ApiOperation(value = "获取一个用户")
    //接口响应信息,这里定义了一个401,当出现401,接口返回的是自定的错误AnimalError的实例。当然可以定义多个。
    @ApiResponses(value = { @ApiResponse(code = 401, message = "请求未通过认证.", response = ErrorCode.class) })
    @RequestMapping(value="/oneMem", method = RequestMethod.GET)
    public SsoMember oneMem(){
        return new SsoMember();
    }

    @ApiImplicitParams({
            @ApiImplicitParam(paramType = "header", name = "Token", value = "token", dataType = "String", required = true,defaultValue = "123")})
    @ApiOperation(value = "创建一用户")
    @ApiResponses(value = { @ApiResponse(code = 401, message = "请求未通过认证.", response = ErrorCode.class) })
    @RequestMapping(value="/member/{name}", method = RequestMethod.GET)
    public SsoMember createMem(
            @ApiParam(defaultValue = "张三")//@ApiParam和@RequestParam注解作用效果相同
            @PathVariable("name") String name){
        SsoMember member = new SsoMember();
        member.setMemNickname(name);
        return member;
    }
}
基本完成了,但如果这时候就启动测试的话,那肯定会404错误
需要给spring boot 添加静态资源映射
@Configuration
public class InterceptorConfiguration extends WebMvcConfigurationSupport {
    @Override
    public void addResourceHandlers(ResourceHandlerRegistry registry) {
        registry.addResourceHandler("swagger-ui.html")
                .addResourceLocations("classpath:/META-INF/resources/");

        registry.addResourceHandler("/webjars/**")
                .addResourceLocations("classpath:/META-INF/resources/webjars/");
    }

}
ok,这时候就完工了 访问 http://localhost:8080/swagger-ui.html


 6373
6373

 被折叠的 条评论
为什么被折叠?
被折叠的 条评论
为什么被折叠?
 到【灌水乐园】发言


