


 本文介绍了如何在Spring Boot项目中集成Swagger2实现API文档自动生成。通过在pom.xml文件中添加依赖并配置SwaggerConfig类,可以快速生成美观且交互式的API文档。最后,在浏览器中访问指定URL即可查看API文档。

pom.xml
<dependency>
   <groupId>org.springframework.boot</groupId>
   <artifactId>spring-boot-starter-web</artifactId>
</dependency>
<!-- https://mvnrepository.com/artifact/io.springfox/springfox-swagger2 -->
<dependency>
   <groupId>io.springfox</groupId>
   <artifactId>springfox-swagger2</artifactId>
   <version>2.6.1</version>
</dependency>
<!-- https://mvnrepository.com/artifact/io.springfox/springfox-swagger-ui -->
<dependency>
   <groupId>io.springfox</groupId>
   <artifactId>springfox-swagger-ui</artifactId>
   <version>2.6.1</version>
</dependency>
swaggerConfig
@EnableSwagger2 用来启用swagger2
@Configuration
@EnableSwagger2
public class SwaggerConfig {
    @Bean
    public Docket api() {
        return new Docket(DocumentationType.SWAGGER_2)
                .select()
                .apis(RequestHandlerSelectors.any())
                .paths(PathSelectors.any())
                .build();
    }
}
controller 控制器中代码自行处理
@RestController
@RequestMapping(value = "/test", method = {RequestMethod.POST, RequestMethod.GET})
public class TestController {
    @RequestMapping("test")
    public String test() {
        return "";
    }

}
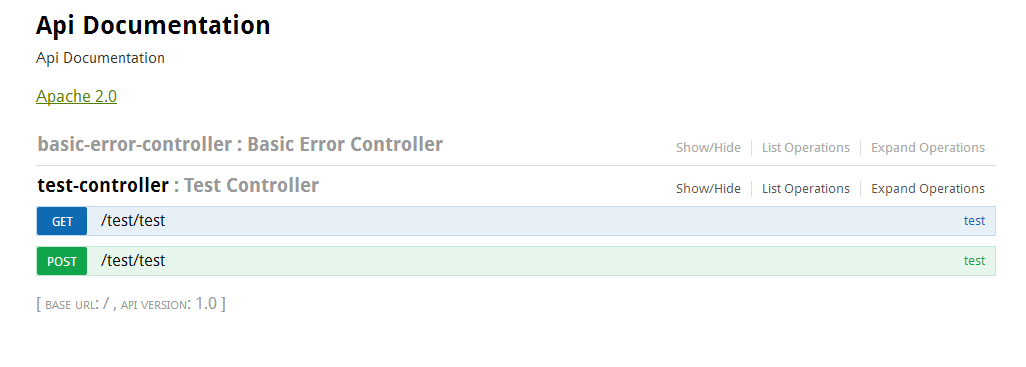
浏览器中输入 localhost:8080/swagger-ui.html


 214
214

 被折叠的 条评论
为什么被折叠?
被折叠的 条评论
为什么被折叠?
 到【灌水乐园】发言


