


感谢:http://blog.youkuaiyun.com/luck_apple/article/details/7064004
这篇文章讲的是如何定义fragment的样式,基本布局都是从源码中弄过来的。通过设置布局文件的属性,让我们可以自定义preference的界面。
先来看看xml文件中的内容
<PreferenceScreen xmlns:android="http://schemas.android.com/apk/res/android" >

    <PreferenceCategory
        android:layout="@layout/prefs_category_widget"
        android:title="第一个模块的标题" >

        <!-- 设置单选模块 -->
        <CheckBoxPreference
            android:icon="@drawable/appstore"
            android:key="checkbox_preference"
            android:layout="@layout/preference_item"
            android:summary="整个布局都是自定义的,包括图标、文字、点击效果和单选按钮"
            android:title="标题"
            android:widgetLayout="@layout/checkbox_preference_widget" />

        <MultiSelectListPreference
            android:layout="@layout/preference_item"
            android:entries="@array/floatColor"
            android:entryValues="@array/floatColor_value"
            android:key="multSelect_preference"
            android:summary="点击可以选择多个选项"
            android:title="多选列表" />

        <RingtonePreference
            android:layout="@layout/preference_item"
            android:key="ringtone_preference"
            android:summary="点击选择铃声"
            android:title="铃声选择列表" />

        <SwitchPreference
            android:layout="@layout/preference_item"
            android:key="switch_preference"
            android:summaryOff="已关闭"
            android:summaryOn="已开启"
            android:switchTextOff="close"
            android:switchTextOn="open"
            android:title="开关" />
    </PreferenceCategory>
    <PreferenceCategory
        android:layout="@layout/prefs_category_widget"
        android:title="第二个模块的标题" >

        <!-- 设置输入框模块 -->
        <EditTextPreference
            android:layout="@layout/preference_item"
            android:dialogIcon="@drawable/itunes"
            android:dialogTitle="dialog_title_edittext_preference"
            android:key="edittext_preference"
            android:negativeButtonText="cancel"
            android:positiveButtonText="ok"
            android:title="文本输入" />

        <!-- 选择列表模块 -->
        <ListPreference
            android:layout="@layout/preference_item"
            android:dialogTitle="dialog_title_list_preference"
            android:entries="@array/floatColor"
            android:entryValues="@array/floatColor_value"
            android:key="list_preference"
            android:summary="点击后会弹出一个单选列表来选择数据"
            android:title="列表选择框" />
    </PreferenceCategory>

    <!-- 点击后又启动一个fragment -->
    <PreferenceCategory
        android:layout="@layout/prefs_category_widget">

        <!--
             This PreferenceScreen tag sends the user to a new fragment of
             preferences.  If running in a large screen, they can be embedded
             inside of the overall preferences UI.

        -->
        <PreferenceScreen
            android:layout="@layout/preference_item"
            android:fragment="com.kale.shared.MainActivity$Prefs1FragmentInner"
            android:summary="点击后跳到另一个fragment_preference"
            android:title="另一个fragment_preference" >

            <!-- Arbitrary key/value pairs can be included for fragment arguments -->
            <extra
                android:name="someKey"
                android:value="somePrefValue" />
        </PreferenceScreen>

        <!--
             This PreferenceScreen tag sends the user to a completely different
             activity, switching out of the current preferences UI.

        -->
        <PreferenceScreen
            android:layout="@layout/preference_item"
            android:icon="@drawable/ic_launcher"
            android:summary="点击后跳转到 http://www.android.com"
            android:title="点击触发intent动作" >
            <intent
                android:action="android.intent.action.VIEW"
                android:data="http://www.android.com" />
        </PreferenceScreen>
    </PreferenceCategory>
    <PreferenceCategory
        android:layout="@layout/prefs_category_widget"
        android:title="第四个模块的标题" >
        <CheckBoxPreference
            android:layout="@layout/preference_item"
            android:icon="@drawable/ic_launcher"
            android:key="parent_checkbox_preference"
            android:summary="点击后才可以让子控件可操作"
            android:title="父选择控件"
            android:widgetLayout="@layout/checkbox_preference_widget" />

        <!-- The visual style of a child is defined by this styled theme attribute. -->
        <!-- 子控件关联父控件,如果父控件选中后子控件才可用 -->
        <!--  android:layout="?android:attr/preferenceLayoutChild" -->
        <CheckBoxPreference
            android:dependency="parent_checkbox_preference"
            android:icon="@drawable/calculator"
            android:key="child_checkbox_preference"
            android:layout="@layout/preference_item"
            android:title="子控件(依托于父控件)"
            android:widgetLayout="@layout/checkbox_preference_widget" />
    </PreferenceCategory>

</PreferenceScreen>
这里面和传统的内容设置都是一样的,但是我通过
android:layout="@layout/prefs_category_widget"
android:layout="@layout/preference_item"
android:widgetLayout="@layout/checkbox_preference_widget"
这三个属性,让我们可以通过布局文件来定义视图
需要注意的是:这里面的id都是系统的,所以我们可以直接在原始的xml文件中设置属性,这对于我们之前的操作无影响。只是换了布局而已。
prefs_category_widget
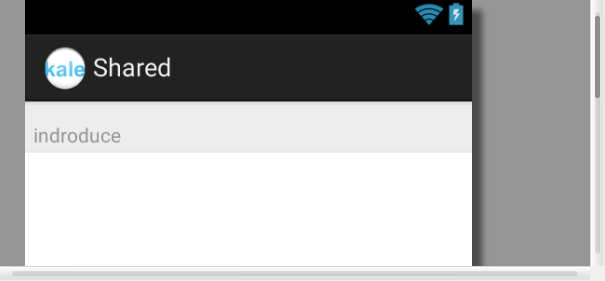
<?xml version="1.0" encoding="UTF-8"?>
<LinearLayout xmlns:android="http://schemas.android.com/apk/res/android"
    android:layout_width="fill_parent"
    android:layout_height="wrap_content"
    android:background="#ededed"
    android:orientation="vertical" >

    <!-- 这个id需要注意,要引用安卓源码中的 -->
    <ImageView
        android:layout_width="match_parent"
        android:layout_height="1dp"
        android:src="#dadada" />

    <ImageView
        android:layout_width="match_parent"
        android:layout_height="1dp"
        android:layout_marginBottom="13dp"
        android:src="#e2e2e2" />

    <TextView
        android:id="@android:id/title"
        android:layout_width="match_parent"
        android:layout_height="wrap_content"
        android:paddingLeft="6dp"
        android:layout_marginBottom="2dp"
        android:textColor="#939393"
        android:textSize="14sp" />

    <ImageView
        android:layout_width="match_parent"
        android:layout_height="1dp"
        android:src="#e9e9e9" />

</LinearLayout>
preference_item
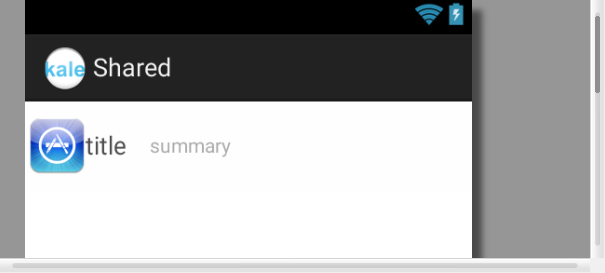
<?xml version="1.0" encoding="UTF-8"?>
<LinearLayout xmlns:android="http://schemas.android.com/apk/res/android"
    android:layout_width="match_parent"
    android:layout_height="wrap_content"
    android:background="@drawable/selector_item"
    android:gravity="center_vertical"
    android:minHeight="?android:listPreferredItemHeight"
    android:orientation="horizontal" >

    <ImageView
        android:id="@android:id/icon"
        android:layout_width="40dp"
        android:layout_height="40dp"
        android:layout_gravity="center_vertical"
        android:layout_marginLeft="3dp"
        android:scaleType="fitStart"
        android:src="@drawable/appstore" />

    <RelativeLayout
        android:layout_width="wrap_content"
        android:layout_height="wrap_content"
        android:layout_marginBottom="4dp"
        android:layout_marginTop="4dp" >

        <TextView
            android:id="@android:id/title"
            android:layout_width="wrap_content"
            android:layout_height="wrap_content"
            android:layout_centerVertical="true"
            android:ellipsize="marquee"
            android:fadingEdge="horizontal"
            android:singleLine="true"
            android:text="title"
            android:textColor="#4d4d4d"
            android:textSize="18.0sp" />

        <TextView
            android:id="@android:id/summary"
            android:layout_width="wrap_content"
            android:layout_height="wrap_content"
            android:layout_centerVertical="true"
            android:layout_marginLeft="15dp"
            android:layout_toRightOf="@android:id/title"
            android:layout_toLeftOf="@android:id/widget_frame"
            android:maxLines="2"
            android:text="summary"
            android:textColor="#AAAAAA"
            android:textSize="14sp" />

        <LinearLayout
            android:id="@android:id/widget_frame"
            android:layout_width="wrap_content"
            android:layout_height="wrap_content"
            android:layout_alignParentRight="true"
            android:layout_marginLeft="4dp"
            android:layout_centerVertical="true"
            android:gravity="center_vertical"
            android:orientation="vertical" >
        </LinearLayout>
    </RelativeLayout>

</LinearLayout>
checkbox_preference_widget<?xml version="1.0" encoding="UTF-8"?> <!-- 这里放上系统的id --> <CheckBox xmlns:android="http://schemas.android.com/apk/res/android" android:id="@android:id/checkbox" android:layout_width="wrap_content" android:layout_height="wrap_content" android:layout_gravity="center_vertical" android:button="@drawable/selector_checkbox" android:clickable="false" android:focusable="false"
我的主代码用的是android推荐的activity和fragment结合的方式来实现的
package com.kale.shared;

import java.util.List;

import android.content.SharedPreferences;
import android.os.Bundle;
import android.preference.PreferenceActivity;
import android.preference.PreferenceFragment;
import android.preference.PreferenceManager;
import android.util.Log;
import android.view.LayoutInflater;
import android.view.View;
import android.view.ViewGroup;

public class MainActivity extends PreferenceActivity {

    SharedPreferences sp;
    SharedPreferences.Editor editor;
    @Override
    protected void onCreate(Bundle savedInstanceState) {
        super.onCreate(savedInstanceState);
        //设置背景图,给activity设置后。所有fragment的背景都会改了,十分方便!
        getWindow().setBackgroundDrawable(getResources().getDrawable(R.drawable.bgColor));
        //setContentView(R.layout.activity_main); 这里就不能设置布局了

        sp = getSharedPreferences("kaleShared", MODE_PRIVATE);
        editor = sp.edit();
        editor.putString("KEY", "value");
        editor.commit();

        if (sp.contains("KEY")) {
            System.out.println("have a key");
        }

        ;
    }
    /**
     * Populate the activity with the top-level headers.
     */
    @Override
    public void onBuildHeaders(List<Header> target) {
        //下面我们从源码的角度来自己搭建整个布局,所以我们设置布局。整个布局里面用一个list,id是默认的@android:id/list
        setContentView(R.layout.preference_hearders_frame);
        loadHeadersFromResource(R.xml.preference_headers, target);
    }

    public static class Prefs0Fragment extends PreferenceFragment {
        @Override
        public void onCreate(Bundle savedInstanceState) {
            super.onCreate(savedInstanceState);
            // Load the preferences from an XML resource
            addPreferencesFromResource(R.xml.customer_preferences);
        }

        @Override
        public View onCreateView(LayoutInflater inflater, ViewGroup container,
                Bundle savedInstanceState) {
            View v = inflater.inflate(R.layout.preference_hearders_frame, container, false);
            return v;
        }
    }

    /**
     * This fragment shows the preferences for the first header.
     */
    public static class Prefs1Fragment extends PreferenceFragment {
        @Override
        public void onCreate(Bundle savedInstanceState) {
            super.onCreate(savedInstanceState);


            // Make sure default values are applied.  In a real app, you would
            // want this in a shared function that is used to retrieve the
            // SharedPreferences wherever they are needed.
            PreferenceManager.setDefaultValues(getActivity(),R.xml.fx_setting, false);

            // Load the preferences from an XML resource
            addPreferencesFromResource(R.xml.fragmented_preferences);
        }
    }

   /**
     * This fragment contains a second-level set of preference that you
     * can get to by tapping an item in the first preferences fragment.
     */
    /**
     * @author:Jack Tony
     * @tips  :在第一个fragment中点击一个PreferenceScreen中的fragment对象启动的fragment
     * @date  :2014-8-4
     */
    public static class Prefs1FragmentInner extends PreferenceFragment {
        @Override
        public void onCreate(Bundle savedInstanceState) {
            super.onCreate(savedInstanceState);

            // Can retrieve arguments from preference XML.
            Log.i("args", "Arguments: " + getArguments());

            // Load the preferences from an XML resource
            addPreferencesFromResource(R.xml.fx_setting);
        }
    }

    /**
     * This fragment shows the preferences for the second header.
     */
    public static class Prefs2Fragment extends PreferenceFragment {
        @Override
        public void onCreate(Bundle savedInstanceState) {
            super.onCreate(savedInstanceState);

            // Can retrieve arguments from headers XML.
            Log.i("args", "Arguments: " + getArguments());

            // Load the preferences from an XML resource
            addPreferencesFromResource(R.xml.display_prefs);
        }
    }
}
源码下载:http://download.youkuaiyun.com/detail/shark0017/7717357
 998


 扫一扫


 被折叠的 条评论
为什么被折叠?
 到【灌水乐园】发言


