


 本文详细介绍如何在VMware Workstation 6.5中创建并安装VMware ESX 3.5 Update 3虚拟机,包括配置硬件参数、网络类型、磁盘容量等步骤。
【IT168 专稿】虚拟化给企业及社区带来了很多益处,同时,拥有虚拟化技术使用经验也让很多IT PRO人员有了工作稳定及高额工资的保证。但近期,与虚拟化形式的喜人发展所不协调的是整体金融形式的始终萎靡,这就限制了很多IT 人员投资于学习使用虚拟化的成本。签于此,参考国外同行所写的英文文档,略加改动以中文的形式来介绍一种如何利用现有硬件资源和
软件资源来学习使用VM ESX 的方法。

本文亦是使用SCVMM2008管理虚拟化解决方案系列之一部分。
本文将通过图文的方式介绍如何在VMware Workstation 6.5.0 build 118166安装VM Esx 3.5 Update 3。(在未来的几周内会陆续写出使用VIC 或 VC来管理ESX,以及最终通过VMM来管理VC等系列文章。)以及通过VIC2.5来连接ESX 3.5并在其上创建虚拟机windows xp sp3。
一、软硬件需求
1、 硬件环境:
注意:这是偶的个人电脑,偶的大部分虚拟化实验之旅是在此机器上完成的,而要完成本次文章所求之目的,请保证你的硬盘可用空间到少30G左右。
2、 软件需求:
A、 windows server 2003 Ent with sp2为本本的
操作系统。
B、 VMware Workstation 6.5.0 build 118166 在本本上已安装。
C、 VM Esx 3.5 Update 3 将安装于VMware Workstation 6.5中。
注意:B、VMware Workstation 6.5.0 build 118166已完成安装,且使用一直良好,相信大部分朋友都有安装的经验,在此文中将不会出现安装方法。
二、在VMware 6.5创建ESX虚拟机器
1、在VM6.5控制台,开始新建虚拟机向导,并在虚机新建欢迎页选择"Custom(advanced)"选项。下一步:
注意:相对于VMware 6.5来说,将要安装于此上的ESX 3.5只是一个虚拟机器的角色。
和其它的虚拟机器的待遇是平等的。只是安装的步骤和设置的细节不同罢了。
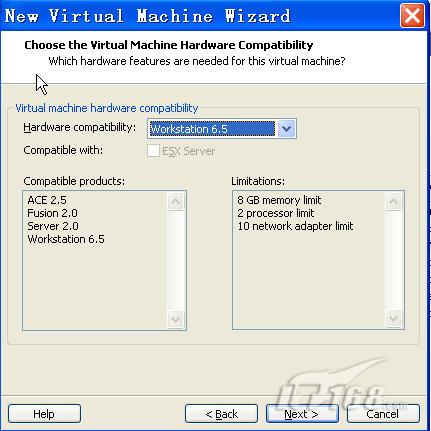
2、在"Choose the Virtual Machine Hardware Compatibility"界面的"Hardware Compatibility"后框中,确保选中Workstation 6.5。下一步:(图1)
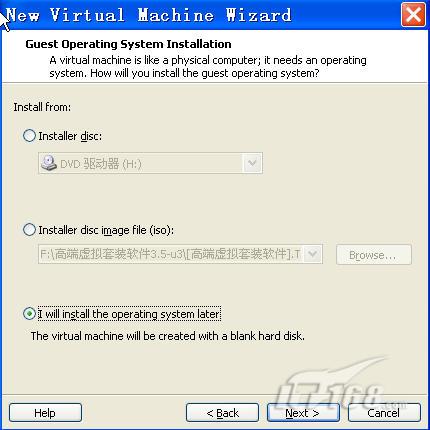
3、 在"Guest Operating System Installation"界面,选择'I will install the operating system later'。下一步:(图2)
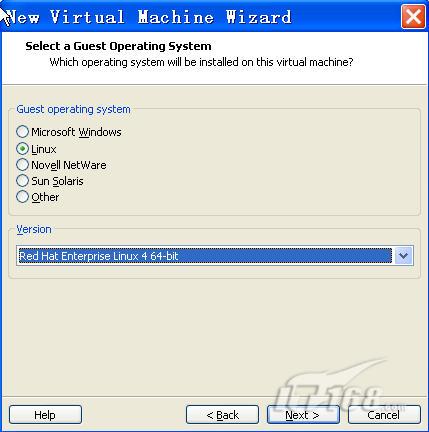
4、 在"Select a Guest Operating System"界面选择"Red Hat Enterprise Linux 4 64-bit"。下一步:(图3)
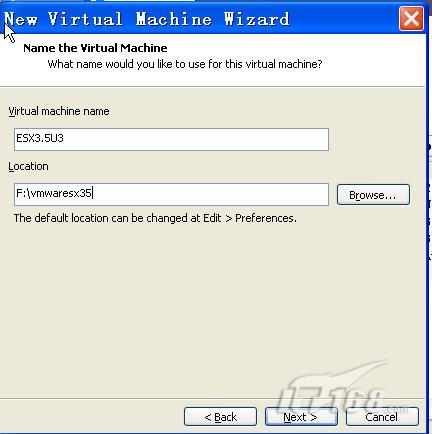
5、 在"Name the Virtual Machine"界面,在"Virtual Machine name"下框中输入虚机的名机:ESX3.5U3,在"Location"下框中输入本地
存储ESX虚拟机的位置F:\vmwaresx35。当然亦可浏览至任何文件夹下,但要保证磁盘可用空间足够大(最好在30G左右,以便未来可以在ESX中安装多个虚拟机器),这和你规划中的实验环境有关。下一步:(图4)
6、 在"Processor Configuration"界面,选择
CPU的数量为one。下一步:
7、 在"Memory for the Virtual Machine"界面,选择memory的大小为1024Mb。下一步:
8、 在"Network Type"界面,选择
网络连接类型为:Use bridged networking,下一步:
9、 在"Select I/O Adapter Types"界面,在"I/O Adapter Types"后,选择"LSI Logic",下一步:
10、 在"Select a Disk"界面,选择"Creat a new virtual disk"。下一步:
11、 在"Select a Disk Type"界面,一定要选择磁盘类型为SCSI。下一步:
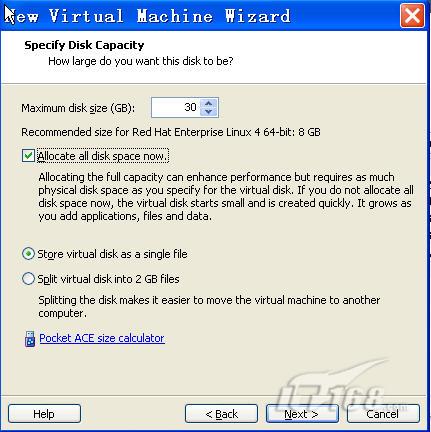
12、 在"Specify Disk Capacity"界面,磁盘大小可以根据自己今后的实验规划以及
硬盘空间大小来定,此处填入30GB。但下述两项一定要选择上:Allocate all disk space now和Store virtual disk as a single file。切记。下一步:(图5)
13、 在"Specify Disk File"界面,你可以选择定义磁盘文件,此处保留默认。下一步:
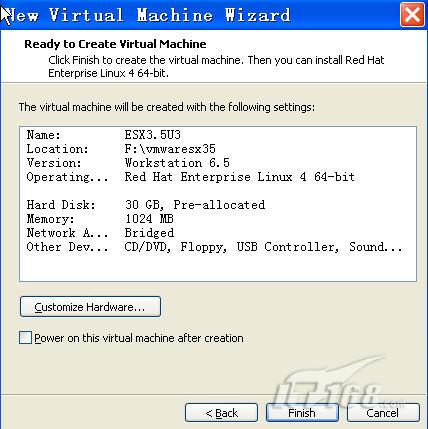
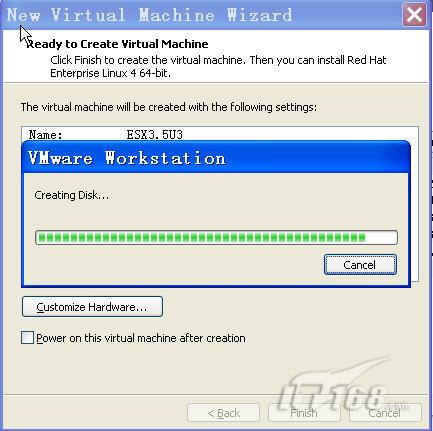
14、 在"Ready to Create Virtual Machine",确保"Power on this virtual machine after creation"之前的对勾不被打上。并点击"Customize Hardware"。(图6)
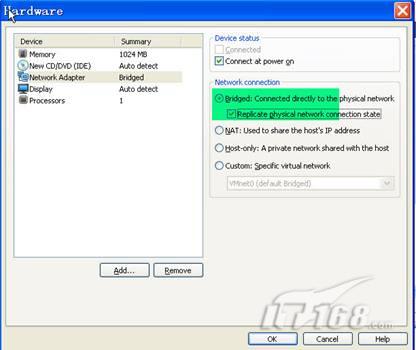
15、 在"HardWare"界面,remove Floppy, USB Controller and Sound。
16、 在"HardWare"界面,选择"Network Adapter",并在右侧的框中确保如图中绿色部分的选择:(图7)
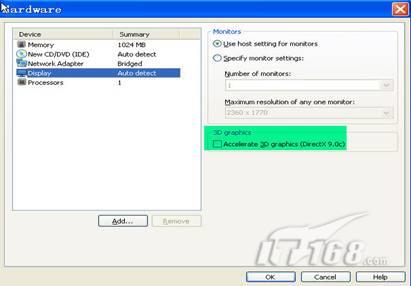
17、 在"HardWare"界面,选择"Display"选项,确保"Accelerate 3D graphics"前面的对勾不被选择:(图8)
18、 在"HardWare"界面,选择"Processors"选项,并确保在"Preferred Mode"后面"Intel-VTx or AMD-V"被选择。并单击"OK"。(图9)
19、 在返回的"Ready to Create Virtual Machine"界面,单击"Finish"。便会出现磁盘文件创建的进度。这个过程将要花费几分钟到十几分钟的时间。(图10)
20、 上述过程完成后,双击"CD/DVE (IDE)"选项,并在接下来的界面中选择"Use ISO image file"。浏览至存放有镜像的文件夹(当然你使用物理光驱也可以,这方面不做太多要求)。并OK。
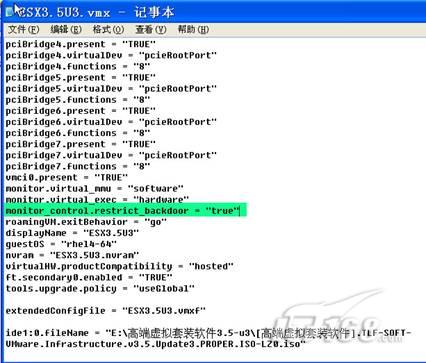
21、 此时,你仍不能启动虚机,进行安装ESX的进程。还需要添加一行文字到.VMX文件里才可以。
在存放ESX 3.5安装文件的路径F:\vmwaresx35,找到ESX3.5U3.vmx(注意安装路径不同,此文件的位置也不同。请根据自己的实际安装路径及ESX磁盘文件名称来定)。使用记事本进行编辑,并添加"monitor_control.restrict_backdoor = "true""(没有外引号)在适当的如图中所示的位置:(图11)


 125
125

 被折叠的 条评论
为什么被折叠?
被折叠的 条评论
为什么被折叠?
 到【灌水乐园】发言


