


 本文详细介绍如何在Ubuntu 14.04环境下搭建GitLab私有代码仓库,包括安装、配置过程及个性化设置,如使用Nginx进行代理配置。

相信很多技术人员都知道有个github造福开发人员的git(分布式版本管理工具)代码管理社区,可以说现在git是开发人员的必备技能之一
本周有个朋友公司需要一个类似github的代码仓库管理系统,本人选择了gitlab(没有什么对比了,好像目前就gitlab最好了并且维护也不错了),下面就来说说搭建私有github系统的过程
服务器设备信息如下
Ubuntu 14.04(64)
   memory:8G
   cpu:4
   disk:100G
   bandwidth:2Mbit/s
下载gitlab-ce-8.3.4.deb
官网地址:https://about.gitlab.com/downloads/ (下载比较慢还要翻墙,下面有一个云盘下载地址)
访问密码 1091 https://yunpan.cn/crywEZAgEK9gH安装gitlab
$ su root - #切换到root账号
$ dpkg -i gitlab-ce-8.3.4.deb #安装
$ gitlab-ctl reconfigure #配置gitlab
$ gitlab-ctl status #查看服务
$ gitlab-ctl restart/stop #重启或者关闭服务
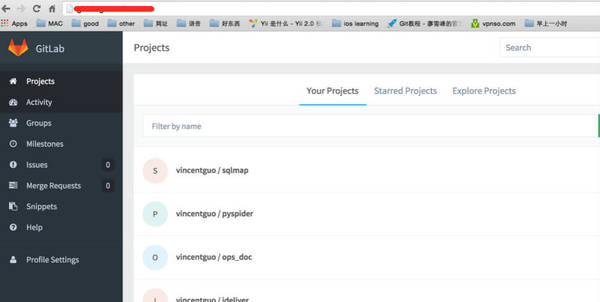
之后就可以直接使用浏览器访问 http://ip,效果如下
个性化配置 和 注意事项
使用自己的nignx
$ apt-get install nginx #安装nginx
$ cd /etc/nginx/conf.d && touch gitlab-http.conf
Nginx gitlab-http.conf 配置如下
upstream gitlab-workhorse {
  #server unix:/var/opt/gitlab/gitlab-workhorse/socket;
  server 127.0.0.1:8080;
}

upstream gitlab-git-http-server {
  server 127.0.0.1:8181;
}

server {
  listen *:80;
  server_name gitlab.guowei.com;
  root /opt/gitlab/embedded/service/gitlab-rails/public;
  client_max_body_size 0;
  location / {
    proxy_read_timeout      300;
    proxy_connect_timeout   300;
    proxy_redirect          off;
    proxy_http_version 1.1;
    proxy_set_header    Host                $http_host;
    proxy_set_header    X-Real-IP           $remote_addr;
    proxy_set_header    X-Forwarded-For     $proxy_add_x_forwarded_for;
    proxy_set_header    X-Forwarded-Proto   http;
    proxy_pass http://gitlab-workhorse;
  }

  location ~ [-\/\w\.]+\.git\/ {
    proxy_read_timeout      300;
    proxy_connect_timeout   300;
    proxy_redirect          off;
    proxy_buffering off;
    proxy_set_header    Host                $http_host;
    proxy_set_header    X-Real-IP           $remote_addr;
    proxy_set_header    X-Forwarded-For     $proxy_add_x_forwarded_for;
    proxy_set_header    X-Forwarded-Proto   $scheme;
    proxy_pass http://gitlab-git-http-server;
  }

  location ~ ^/[\w\.-]+/[\w\.-]+/repository/archive {
    client_max_body_size 0;
    error_page 418 = @git-http-server;
    return 418;
  }

  location @git-http-server {
    proxy_read_timeout      300;
    proxy_connect_timeout   300;
    proxy_redirect          off;
    proxy_buffering off;
    proxy_set_header    Host                $http_host;
    proxy_set_header    X-Real-IP           $remote_addr;
    proxy_set_header    X-Forwarded-For     $proxy_add_x_forwarded_for;
    proxy_set_header    X-Forwarded-Proto   $scheme;
    proxy_pass http://gitlab-git-http-server;
  }

}
配置gitlab不使用nginx
$ vim /etc/gitlab/gitlab.rb
# search nginx find nginx['enable'] = true

# add
nginx['enable'] = false
gitlab_git_http_server['listen_network'] = "tcp"
gitlab_git_http_server['listen_addr'] = "127.0.0.1:8181"
# nginx['enable'] = true

$ gitlab-ctl reconfigure #配置gitlab
$ gitlab-ctl restart #重启服务
卸载gitlab
# Stop gitlab and remove its supervision process
sudo gitlab-ctl uninstall

# Debian/Ubuntu
sudo dpkg -r gitlab-ce

# Redhat/Centos
sudo rpm -e gitlab-ce
注意事项
在nginx中有个8181端口的配置(对应gitlab.rb中的gitlab_git_http_server配置),这个是为了方便以 http的方式 操作git仓库
待解决问题
下载仓库代码还是有些问题,有的可以下载,有的不可以下载还没有找出规律
原文地址: 用GitLab搭建自己的私有GitHub
标签: github git gitlab gitlab_git_http_server nginx
智能推荐
- 【Git 使用笔记】第一部分:安装git 和 使用git
- Startssl 现在就启用 HTTPS,免费的!
- 【运维工具】logrotate 日志管理神器
- tp5, laravel, yii2我该选择哪个
- 编程浪子我的个人知识树


 603
603

 被折叠的 条评论
为什么被折叠?
被折叠的 条评论
为什么被折叠?
 到【灌水乐园】发言


