


一、vue-cli使用
1.基本配置
(1)安装node
官网下载node:https://nodejs.org/zh-cn/download/
node -V #node版本
npm -V #npm版本
(2)安装vue和vue-cli
npm install vue
npm install --global vue-cli
(3)创建基于webpack的项目
vue init webpack vue-study #初始化
cd vue-study #进入项目文件夹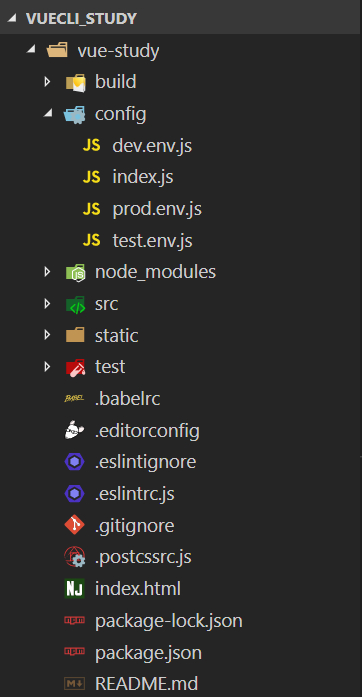
项目创建好
(4)运行项目
npm run dev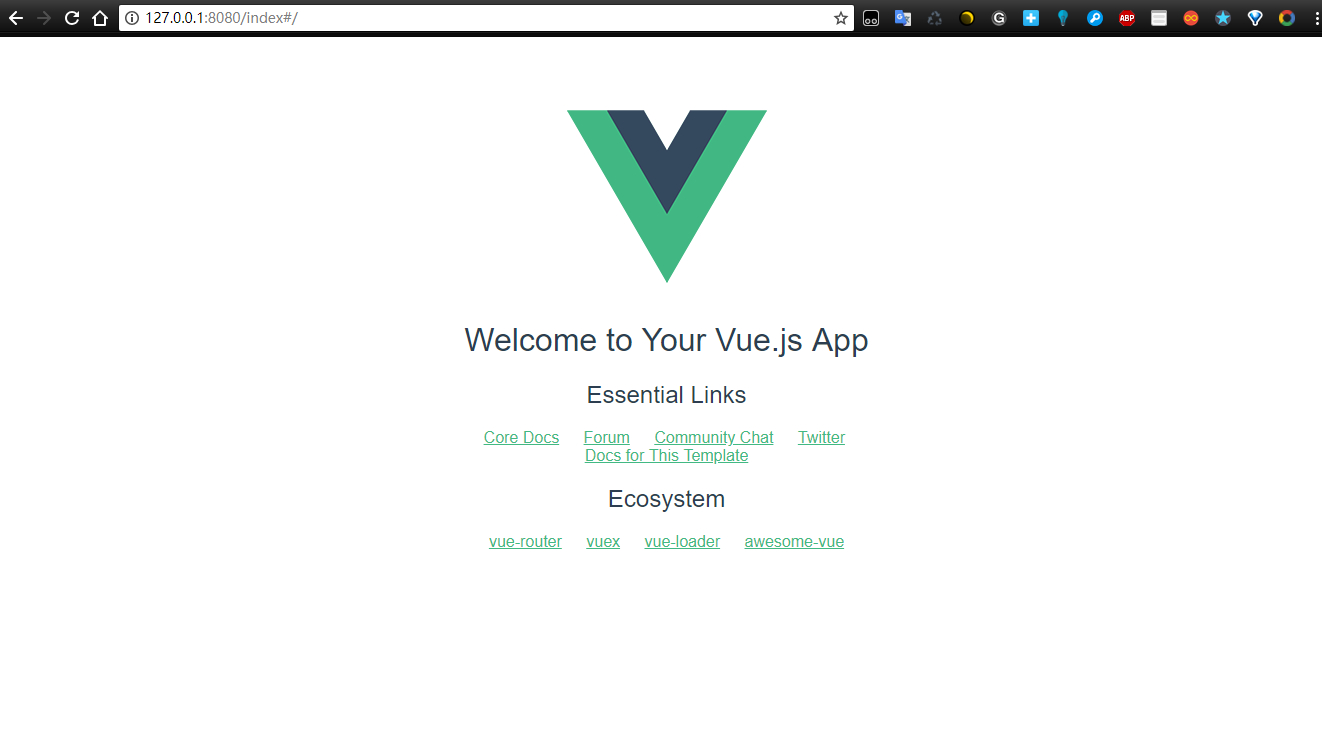
项目运行成功
2.增加一些配置
(1)eslint报错修复

"lint-fix": "eslint --fix --ext .js --ext .jsx --ext .vue src/",格式错误可以通过
npm run lint-fix(2)添加中心状态管理
安装vuex
npm i vuex -D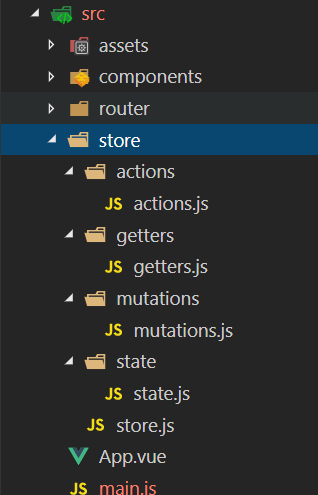
新建store文件夹及其以下文件
import Vue from 'vue'
import vuex from 'vuex'
import mutations from './mutations/mutations'
import actions from './actions/actions'
import getters from './getters/getters'
import state from './state/state'
Vue.use(vuex)

export default new vuex.Store({
  state,
  getters,
  actions,
  mutations
})
store/store.js
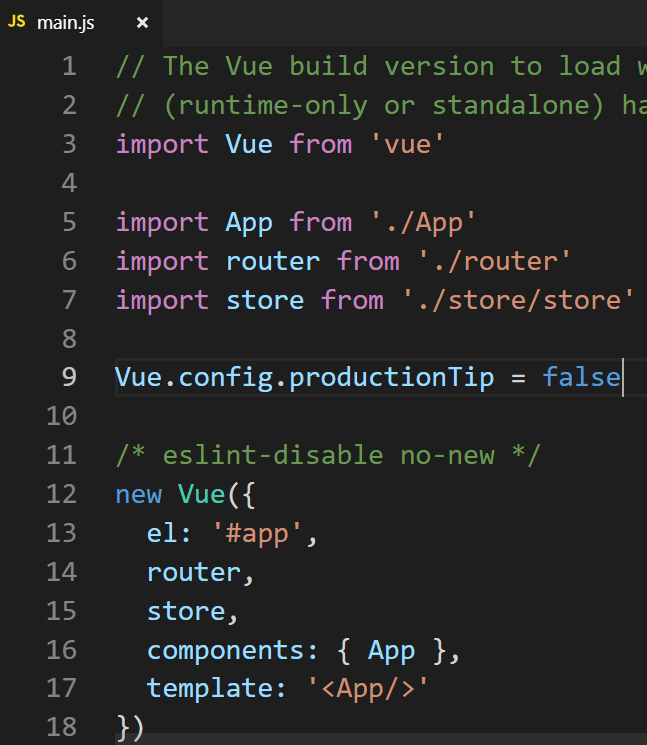
import store from './store/store'

new Vue({
  el: '#app',
  router,
  store,
  components: { App },
  template: '<App/>'
})
引入store
A.state和getters
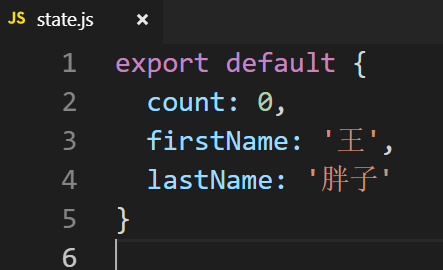
state/state.js

getters.js
mutations.js,actions.js都是export default{}形式
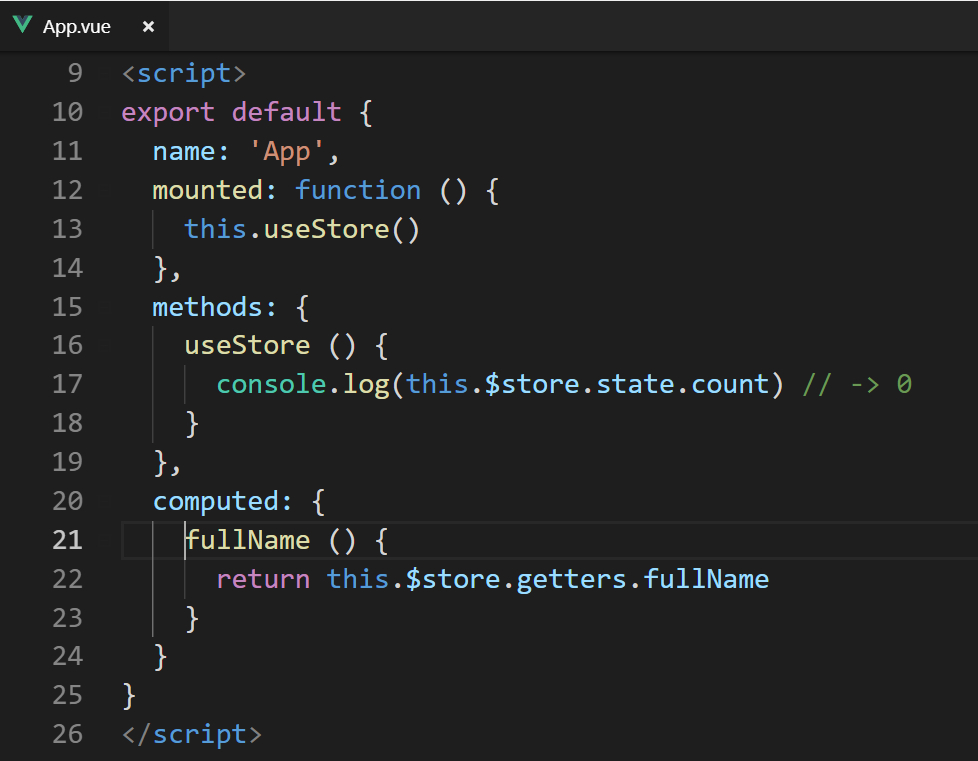
export default {
  name: 'App',
  mounted: function () {
    this.useStore()
  },
  methods: {
    useStore () {
      console.log(this.$store.state.count) // -> 0
    }
  },
  computed: {
    fullName () {
      return this.$store.getters.fullName
    }
  }
}
App.vue
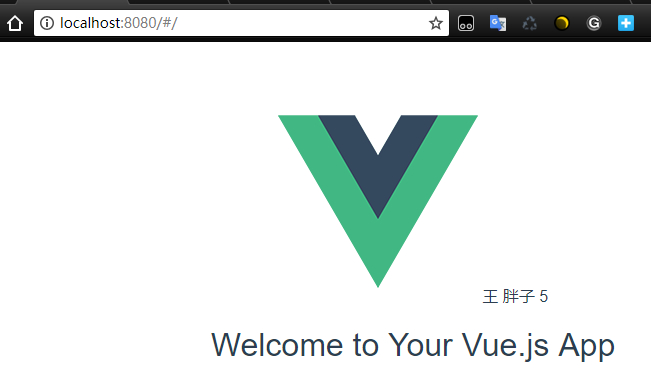
npm run dev运行
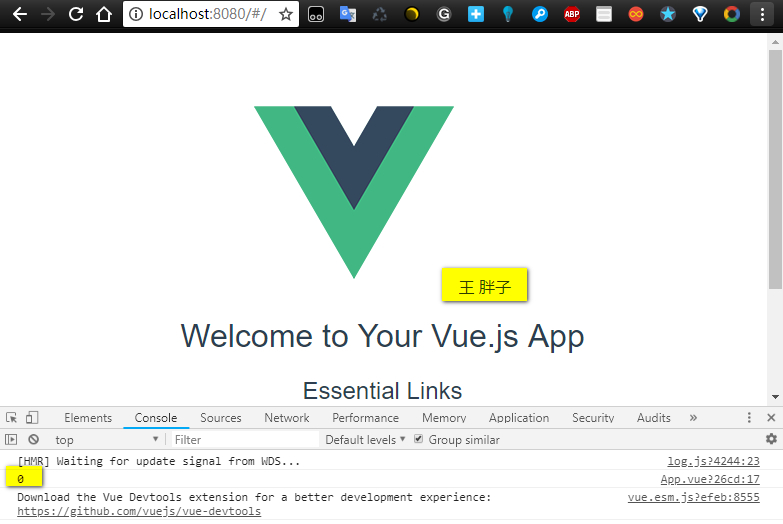
打印出store里的state,得到getters里面的值
B.mutations,actions
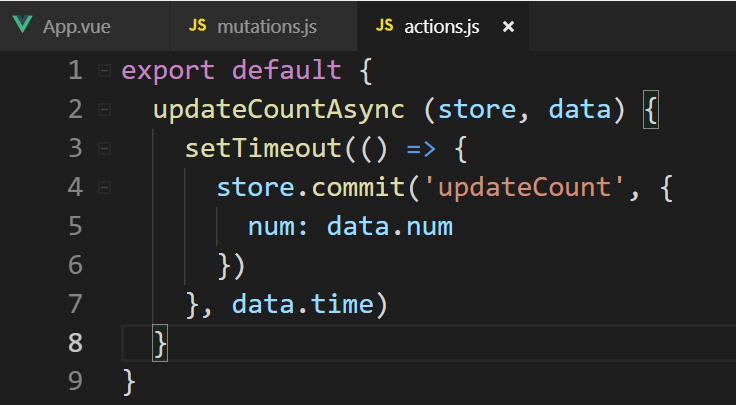
export default {
  updateCountAsync (store, data) {
    setTimeout(() => {
      store.commit('updateCount', {
        num: data.num
      })
    }, data.time)
  }
}
actions.js
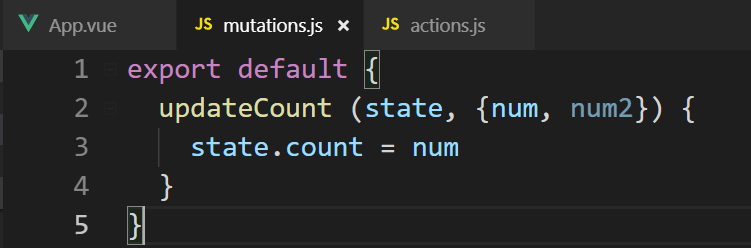
export default {
  updateCount (state, {num, num2}) {
    state.count = num
  }
}
mutations
dispatch用来触发actions,和commit用来触发mutations一样
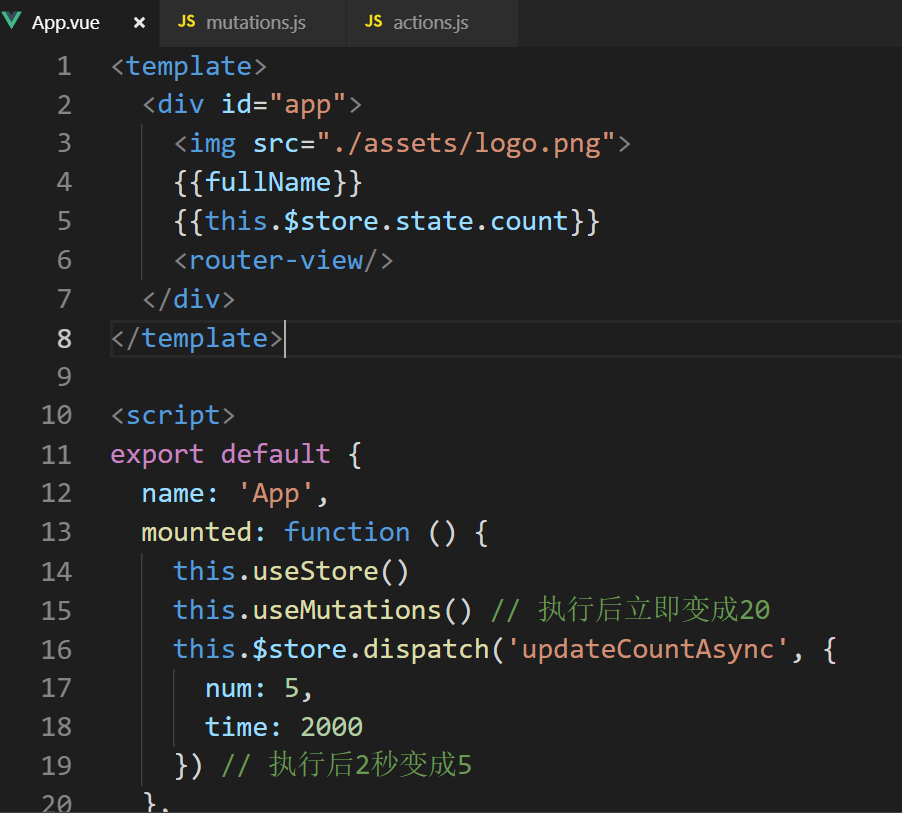
{{this.$store.state.count}}
mounted: function () {
this.useStore()
this.useMutations() // 执行后立即变成20
this.$store.dispatch('updateCountAsync', {
num: 5,
time: 2000
}) // 执行后2秒变成5
},
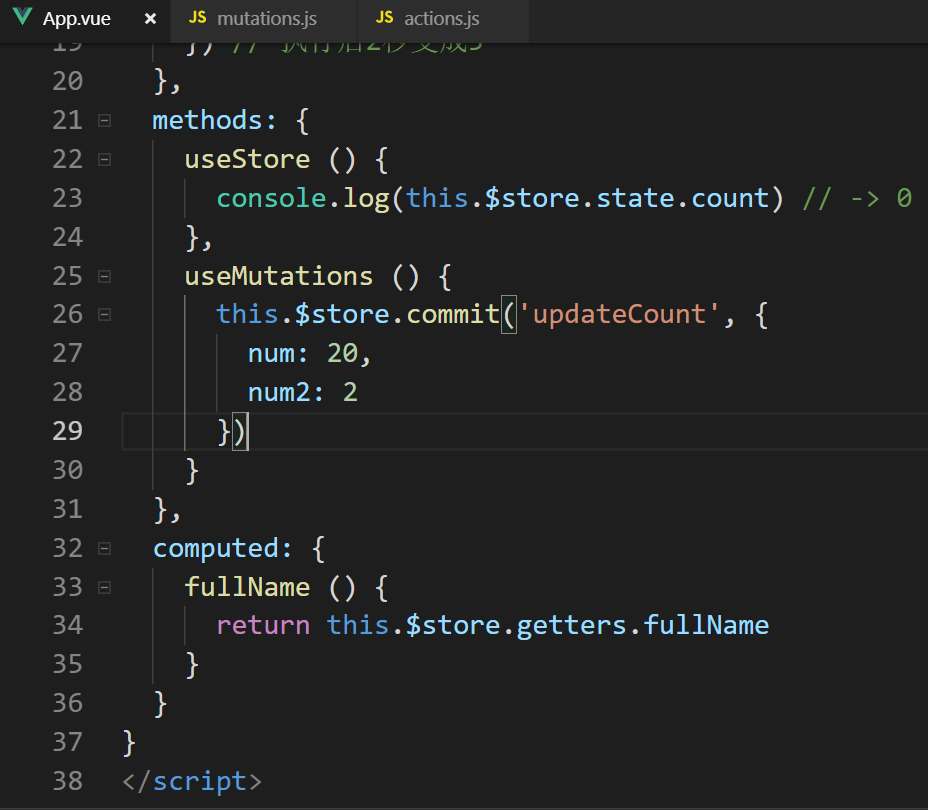
methods: {
useStore () {
console.log(this.$store.state.count) // -> 0
},
useMutations () {
this.$store.commit('updateCount', {
num: 20,
num2: 2
})
}
},App.vue
npm run dev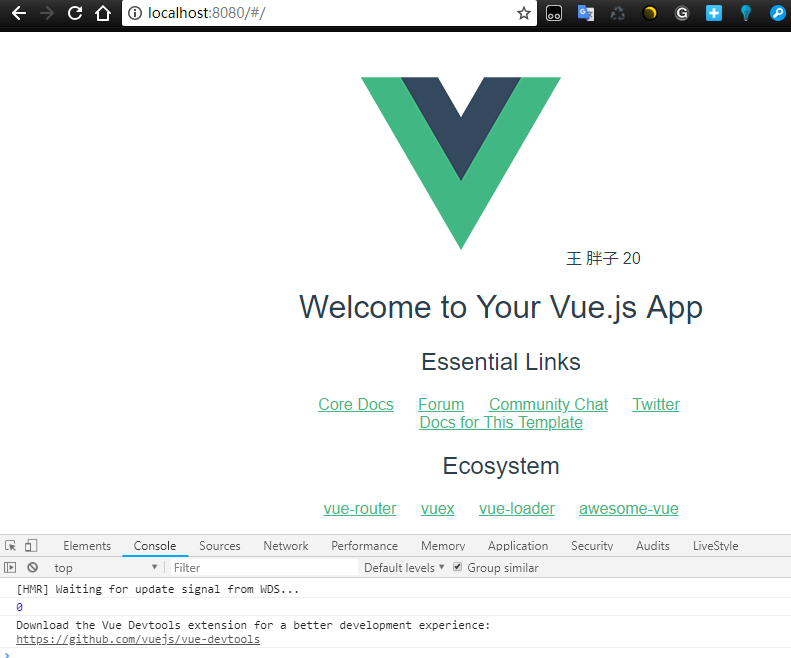
2秒之后从20变成5
C.让store使用更便捷
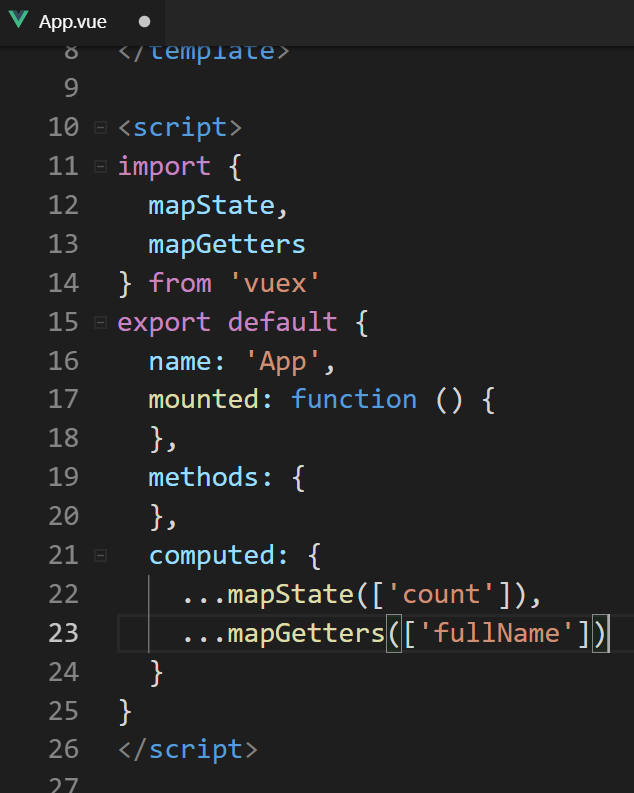
<script>
import {
  mapState,
  mapGetters
} from 'vuex'
export default {
  name: 'App',
  mounted: function () {
  },
  methods: {
  },
  computed: {
    ...mapState(['count']),
    ...mapGetters(['fullName'])
  }
}
使用map语法更简洁获得state和getters里的值。
(3)跨域代理
A.axios和proxyTable解决get跨域问题
npm i axios -D #安装axios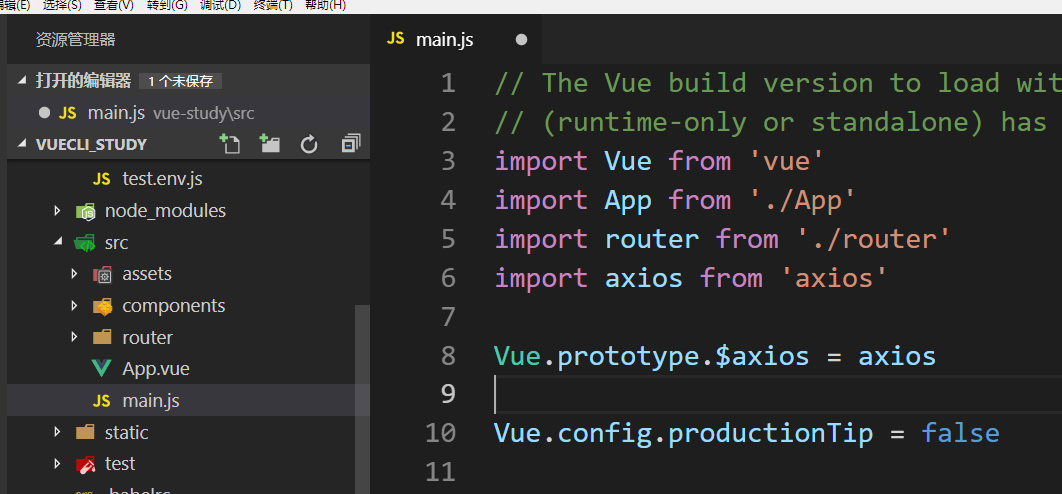
import axios from 'axios'
Vue.prototype.$axios = axios
src/main.js全局添加axios

拿到一个本地数据
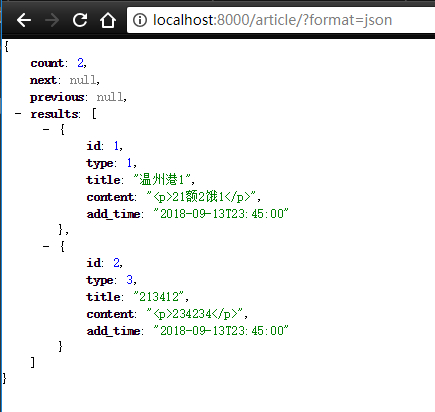
jsonview后的视图
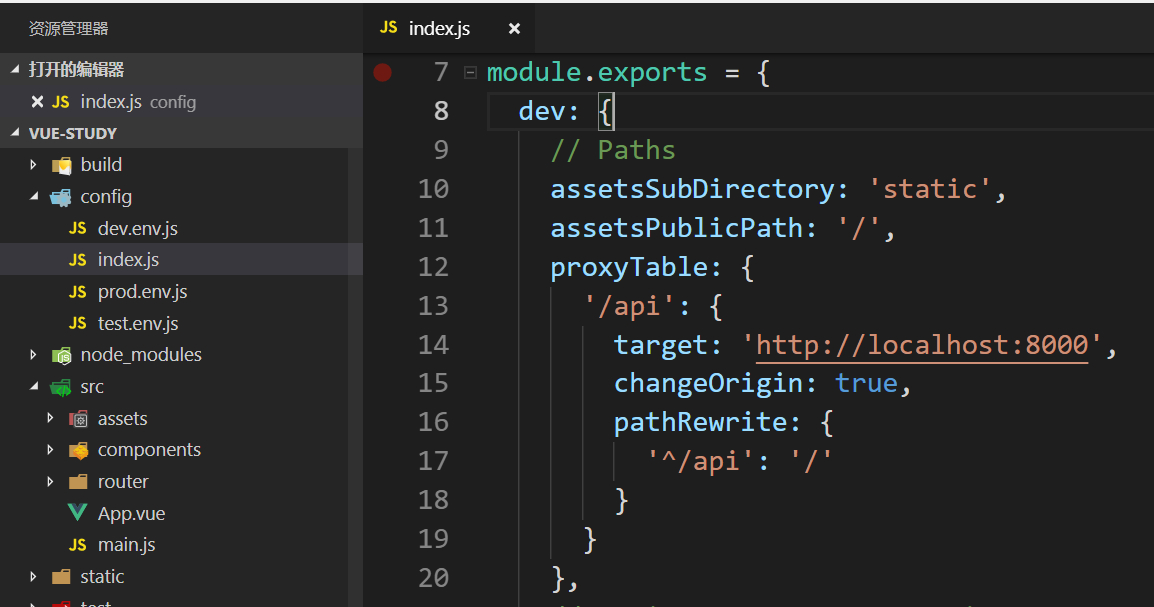
    proxyTable: {
      '/api': {
        target: 'http://localhost:8000',
        changeOrigin: true,
        pathRewrite: {
          '^/api': '/'
        }
      }
    },
config/index.js
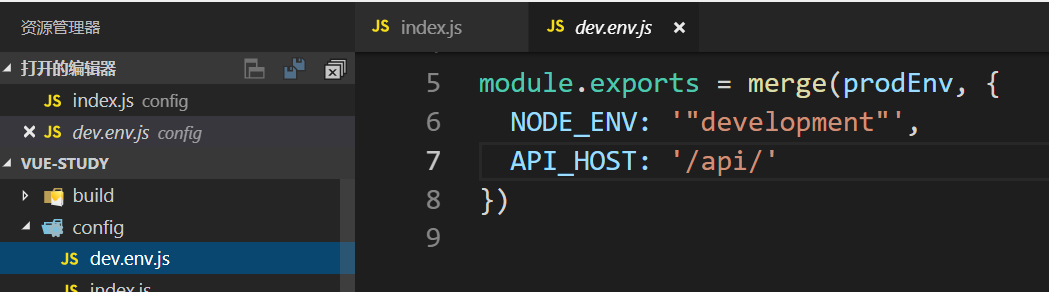
API_HOST: '/api/'condfig/dev.env.js增加API_HOST
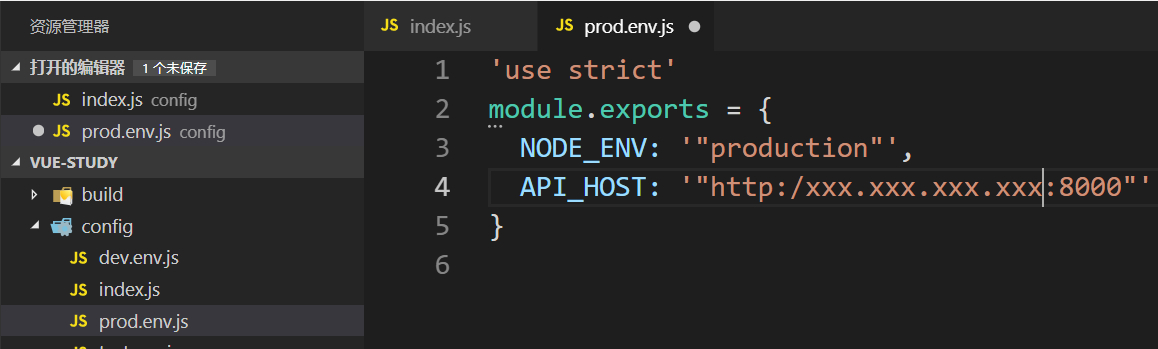
API_HOST: '"http:/xxx.xxx.xxx.xxx:8000"' // 生产环境的地址,上线后修改config/prod.env.js增加线上地址接口
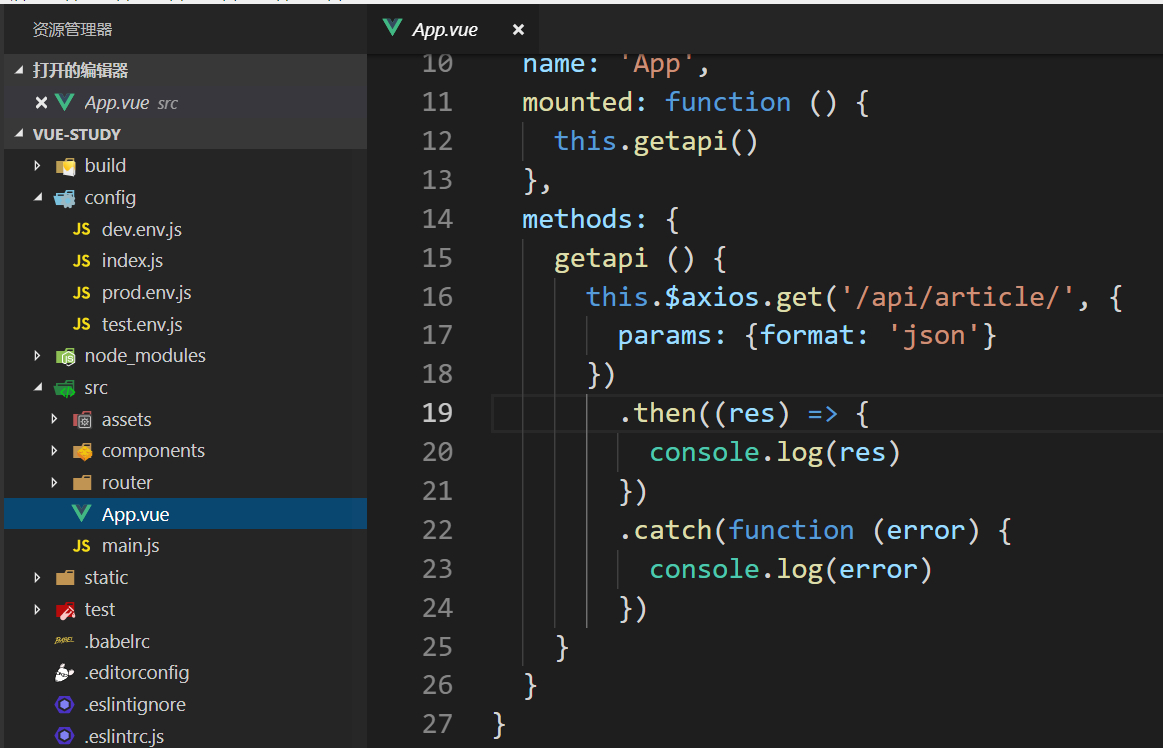
  mounted: function () {
    this.getapi()
  },
  methods: {
    getapi () {
      this.$axios.get('/api/article/', {
        params: {format: 'json'}
      })
        .then((res) => {
          console.log(res)
        })
        .catch(function (error) {
          console.log(error)
        })
    }
  }
App.vue内调用,注意接口格式
npm run dev启动开发环境
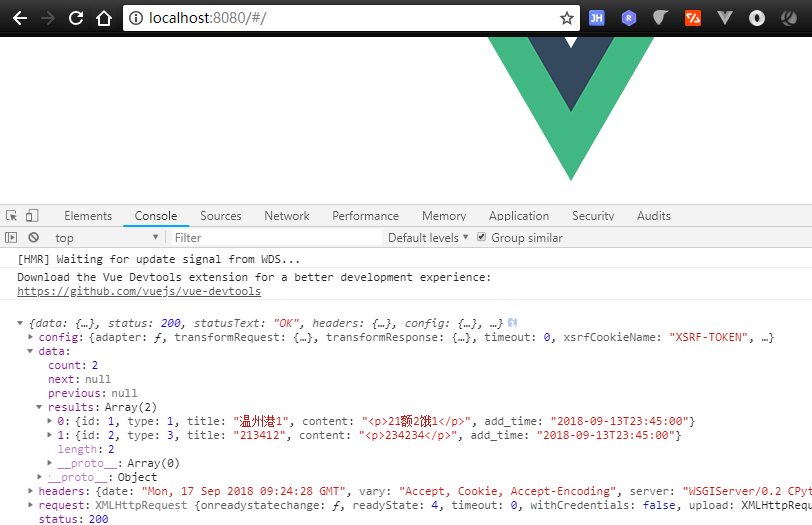
查看控制台输出跨域接口信息
B.qs解决post发送兼容问题
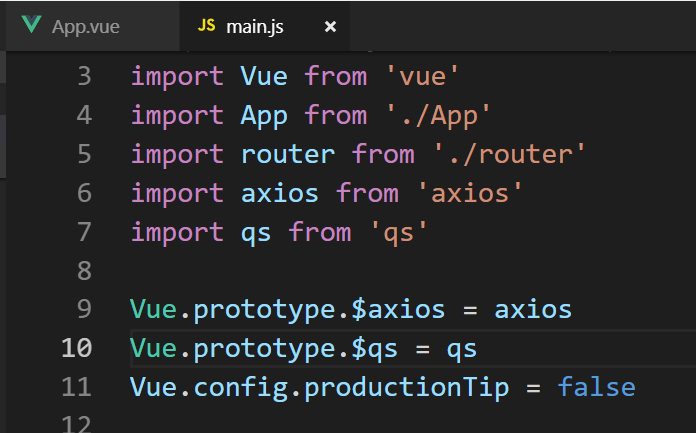
import qs from 'qs'

Vue.prototype.$axios = axios
Vue.prototype.$qs = qs
main.js
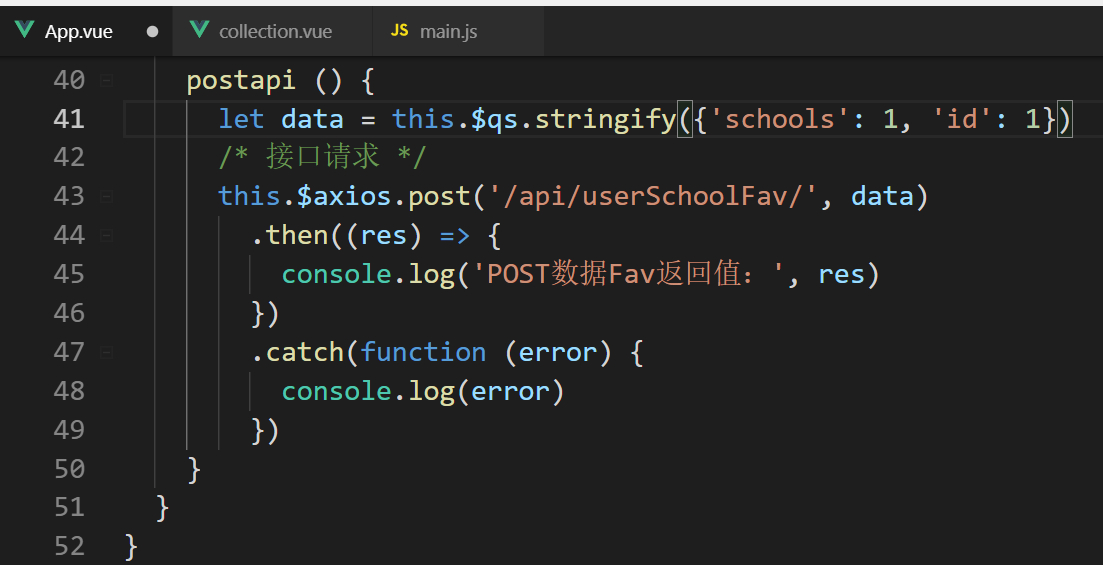
    postapi () {
      let data = this.$qs.stringify({'schools': 1, 'id': 1})
      /* 接口请求 */
      this.$axios.post('/api/userSchoolFav/', data)
        .then((res) => {
          console.log('POST数据Fav返回值:', res)
        })
        .catch(function (error) {
          console.log(error)
        })
    }
或者qs非全局注册
import Qs from 'qs'
export default {
   methods:{
    postapi () {
      let data = Qs.stringify({'schools': 1, 'id': 1})
      /* 接口请求 */
      this.$axios.post('/api/userSchoolFav/', data)
        .then((res) => {
          console.log('POST数据Fav返回值:', res)
        })
        .catch(function (error) {
          console.log(error)
        })
   }
}
当前页面引入并使用
C.解决跨域携带token信息(JWT的方式不是cookie,所以这里暂时用不上)

axios.defaults.withCredentials = true // 允许跨域携带cookie信息以jwt的token为例:
参考:https://my.oschina.net/u/3018050/blog/2054854
(4)jquery配置
安装jquery
npm install jquery -D
const webpack = require('webpack')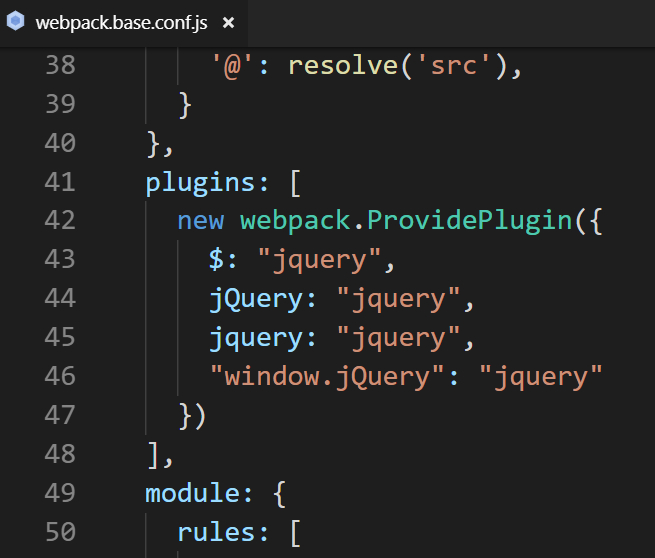
  plugins: [
    new webpack.ProvidePlugin({
      $: "jquery",
      jQuery: "jquery",
      jquery: "jquery",
      "window.jQuery": "jquery"
    })
  ],
添加build/webpack.base.conf.js相关plugin
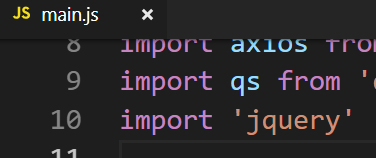
import 'jquery'main.js
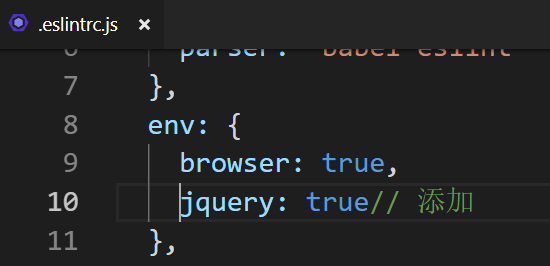
jquery: true// 添加
可以获得到,jquery可以使用
(7)styl使用
安装styl-loader
npm install stylus stylus-loader -D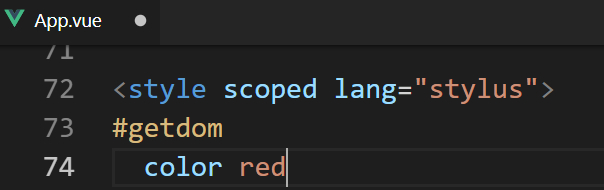
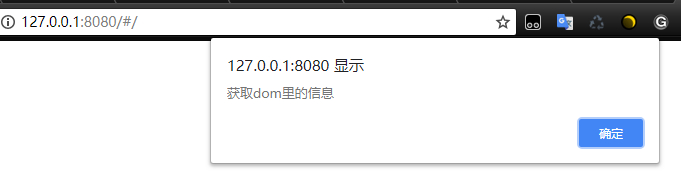
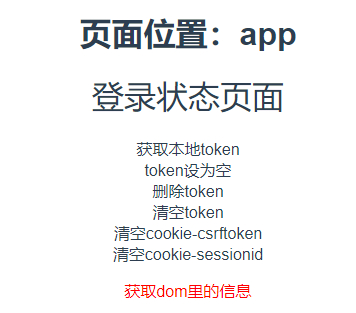
<style scoped lang="stylus">语言上lang='stylus'即可
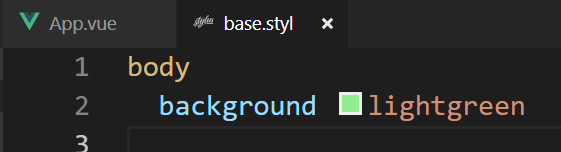
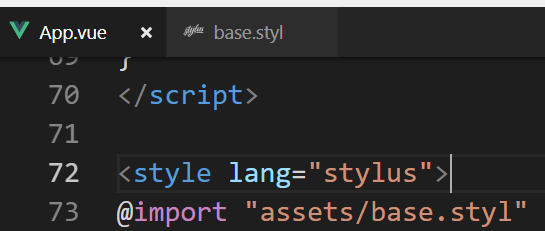
<style lang="stylus">
@import "assets/base.styl"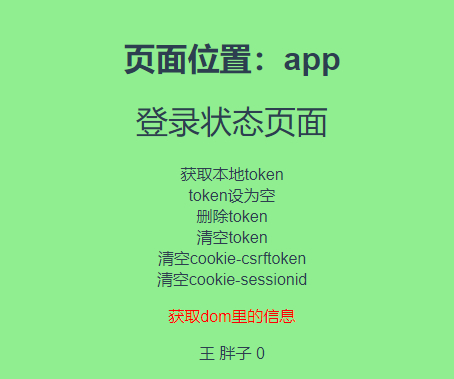
外部引用
(5)外部ui库
以element UI为例
安装element ui
npm i element-ui -S #安装element-ui
npm i sass-loader node-sass -D #安装sass-loader,node-sass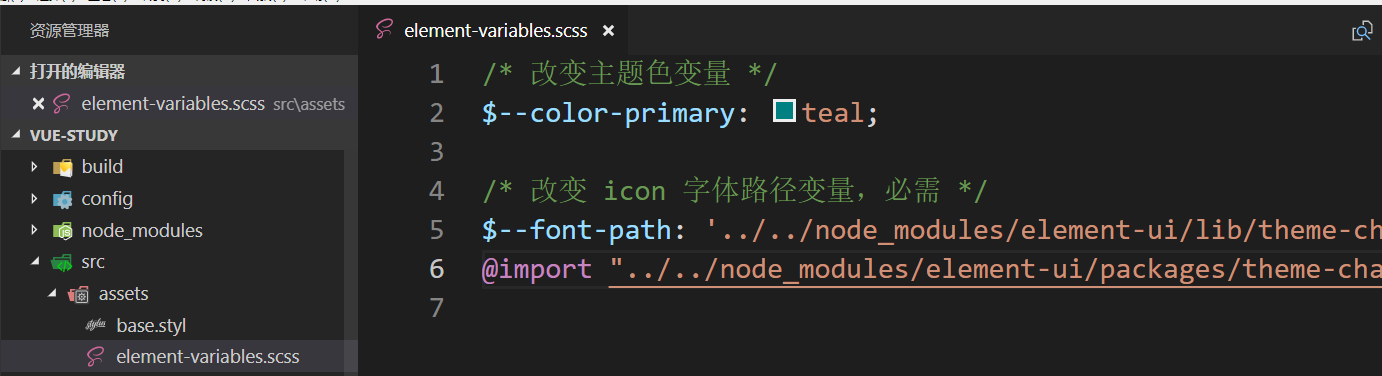
/* 改变主题色变量 */
$--color-primary: teal;

/* 改变 icon 字体路径变量,必需 */
$--font-path: '../../node_modules/element-ui/lib/theme-chalk/fonts';
@import "../../node_modules/element-ui/packages/theme-chalk/src/index";
新建src/assets/element-variables.scss文件
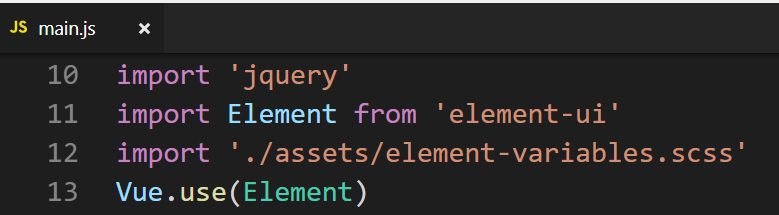
import Element from 'element-ui'
import './assets/element-variables.scss'
Vue.use(Element)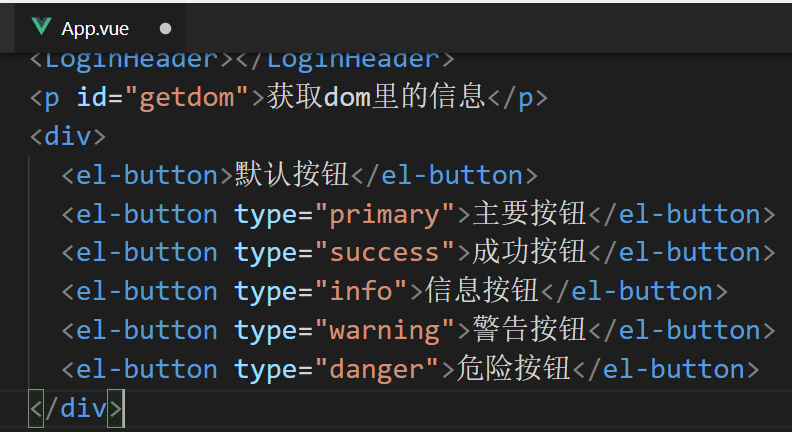
使用element ui

主要按钮的主题色定义好
3.优化一些设置
(1)使用路由守卫和request/response 拦截器
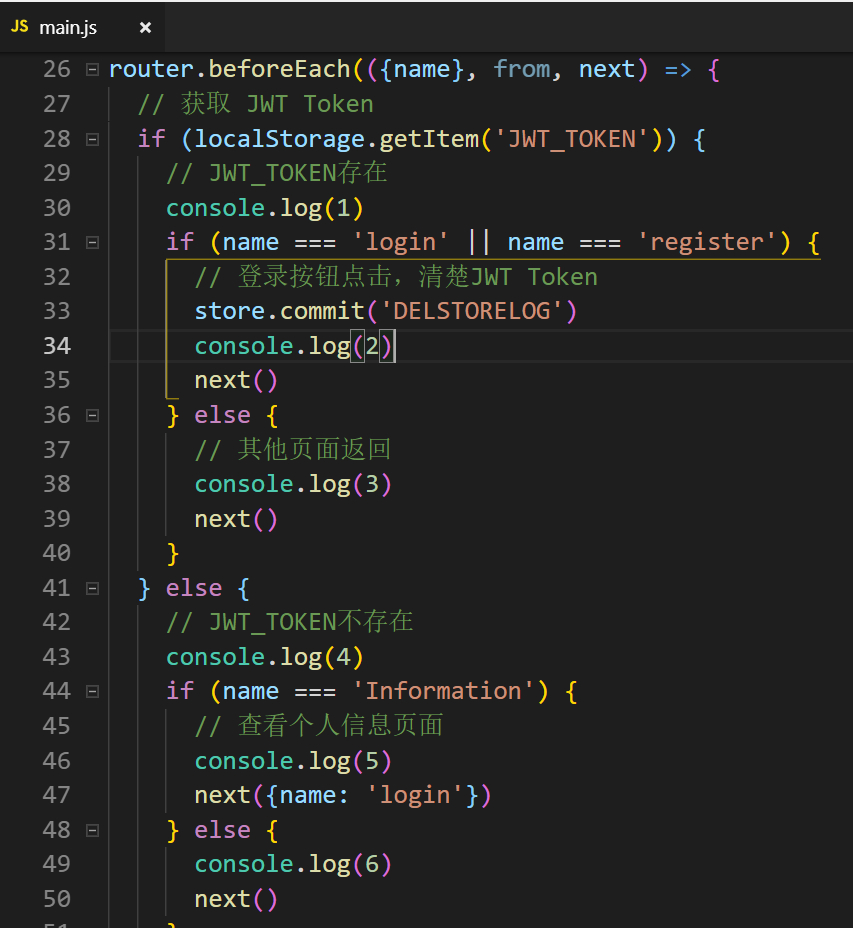
在main.js里添加每个跳转前的路由钩子。这里是通过JWTtoken是否存在,以及跳转页面是否为登录页、注册页、或者个人中心(例如个人信息页面)等,确定对localstorage里存储的token是否进行删除,以及是否需要跳转回登录页面
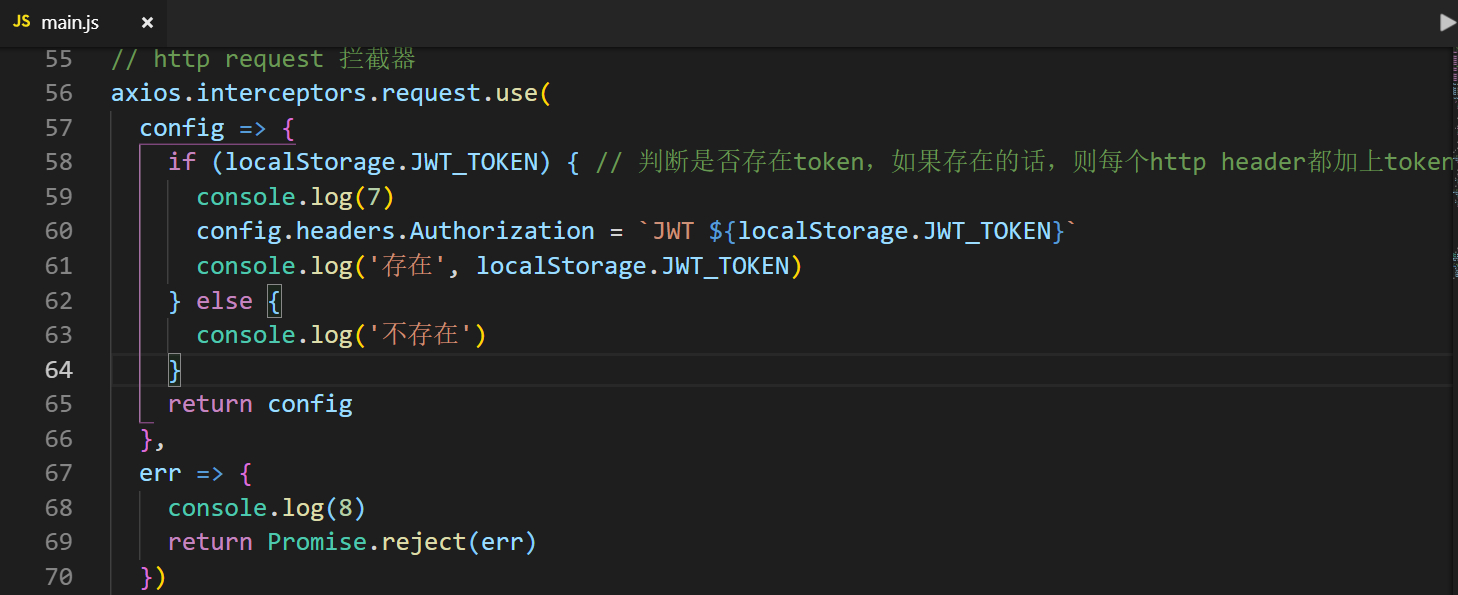
对request拦截,判断localstorage里的token是否存在,来添加authorization认证信息,确保登录成功的状态下,每次发送信息携带JWTtoken,使得一些需要用户权限的页面能够顺利通过
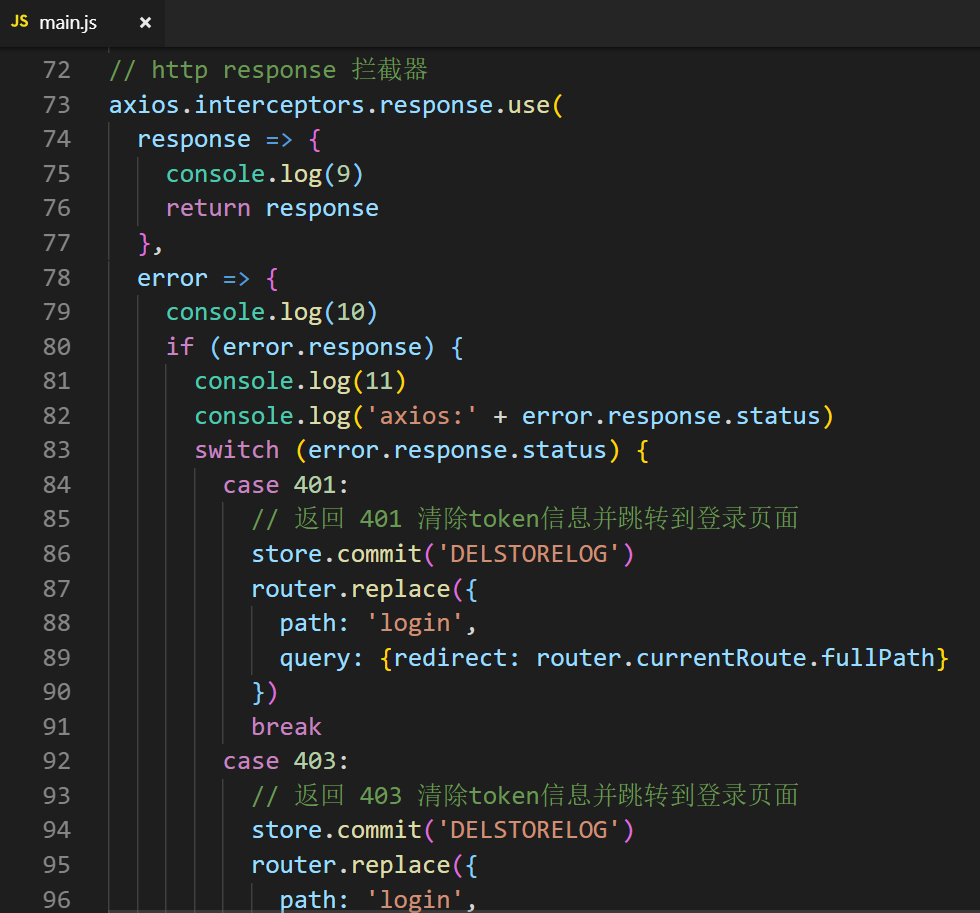
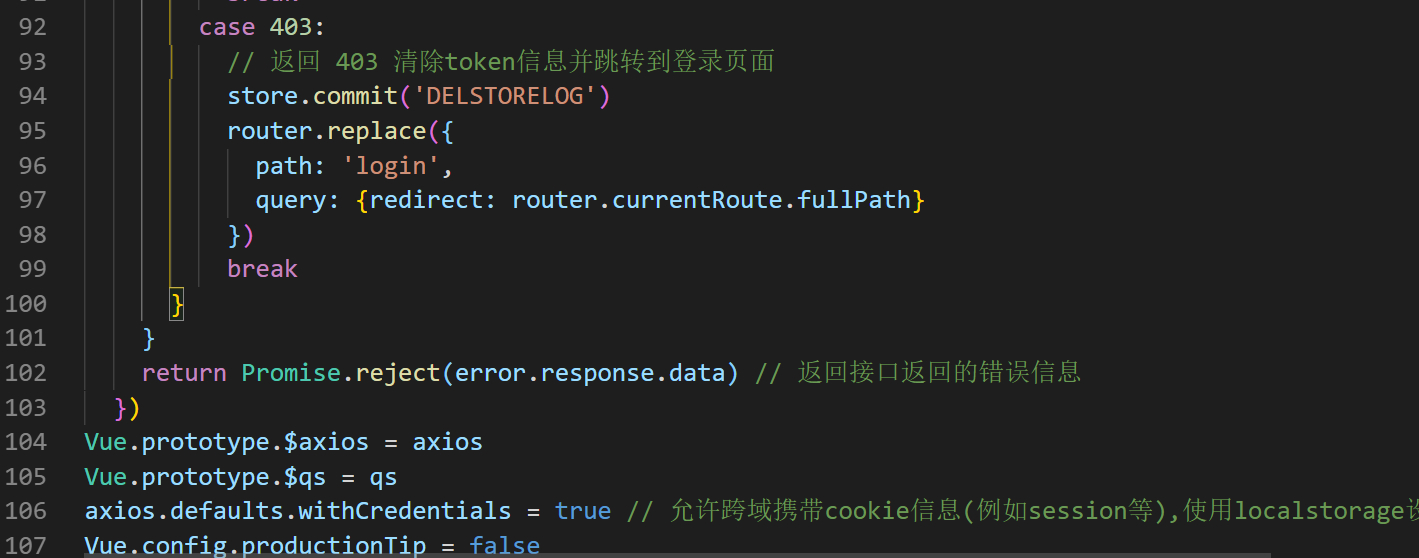
对response拦截,判断返回信息中是否有用户未登录401,或者登录认证错误403的情况,如果有,则返回登录页面
这里对路由钩子和http拦截判断打印数字,以便在控制台更好看到操作时,走的逻辑路径
// The Vue build version to load with the `import` command
// (runtime-only or standalone) has been set in webpack.base.conf with an alias.
import Vue from 'vue'

import App from './App'
import router from './router'
import store from './store/store'
import axios from 'axios'
import qs from 'qs'
// import 'jquery'
import Element from 'element-ui'
import './assets/element-variables.scss'

import IndexHeader from '@/layout/Header'
import IndexFooter from '@/layout/Footer'
import Banner from '@/components/Banner'
import Pages from '@/components/Pages'

Vue.use(Element)

Vue.component('IndexHeader', IndexHeader)
Vue.component('IndexFooter', IndexFooter)
Vue.component('Banner', Banner)
Vue.component('Pages', Pages)

router.beforeEach(({name}, from, next) => {
  // 获取 JWT Token
  if (localStorage.getItem('JWT_TOKEN')) {
    // JWT_TOKEN存在
    console.log(1)
    if (name === 'login' || name === 'register') {
      // 登录按钮点击,清楚JWT Token
      store.commit('DELSTORELOG')
      console.log(2)
      next()
    } else {
      // 其他页面返回
      console.log(3)
      next()
    }
  } else {
    // JWT_TOKEN不存在
    console.log(4)
    if (name === 'Information') {
      // 查看个人信息页面
      console.log(5)
      next({name: 'login'})
    } else {
      console.log(6)
      next()
    }
  }
})

// http request 拦截器
axios.interceptors.request.use(
  config => {
    if (localStorage.JWT_TOKEN) { // 判断是否存在token,如果存在的话,则每个http header都加上token
      console.log(7)
      config.headers.Authorization = `JWT ${localStorage.JWT_TOKEN}`
      console.log('存在', localStorage.JWT_TOKEN)
    } else {
      console.log('不存在')
    }
    return config
  },
  err => {
    console.log(8)
    return Promise.reject(err)
  })

// http response 拦截器
axios.interceptors.response.use(
  response => {
    console.log(9)
    return response
  },
  error => {
    console.log(10)
    if (error.response) {
      console.log(11)
      console.log('axios:' + error.response.status)
      switch (error.response.status) {
        case 401:
          // 返回 401 清除token信息并跳转到登录页面
          store.commit('DELSTORELOG')
          router.replace({
            path: 'login',
            query: {redirect: router.currentRoute.fullPath}
          })
          break
        case 403:
          // 返回 403 清除token信息并跳转到登录页面
          store.commit('DELSTORELOG')
          router.replace({
            path: 'login',
            query: {redirect: router.currentRoute.fullPath}
          })
          break
      }
    }
    return Promise.reject(error.response.data) // 返回接口返回的错误信息
  })
Vue.prototype.$axios = axios
Vue.prototype.$qs = qs
axios.defaults.withCredentials = true // 允许跨域携带cookie信息(例如session等),使用localstorage设置为false
Vue.config.productionTip = false

/* eslint-disable no-new */
new Vue({
  el: '#app',
  router,
  store,
  components: { App },
  template: '<App/>'
})
main.js
(2)mutations-types.js的设置
A.设置前
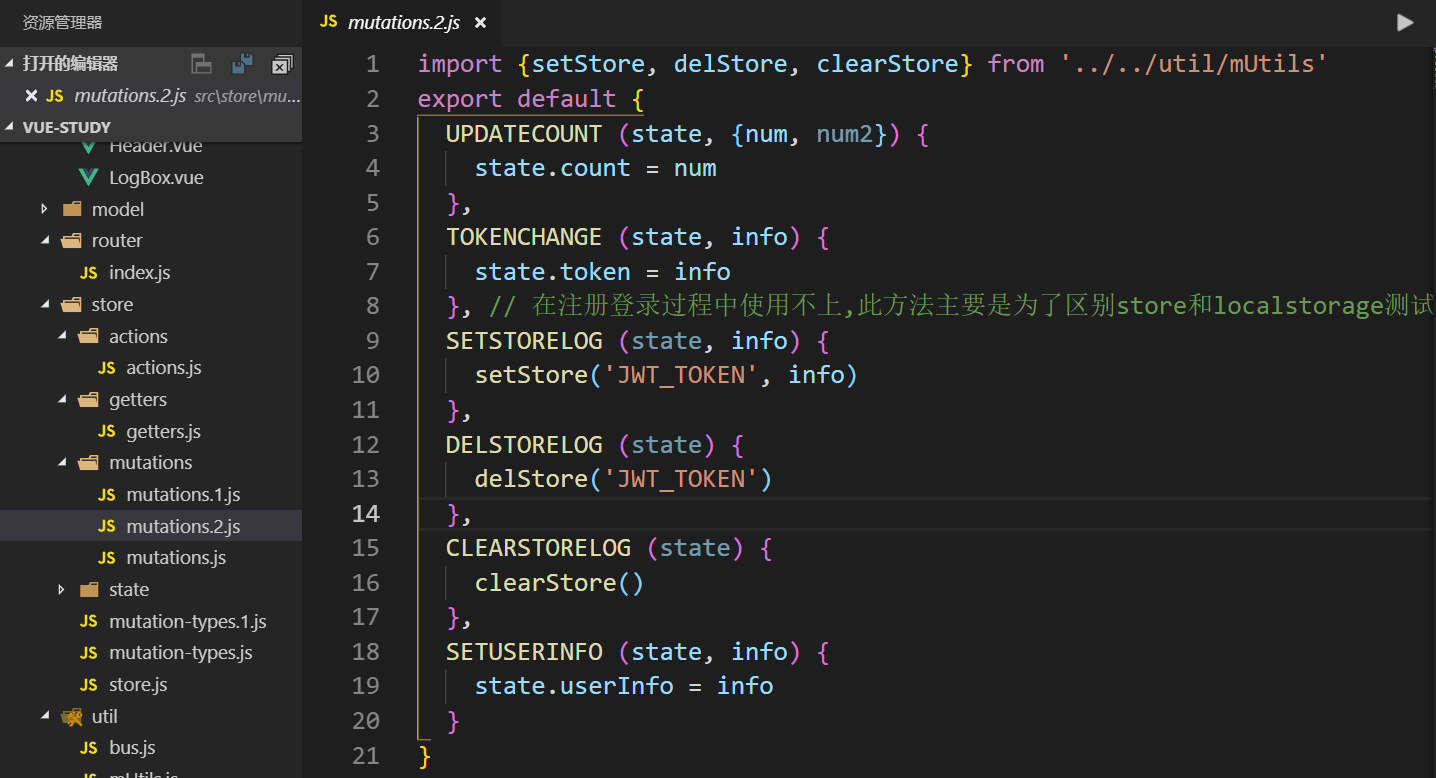
  SETUSERINFO (state, info) {
    state.userInfo = info
  }
![]()
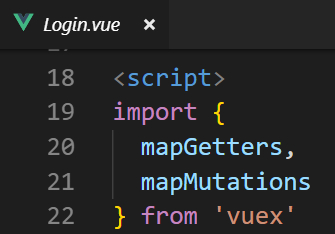
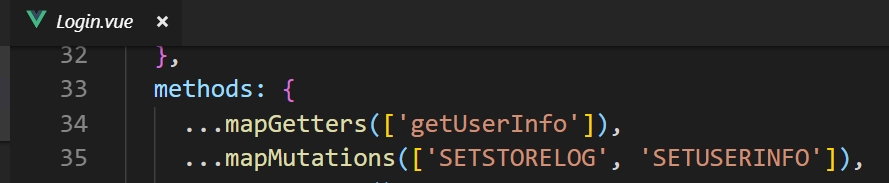
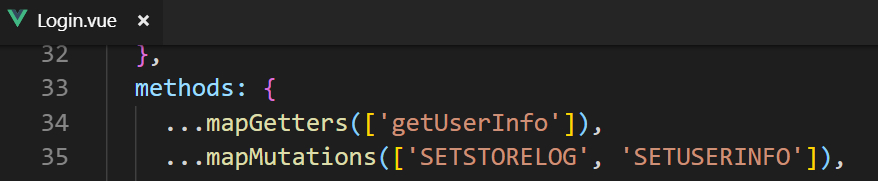
this['SETSTORELOG'](res.data.token)B.设置后
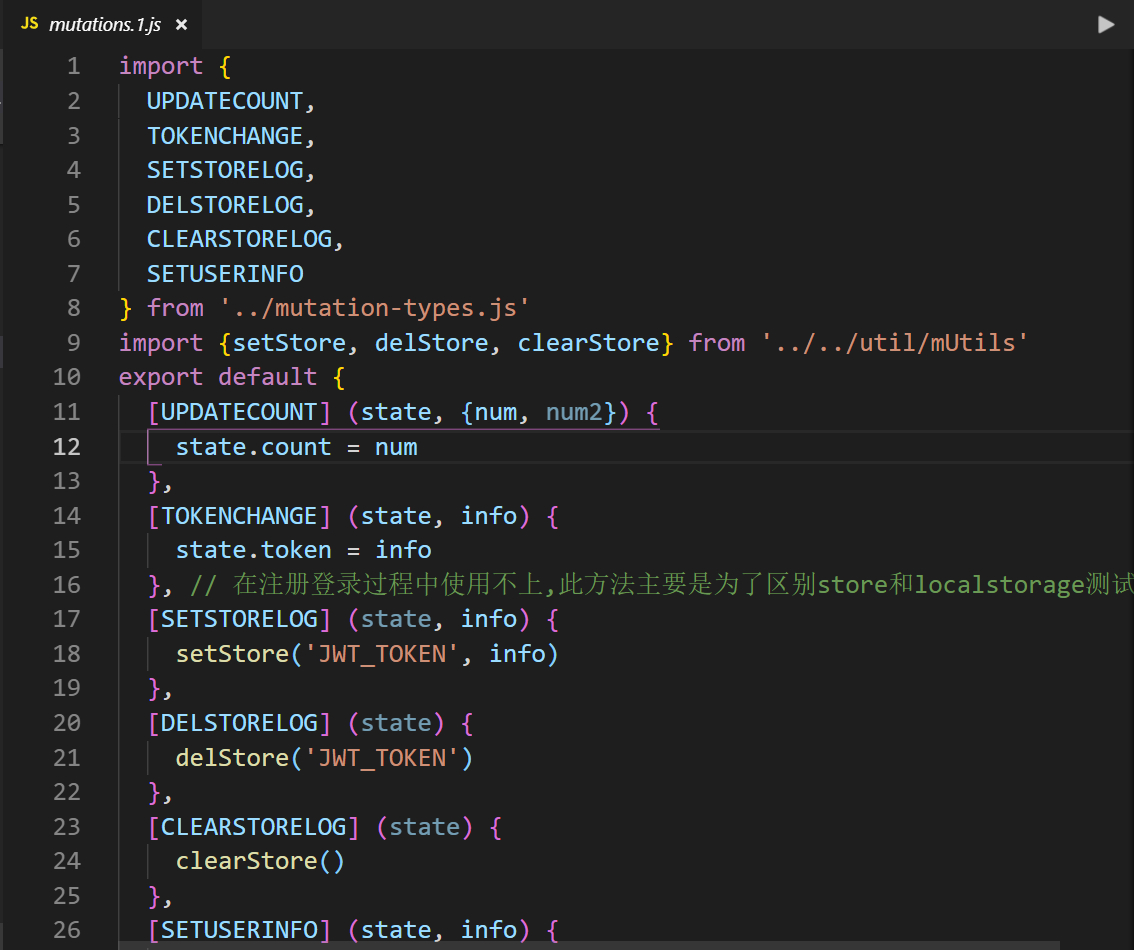
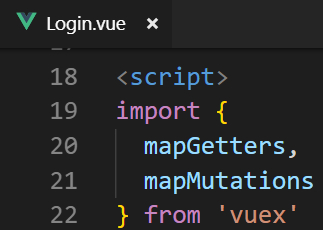
import {
  SETUSERINFO
} from '../mutation-types.js'
export default {
  [SETUSERINFO] (state, info) {
    state.userInfo = info
  }
}
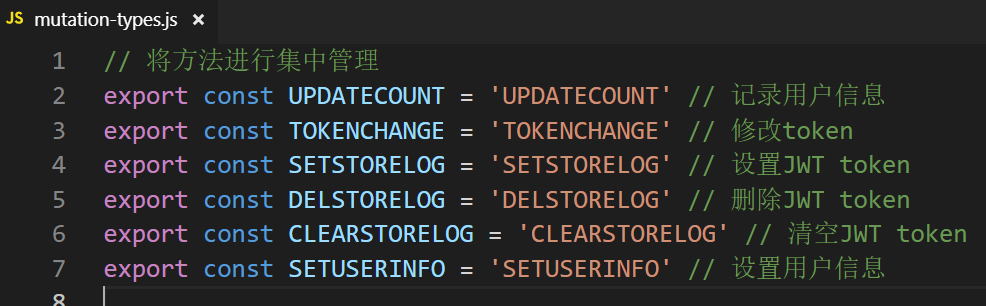
新建store/mutation-types.js
![]()
this.SETSTORELOG(res.data.token)对比
1)增加mutation-types.js后,需要在mutations.js里引入,并且将所有方法名用[]括起来。
2)两者引入都徐亚用map from vuex的方式,并且在methods里添加该方法
3)使用时,无mutation-types需要将方法名用[]括起来,而有mutation-types时,则直接使用,不需要[]
(3)封装axios方法
A.封装思路
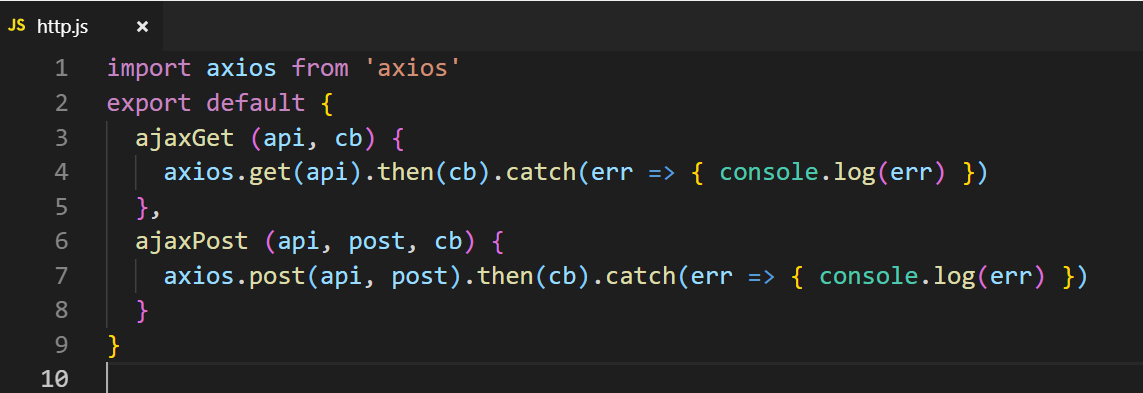
import axios from 'axios'
export default {
  ajaxGet (api, cb) {
    axios.get(api).then(cb).catch(err => { console.log(err) })
  },
  ajaxPost (api, post, cb) {
    axios.post(api, post).then(cb).catch(err => { console.log(err) })
  }
}
新建src/axios/http.js
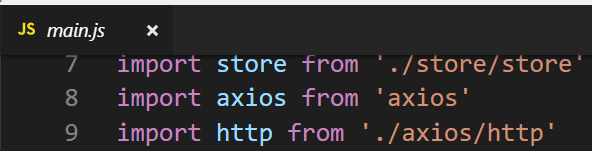
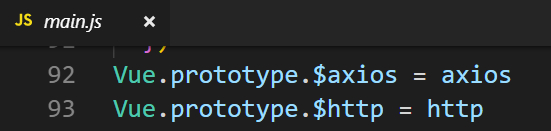
import http from './axios/http'
Vue.prototype.$http = http
在main.js中引入
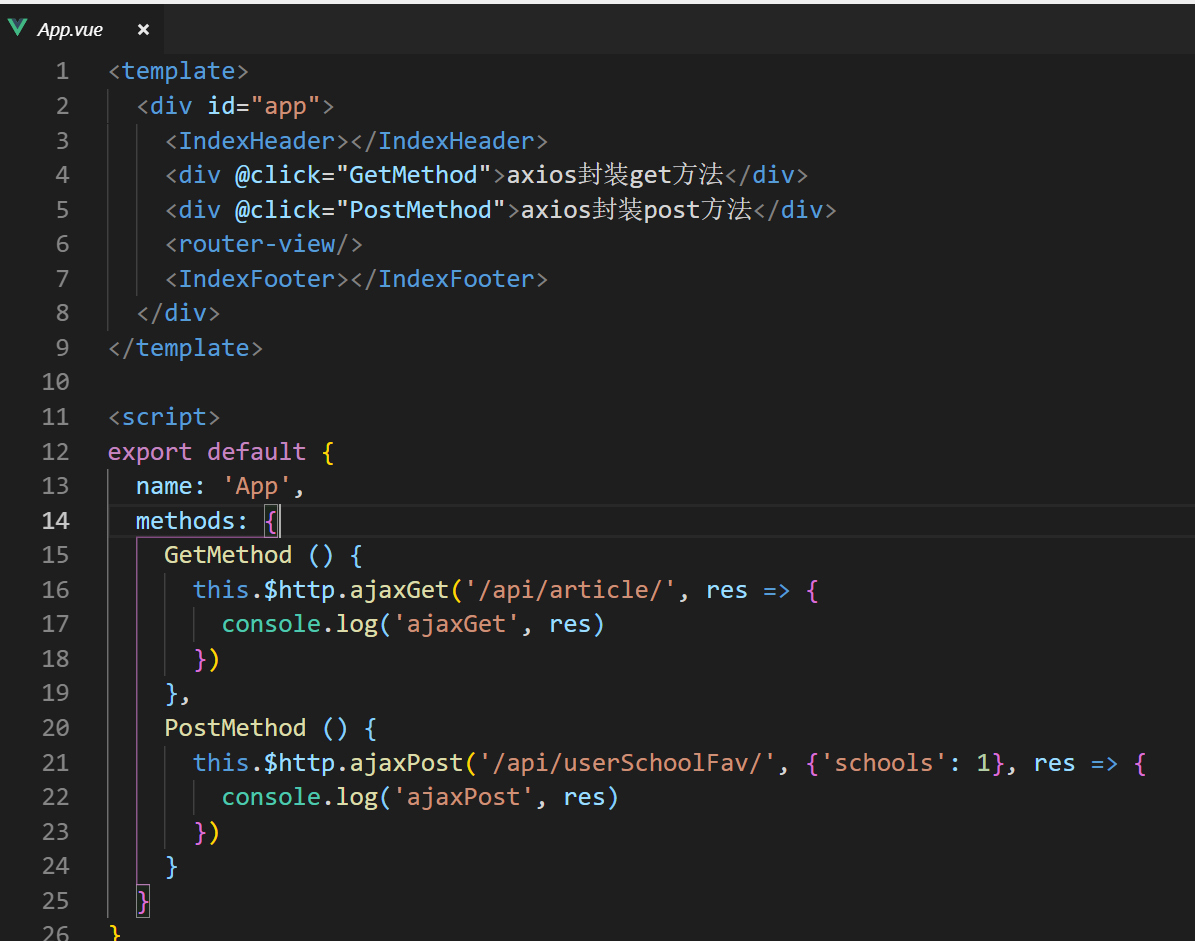
<template>
  <div id="app">
    <IndexHeader></IndexHeader>
    <div @click="GetMethod">axios封装get方法</div>
    <div @click="PostMethod">axios封装post方法</div>
    <router-view/>
    <IndexFooter></IndexFooter>
  </div>
</template>

<script>
export default {
  name: 'App',
  methods: {
    GetMethod () {
      this.$http.ajaxGet('/api/article/', res => {
        console.log('ajaxGet', res)
      })
    },
    PostMethod () {
      this.$http.ajaxPost('/api/userSchoolFav/', {'schools': 1}, res => {
        console.log('ajaxPost', res)
      })
    }
  }
}
</script>
在.vue文件中使用
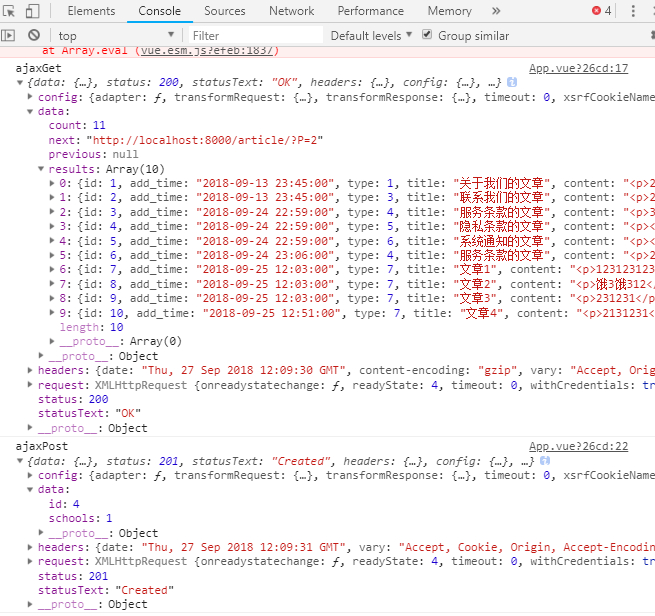
点击后可在控制台看到相关内容。
这种封装方式更简化了写法,不需要then,catch这些关键字,专心写里面的处理逻辑
由此,我们可以将一些常用方法封装起来
B.一些方法封装示例
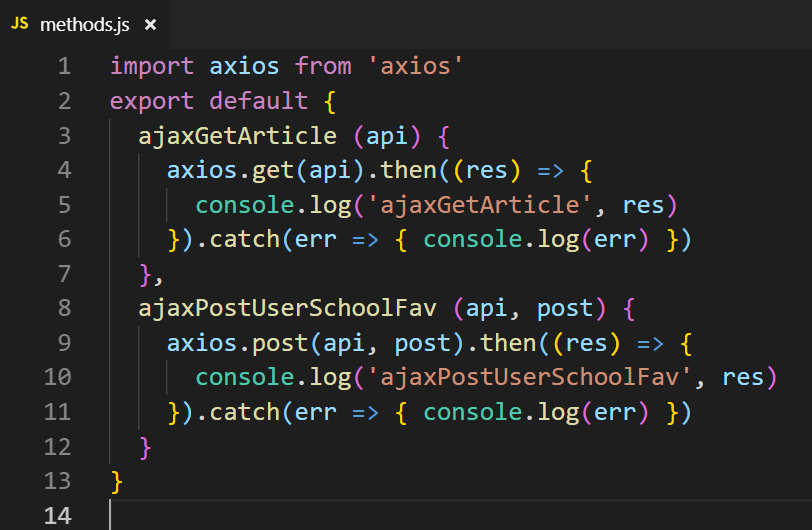
新建src/axios/methods.js来保存常用方法,方便在调用
import axios from 'axios'
export default {
  ajaxGetArticle (api) {
    axios.get(api).then((res) => {
      console.log('ajaxGetArticle', res)
    }).catch(err => { console.log(err) })
  },
  ajaxPostUserSchoolFav (api, post) {
    axios.post(api, post).then((res) => {
      console.log('ajaxPostUserSchoolFav', res)
    }).catch(err => { console.log(err) })
  }
}
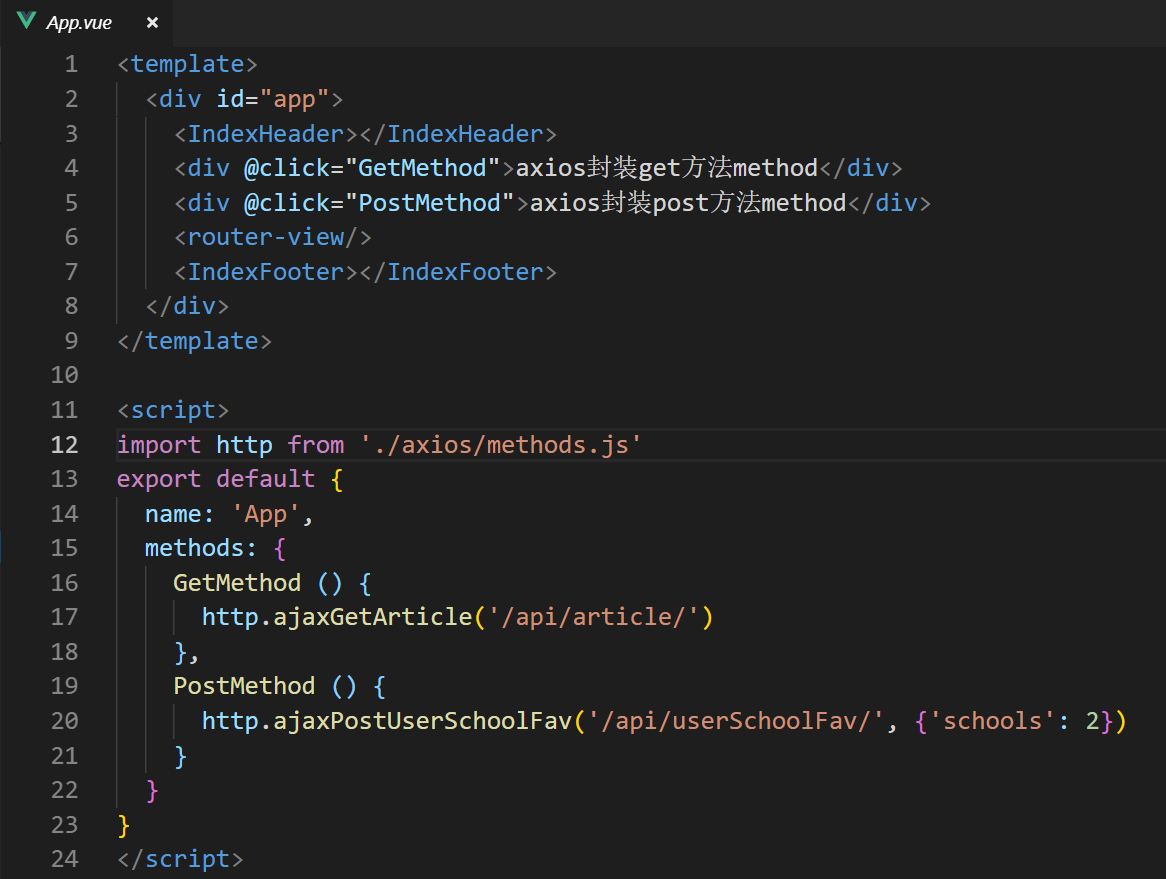
<template>
  <div id="app">
    <IndexHeader></IndexHeader>
    <div @click="GetMethod">axios封装get方法method</div>
    <div @click="PostMethod">axios封装post方法method</div>
    <router-view/>
    <IndexFooter></IndexFooter>
  </div>
</template>

<script>
import http from './axios/methods.js'
export default {
  name: 'App',
  methods: {
    GetMethod () {
      http.ajaxGetArticle('/api/article/')
    },
    PostMethod () {
      http.ajaxPostUserSchoolFav('/api/userSchoolFav/', {'schools': 2})
    }
  }
}
</script>
.vue里引用方法并使用
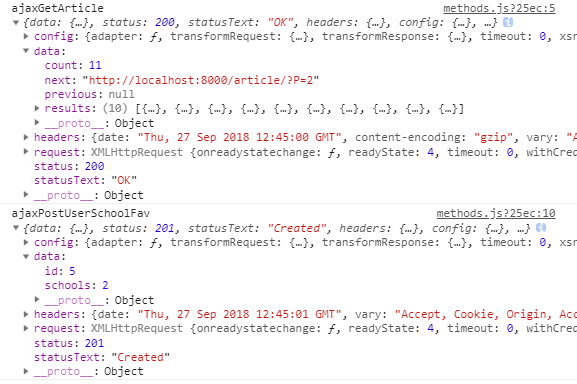
可以看到页面能够调用。
目的和使用:
这种方式在rest模式下,当数据格式和返回status一致时,提供很好的使用方法。
比如,我们要调用很多列表数据时,写了很多不同的.vue下模板,填充数据,就可以用一条流水线的方式来处理。
把axios发送get请求,对获得列表统一置入当前this的data下,这样的方式封装好。
然后统一在method里使用这个方法带上url参数即可。
当然,填写表单也是这个思路,只是多个post传递数据对象,表单还要对返回的错误提示进行提醒,也就是error里操作显示给用户看。前面我们都是把method方法和error打印进行统一处理,现在可以针对不同的error代码独立出来不再封装即可灵活使用
举例:
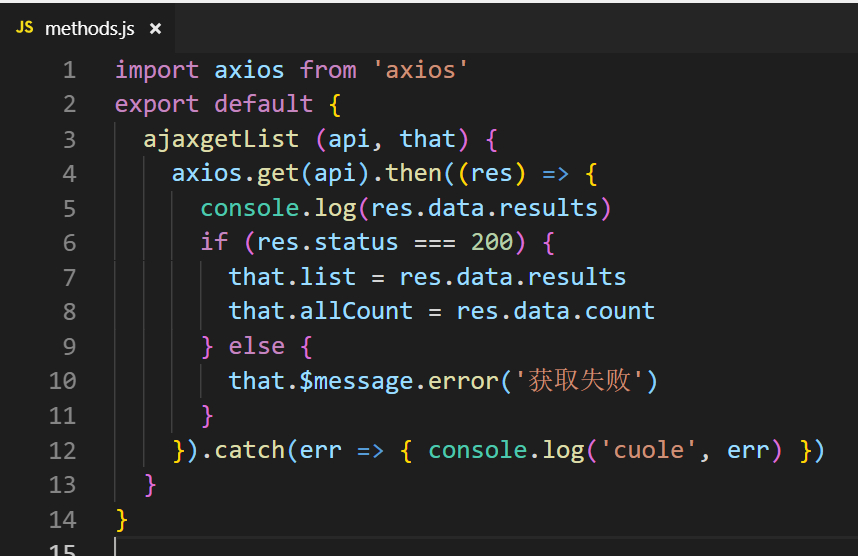
import axios from 'axios'
export default {
  ajaxgetList (api, that) {
    axios.get(api).then((res) => {
      console.log(res.data.results)
      if (res.status === 200) {
        that.list = res.data.results
        that.allCount = res.data.count
      } else {
        that.$message.error('获取失败')
      }
    }).catch(err => { console.log('cuole', err) })
  }
}
axios/methods.js,写入方法,传入that指代this
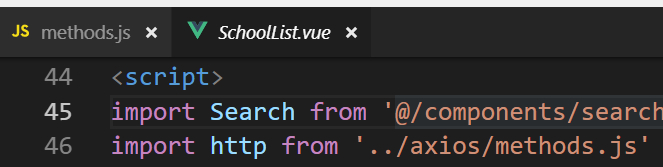
schoolList局部引入

schoolList一行代码调用

同理,teacherList局部引入

同理,teacherList一行代码调用
如此即可方便使用。
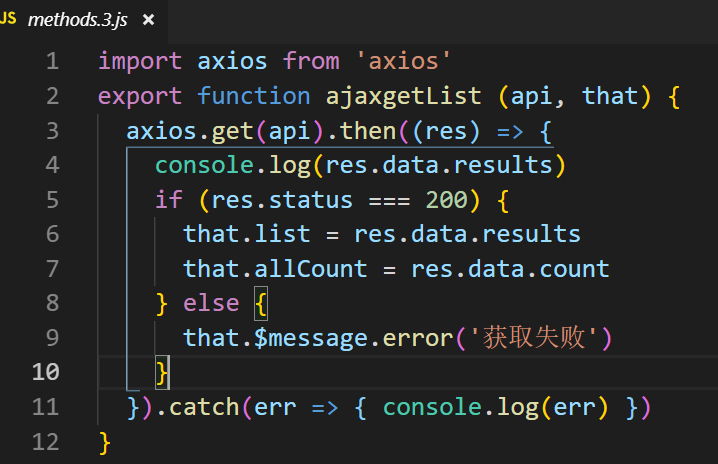
import axios from 'axios'
export function ajaxgetList2 (api, that) {
  axios.get(api).then((res) => {
    console.log(res.data.results)
    if (res.status === 200) {
      that.list = res.data.results
      that.allCount = res.data.count
    } else {
      that.$message.error('获取失败')
    }
  }).catch(err => { console.log(err) })
}
如果只是一个方法单独在一个文件里,可以导出为命名方法

两种引用方法都可

使用不需要http下了
(4)actions提交mutation(未练习)
import * as types from './mutation-types';
// 提交mutation
function makeAction (type) {
  return ({ commit }, ...args) => commit(type, ...args);
};
export const setShopList = makeAction(types.SET_SHOPLIST);
actions.js
import * as types from './mutation-types';
import cookie from '../static/js/cookie';
import {getShopCarts} from '../api/api'
// 类似于事件 每个mutation都有字符类型的事件类型和回调函数
//全局引入vue
import Vue from 'vue';
import Axios from 'axios';
Vue.prototype.$http = Axios


export default {
    [types.SET_SHOPLIST] (state) { //设置购物车数据
        // token = cookie.getCookie('token')
        if(cookie.getCookie('token') != null){
          getShopCarts().then((response)=> {
            // 更新store数据
            state.goods_list.goods_list = response.data;
            console.log(response.data)
            var totalPrice = 0
            response.data.forEach(function(entry) {
              totalPrice += entry.goods.shop_price*entry.nums
            });
            state.goods_list.totalPrice = totalPrice;

          }).catch(function (error) {
            console.log(error);
          });
        }
    },


}
mutations.js
// 获取购物车数据
export const SET_SHOPLIST = 'SET_SHOPLIST';
mutation-types.js
        addShoppingCart () { //加入购物车
            addShopCart({
                goods: this.productId, // 商品id
                nums: this.buyNum, // 购买数量
            }).then((response)=> {
                this.$refs.model.setShow();
                // 更新store数据
                this.$store.dispatch('setShopList');

            }).catch(function (error) {
                console.log(error);
            });
        },
.vue中method方法使用
C.http拦截器抽出

import {getStore} from '../util/mUtils'
import axios from 'axios'
// 全局状态控制引入
import store from '../store/store'
import router from '../router'

// http request 拦截器
axios.interceptors.request.use(
  config => {
    if (localStorage.JWT_TOKEN) { // 判断是否存在token,如果存在的话,则每个http header都加上token
      // 1.不设置有效期
      // config.headers.Authorization = `JWT ${localStorage.JWT_TOKEN}`
      // 2.设置有效期
      let JWT_TOKEN = getStore('JWT_TOKEN')
      config.headers.Authorization = `JWT ${JWT_TOKEN}`
    } else {
    }
    return config
  },
  err => {
    return Promise.reject(err)
  })

// http response 拦截器
axios.interceptors.response.use(
  response => {
    return response
  },
  error => {
    if (error.response) {
      console.log('axios:' + error.response.status)
      switch (error.response.status) {
        case 401:
          // 返回 401 清除token信息并跳转到登录页面
          store.commit('DELTOKEN')
          router.replace({
            path: 'login',
            query: {redirect: router.currentRoute.fullPath}
          })
          break
        case 500:
          console.log('服务器错误')
        // case 403:
        //   // 返回 403 清除token信息并跳转到登录页面
        //   store.commit('DELTOKEN')
        //   router.replace({
        //     path: 'login',
        //     query: {redirect: router.currentRoute.fullPath}
        //   })
        //   break
      }
    }
    return Promise.reject(error.response.data) // 返回接口返回的错误信息
  })
新建src/axios/index.js,把main.js中关于http拦截器部分全部剪切过来

在main.js中引入
(5)设置default/404图片
对图片src是否存在,404等情况设置默认图
<!-- 404Img -->
<template>
  <div style="width:100%;height:500px;border:2px solid red">
    <img :src="avatar?avatar:defaultNoImage" :onerror="defaultImg" alt="" >
  </div>
</template>

<script>
export default {
  name: 'Demo404Img',
  data () {
    return {
      defaultImg: 'this.src="' + require('../assets/images/banner1.jpg') + '"',
      defaultNoImage: 'this.src="' + require('../assets/images/banner2.jpg') + '"',
      avatar: '../static/images/avatar-1.jpg'
    }
  }
}
</script>
报错解决
1.[Vue warn]: You are using the runtime-only build of Vue where the template compiler is not available. Either pre-compile the templates into render functions, or use the compiler-included build.
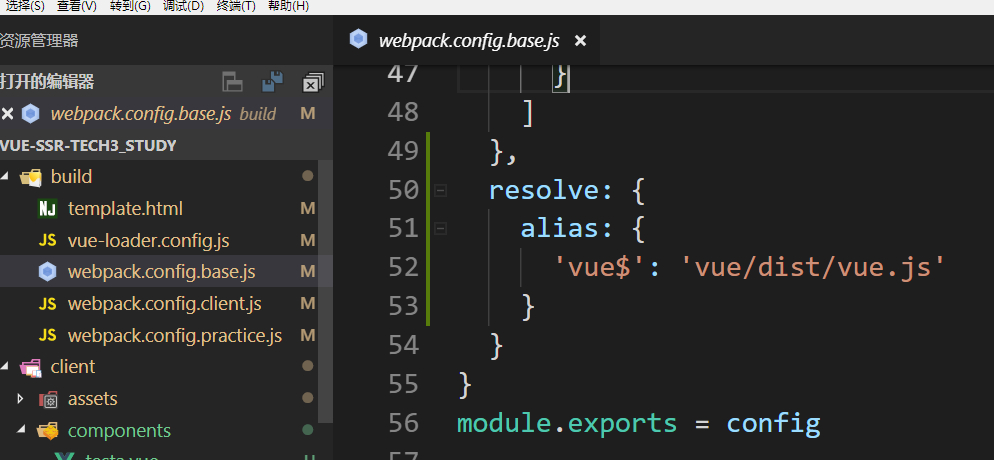
  resolve: {
    alias: {
      'vue$': 'vue/dist/vue.js'
    }
  }
2.npm install时,报错:正在生成解决方案配置“Release|x64”。
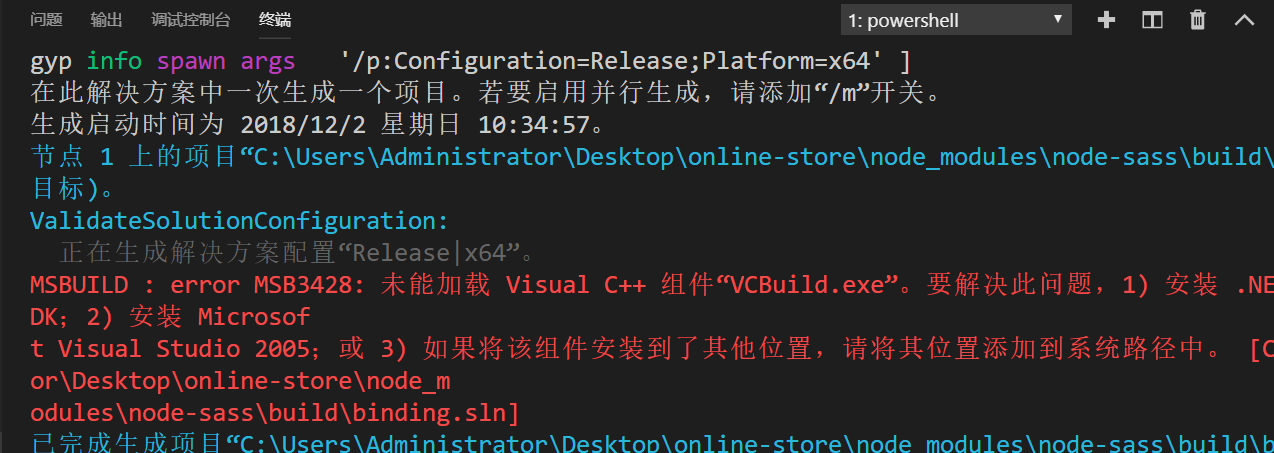
npm config set sass_binary_site https://npm.taobao.org/mirrors/node-sass/设置全局镜像源,之后再涉及到 node-sass 的安装时就会从淘宝镜像下载。
3.服务器http://localhost:8080要求用户输入用户名和密码
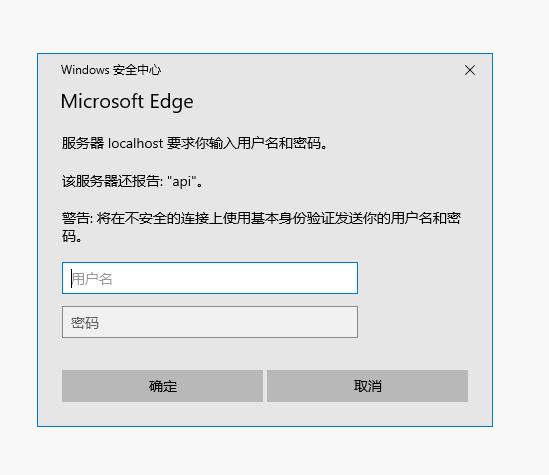
还未解决
参看文档
1.vuex官方中文文档:https://vuex.vuejs.org/zh-cn/
2.详解 Vue & Vuex 实践:https://zhuanlan.zhihu.com/p/25042521
3.运用JS设置cookie、读取cookie、删除cookie:https://www.cnblogs.com/limeiky/p/6927305.html
4.Django框架基于session的登录/注销实现:https://www.cnblogs.com/cllovewxq/p/7878248.html
5.前后端分离之JWT(JSON Web Token)的使用:https://segmentfault.com/a/1190000010444825
6.Vue 中使用 jQuery:https://blog.youkuaiyun.com/anxin_wang/article/details/78788773
7.在vue项目中使用stylus:https://blog.youkuaiyun.com/shooke/article/details/75907388
8.Vue的elementUI实现自定义主题:https://blog.youkuaiyun.com/wangcuiling_123/article/details/78513245
9.【Vue】axios请求的方法封装和运用:https://blog.youkuaiyun.com/lgysjfs/article/details/80407130
10.node-sass 安装失败的解决办法:https://lzw.me/a/node-sass-install-helper.html#%E8%A7%A3%E5%86%B3%E6%96%B9%E6%B3%95%E4%B8%80%EF%BC%9A%E4%BD%BF%E7%94%A8%E6%B7%98%E5%AE%9D%E9%95%9C%E5%83%8F%E6%BA%90
11.vue 显示图片404的解决办法:https://blog.youkuaiyun.com/qq_15576765/article/details/83823700


 405
405

 被折叠的 条评论
为什么被折叠?
被折叠的 条评论
为什么被折叠?
 到【灌水乐园】发言


