


 本文介绍如何通过编译安装 Tez UI 并进行详细配置。包括 Tomcat 的环境搭建与配置、WAR 文件解压及配置修改、Timeline Server 的 YARN 配置更新与启动等步骤。
本文介绍了tez ui的安装配置。在上一篇源代码编译安装tez的时候,已经生成了tez-ui-0.9.0.war文件,具体配置过程如下:
1、Tomcat的配置
[hadoop@hdp01 ~]$ wget http://mirrors.hust.edu.cn/apache/tomcat/tomcat-9/v9.0.2/bin/apache-tomcat-9.0.2.tar.gz
[hadoop@hdp01 u01]$ tar -xzf /home/hadoop/apache-tomcat-9.0.2.tar.gz;mv apache-tomcat-9.0.2 tomcat
--编辑bin/catalina.sh,加入下面的内容:
[hadoop@hdp01 u01]$ vi tomcat/bin/catalina.sh
export CATALINA_BASE=/u01/tomcat
export CATALINA_HOME=/u01/tomcat
export CATALINA_TMPDIR=/u01/tomcat/temp
2、解压war文件
[hadoop@hdp01 ~]$ mkdir /u01/tomcat/webapps/tez-ui
[hadoop@hdp01 ~]$ cd  /u01/tomcat/webapps/tez-ui
[hadoop@hdp01 tez-ui]$ unzip /u01/tez/tez-ui-0.9.0.war
--编辑config目录下的configs.env,更改以下内容:
[hadoop@hdp01 tez-ui]$ vi config/configs.env
timeline: "http://192.168.120.96:8188",
rm: "http://192.168.120.96:8088",
3、配置timelineserver
3.1 编辑yarn-site.xml
加入以下内容:
<!-- conf timeline server -->
   <property>
        <name>yarn.timeline-service.enabled</name>
        <value>true</value>
   </property>
   <property>
        <name>yarn.timeline-service.hostname</name>
        <value>hdp01</value>
   </property>
   <property>
        <name>yarn.timeline-service.http-cross-origin.enabled</name>
        <value>true</value>
   </property>
   <property>
        <name> yarn.resourcemanager.system-metrics-publisher.enabled</name>
        <value>true</value>
   </property>
   <property>
        <name>yarn.timeline-service.generic-application-history.enabled</name>
        <value>true</value>
   </property>
   <property>
        <description>Address for the Timeline server to start the RPC server.</description>
        <name>yarn.timeline-service.address</name>
        <value>hdp01:10201</value>
   </property>
   <property>
        <description>The http address of the Timeline service web application.</description>
        <name>yarn.timeline-service.webapp.address</name>
        <value>hdp01:8188</value>
   </property>
   <property>
        <description>The https address of the Timeline service web application.</description>
        <name>yarn.timeline-service.webapp.https.address</name>
        <value>hdp01:2191</value>
   </property>
   <property>
        <name>yarn.timeline-service.handler-thread-count</name>
        <value>24</value>
   </property>
3.2 编辑tez-site.xml
加入以下内容:
<!--Configuring Tez to use YARN Timeline-->
    <property>
        <name>tez.history.logging.service.class</name>
        <value>org.apache.tez.dag.history.logging.ats.ATSHistoryLoggingService</value>
    </property>
    <property>
        <name>tez.tez-ui.history-url.base</name>
        <value>http://hdp01:8080/tez-ui/</value>
    </property>
3.3 启动timelineserver
[hadoop@hdp01 ~]$ yarn-daemon.sh start timelineserver4、启动Tomcat服务
[hadoop@hdp01 ~]$ /u01/tomcat/bin/startup.sh &5、测试访问
通过访问指定主机的8080端口即可访问tez ui界面。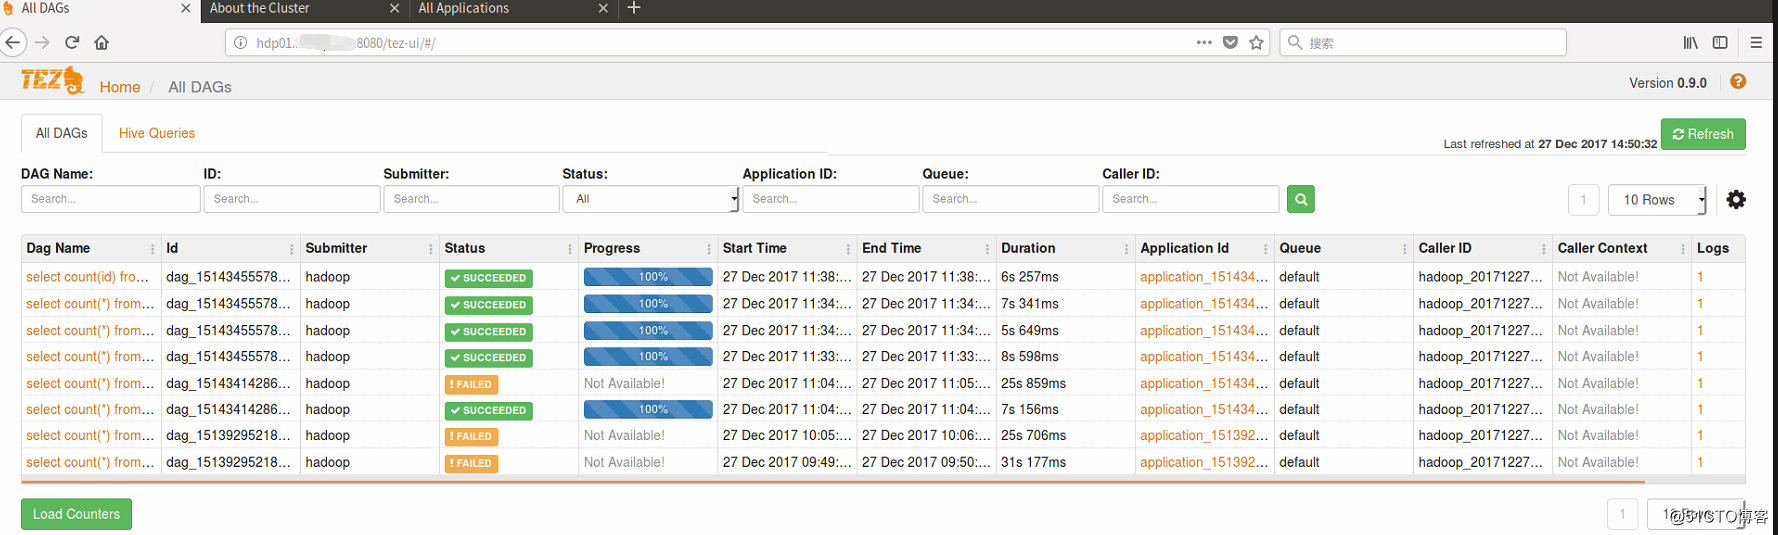


 2067
2067

 被折叠的 条评论
为什么被折叠?
被折叠的 条评论
为什么被折叠?
 到【灌水乐园】发言


