一 ,发布文件:
①, 首先需要在npm官网注册一个账号:
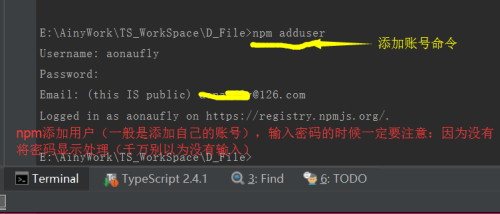
②, 使用npm adduser命令添加一个账号
注意:需要输入3个信息
1 , 你的用户名( 如 : 我的是aonaufly )
2 , 你的密码 ( 注意 , 密码是掩藏的不会显示出来 , 也不会以*的显示显示 , 输入完成以后按enter键键入下一项)
3 , 你的注册邮箱
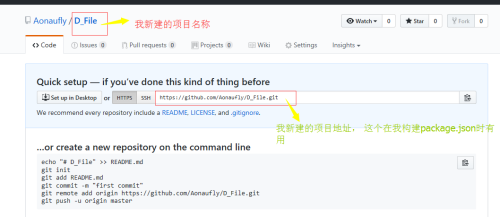
③ , 注册一个github账号 ( https://github.com ) 并且新建一个项目
④, 打包项目 npm init(会生成package.json), 这是在发布项目之前需要做的
以下是生成的package.json
{
  "name": "sample_ts",
  "version": "1.0.0",
  "description": "aonaufly for test",
  "main": "./com/sample-00.d.ts",
  "scripts": {
    "test": "hello"
  },
  "repository": {
    "type": "git",
    "url": "git+https://github.com/Aonaufly/D_File.git"
  },
  "keywords": [
    "hello",
    "world"
  ],
  "author": "Aonaufly",
  "license": "ISC",
  "bugs": {
    "url": "https://github.com/Aonaufly/D_File/issues"
  },
  "homepage": "https://github.com/Aonaufly/D_File#readme"
}
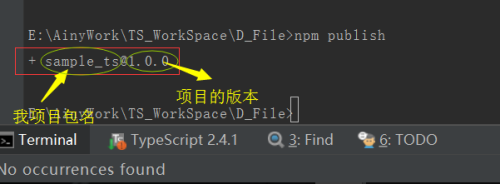
⑤, 发布 npm publish
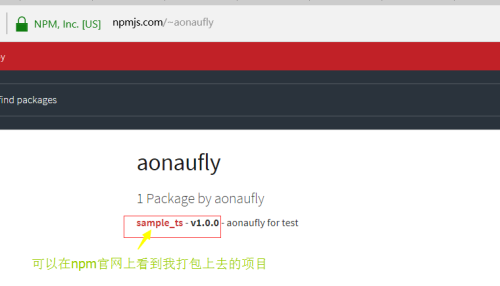
⑥, 发布成果:
二 , 使用我的包 ( 这里需要新建一个项目 )
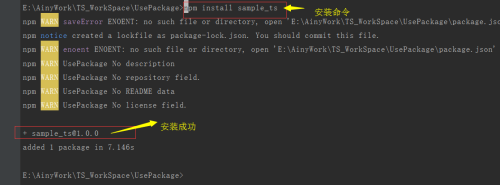
①, 安装我的包 (npm install sample_ts):
⑤, 测试 :
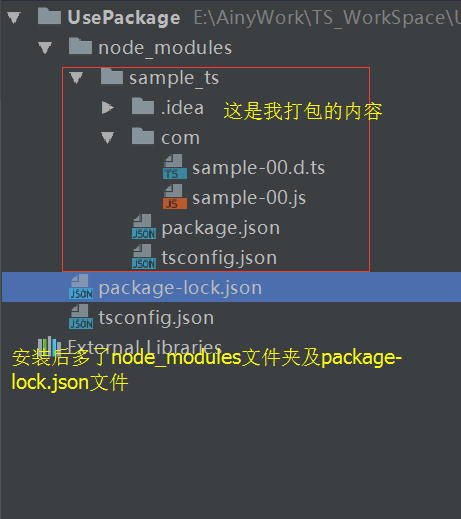
1, 先看看安装成功后的项目结构
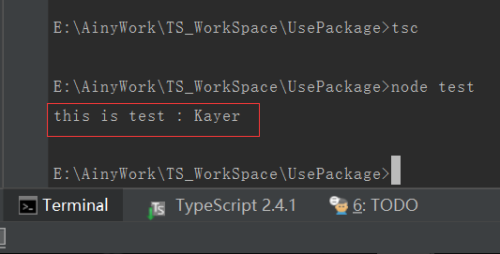
2, 正式测试
import {sample_ts} from "./node_modules/sample_ts/sample-00"
type AAA = sample_ts.AAA;
export module test{
    export class  CCC{
        private class_a : AAA;
        public constructor( class_a : AAA ){
            this.class_a = class_a;
        }

        public doSomething() : string{
            if( this.class_a != null){
                return this.class_a.get_name();
            }else{
                return "Error";
            }
        }
    }
}
let a : AAA = new sample_ts.AAA("Kayer");
let c : test.CCC = new test.CCC(a);
console.log(`this is test : ${c.doSomething()}`);
结果:
缺陷 : 没有进入到类库(.d.ts)的境界 , 还需继续努力。
转载于:https://blog.51cto.com/aonaufly/1959591


 本文详细介绍了如何通过npm发布个人项目,并提供了基于TypeScript的实际案例,包括从注册账号到发布项目的全部步骤。




 4410
4410

 被折叠的 条评论
为什么被折叠?


