


 本文介绍如何在Android中使用自定义的GridView适配器显示复杂数据,包括创建布局文件、定义数据模型类以及实现适配器的getView()方法。
第一步:在主界面创建一个LinearLayout用于加载fragment
自定义几个.xml文件
adapter.xml
<GridView
android:layout_width="wrap_content"
android:layout_height="wrap_content"
android:numColumns="1"
android:stretchMode="columnWidth"
android:gravity="center"
android:id="@+id/fragment_gridview">
对象.xml
 <TextView
      android:layout_width="match_parent"
      android:layout_height="wrap_content"
      android:text="@string/xingming"
      style="@style/text"
      android:id="@+id/title1"/>
 <TextView
      android:layout_width="match_parent"
      android:layout_height="wrap_content"
      android:text="@string/nianling"
      style="@style/text"
      android:id="@+id/title2"/>
 <TextView
      android:layout_width="match_parent"
      android:layout_height="wrap_content"
      android:text="@string/youxiang"
      style="@style/text"
      android:id="@+id/title3"/>
 <TextView
      android:layout_width="match_parent"
      android:layout_height="wrap_content"
      android:text="@string/dizhi"
      style="@style/text"
      android:id="@+id/title4"/>
添加对象的方法
public ClassInfo(String title1, String title2, String title3, String title4) {
    this.title1=title1;
    this.title2=title2;
    this.title3=title3;
    this.title4=title4;

}
获取数据和视图
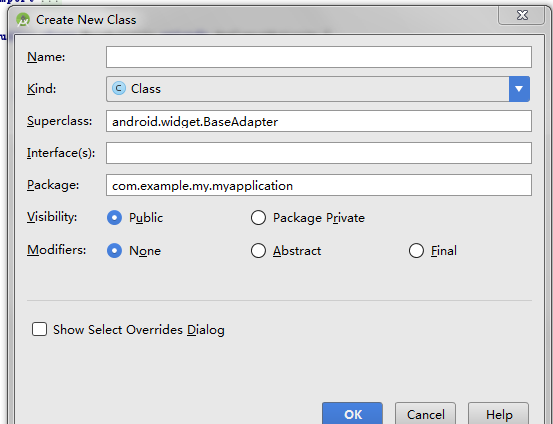
创建的时候继承的父类
定义数据和上下文变量
private List<ClassInfo> datas;
private Context context;
重写getView()方法
public View getView(int i, View view, ViewGroup viewGroup) {
    //获取view
    if(view==null){
        view = LayoutInflater.from(context).inflate(R.layout.gridview_item,null);
    }

    TextView title1 =(TextView)view.findViewById(R.id.title1) ;
    TextView title2 =(TextView)view.findViewById(R.id.title2) ;
    TextView title3 =(TextView)view.findViewById(R.id.title3) ;
    TextView title4 =(TextView)view.findViewById(R.id.title4) ;


    ClassInfo classInfo = datas.get(i);

    title1.setText(classInfo.getTitle1());
    title2.setText(classInfo.getTitle2());
    title3.setText(classInfo.getTitle3());
    title4.setText(classInfo.getTitle4());//数据要与其方法对应!!!

    return view;
}
增加相对应的数据
List<ClassInfo> datas = new ArrayList<>(); //定义一个ClassInfo对象的List集合
    datas.add(new ClassInfo("姓名:许仙","年龄:25","邮箱:xuxian.qq.com","地址:杭州"));
    datas.add(new ClassInfo("姓名:杨婵","年龄:300","邮箱:yangchan.qq.com","地址:华山"));
    datas.add(new ClassInfo("姓名:聂小倩","年龄:200","邮箱:niexiaoqian.qq.com","地址:兰若寺"));
    datas.add(new ClassInfo("姓名:白素贞","年龄:1000","邮箱:baishuzhen.qq.com","地址:青城山"));
    datas.add(new ClassInfo("姓名:嫦娥","年龄:3000","邮箱:change.qq.com","地址:月宫"));//增加数据
    final CustomGridViewAdapter adapter = new CustomGridViewAdapter(getActivity(),datas);
    GridView gridView = (GridView)view.findViewById(R.id.fragment_gridview);
    gridView.setAdapter(adapter);
    return view;
静态创建
FragmentManager manager = getFragmentManager();
    transaction = manager.beginTransaction();
    if (gridViewFragment == null) {
        gridViewFragment = new GridViewFragment();
        transaction.add(R.id.show, gridViewFragment);
    }
    transaction.replace(R.id.show, gridViewFragment);
    transaction.commit();


 356
356

 被折叠的 条评论
为什么被折叠?
被折叠的 条评论
为什么被折叠?
 到【灌水乐园】发言


