


 本文介绍了一个网站个人中心页面的设计与实现过程,包括页面布局、视图函数定义、数据展示等关键步骤。通过具体的代码示例展示了如何使用HTML和Python Flask框架来构建个人中心页面,并实现用户问答和评论等内容的展示。
- 显示所有评论
{% for foo in ques.comments %}<ul class="note-list" style="padding-left: 0px;"> {% for foo in comments %} <li class="list-group-item"> <span class="glyphicon glyphicon-heart" aria-hidden="true"></span> <a href="{{ url_for('usercenter',user_id=foo.author.id) }} ">{{ foo.author.username }}</a> <span class="badge" >{{ foo.time }}</span> <br> <p>{{ foo.detail }}</p> </li> {% endfor %} </ul>
- 所有评论排序
uquestion = db.relationship('Question', backref=db.backref('comments', order_by=creat_time.desc))question = db.relationship('Question', backref=db.backref('comments',order_by=time.desc)) - 显示评论条数
{{ ques.comments|length }}<a href="{{ url_for('detail',question_id=foo.id) }}">评论:({{ foo.comments|length }})</a>
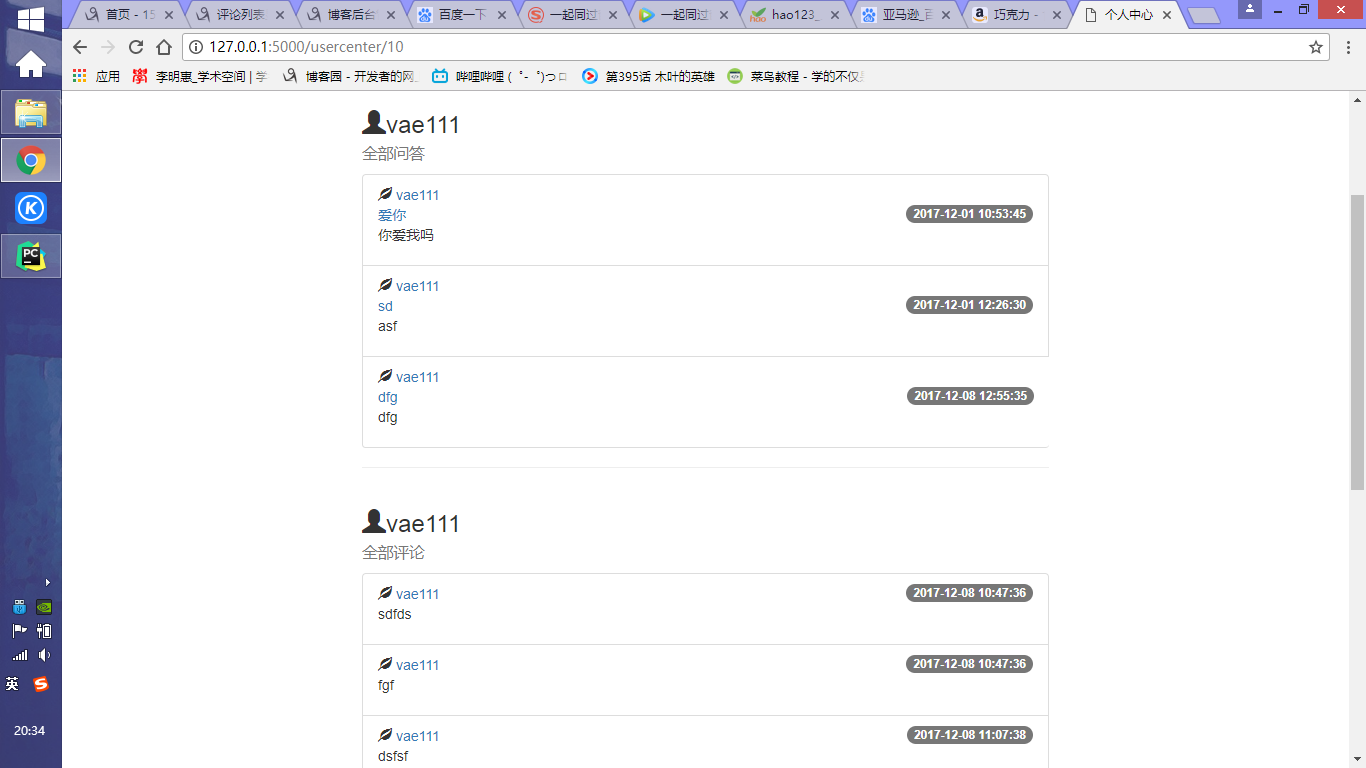
- 完成个人中心
1.个人中心的页面布局(html文件及相应的样式文件)
{% extends 'user.html' %}

{% block user %}
    <div style="padding-left: 300px;padding-right: 300px">
        <div class="page-header">
            <h3><span class="glyphicon glyphicon-user" aria-hidden="true"></span>{{ username }} <br>
                <small>全部问答</small>
            </h3>
            <ul class="note-list" style="padding-left: 0px;">
                {% for foo in questions %}
                    <li class="list-group-item">
                        <span class="glyphicon glyphicon-leaf" aria-hidden="true"></span>
                        <a href="#">{{ foo.author.username }}</a>
                        <br>
                        <a href="{{ url_for('detail',question_id=foo.id) }}">{{ foo.title }}</a>
                        <span class="badge">{{ foo.time }}</span>
                        <p>{{ foo.detail }}</p>

                    </li>
                {% endfor %}
            </ul>
        </div>

        <div class="page-header">
            <h3><span class="glyphicon glyphicon-user" aria-hidden="true"></span>{{ username }}<br>
                <small>全部评论</small>
            </h3>
            <ul class="note-list" style="padding-left: 0px;">
                {% for foo in comments %}
                    <li class="list-group-item">
                        <span class="glyphicon glyphicon-leaf" aria-hidden="true"></span>
                        <a href="#">{{ foo.author.username }}</a>
                        <span class="badge">{{ foo.time }}</span>
                        <br>
                        <p>{{ foo.detail }}</p>

                    </li>
                {% endfor %}
            </ul>

        </div>
        <div class="page-header">
            <h3><span class="glyphicon glyphicon-user" aria-hidden="true"></span>{{ username }}<br>
                <small>个人信息</small>
            </h3>
            <ul>
                <li>姓名</li>

            </ul>


        </div>
    </div>
{% endblock %}
2.定义视图函数def usercenter(user_id):
# 个人中心
@app.route('/usercenter/<user_id>')
@loginFrist
def usercenter(user_id):
    user = User.query.filter(User.id == user_id).first()
    context={
        'username':user.username,
        'questions':user.questions,
        'comments':user.comments,
    }
    return render_template('usercenter.html',**context)
3.向前端页面传递参数
4.页面显示相应数据
发布的全部问答
<div class="page-header">
            <h3><span class="glyphicon glyphicon-user" aria-hidden="true"></span>{{ username }} <br>
                <small>全部问答</small>
            </h3>
            <ul class="note-list" style="padding-left: 0px;">
                {% for foo in questions %}
                    <li class="list-group-item">
                        <span class="glyphicon glyphicon-leaf" aria-hidden="true"></span>
                        <a href="#">{{ foo.author.username }}</a>
                        <br>
                        <a href="{{ url_for('detail',question_id=foo.id) }}">{{ foo.title }}</a>
                        <span class="badge">{{ foo.time }}</span>
                        <p>{{ foo.detail }}</p>

                    </li>
                {% endfor %}
            </ul>
        </div>
发布的全部评论
 <div class="page-header">
            <h3><span class="glyphicon glyphicon-user" aria-hidden="true"></span>{{ username }}<br>
                <small>全部评论</small>
            </h3>
            <ul class="note-list" style="padding-left: 0px;">
                {% for foo in comments %}
                    <li class="list-group-item">
                        <span class="glyphicon glyphicon-leaf" aria-hidden="true"></span>
                        <a href="#">{{ foo.author.username }}</a>
                        <span class="badge">{{ foo.time }}</span>
                        <br>
                        <p>{{ foo.detail }}</p>

                    </li>
                {% endfor %}
            </ul>

        </div>
个人信息
5.各个页面链接到个人中心


 4857
4857

 被折叠的 条评论
为什么被折叠?
被折叠的 条评论
为什么被折叠?
 到【灌水乐园】发言


