


 本文详细介绍如何使用SpringBoot搭建微服务架构,包括环境配置、项目搭建、数据库集成、Swagger文档生成、WebSocket实时通信以及Vue.js前端集成,为读者提供一个完整的微服务开发流程。
最近放假了,休息的时候不忘写个小项目来玩玩。
如果有需要一起手动做项目的朋友可以和我一起做这个小项目。
做到哪随心所欲。也就一周的事哈哈。
***
开发环境#
- JDK1.8
- JetBrain InteliJ
傻瓜式启动项目#
打开newProject 然后单击Spring Initializr然后一直next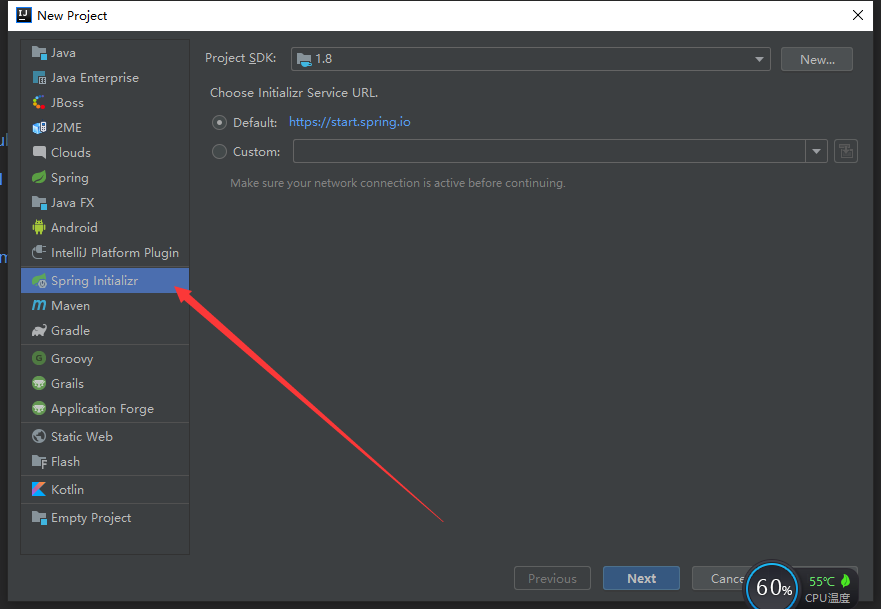
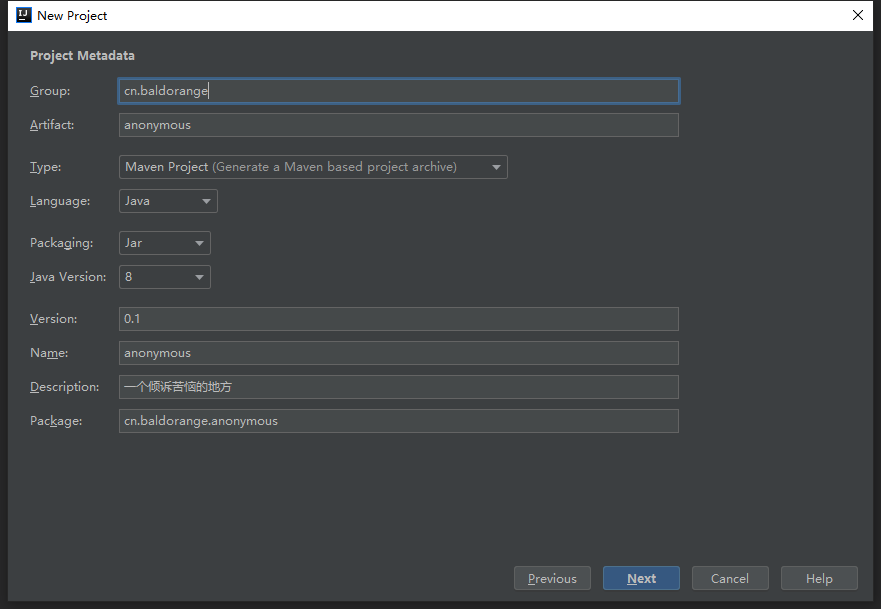
在这里确定好包名之类的
在这里不用单击任何东西,直接next就行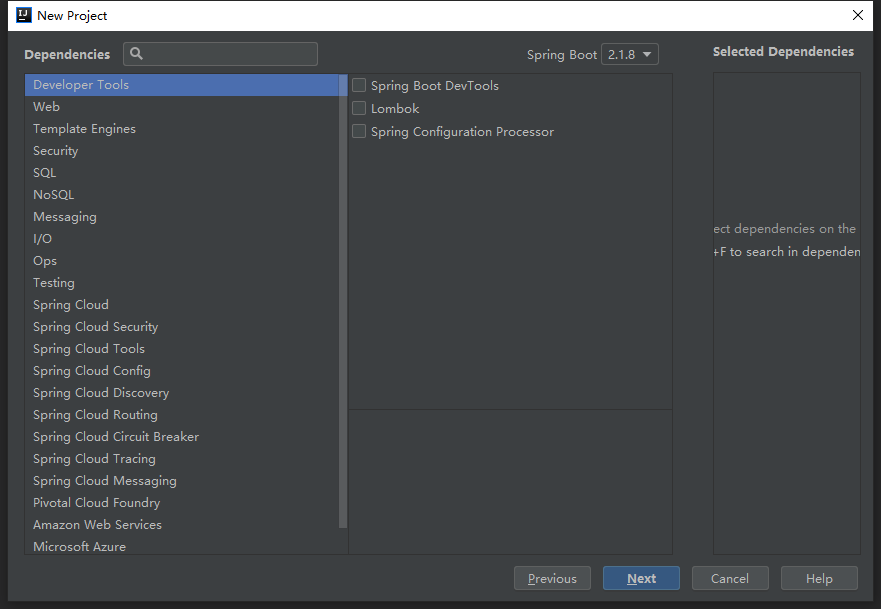
在这里我们可以看到项目建起来了。
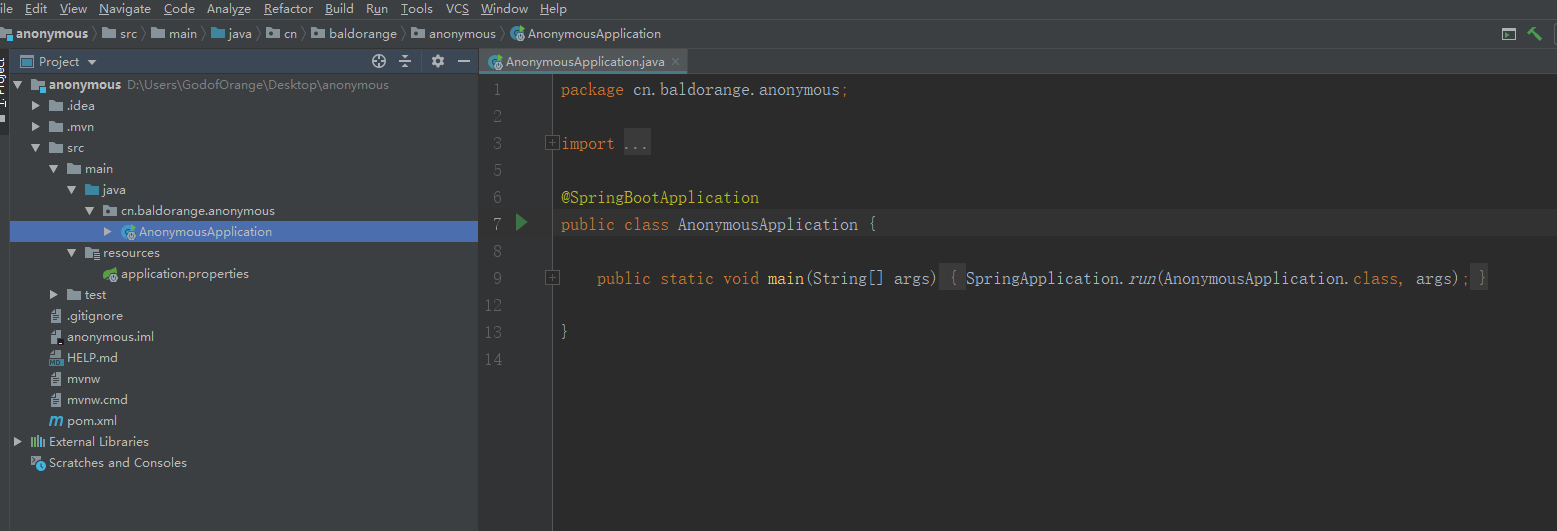
我们直接点启动,就能把项目跑起来。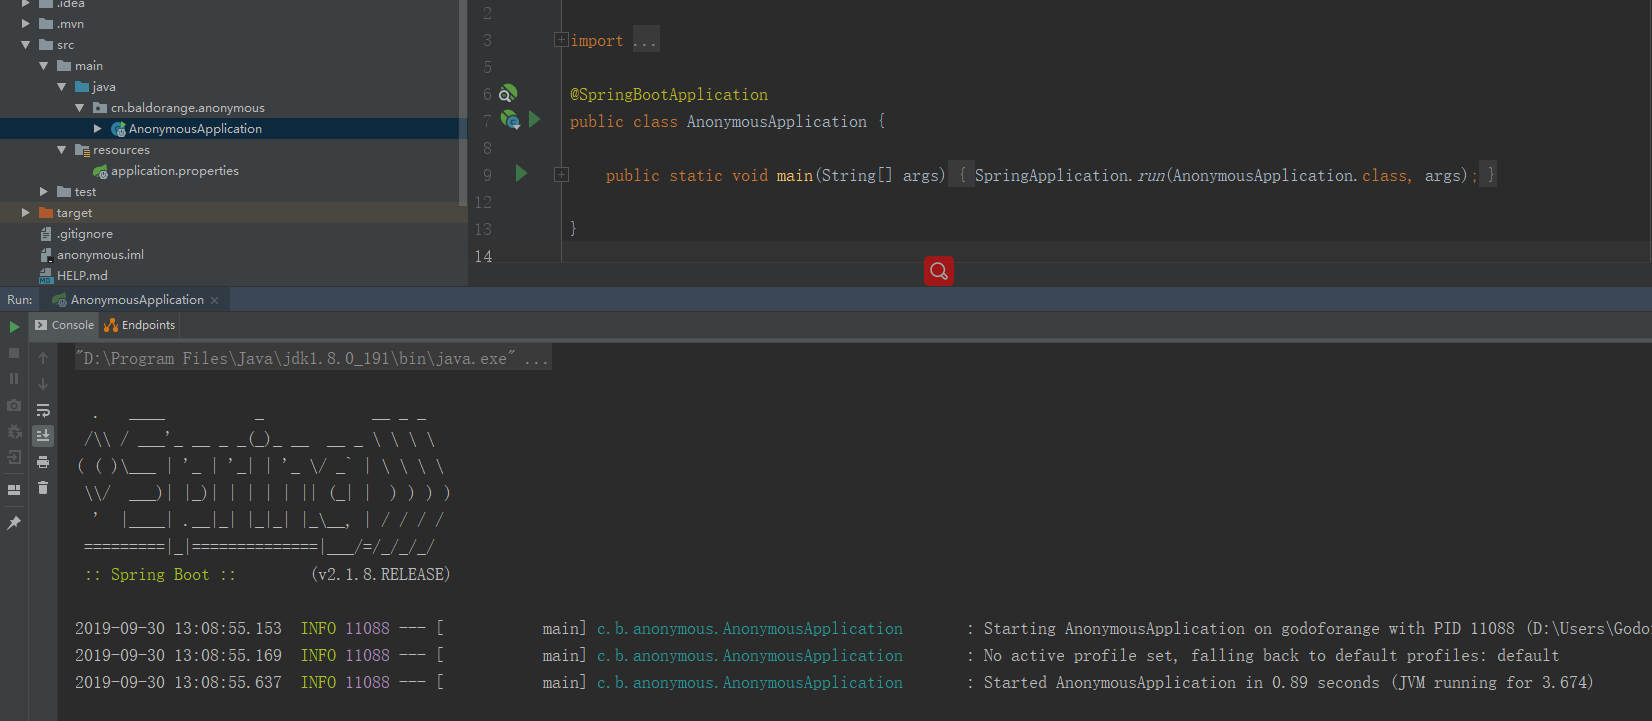
OK,至此我们就完成了SpringBoot的搭建。
我要将其开源,因此我们需要将这个项目放到Github上面。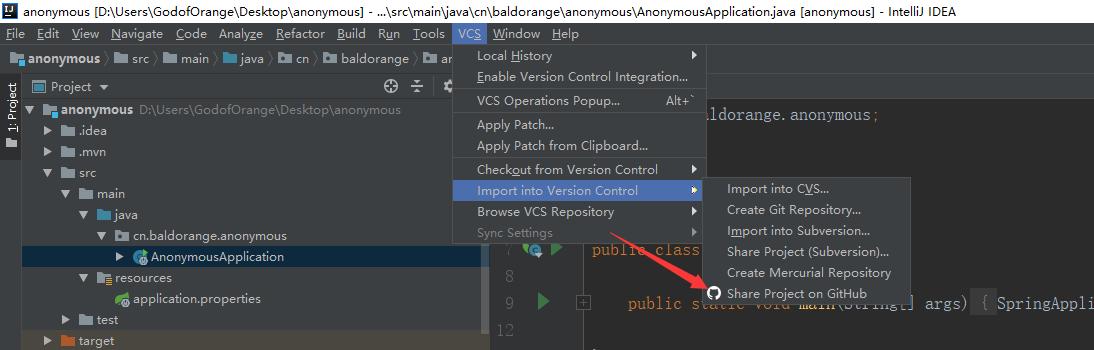
首先share it
然后凭直觉一直往下点就可以了。
项目地址在这:https://github.com/GodofOrange/anonymous
我会持续更新文章。
如果有兴趣的同学可以给个star
项目需求#
我想趁着国庆做一个匿名倾吐烦恼的APP,其实整个想法实现起来蛮简单的,但是如果仅仅使用mysql那就没有什么意义了,因此我将使用jpa+redis+kafka+ngnix组装一个高可用性的后端。
整个项目呢,我打算使用敏捷开发方式,一点一点的集成到这个项目里面。
SpringBoot+JPA做持久层#
MYSQL的环境相信大家都会有的,那我这里直接给出数据表(注意ORM技术不用建表)
| id | title | content | update | summary | hot |
|---|---|---|---|---|---|
| BIGINT | varchar(255) | LONGTEXT | TIMESTAMP | TEXT | BIGINT |
数据库创建脚本:
CREATE DATABASE anonymous DEFAULT CHARSET utf8mb4;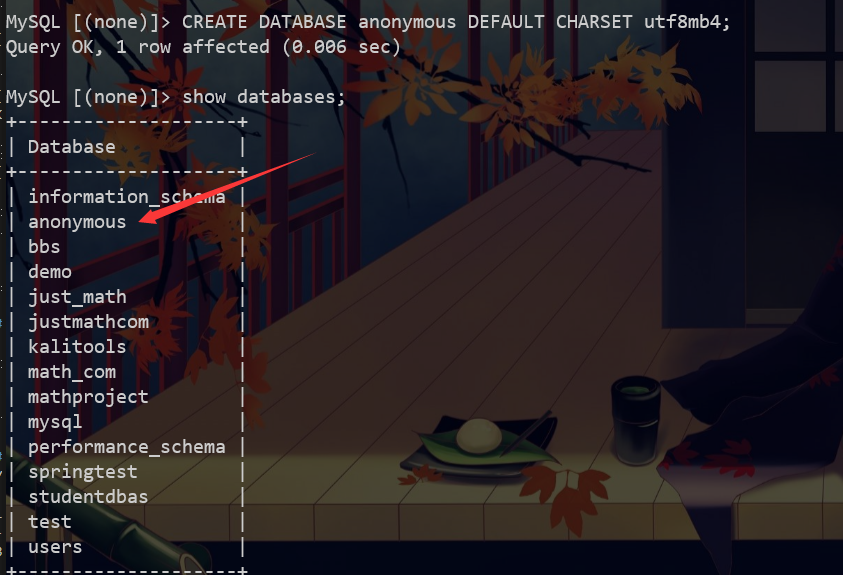
OK,现在数据库已经建起来了。那么我们接下来导入JPA的依赖吧。
在pom文件下引入以下文件。
        <dependency>
            <groupId>org.springframework.boot</groupId> <artifactId>spring-boot-starter-data-jpa</artifactId> </dependency> <dependency> <groupId>com.alibaba</groupId> <artifactId>druid-spring-boot-starter</artifactId> <version>1.1.10</version> </dependency> <dependency> <groupId>mysql</groupId> <artifactId>mysql-connector-java</artifactId> </dependency>
然后修改配置文件。
spring.datasource.url=jdbc:mysql://127.0.0.1:3306/anonymous?serverTimezone=UTC&useSSL=true&allowMultiQueries=true&characterEncoding=utf8
spring.datasource.username=root
spring.datasource.password=123456
spring.jpa.show-sql=true spring.jpa.database=mysql spring.jpa.hibernate.ddl-auto=update spring.jpa.database-platform=org.hibernate.dialect.MySQL57InnoDBDialect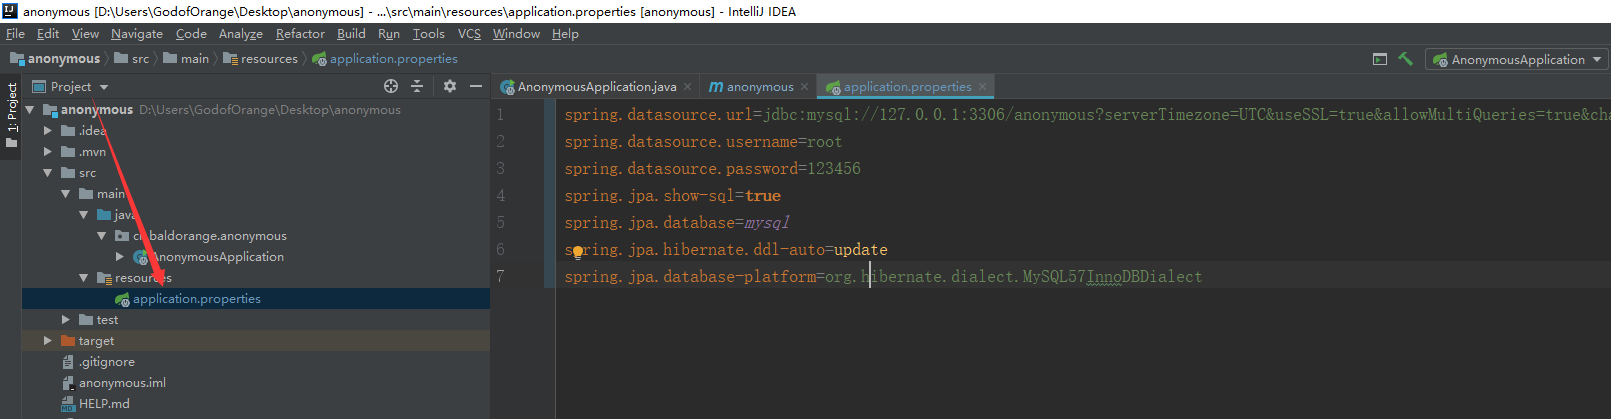
随后启动,观察是否报错。
如果没报错,会正常退出那就一切OK.
下面我们来创建表
新建类Wall.java
package cn.baldorange.anonymous.entity;

import javax.persistence.*;
import java.util.Date;

@Entity(name = "wall") public class Wall { public Wall(){ } public Wall(String title, String content, Date up_time, String summary, String hot) { this.title = title; this.content = content; this.up_time = up_time; this.summary = summary; this.hot = hot; } @Id @GeneratedValue(strategy = GenerationType.IDENTITY) @Column(name = "id",columnDefinition="BIGINT COMMENT '主键,自动生成'") private String id; @Column(name = "title",columnDefinition="VARCHAR(255)") private String title; @Column(name = "content",columnDefinition="LONGTEXT") private String content; @Column(name = "up_time",columnDefinition="TIMESTAMP") private Date up_time; @Column(name = "summary",columnDefinition="TEXT") private String summary; @Column(name = "hot",columnDefinition = "BIGINT") private String hot; public String getId() { return id; } public void setId(String id) { this.id = id; } public String getTitle() { return title; } public void setTitle(String title) { this.title = title; } public String getContent() { return content; } public void setContent(String content) { this.content = content; } public Date getUp_time() { return up_time; } public void setUp_time(Date up_time) { this.up_time = up_time; } public String getSummary() { return summary; } public void setSummary(String summary) { this.summary = summary; } public String getHot() { return hot; } public void setHot(String hot) { this.hot = hot; } @Override public String toString() { return "Wall{" + "id='" + id + '\'' + ", title='" + title + '\'' + ", content='" + content + '\'' + ", up_time=" + up_time + ", summary='" + summary + '\'' + ", hot='" + hot + '\'' + '}'; } }
新建接口
package cn.baldorange.anonymous.repository; import cn.baldorange.anonymous.entity.Wall; import org.springframework.data.jpa.repository.JpaRepository; public interface WallRepo extends JpaRepository<Wall,String> { } SpringTest文件
package cn.baldorange.anonymous;

import cn.baldorange.anonymous.entity.Wall; import cn.baldorange.anonymous.repository.WallRepo; import org.junit.Test; import org.junit.runner.RunWith; import org.springframework.beans.factory.annotation.Autowired; import org.springframework.boot.test.context.SpringBootTest; import org.springframework.test.context.junit4.SpringRunner; import java.util.Date; @RunWith(SpringRunner.class) @SpringBootTest public class AnonymousApplicationTests { @Autowired WallRepo wallRepo; @Test public void contextLoads() { wallRepo.save(new Wall("测试","文章",new Date(),"摘要","0")); System.out.println(wallRepo.findById("1")); } }
运行结果如下所示:
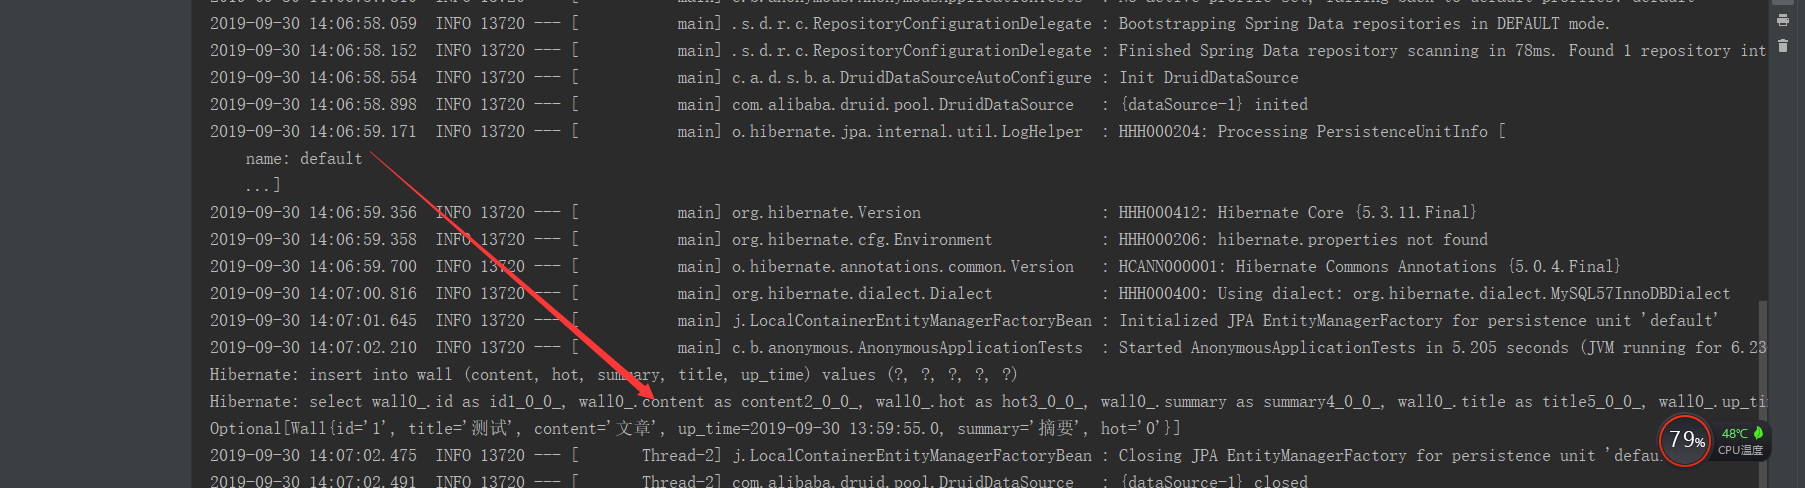
到此DAO层的就结束了。
我们Commit后直接推上去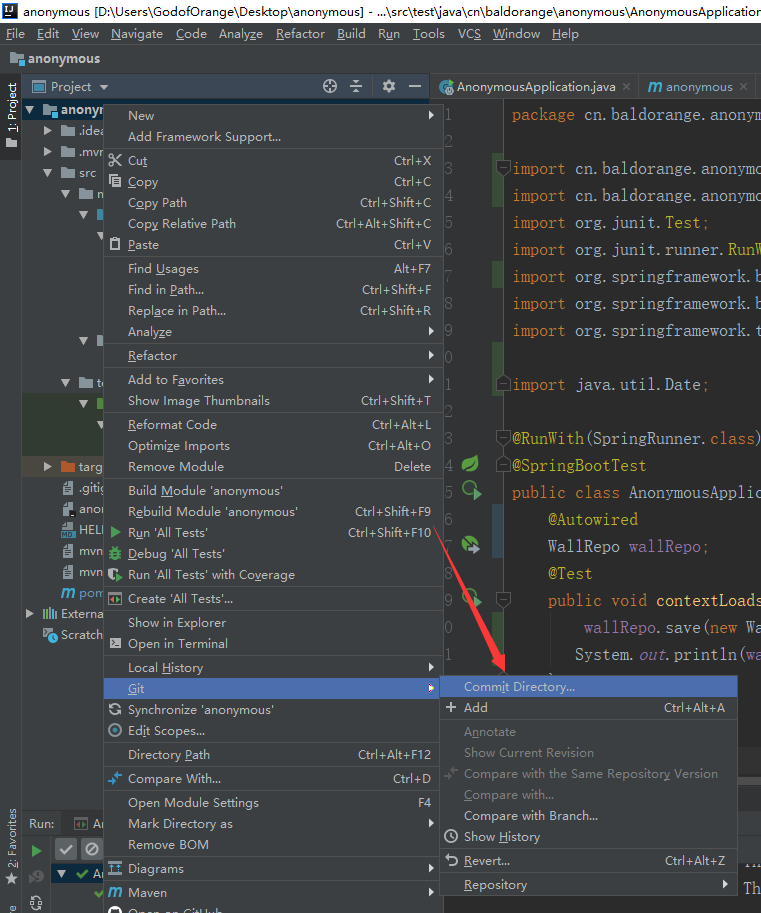
这就完成了一次代码提交
下面是关于SpringBoot整合其他项目的解决方法。可作为扩展参考
swagger引入#
Swagger是一个接口文档工具,依照Swagger可以0配置开发接口。不过要注意,Swagger是基于SpringBoot1.47版本开发的,而SpringBoot现在基本都是是2+。
如果要选用restful支持,只能将SpringBoot退出到1+版本。
***
maven引入#
<dependency>
<groupId>io.springfox</groupId> <artifactId>springfox-swagger2</artifactId> <version>2.9.2</version> </dependency> <dependency> <groupId>io.springfox</groupId> <artifactId>springfox-swagger-ui</artifactId> <version>2.9.2</version> </dependency>Swagger配置文档#
import org.springframework.context.annotation.Bean; import org.springframework.context.annotation.Configuration; import springfox.documentation.builders.ApiInfoBuilder; import springfox.documentation.builders.PathSelectors; import springfox.documentation.builders.RequestHandlerSelectors; import springfox.documentation.spi.DocumentationType; import springfox.documentation.spring.web.plugins.Docket; import springfox.documentation.swagger2.annotations.EnableSwagger2; @Configuration @EnableSwagger2 public class swaggerConfig { @Bean Docket docket(){ return new Docket(DocumentationType.SWAGGER_2) .select() .apis(RequestHandlerSelectors.any()) .paths(PathSelectors.any()) .build() .apiInfo(new ApiInfoBuilder().description("项目").build()); } }接口配置#
import io.swagger.annotations.Api; import io.swagger.annotations.ApiOperation; import org.just.computer.mathproject.Entity.Advertisement; import org.just.computer.mathproject.Service.AdvertisementService; import org.springframework.beans.factory.annotation.Autowired; import org.springframework.web.bind.annotation.GetMapping; import org.springframework.web.bind.annotation.RequestMapping; import org.springframework.web.bind.annotation.RequestParam; import org.springframework.web.bind.annotation.RestController; import java.util.List; @RestController @Api(tags ="广告") @RequestMapping("/Advertisement/") public class AdvertisementController { @Autowired AdvertisementService advertisementService; @ApiOperation(value ="获得所有广告") @GetMapping("/getAllAdvertisement") public List<Advertisement> getAllAdvertisement(){ return advertisementService.getAllAdvertisement(); } @ApiOperation(value = "添加广告") @GetMapping("/addAdvertisement") public Boolean getAllAdvertisement(@RequestParam String img, @RequestParam String href){ try { advertisementService.addAdvertisement(img,href); return true; }catch (Exception e){ return false; } } @ApiOperation(value = "删除广告") @GetMapping("/deleteAdvertisement") public Boolean deleteAdvertisementById(Integer id){ try{ advertisementService.deleteAdvertisementById(id); return true; }catch (Exception e){ return false; } } } 本地运行后访问这里即可访问
或者到ip:端口/swagger-ui.html
运行结果如下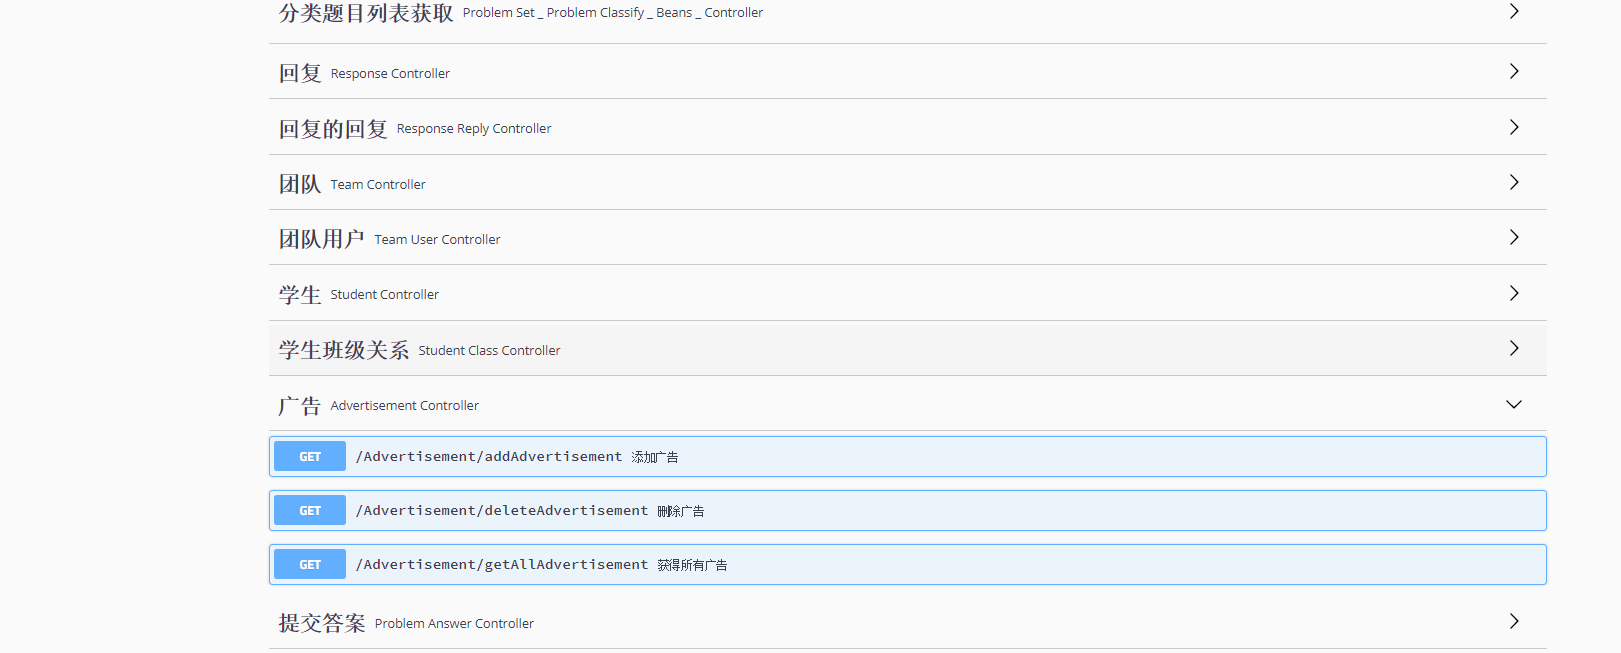
SpringBoot引入websocket#
maven 依赖#
<dependency>
            <groupId>org.springframework.boot</groupId> <artifactId>spring-boot-starter-websocket</artifactId> </dependency>
WebSocketConfig 配置文件#
import org.springframework.context.annotation.Configuration;
import org.springframework.messaging.simp.config.MessageBrokerRegistry;
import org.springframework.web.socket.config.annotation.EnableWebSocketMessageBroker;
import org.springframework.web.socket.config.annotation.StompEndpointRegistry;
import org.springframework.web.socket.config.annotation.WebSocketMessageBrokerConfigurer; @Configuration @EnableWebSocketMessageBroker public class WebSocketConfig implements WebSocketMessageBrokerConfigurer { @Override public void configureMessageBroker(MessageBrokerRegistry config){ config.enableSimpleBroker("/topic"); config.setApplicationDestinationPrefixes("/app"); } @Override public void registerStompEndpoints(StompEndpointRegistry registry){ registry.addEndpoint("/chat").setAllowedOrigins("*").withSockJS(); } } 配置了之后基本上不用做其他的配置了
setAllowedOrigins()为跨域函数
然后是Controller#
import org.just.computer.mathproject.Bean.Message;
import org.springframework.messaging.handler.annotation.MessageMapping;
import org.springframework.messaging.handler.annotation.SendTo;
import org.springframework.stereotype.Controller;

import java.security.Principal; import java.util.Date; @Controller public class GreetingController { @MessageMapping("/hello") @SendTo("/topic/greetings") public Message greeting(String content, Principal pl) throws Exception{ Message message = new Message(); message.setContent(content.substring(1,content.length()-1)); message.setData(new Date().toString()); message.setName(pl.getName()); return message; } }
这里的Principal 为SpringSecurity相关知识,目的是通过session获得用户名。
到此为止,SpringBoot的配置已经没了
Vue通过stompClient使用webSocket#
package.json#
"dependencies": {
    "@tinymce/tinymce-vue": "^3.0.1",
    "axios": "^0.19.0", "echarts": "^4.2.1", "element-ui": "^2.11.1", "net": "^1.0.2", "nprogress": "^0.2.0", "sockjs-client": "^1.4.0", "stompjs": "^2.3.3", "tinymce": "^4.8.5", "tinymce-vue": "^1.0.0", "vue": "^2.5.2", "vue-axios": "^2.1.4", "vue-echarts": "^4.0.3", "vue-router": "^3.0.1", "vue-stomp": "0.0.5" }
一定要填加的有vue-stomp sockjs-client stompjs这三个
想用的地方直接引入。
import SockJS from 'sockjs-client'
import Stomp from 'webstomp-client'vue中完整代码如下#
<template>
  <div> <input type="text" v-model="text"> <button @click="sendMessage">发送消息</button> <div class="bubble"> </div> <div> <div v-for="(data,key) in datas" :key="key"> {{data.content}} </div> </div> </div> </template> <script> import SockJS from 'sockjs-client' import Stomp from 'webstomp-client' export default { name: 'ChatRoom', data () { return { text: '', datas: [], stompClient: null } }, mounted () { if ('WebSocket' in window) { this.initWebSocket() } else { alert('当前浏览器 Not support websocket') } }, methods: { sendMessage () { this.stompClient.send('/app/hello', JSON.stringify(this.text), {}) }, initWebSocket () { this.connection() }, connection () { const socket = new SockJS(this.$baseUrl + '/chat') this.stompClient = Stomp.over(socket) this.stompClient.connect({}, (frame) => { this.stompClient.subscribe('/topic/greetings', (greeting) => { console.log(JSON.parse(greeting.body)) this.datas.push(JSON.parse(greeting.body)) }) }) } } } </script> <style scoped> </style>
注意在这行代码this.stompClient.send('/app/hello', JSON.stringify(this.text), {}) {}的位置,有的版本可能是相反的。
运行结果如下所示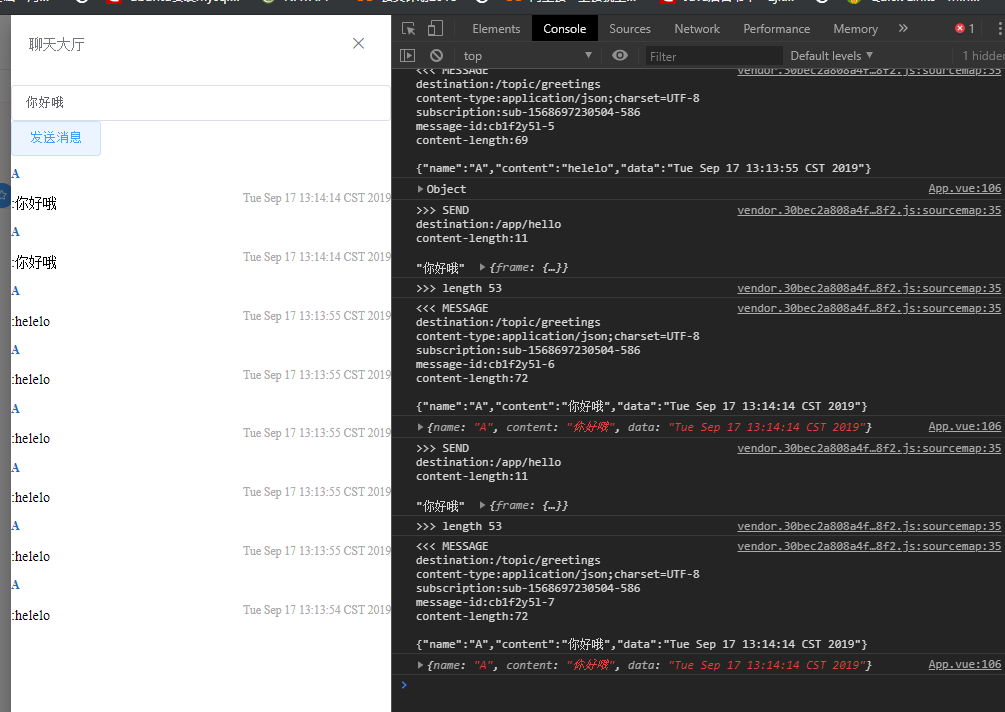
作者: 秃桔子
出处:https://www.cnblogs.com/godoforange/p/11613521.html
版权:本站使用「CC BY 4.0」创作共享协议,转载请在文章明显位置注明作者及出处。


 1284
1284

 被折叠的 条评论
为什么被折叠?
被折叠的 条评论
为什么被折叠?
 到【灌水乐园】发言


