 Nginx 1.10.3 安装教程


Nginx-1.10.3编译安装
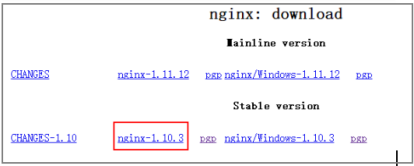
官方网站下载nginx源码包
1.安装准备: nginx依赖于 pcre库,zlib库,安装ssl
1 yum install -y gcc gcc-c++ pcre pcre-devel openssl-devel zlib zlib-devel
2.把nginx下载到自定义目录(/home/package)
1 wget http://nginx.org/download/nginx-1.10.3.tar.gz
3.解压
1 tar -zxvf nginx-1.10.3.tar.gz
2 cd nginx-1.10.3
4.配置
1 ./configure \
2 --prefix=/usr/local/nginx \
3 --with-http_ssl_module                //https支持
5.安装
1 make && make install
6.安装成功后 目录如下
配置目录如下

7.启动
确保系统的 80 端口没被其他程序占用
1 netstat -ano|grep 80
如果查不到结果后执行,如果有占用直接pkill掉
1 Nginx#>./sbin/nginx #开启nginx
8.接下来我们会看到如下界面

9.添加自动启动
首先,在linux系统的/etc/init.d/目录下创建nginx文件,使用如下命令:
vim /etc/init.d/nginx
在脚本中添加如下命令:
#!/bin/bash
# nginx Startup script for the Nginx HTTP Server
# it is v.0.0.2 version.
# chkconfig: - 85 15
# description: Nginx is a high-performance web and proxy server.
#              It has a lot of features, but it's not for everyone.
# processname: nginx
# pidfile: /var/run/nginx.pid
# config: /usr/local/nginx/conf/nginx.conf
nginxd=/usr/local/nginx/sbin/nginx
nginx_config=/usr/local/nginx/conf/nginx.conf
nginx_pid=/var/run/nginx.pid
RETVAL=0
prog="nginx"
# Source function library.
. /etc/rc.d/init.d/functions
# Source networking configuration.
. /etc/sysconfig/network
# Check that networking is up.
[ ${NETWORKING} = "no" ] && exit 0
[ -x $nginxd ] || exit 0
# Start nginx daemons functions.
start() {
if [ -e $nginx_pid ];then
   echo "nginx already running...."
   exit 1
fi
   echo -n $"Starting $prog: "
   daemon $nginxd -c ${nginx_config}
   RETVAL=$?
   echo
   [ $RETVAL = 0 ] && touch /var/lock/subsys/nginx
   return $RETVAL
}
# Stop nginx daemons functions.
stop() {
        echo -n $"Stopping $prog: "
        killproc $nginxd
        RETVAL=$?
        echo
        [ $RETVAL = 0 ] && rm -f /var/lock/subsys/nginx /var/run/nginx.pid
}
# reload nginx service functions.
reload() {
    echo -n $"Reloading $prog: "
    #kill -HUP `cat ${nginx_pid}`
    killproc $nginxd -HUP
    RETVAL=$?
    echo
}
# See how we were called.
case "$1" in
start)
        start
        ;;
stop)
        stop
        ;;
reload)
        reload
        ;;
restart)
        stop
        start
        ;;
status)
        status $prog
        RETVAL=$?
        ;;
*)
        echo $"Usage: $prog {start|stop|restart|reload|status|help}"
        exit 1
esac
exit $RETVAL
保存脚本文件后设置文件的执行权限:
chmod a+x /etc/init.d/nginx
然后,就可以通过该脚本对nginx服务进行管理了:
/etc/init.d/nginx start
/etc/init.d/nginx stop
使用chkconfig进行管理
chkconfig --add /etc/init.d/nginx
chkconfig nginx on
加完这个之后,就可以使用service对nginx进行启动,重启等操作了
service nginx start
service nginx stop
脚本地址:http://blog.163.com/qsc0624@126/blog/static/140324073201312734548701/


 1039
1039

 被折叠的 条评论
为什么被折叠?
被折叠的 条评论
为什么被折叠?
 到【灌水乐园】发言


