1. /TestTabWidget/res/layout/main.xml:
 1 <?xml version="1.0" encoding="utf-8"?>
 2 <TabHost xmlns:android="http://schemas.android.com/apk/res/android"
 3     android:id="@android:id/tabhost"
 4     android:layout_width="fill_parent"
 5     android:layout_height="fill_parent"
 6     >
 7     <LinearLayout
 8     android:orientation="vertical"
 9     android:layout_width="fill_parent"
10     android:layout_height="fill_parent"
11     >
12     <TabWidget
13     android:id="@android:id/tabs"
14     android:layout_width="fill_parent"
15     android:layout_height="wrap_content"
16     />
17     <FrameLayout
18     android:id="@android:id/tabcontent"
19     android:layout_height="fill_parent"
20     android:layout_width="fill_parent"
21     >
22     <TextView
23     android:id="@+id/textview01"
24     android:layout_width="fill_parent"
25     android:layout_height="fill_parent"
26     android:text="this is one tab!"
27     />
28     <TextView
29     android:id="@+id/textview02"
30     android:layout_width="fill_parent"
31     android:layout_height="fill_parent"
32     android:text="this is tow tab!"
33     />
34     <TextView
35     android:id="@+id/textview03"
36     android:layout_width="fill_parent"
37     android:layout_height="fill_parent"
38     android:text="this is third tab!"
39     />
40     </FrameLayout>
41     </LinearLayout>
42 </TabHost>
2.TestTabWidgetActivity:
 1 import android.app.AlertDialog;
 2 import android.app.Dialog;
 3 import android.app.TabActivity;
 4 import android.content.DialogInterface;
 5 import android.content.DialogInterface.OnClickListener;
 6 import android.graphics.Color;
 7 import android.os.Bundle;
 8 import android.widget.TabHost;
 9 import android.widget.TabHost.OnTabChangeListener;
10
11 public class TestTabWidgetActivity extends TabActivity
12 {
13     private TabHost mTabHost;
14
15     @Override
16     public void onCreate(Bundle savedInstanceState)
17     {
18         super.onCreate(savedInstanceState);
19         setContentView(R.layout.main);
20         // 取得TabHost对象
21         mTabHost = getTabHost();
22         // 为TabHost添加标签
23         mTabHost.addTab(mTabHost.newTabSpec("tab_test1").setIndicator("TAB 1",
24                 getResources().getDrawable(R.drawable.flag)).setContent(R.id.textview01));
25         mTabHost.addTab(mTabHost.newTabSpec("tab_test2").setIndicator("TAB 2",
26                 getResources().getDrawable(R.drawable.flag2)).setContent(R.id.textview02));
27         mTabHost.addTab(mTabHost.newTabSpec("tab_test3").setIndicator("TAB 3",
28                 getResources().getDrawable(R.drawable.flag3)).setContent(R.id.textview03));
29         // 设置TabHost背景颜色
30 // mTabHost.setBackgroundColor(Color.argb(150, 22, 70, 150));
31 // 设置TabHost的背景图片资源
32 // mTabHost.setBackgroundResource(R.drawable.icon);
33 // 设置当前显示哪一个标签setOnTabChangedListener
34         mTabHost.setCurrentTab(0);
35         // 标签处理事件
36         mTabHost.setOnTabChangedListener(new OnTabChangeListener()
37         {
38             @Override
39             public void onTabChanged(String tabId)
40             {
41                 Dialog dialog = new AlertDialog.Builder(TestTabWidgetActivity.this).setTitle("提示").setMessage(
42                         "当前选择的是" + tabId + "号标签").setPositiveButton("确定", new OnClickListener()
43                 {
44                     @Override
45                     public void onClick(DialogInterface dialog, int which)
46                     {
47                         dialog.cancel();
48                     }
49                 }).create();// 创建按钮
50                 dialog.show();
51             }
52         });
3. 效果图:
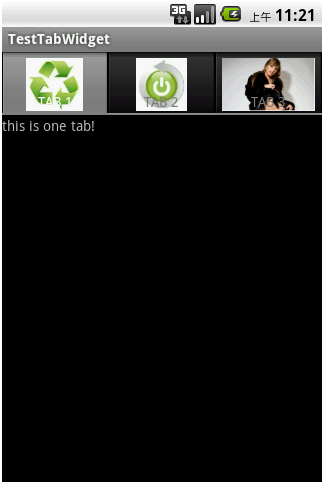
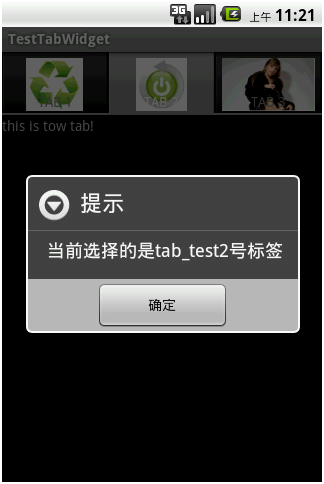


 本文介绍了如何在 Android 应用中使用 Tab Widget 创建多标签界面,并通过代码示例展示了如何添加标签、设置标签样式及处理标签切换事件。


 1418
1418

 被折叠的 条评论
为什么被折叠?
被折叠的 条评论
为什么被折叠?
 到【灌水乐园】发言


