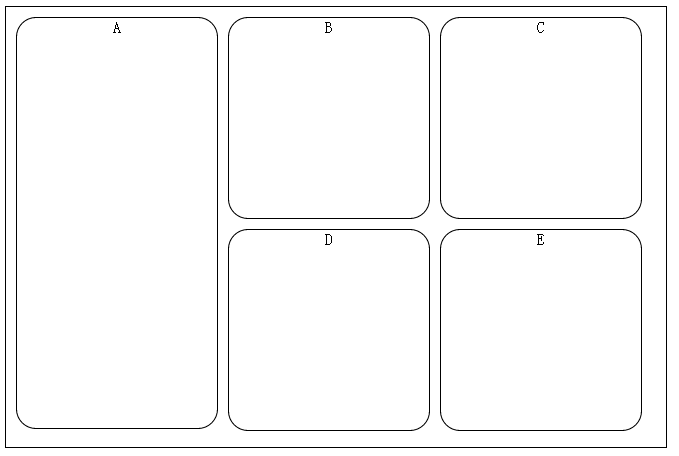
一、使用float:
复制代码
代码如下:
<!DOCTYPE html>
<html>
<head>
<meta http-equiv="Content-Type" content="text/html; charset=utf-8" />
<title></title>
<style>
section
{
border: solid 1px;
}
section section
{
float: left;
margin-left: 10px;
margin-top: 10px;
text-align: center;
width: 200px;
border-radius: 20px;
height: 200px;
}
.parent
{
height: 440px;
width: 660px;
}
.parent section:first-child
{
height: 410px;
}
</style>
</head>
<body>
<section class="parent">
<section>A</section>
<section>B</section>
<section>C</section>
<section>D</section>
<section>E</section>
</section>
</body>
</html>
二、使用display:flex(这个css3属性仅谷歌和火狐支持)
复制代码
代码如下:
<!DOCTYPE html>
<html>
<head>
<meta http-equiv="Content-Type" content="text/html; charset=utf-8" />
<title></title>
<style>
section
{
border: solid 1px;
}
section section
{
margin-left: 10px;
margin-top: 10px;
text-align: center;
width: 200px;
border-radius: 20px;
height: 200px;
}
.parent
{
display: flex;
flex-direction: column;
flex-wrap: wrap;
height: 440px;
width: 660px;
}
.parent section:first-child
{
height: 410px;
}
</style>
</head>
<body>
<section class="parent">
<section>A</section>
<section>B</section>
<section>C</section>
<section>D</section>
<section>E</section>
</section>
</body>
</html>
实现效果如图所示:


 本文介绍了使用float和display:flex两种方式实现栅格布局的方法,并提供了实现代码和效果展示。


 2291
2291

 被折叠的 条评论
为什么被折叠?


