


 本文是关于React中数据通信系列的第四篇,重点介绍Redux及其核心概念,包括store、reducer、action和dispatch。通过实例展示了如何在React中使用Redux进行状态管理,包括 Provider组件和connect函数的使用,以及如何处理异步操作。同时,讨论了使用react-redux库的useSelector和useDispatch Hook来简化组件订阅和操作状态。

点击蓝字 关注我们
本专栏主要讲讲 React 中数据通信的几种方式:
- 通过一个例子看看React是如何进行数据通信的-第1篇--props和事件回调
- 通过一个例子看看React是如何进行数据通信的-第2篇--Context对象
- 通过一个例子看看React是如何进行数据通信的-第3篇--useContext
- 通过一个例子看看React是如何进行数据通信的-第4篇--Redux
随着 JavaScript 单页应用开发日趋复杂,JavaScript 需要管理越来越多的 state 。比如说服务器响应、缓存数据、 UI 状态、分页器、loading 等等。而 Redux 就是 JavaScript 的一种状态容器,能提供可预测化的状态管理。
本身 Redux 是比较简单的,在项目中使用需要先安装依赖模块:
npm install redux --save
然后先来看看他的几个核心概念。
store
store 是一个对象,保存了整个应用的 state ,相当于一个保存数据的容器,且该容器在整个应用中有且只有一个。
创建方式如下:
// ./index.js
import { createStore } from 'redux'
import reducer from './reducers'
let store = createStore(reducer)
createStore(reducer, [preloadedState], enhancer) 用来创建一个 store 来存放应用中所有的 state,参数 reducer 是一个函数,参数 preloadedState 是初始时的 state,会覆盖 reducer 函数中的默认初始值,参数 enhancer 是一个高阶函数,用于返回一个新的强化过的 store creator。
想要获取应用的 state 可以通过 getState() 方法获取:
console.log(store.getState())
reducer
是一个函数,会根据不同的 action 来决定如何响应并返回一个新的 state。reducer 接收两个参数,参数1是当前的 state,参数2是 action。
// ./reducers/index.js

let initState = { // 初始 state
  count: 0
}

function reducer(state = initState, action) {
  switch(action.type) { // 根据传入的 action 对象的 type 字段来决定如何响应 state 的变化
    case 'INCREMENT':
      return { count: state.count + 1 }
    case 'DECREMENT':
      return { count: state.count - 1 }
    default: // 无任何匹配时返回初始的 state
      return state
  }
}
这里需要注意的是 reducer 是一个纯函数:
- 不要修改传入的参数;
- 不要执行有副作用的操作,例如 API 请求、路由跳转等;
- 不要调用非纯函数,例如
Date.now()、Math.random()等。
action
是一个描述事件的简单对象,告诉我们发生了什么事情,reducer 函数会根据 action 去改变 state,其中 action 必须拥有 type 属性,用于决定要执行的行为,其他属性可任意设置:
const incrementActionType = {
  type: 'INCREMENT'
}

const addCounterActionType = {
  type: 'ADD_COUNTER',
  step: 2
}
一般我们会通过一个工厂方法来返回一个 action 对象:
function addCounter(num) {
  return {
    type: 'ADD_COUNTER',
    step: num
  }
}
export default addCounter
dispatch
action 描述发生了什么事情,但是这个事情并不会主动发生,而是需要通过 dispatch 方法来触发,它将 action 发送到 reducer 函数中,然后 reducer 函数根据匹配规则进行状态的更新。
import addCounter from './actions'
store.dispatch(addCounter(1))
这是触发 state 改变的惟一途径。
subscribe
添加一个变化监听器,每当 dispatch action 的时候都会执行的回调。
store.subscribe(() => {
  console.log('state 发生了改变: ', store.getState().count)
})
一个完整的列子:
import { createStore } from 'redux'

// 生成 Action 的函数
function incAction() {
  return { type: 'INCREMENT' };
}
function decAction(num) {
  return { type: 'DECREMENT', step: num };
}

// reducer 函数
function reducer(state = { count: 0 }, action) {

  switch (action.type) {
    case 'INCREMENT':
      return { count: state.count + 1 };
    case 'DECREMENT':
      return { count: state.count - action.step }; // 根据 action 其他字段作为数据来源
    default:
      return state; // 无论如何都返回一个 state
  }
}

const store = createStore(reducer); // 应用唯一 store
console.log( store.getState().count ); // 初始的时候值:0

// 监视当前 state 的变化
store.subscribe(() => {
  console.log(store.getState().count);
});

store.dispatch(incAction()); // 1
store.dispatch(incAction()); // 2
store.dispatch(incAction()); // 3
store.dispatch(decAction(2)); // 1
拆分 Reducer
随着应用业务量的增加,reducer 必定也会越来越大,就需要按模块来拆分 reducer,有利于模块化开发,降低耦合度。通过 redux 提供的 combineReducers 方法可以将多个 reducer 进行组合。
// ./countReducer.js
function countReducer(state = { count: 0 }, action) {

  switch (action.type) {
    case 'INCREMENT':
      return { count: state.count + 1 };
    case 'DECREMENT':
      return { count: state.count - action.step };
    default:
      return state;
  }
}

// ./otherReducer.js
function otherReducer(state, action) {
  // ...
}

import { combineReducers, createStore } from 'redux'
import countReducer from './countReducer'
import otherReducer from './otherReducer'

const mainReducer = combineReducers({
  countReducer,
  otherReducer
})

const store = createStore(mainReducer);
console.log(store.getState().countReducer); // 注意每个 reducer 根据它们的 key 来筛选出 state
console.log(store.getState().otherReducer);
每个 reducer 只负责管理全局 state 中它负责的一部分。每个 reducer 的 state 参数都不同,分别对应它管理的那部分 state 数据。
react-redux
上面我们已经认识了 redux 以及他的工作方式了,可以看出 redux 与 react 是没有联系的。的确也是这样,因为 redux 是独立于其他框架而存在的,也就是说可以在任意框架中使用。而直接在 react 中使用 redux 不是很方便,这就需要用到 react-redux 这个库来将两者联系在一起。
安装:
npm install redux react-redux --save
Provider
使用 react-redux 提供的 组件来包装整个应用,这样所有的子组件都可以访问 store ,而不必显示的传递它。
import React from 'react'
import { render } from 'react-dom'
import { createStore } from 'redux'
import { Provider } from 'react-redux'
import reducer from './store/reducers'
const store = createStore(reducer)

render(
  {/* 接收全局 store 作为 props */}
  <App />
  </Provider>,
  document.getElementById('root')
)
connect
使用 react-redux 提供的 connect() 方法,可以使得 UI 组件能直接通过 props 拿到 store 中的数据以及修改数据的方法。
import React from 'react'
import { connect } from 'react-redux'

class Counter extends React.Component {
  render() {
    const { count, inc, dec } = this.props
    return (
      <><button onClick={dec}>-button><span>{count}span><button onClick={inc}>+button>>
    )
  }
}
function mapStateToProps(state) { // 将 store 中的 state 映射为 props
  return {
    count: state.count
  }
}

function mapDispatchToProps(dispatch) { // 将修改 store 的方法映射为 props
  return {
    inc: () => dispatch({type: 'INCREMENT'}),
    dec: () => dispatch({type: 'DECREMENT'})
  }
}

export default connect(
  mapStateToProps,
  mapDispatchToProps
)(Counter)
mapStateToProps(state [,ownProps]) 用于建立 Counter 组件 跟 store.state 的映射关系,接收一个从 reducer 传递过来的 state 作为参数,定义从 state 转换成 UI 组件 props 的规则。如果不传递,组件就不会监听 store 的变化:
export default connect(
  null,
  mapDispatchToProps
)(Counter)
mapDispatchToProps(dispatch) 用于建立 Counter 组件跟 store.dispatch 的映射关系,接收 Store 中的 dispatch 方法作为参数,也可以不用设置该参数。
export default connect(mapStateToProps)(Counter)
从上面的示例中可以看出react-redux 中将组件分为了两大部分:
- 容器组件:负责管理数据和业务逻辑,不负责 UI 的呈现,使用
Redux的 API,如被connect包装后的组件, - 展示(UI)组件:只负责 UI 的呈现,不带有任何业务逻辑,不使用任何
Redux的 API,所有数据都由props提供,如Counter组件。
现在我们回到之前系列文章中的 List 组件看看,如何通过 redux 来解决跨组件通信的问题。
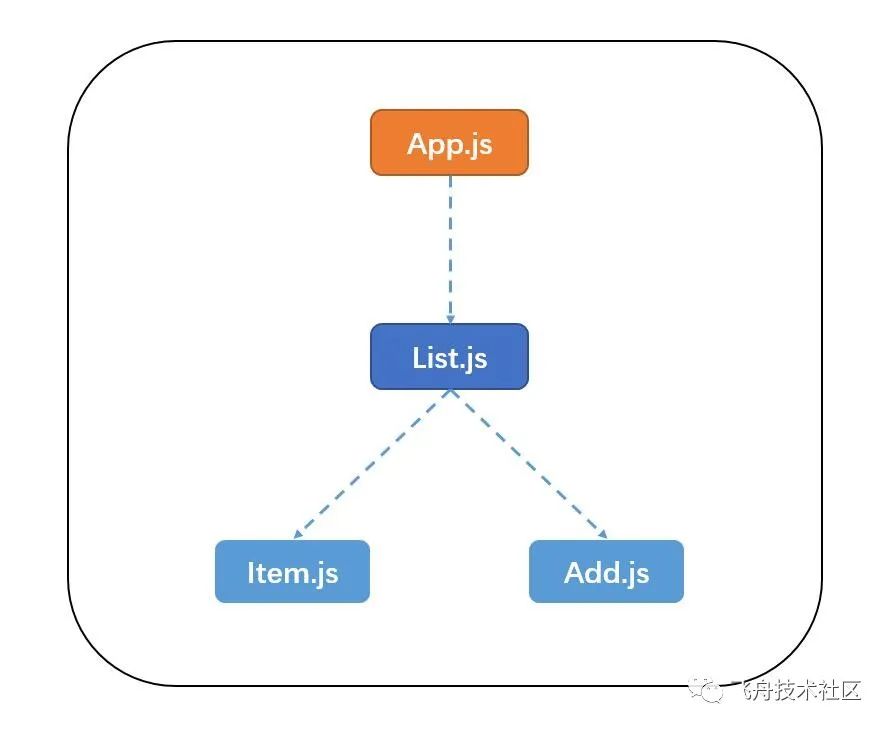
先来看看项目结构:
├─src
│  ├─store
│  │  ├─index.js // store 创建
│  │  ├─actionTypes
│  │  │  ├─listActionType.js
│  │  ├─reducers // 公共 reducers
│  │  │  ├─index.js
│  │  ├─actions // 公共 actions
│  │  │  ├─listAction.js
│  ├─components // 组件
│  │  ├─List.jsx
│  │  ├─Item.jsx
│  │  ├─Add.jsx
│  ├─views
│  │  ├─App.jsx
│  ├─index.js // 入口文件
├─package.json
store 相关代码:
// ./src/store/index.js
// 创建 store
import { createStore } from 'redux'
import reducer from './reducers'
let store = createStore(reducer)

// ./src/store/reducers/index.js
// reducer 纯函数,根据 action.type 字段更新 state
import * as actionType from '../actionTypes/listActionType'

const initState = { // 初始 state
  listData: [
    {
      id: 1,
      title: 'JavaScript'
    }
  ]
}

export default function listReducer(state = initState, action) {

  switch (action.type) {
    case actionType.ADDTYPE:
      return {
        ...state,
        listData: [
          ...state.listData,
          {
            id: Math.floor(Math.random() * 1000), // 模拟 id
            title: action.title // action 对象其他字段可用于传递数据
          }
        ]
      }
    case actionType.DELTYPE:
      const list = state.listData.filter(item => item.id != action.id)
      return {
        ...state,
        listData: list
      }
    default:
      return state
  }
}

// ./src/store/actions/listAction.js
// action 工厂方法,调用函数,返回一个 action 对象
import * as actionType from '../actionTypes/listActionType'

export function addAction(title) {
  return {
    type: actionType.ADDTYPE,
    title
  }
}

export function delAction(id) {
  return {
    type: actionType.DELTYPE,
    id
  }
}

// ./src/store/actionTypes/listActionType.js
// 分离 action.type 字段,因为是常量,所以变量名采用全大写
export const ADDTYPE = 'ADD'
export const DELTYPE = 'DEL'
组件代码:
// ./src/index.js
import React from 'react'
import ReactDOM from 'react-dom'
import { Provider } from 'react-redux'
import store from './store'
import App from './views/App'

ReactDOM.render(
  <Provider store={store}><App />Provider>,
  document.getElementById('root')
)

// ./src/views/App.jsx
import List from '../components/List'

function App() {
  return (
    <div className="App"><List />div>
  );
}

export default App

// ./src/components/List.jsx
import React, { Component } from 'react'
import { connect } from 'react-redux'
import Add from './Add'
import Item from './Item'


class List extends Component {
  render() {
    const { listData } = this.props
    const items = listData.map(ele => <Item key={ele.id} data={ele} />)
    return (
      <div><Add /><div>
          {items}div>div>
    )
  }
}

function mapStateToProps(state) { // 将 store 中的 state 映射为 props,这样 List 组件可以通过 this.props.listData 访问数据
  return {
    listData: state.listData
  }
}

export default connect(
  mapStateToProps
)(List) // 将 List 组件包装为容器组件

// ./src/components/Add.jsx
import React, { Component } from 'react'
import { connect } from 'react-redux'
import { addAction } from '../store/actions/listAction'

class Add extends Component {
  state = {
    title: ''
  }
  inputChange = (e) => {
    this.setState({
      title: e.target.value
    })
  }
  render() {
    const { title }  = this.state
    const { add } = this.props
    return (
      <div><input type="text" value={title} onChange={this.inputChange} /><button onClick={() => add(title) }>添加button>div>
    )
  }
}

function mapDispatchToProps(dispatch) { // 将修改 store 的方法映射为 Add 组件可以通过调用 this.props.add() 修改数据
  return {
    add: (title) => dispatch(addAction(title))
  }
}

export default connect(
  null,
  mapDispatchToProps
)(Add)

// ./src/components/Item.jsx
import React, { Component } from 'react'
import { connect } from 'react-redux'
import { delAction } from '../store/actions/listAction'

class Item extends Component {
  render() {
    console.log(this.props)
    const { data, del } = this.props
    return (
      <div><p>{data.title}p><button onClick={() => del(data.id)}>删除button>div>
    )
  }
}

function mapDispatchToProps(dispatch) { // 将修改 store 的方法映射为 Item 组件可以通过调用 this.props.add() 修改数据
  return {
    del: (id) => dispatch(delAction(id))
  }
}

export default connect(
  null,
  mapDispatchToProps
)(Item)
写到这里,基本完成了一个简单的 redux 项目,但还是差一点东西,比如说正常情况下,数据的获取或者修改应该是基于服务器上存储的数据的,也就是说要加上 AJAX ,拿 List 组件来讲,初始时应该从服务器获取数据,然后保存到 store 中,看代码:
// 模拟请求
function getData() {
  const data = [
    {
      id: 1,
      title: 'JavaScript'
    }
  ]
  return new Promise((resolve) => {
    setTimeout(() => {
   resolve(data)
 }, 1000)
  })
}

// List.jsx
class List extends Component {
  componentDidMount() {
    getData()
    .then(res => { // 异步处理
      this.props.getData(res)
    })
  }
  render() {
    const { listData } = this.props
    const items = listData.map(ele => <Item key={ele.id} data={ele} />)
    return (
      <div><Add /><div>
          {items}div>div>
    )
  }
}

function mapStateToProps(state) {
  return {
    listData: state.listData
  }
}

function mapDispatchToProps(dispatch) {
  return {
    getData: (data) => dispatch(getAction(data))
  }
}

export default connect(
  mapStateToProps,
  mapDispatchToProps
)(List) // 将 List 组件包装为容器组件
但是这样做会增加组件的复杂程度,我们还可以把异步的处理放在 connect 中:
// List.jsx
class List extends Component {
  componentDidMount() {
    this.props.getDataSync()
  }
  render() {
    const { listData } = this.props
    const items = listData.map(ele => <Item key={ele.id} data={ele} />)
    return (
      <div><Add /><div>
          {items}div>div>
    )
  }
}

function mapStateToProps(state) {
  return {
    listData: state.listData
  }
}

function mapDispatchToProps(dispatch) {
  return {
    getDataSync: () => {
      getData()
        .then(res => { // 异步处理放在这里
          dispatch(getAction(res))
        })
    }
  }
}

export default connect(
  mapStateToProps,
  mapDispatchToProps
)(List)
虽然减少了组件的复杂度,但是也导致了 connect 不纯净了,所以如果可以 dispatch 一个函数,而不仅仅是一个 action 对象,将异步放在 dispatch 阶段处理就比较完美了,我们可以通过一个中间件 redux-thunk 来实现 dispatch 可以传入一个函数。
redux 中 store 仅支持同步数据流,而我们大部分的数据是需要发请求获取的,而 redux-thunk 是一个比较流行的 redux 异步 action 中间件,帮助我们统一了异步和同步 action 的调用方式。
# 安装
npm install redux-thunk --save
改造 store:
// ./src/store/index.js
import { createStore, applyMiddleware } from 'redux'
import thunkMiddleware from 'redux-thunk'
import reducer from './reducers'

let store = createStore(reducer, applyMiddleware(
  thunkMiddleware, // 允许我们 dispatch() 函数
))
改造 action:
// ./src/store/actions/listAction.js
import * as actionType from '../actionTypes/listActionType'
import { getData } from '../../api'

export function getAction(data) { // 同步 action 工厂
  return { // 这里返回的是对象
    type: actionType.GETTYPE,
    data: data
  }
}
export function getActionSync(data) { // 增加一个异步操作
  return function(dispatch) { // 注意这里可以返回一个函数,这个函数有一个 dispatch 的参数
    getData() // 异步
      .then(res => {
        dispatch({
          type: actionType.GETTYPE,
          data: res
        })
      })
  }
}
List 组件改造:
import React, { Component } from 'react'
import { connect } from 'react-redux'
import Add from './Add'
import Item from './Item'
import { getActionSync } from '../store/actions/listAction'

class List extends Component {
  componentDidMount() {
    this.props.getDataSync()
  }
  render() {
    const { listData } = this.props
    const items = listData.map(ele => <Item key={ele.id} data={ele} />)
    return (
      <div><Add /><div>
          {items}div>div>
    )
  }
}

function mapStateToProps(state) {
  return {
    listData: state.listData
  }
}

function mapDispatchToProps(dispatch) {
  return {
    getDataSync: () => dispatch(getActionSync()) // 添加 redux-thunk 后,可以 dispatch 一个函数
  }
}

export default connect(
  mapStateToProps,
  mapDispatchToProps
)(List)
这样就清晰了很多,所有与 redux 有关的代码都放在了接口函数中,connect 只是做了一个中转,在组件中只需要调用对应的方法即可。
useSelector(selector, [equalityFn])
react-redux 现在提供了一系列 hook APIs (v7.1.0+)作为现在 connect() 高阶组件的替代品。这些 APIs 允许你在不使用 connect() 包裹组件的情况下,订阅 redux 的 store,和 分发(dispatch) actions。
而 useSelector 函数的作用就是从 redux 中提取数据的。
import { useSelector } from 'react-redux'

export const Counter = () => {
  // 通过传入 selector 函数,从 Redux 的 store 中获取 state
  const count = useSelector(state => state.count)
  return <div>{count}div>
}
selector 函数与 connect 的 mapStateToProps 的参数是差不多一样的。selector 函数被调用时,将会被传入 redux store 的整个 state,作为唯一的参数。每次函数组件渲染时, selector 函数都会被调用。
默认情况下如果没有指定 equalityFn, react-redux 会使用 === 来进行严格比较更新前后的数据。这样就会存在性能问题,因为每次 Provider 的 value 发生变化的时候,子组件注入的 useSelector 钩子也会被触发执行,从而导致子组件的重新渲染。
useDispatch
这个 hook 返回 redux store 的 分发(dispatch) 函数的引用。
import { useSelector, useDispatch } from 'react-redux'

export const Counter = () => {
  const count = useSelector(state => state.count)
  const dispatch = useDispatch()

  return (
    <div><span>{value}span><button onClick={() => dispatch({ type: 'INCREMENT' })}>+button>div>
  )
}
这里有一个建议在使用dispatch 函数的回调函数传递给子组件时,使用 useCallback 函数将回调函数记忆化,防止因为回调函数引用的变化导致不必要的渲染。
最后我们使用 hook 来改造之前的组件:
// List.jsx
import { useEffect } from 'react'
import { useSelector, useDispatch } from 'react-redux'
import Add from './Add'
import Item from './Item'
import { getActionSync } from '../store/actions/listAction'

const List = () => {
  const listData = useSelector(state => state.listReducer.listData)
  const dispatch = useDispatch()

  useEffect(() => {
    dispatch(getActionSync())
  }, [])

  const items = listData.map(ele => <Item key={ele.id} data={ele} />)
  return (
    <div><Add /><div>
        {items}div>div>
  )
}

export default List

// Item.jsx
import { useDispatch } from 'react-redux'
import { delAction } from '../store/actions/listAction'

const Item = (props) => {
    const { data } = props
    const dispatch = useDispatch()

    return (
      <div><p>{data.title}p><button onClick={() => dispatch(delAction(data.id))}>删除button>div>
    )
}

export default Item

// Add.jsx
import { useState } from 'react'
import { useDispatch } from 'react-redux'
import { addAction } from '../store/actions/listAction'

const Add = () => {
  const [ title, setTitle ] = useState('')
  const dispatch = useDispatch()

  const inputChange = (e) => {
    setTitle(e.target.value)
  }

  return (
    <div><input type="text" value={title} onChange={inputChange} /><button onClick={() => dispatch(addAction(title))}>添加button>div>
  )
}

export default Add
到此,关于 redux 如何在 react 中使用就给大家讲完了,关于 redux 其实就是一个状态管理工具,是社区最流行的状态管理工具,生态较好,支持 middleware,提供了可预测的状态管理,但需要写大量的模板代码,且包体积在状态管理工具中相对较大,适合大型项目。
感谢大家的阅读,如有建议或不对的地方,请在公众号留言。

飞舟技术社区
微信号 : fcstudio_club
新浪微博:@飞舟设计

点击阅读原文查看更多和获取源码


 2215
2215

 被折叠的 条评论
为什么被折叠?
被折叠的 条评论
为什么被折叠?
 到【灌水乐园】发言


