


sql catalyst
Only a small part of AppKit API is available to Mac Catalyst, but since Mac Catalyst apps are also macOS apps, they do have full access to AppKit API in runtime. It’s just not visible to them because Apple marked most of the AppKit classes as unavailable to Catalyst apps.
Mac Catalyst仅可使用AppKit API的一小部分,但是由于Mac Catalyst应用程序也是macOS应用程序,因此它们在运行时确实具有对AppKit API的完全访问权限。 它们只是不可见,因为Apple将大多数AppKit类标记为Catalyst应用程序不可用。
In this article, we’ll see how we can access AppKit API from Mac Catalyst apps in two different ways and in pure Swift.
在本文中,我们将看到我们如何以两种不同的方式以及通过纯Swift从Mac Catalyst应用程序访问AppKit API。
A.使用Dynamic (A. Using Dynamic)

Dynamic is a library that allows us to access Objective-C code from Swift in a simple and clean way. I wrote this library because I wanted a simple way to access hidden and private API from Swift without needing to create a separate plugin or use message-sending tricks that make the code uglier and harder to understand.
Dynamic是一个库,它使我们能够以简单干净的方式从Swift访问Objective-C代码。 我写这个库是因为我想要一种简单的方法来从Swift中访问隐藏的私有API,而无需创建单独的插件或使用消息发送技巧,从而使代码更丑陋且更难以理解。
1.将Dynamic添加为Swift软件包依赖项 (1. Add Dynamic as a Swift package dependency)

2.访问AppKit API (2. Access AppKit API)
That’s it! Now, you can access all of AppKit API using a very simple and clean syntax that is very similar to what you’d do if the API was public.
而已! 现在,您可以使用非常简单干净的语法来访问所有AppKit API,该语法与公开API时的语法非常相似。
For example, this is how we enter fullscreen from a macOS app vs. Catalyst with Dynamic:
例如,这是我们从macOS应用程序与带有Dynamic的Catalyst进入全屏的方式:
// macOS App
NSApplication.shared
        .windows.first?
        .toggleFullScreen(nil)


// Mac Catalyst (with Dynamic)
Dynamic.NSApplication.sharedApplication
        .windows.firstObject
        .toggleFullScreen(nil)
Dynamic is great if you need to call a couple of methods or access a hidden AppKit class. For more complex use cases, creating a macOS plugin may be a better option.
如果您需要调用几个方法或访问隐藏的AppKit类,则Dynamic非常有用。 对于更复杂的用例,创建macOS插件可能是一个更好的选择。
B.使用插件 (B. Using a Plugin)
Since Mac Catalyst apps are also macOS apps, they can embed macOS plugins that use AppKit API and load them at runtime. Let’s build a very simple plugin that shows a message using AppKit’s NSAlert.
由于Mac Catalyst应用程序也是macOS应用程序,因此它们可以嵌入使用AppKit API的macOS插件并在运行时加载它们。 让我们构建一个非常简单的插件,该插件使用AppKit的NSAlert显示一条消息。
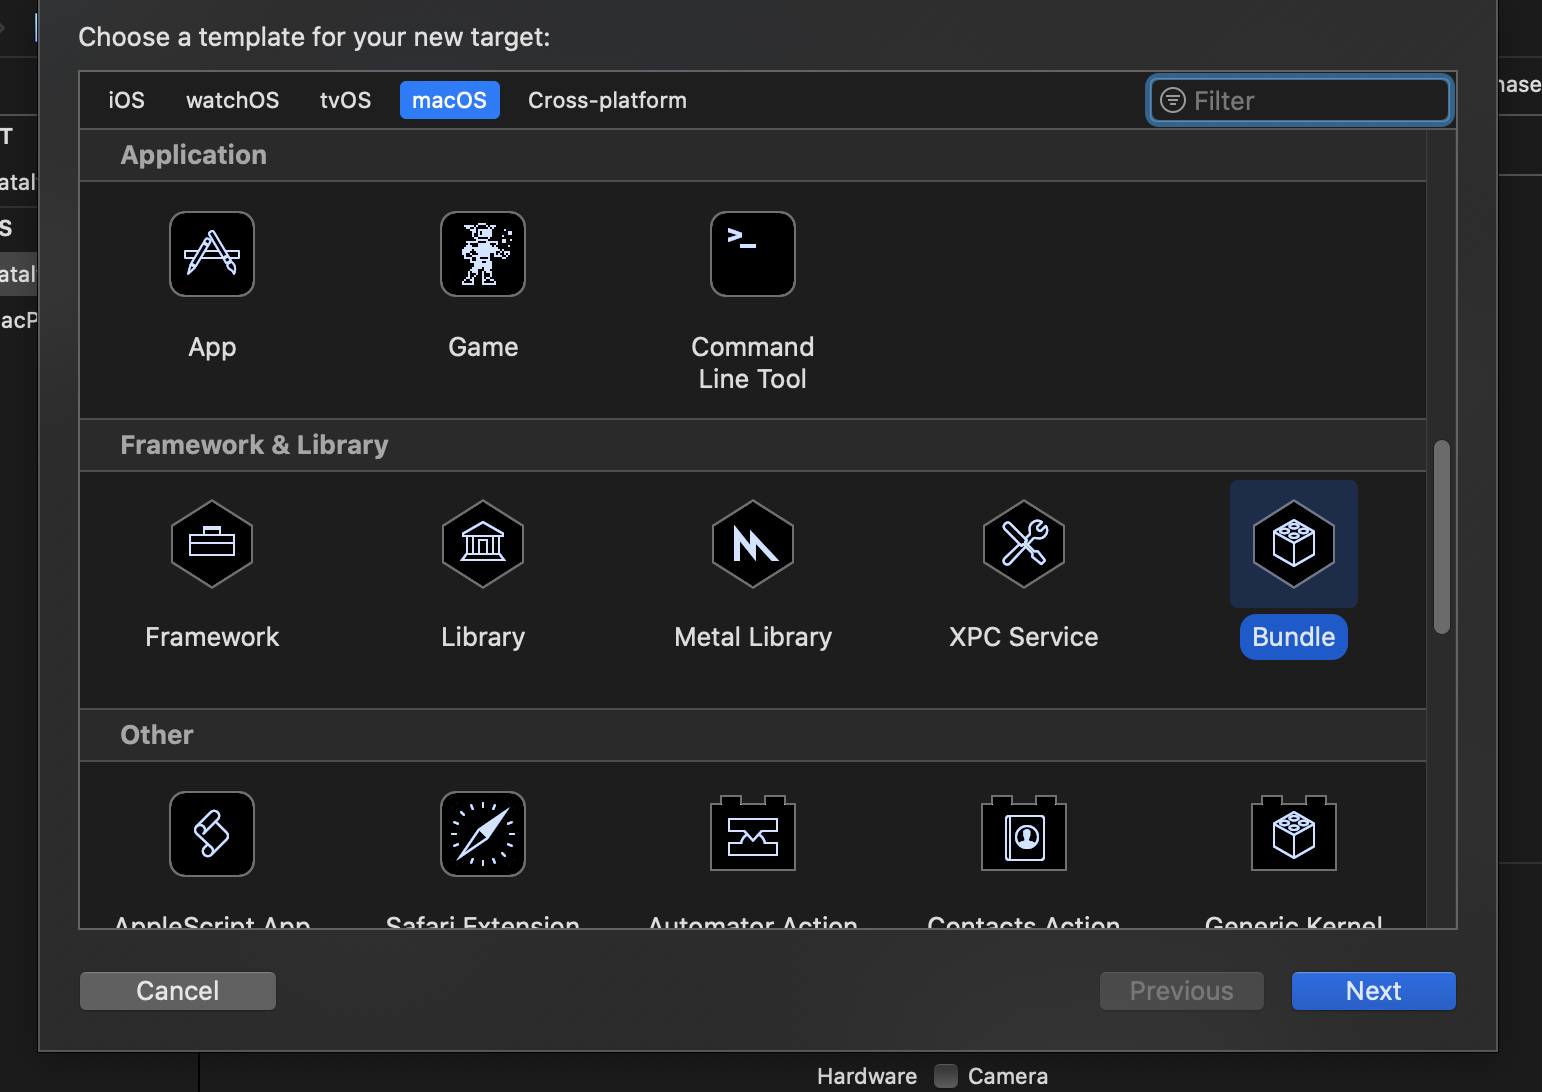
1.添加macOS捆绑包目标 (1. Add a macOS Bundle target)
Let’s name it MacPlugin.
我们将其命名为MacPlugin。
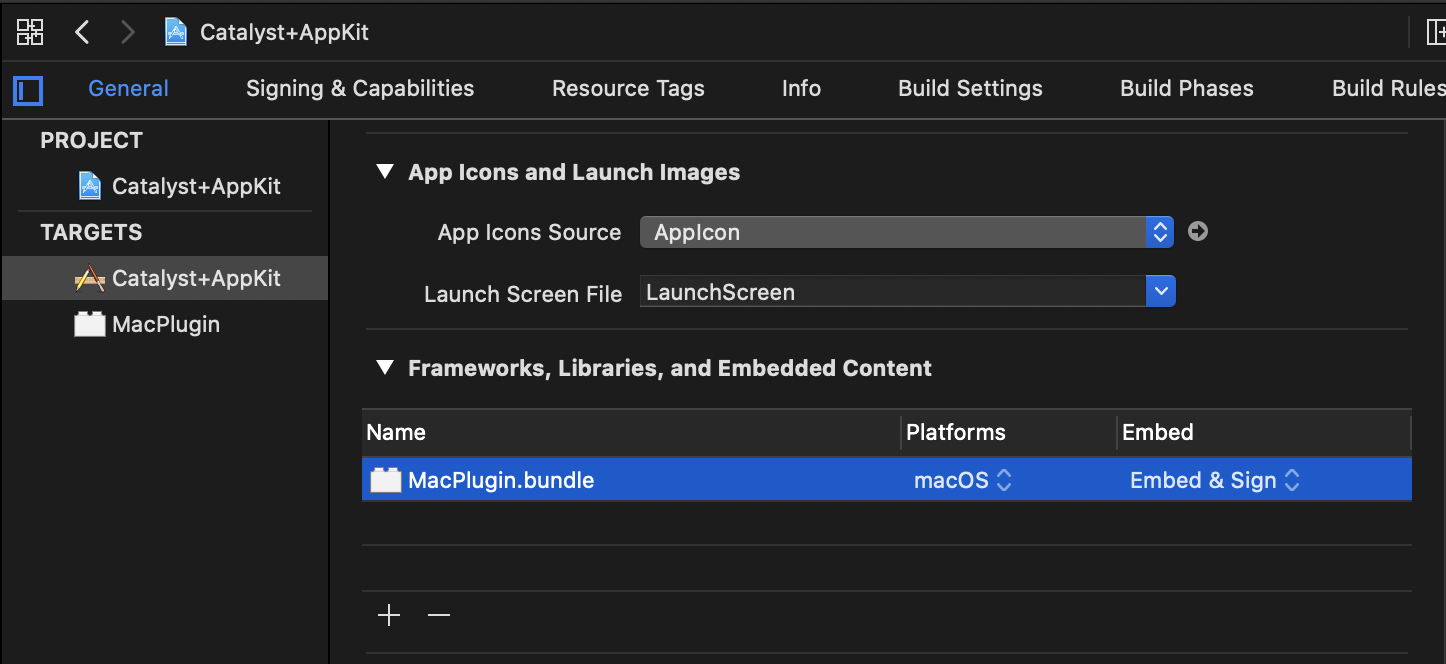
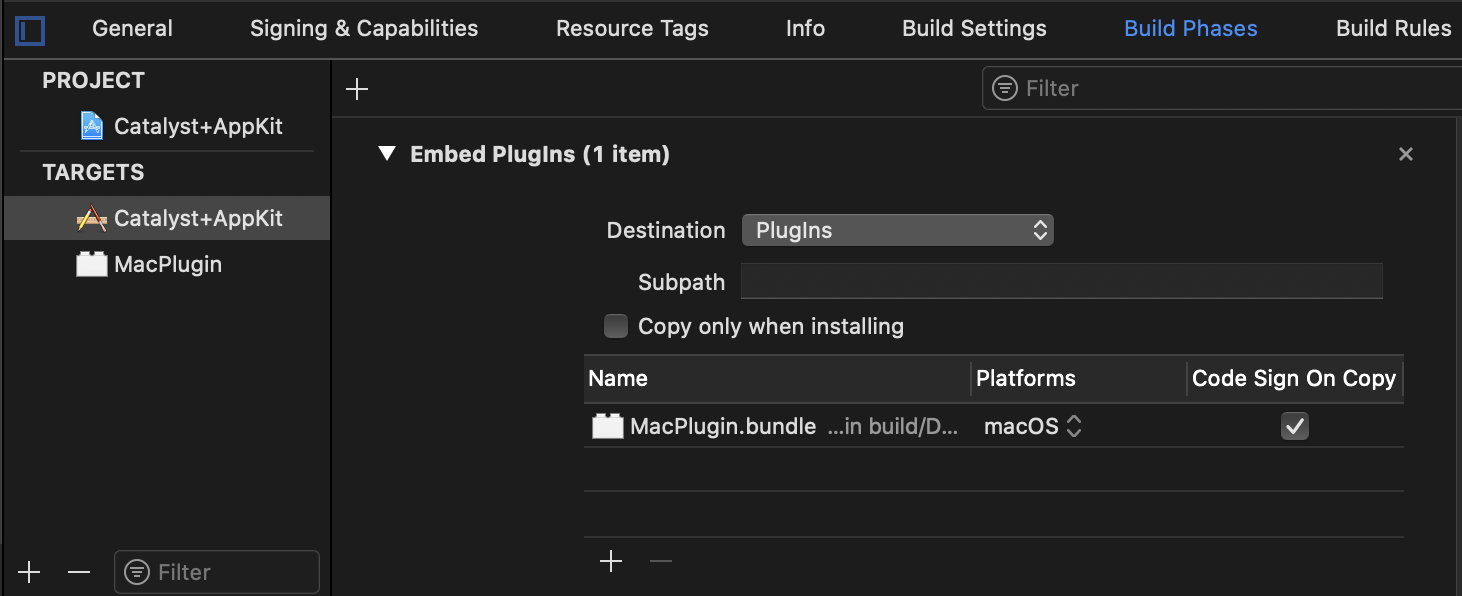
2.将插件嵌入到应用程序目标中,然后将“平台”更改为macOS (2. Embed the plugin in the app target, and change “Platforms” to macOS)
Since the bundle is manually loaded at runtime, we can’t reference its classes directly. Instead, we will make those classes conform to shared protocols that define the contract between our app and the plugin. Later on, when we load a class from the plugin, we will cast it to the shared protocol.
由于捆绑软件是在运行时手动加载的,因此我们无法直接引用其类。 相反,我们将使这些类符合共享协议,这些协议定义了我们的应用程序和插件之间的约定。 稍后,当我们从插件加载类时,会将其强制转换为共享协议。
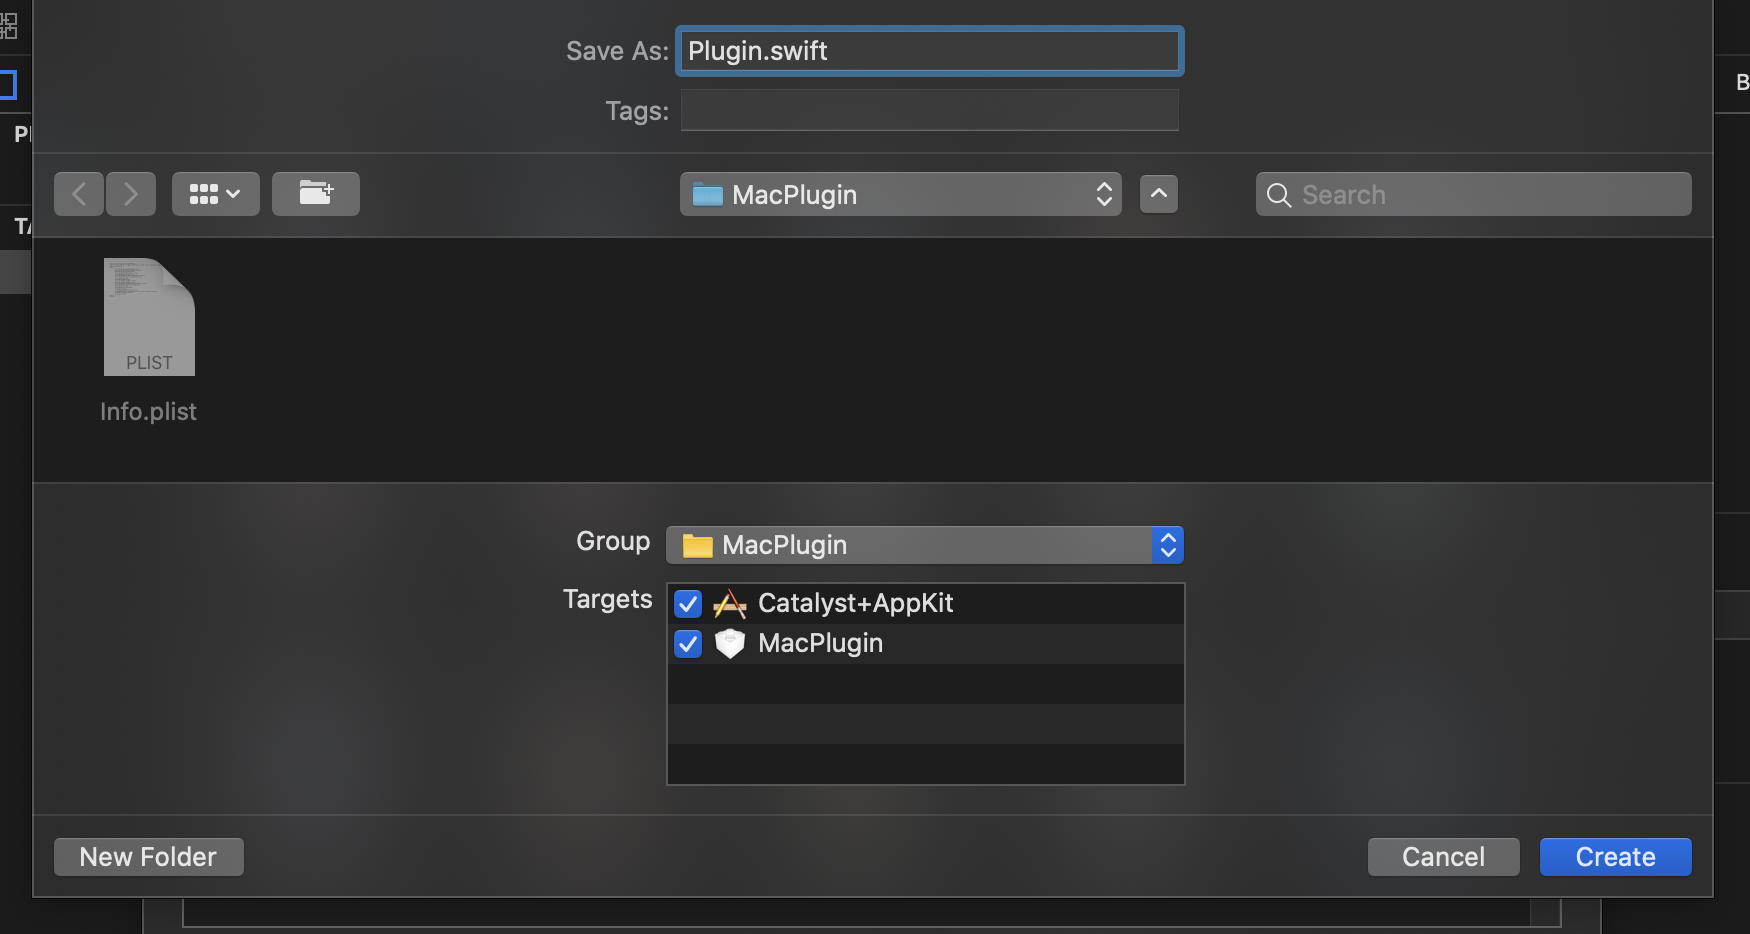
3.创建一个共享协议“插件” (3. Create a shared protocol “Plugin”)
Make sure it’s included in both targets.
确保两个目标中都包含了它。
Bundles can only load Objective-C classes or Swift classes that inherit from NSObject. Shared protocols are usually written in Objective-C, but we can also use Swift protocols as long as they inherit from NSObjectProtocol and only use Swift features that are compatible with Objective-C runtime (For instance, features like structs, generics, and enum associated values aren’t compatible with Objective-C runtime and hence are not supported).
捆绑包只能加载从NSObject继承的Objective-C类或Swift类。 共享协议通常是用Objective-C编写的,但是我们也可以使用Swift协议,只要它们是从NSObjectProtocol继承的,并且仅使用与Objective-C运行时兼容的Swift功能(例如,结构,泛型和枚举相关的功能)值与Objective-C运行时不兼容,因此不受支持)。
When you add Swift code to the plugin target, Xcode will suggest configuring an Objective-C bridging header. That’s wise advice indeed — take it!
将Swift代码添加到插件目标时,Xcode将建议配置一个Objective-C桥接头。 这确实是明智的建议-接受!

Let’s write a simple protocol with one method that shows an alert from AppKit land.
让我们用一种显示来自AppKit区域的警报的方法编写一个简单的协议。
@objc(Plugin)
protocol Plugin: NSObjectProtocol {
    init()


    func sayHello()
}
Notice that we annotated the protocol with @objc(Plugin). This is very important because it ensures that the name of the protocol will stay the same in the eyes of Objective-C runtime in both targets.
注意,我们用@objc(Plugin)注释了协议。 这点非常重要,因为它可以确保协议名称在两个目标的Objective-C运行时中都保持不变。
Without the annotation, the runtime will see two different protocols with different names since the module name is part of the default name: • App.Plugin — the protocol included in our app • MacPlugin.Plugin — the protocol included in the plugin
如果没有注释,则运行时将看到两个具有不同名称的协议,因为模块名称是默认名称的一部分:• App.Plugin应用程序中包含的协议• MacPlugin.Plugin插件中包含的协议
And that means we can’t cast the plugin class that conforms to MacPlugin.Plugin toApp.Plugin.
这意味着我们不能将符合MacPlugin.Plugin的插件类MacPlugin.Plugin为App.Plugin 。
Also, notice that we added an initializer to the shared protocol. This is necessary to make it possible to create instances of the plugin classes after loading them into memory.
另外,请注意,我们在共享协议中添加了初始化程序。 这对于将插件类实例加载到内存中之后创建实例是必要的。
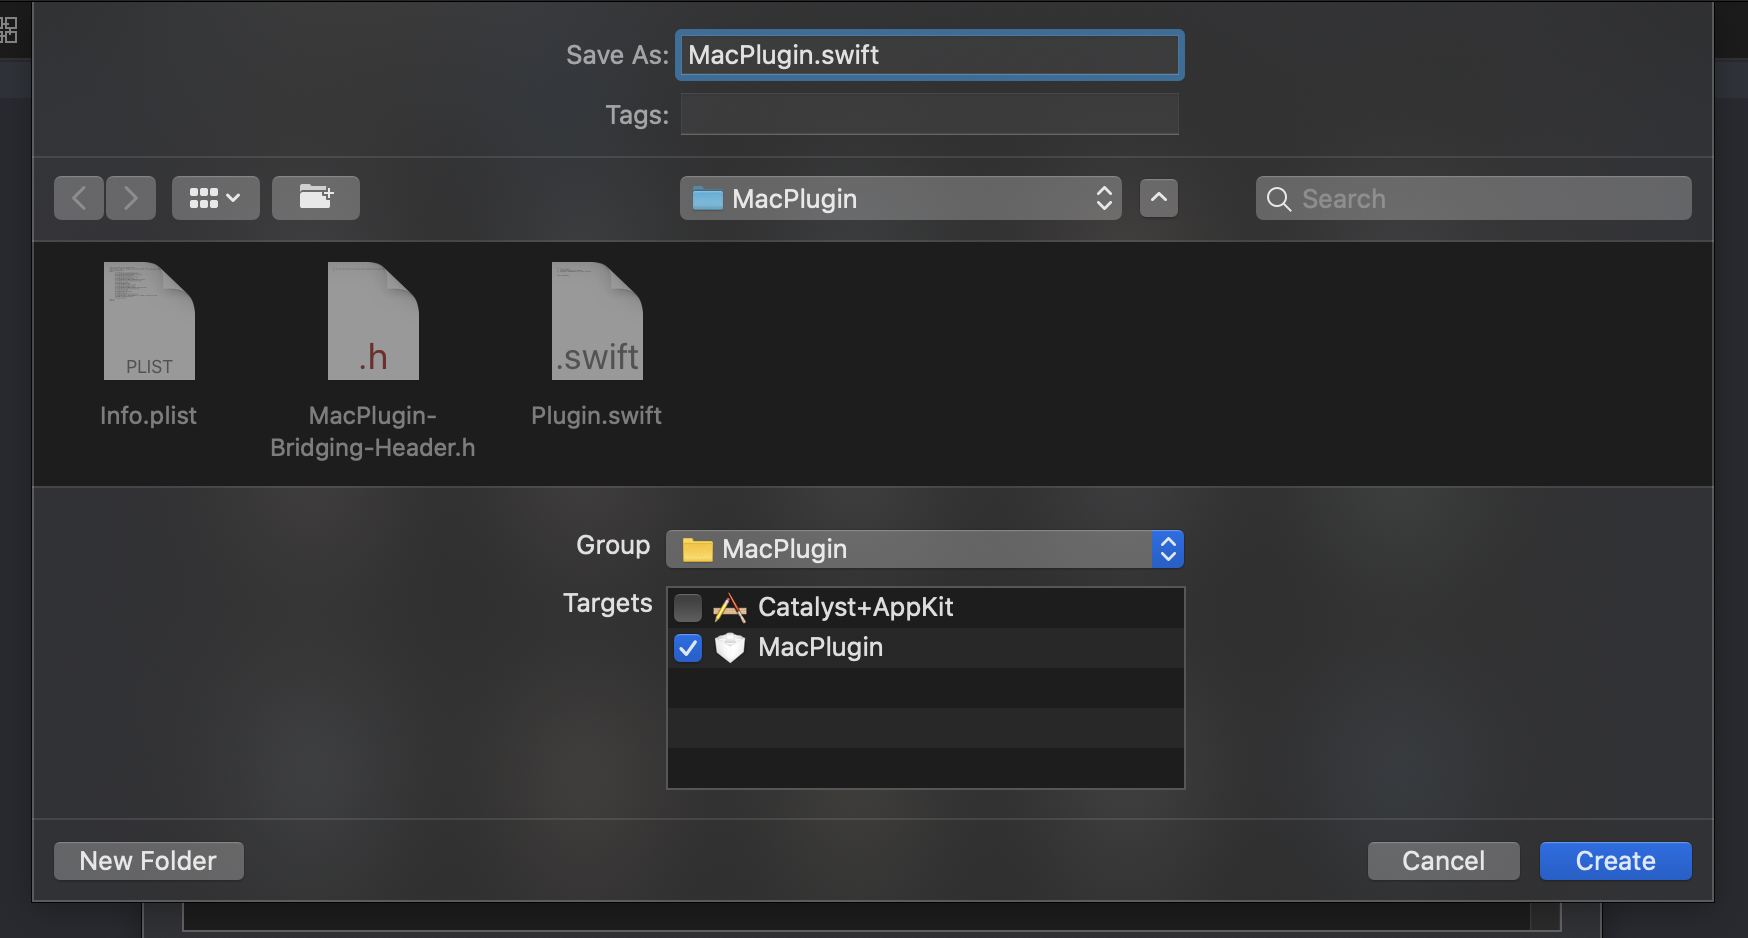
4.编写符合共享协议的类 (4. Write the class that conforms to the shared protocol)
You only need to include it in the plugin target.
您只需要将其包含在插件目标中即可。
class MacPlugin: NSObject, Plugin {
    required override init() {
    }


    func sayHello() {
        let alert = NSAlert()
        alert.alertStyle = .informational
        alert.messageText = "Hello from AppKit!"
        alert.informativeText = "It Works!"
        alert.addButton(withTitle: "OK")
        alert.runModal()
    }
}
The implementation is straightforward. We’re simply showing an alert using the AppKit’s NSAlert class.
实现很简单。 我们只是使用AppKit的NSAlert类显示警报。
5.加载插件包并创建MacPlugin的新实例 (5. Load the plugin bundle and create a new instance of MacPlugin)
private func loadPlugin() {
    /// 1. Form the plugin's bundle URL
    let bundleFileName = "MacPlugin.bundle"
    guard let bundleURL = Bundle.main.builtInPlugInsURL?
                                .appendingPathComponent(bundleFileName) else { return }


    /// 2. Create a bundle instance with the plugin URL
    guard let bundle = Bundle(url: bundleURL) else { return }


    /// 3. Load the bundle and our plugin class
    let className = "MacPlugin.MacPlugin"
    guard let pluginClass = bundle.classNamed(className) as? Plugin.Type else { return }


    /// 4. Create an instance of the plugin class
    let plugin = pluginClass.init()
    plugin.sayHello()
}
We’re creating a new instance of Bundle with the URL of the plugin. The plugin bundle is expected to be at the built-in plugins directory inside the main bundle because that’s where Xcode is copying it.
我们正在使用插件的URL创建Bundle的新实例。 该插件包应位于主包内的内置插件目录中,因为这是Xcode复制它的地方。
We’re then callingbundle.classNamed(), which loads the specified class into memory and returns the class type. If the specified class can’t be found, the method returns nil. Notice that the class name must include the module name.
然后,我们调用bundle.classNamed() ,该方法将指定的类加载到内存中并返回类类型。 如果找不到指定的类,则该方法返回nil 。 请注意,类名必须包含模块名。
Note 1: If you only have one public class in your plugin, you can make it the principal class of the plugin by setting the “Principal class” property (NSPrincipalClass) in the Info.plist file to the full class name.
注意1 :如果插件中只有一个公共类,则可以通过将Info.plist文件中的“ Principal class”属性( NSPrincipalClass )设置为完整类名来使其成为插件的主体类。
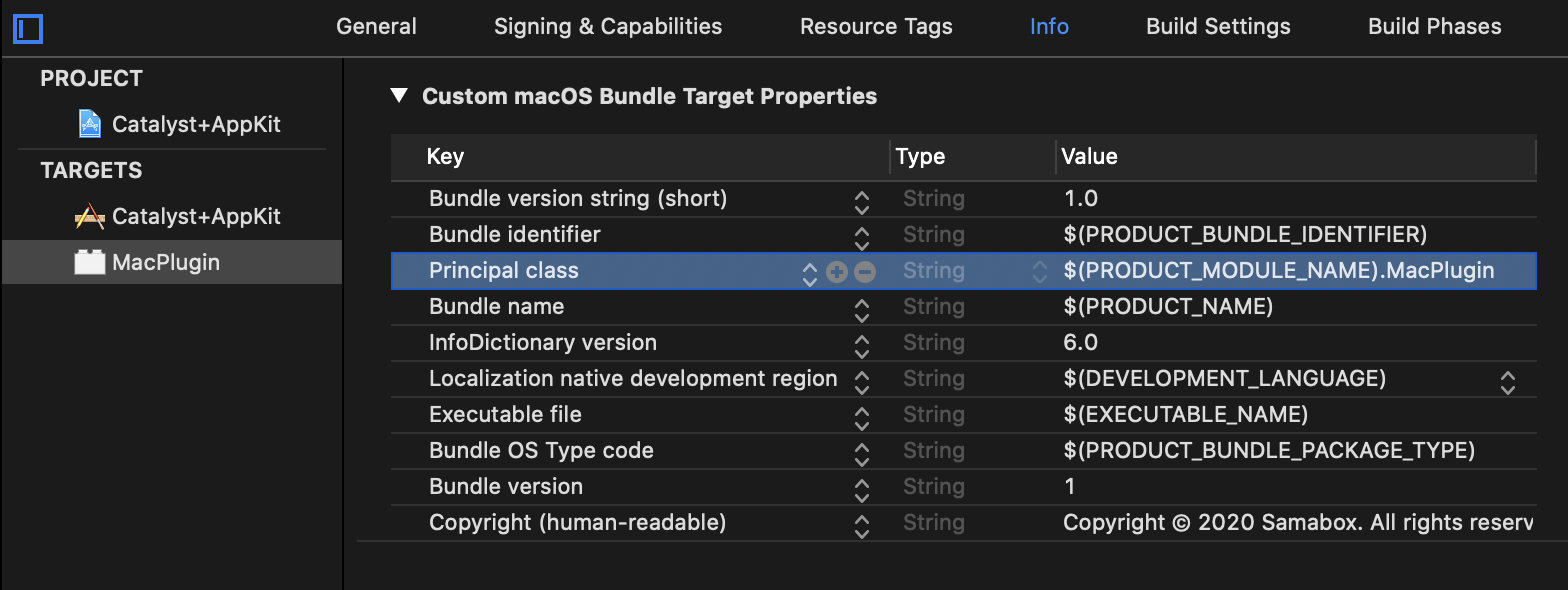
Then you can access that class by calling Bundle.principalClass instead of searching for the class.
然后,您可以通过调用Bundle.principalClass而不是搜索该类来访问该类。
private func loadPlugin() {
    ...

    // Instead of this:
    let className = "MacPlugin.MacPlugin"
    guard let pluginClass = bundle.classNamed(className) as? Plugin.Type else { return }


    // You can use:
    guard let pluginClass = bundle.principalClass as? Plugin.Type else { return }

    ...
}
Note 2: We can explicitly load the plugin by calling bundle.load(), but that’s not really necessary as the plugin is automatically loaded when we try to load any class from it.
注2 :我们可以通过调用bundle.load()显式加载插件,但这并不是必需的,因为当我们尝试从中加载任何类时,插件会自动加载。
After loading the class, we’re creating a new instance using the initializer we defined in the shared protocol and then calling sayHello(). And if everything went well, you’ll see something like this:
加载该类后,我们将使用在共享协议中定义的初始化程序创建一个新实例,然后调用sayHello() 。 如果一切顺利,您将看到类似以下内容:
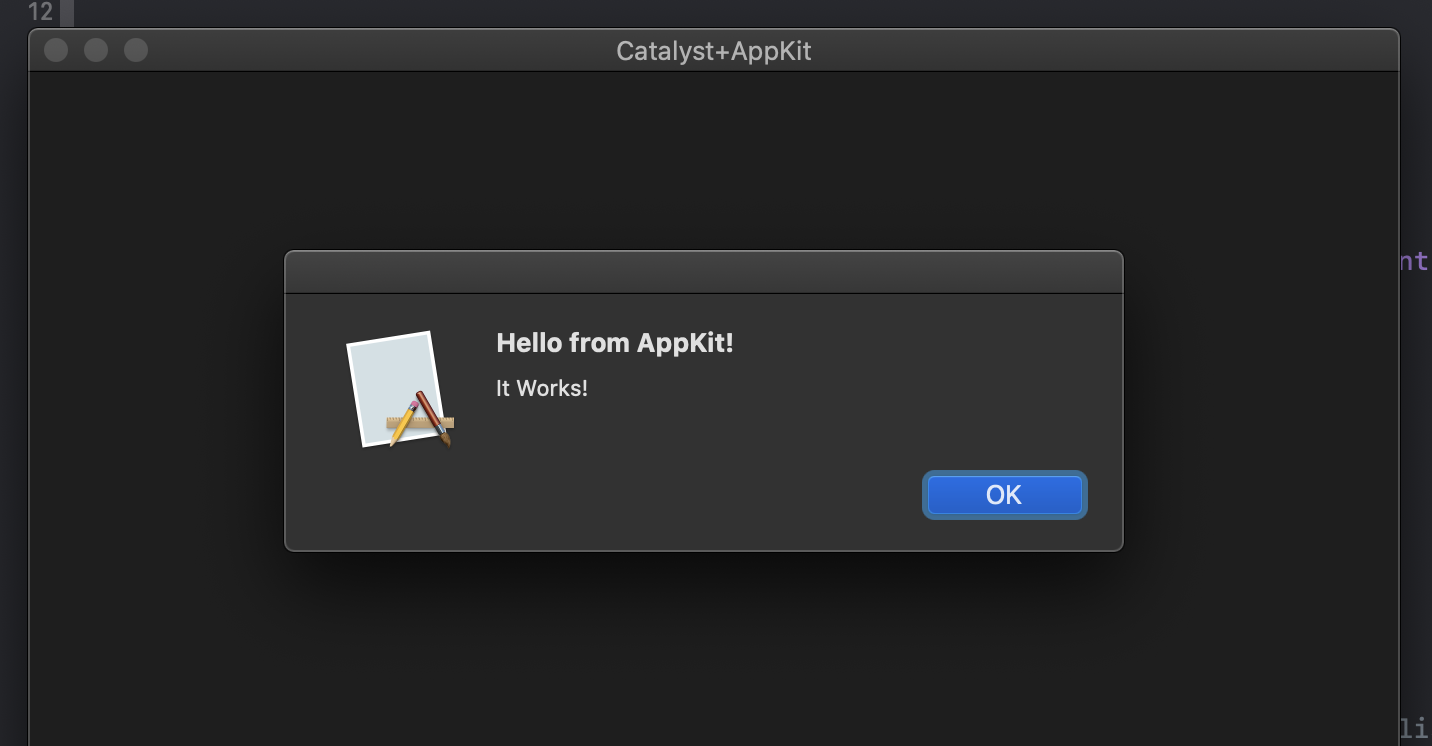
And that’s it!
就是这样!
sql catalyst


 1031
1031

 被折叠的 条评论
为什么被折叠?
被折叠的 条评论
为什么被折叠?
 到【灌水乐园】发言


