


 本文介绍了如何在iOS应用中实现Spotify的身份验证流程,为用户提供音乐服务接入。
ios怎么用spotify
Authenticating through an API like Spotify in order to access and modify a user’s information, music, follows, and so on can be so confusing especially for beginners. Why you may ask? If you have little to no knowledge about dealing with headers, SDK, web APIs, tweaking Xcode’s Build Settings and Info.plist then you are in the right place. My goal in this article is to improve Spotify’s Authorization Guide with better visuals, clearer step by step, actual Swift codes, and more importantly, have my readers level up.
通过诸如Spotify之类的API进行身份验证以访问和修改用户的信息,音乐,跟随等内容可能会造成混乱,尤其是对于初学者而言。 你为什么会问? 如果您几乎不了解处理标头,SDK,Web API,调整Xcode的Build Settings和Info.plist,那么您来对地方了。 本文的目的是通过更好的视觉效果,更清晰的逐步操作,实际的Swift代码,以及更重要的是提高读者的水平来改进Spotify的授权指南。
我们去取得它 (Let’s get it)
I will go over refreshable authorization and authentication process in Swift using Spotify’s iOS SDK. This is a task all software engineers should be comfortable with especially for a very secure backend like Spotify.
我将使用Spotify的iOS SDK讨论Swift中可刷新的授权和身份验证过程。 这是所有软件工程师都应该适应的任务,尤其是对于像Spotify这样的非常安全的后端。

准备环境 (Prepare Your Environment)
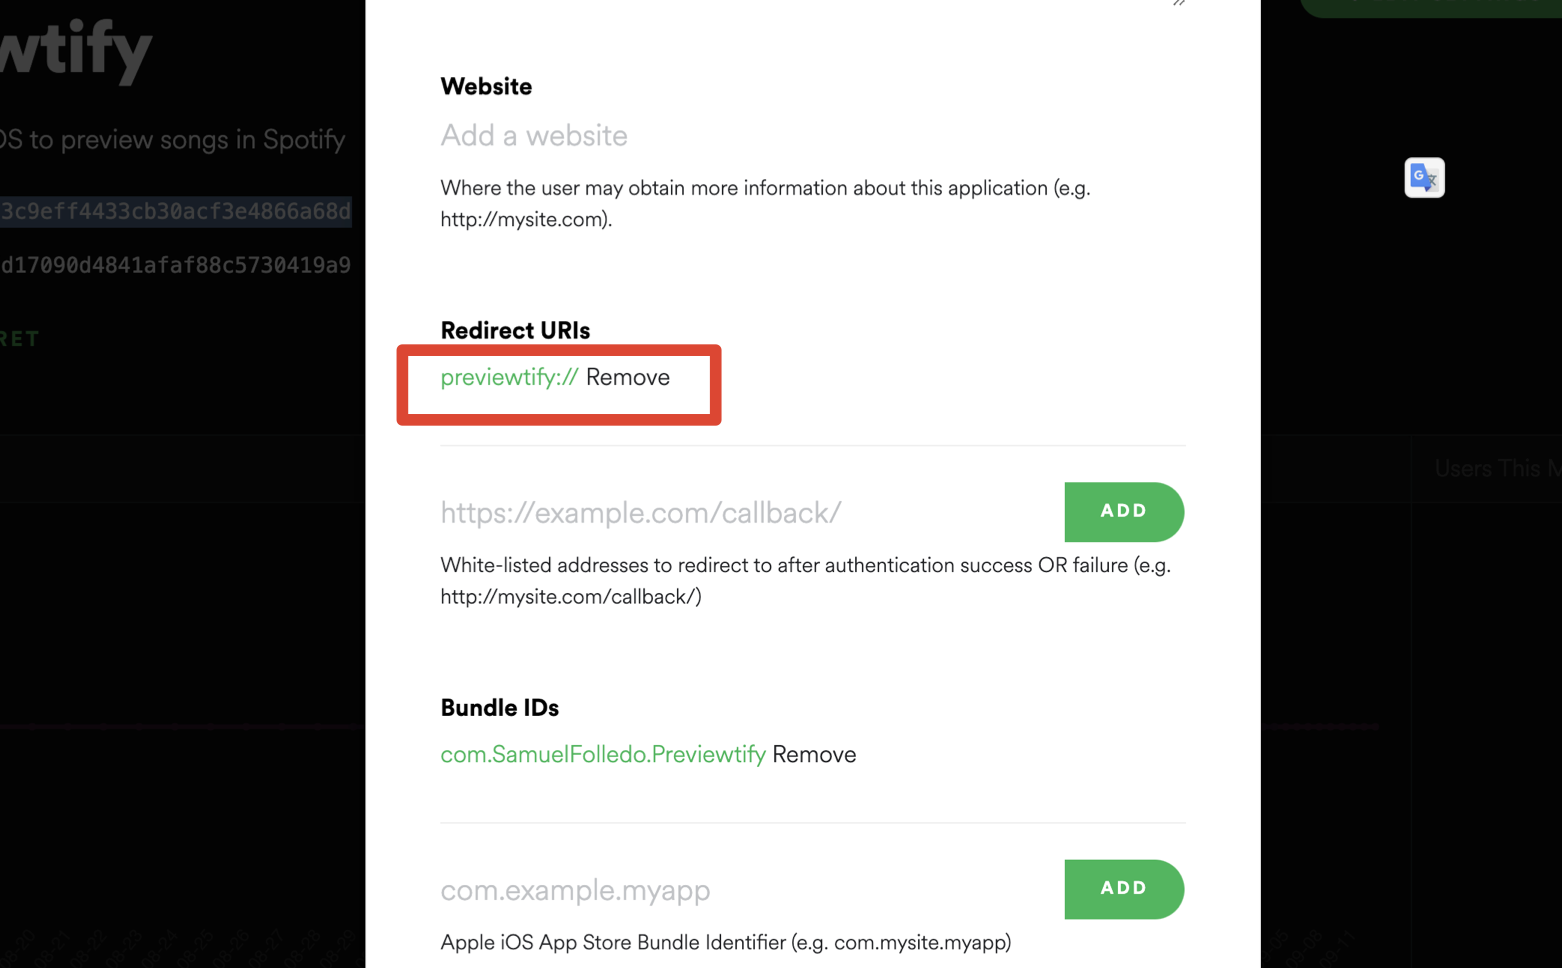
I will assume that you registered your app and have a client Identifier from Spotify’s Developer Dashboard. If not, read through Spotify’s iOS SDK Quick Start and App Settings guide. It is important to have appName:// whitelisted as a redirect URIs in your project in Spotify Dashboard in order for Spotify to know how to go back to your app.
我将假设您已经注册了应用程序,并且具有Spotify开发人员仪表板中的客户端标识符。 如果没有,请仔细阅读Spotify的iOS SDK快速入门和应用设置指南。 重要的是,在Spotify信息中心的项目中将appName://作为重定向URI列入白名单,以便Spotify知道如何返回到您的应用程序。
在Xcode中设置Spotify的iOS SDK (Setup Spotify’s iOS SDK in Xcode)
Skip this section if you are not planning to use Spotify’s iOS SDK. If you want to make your user’s experience as delightful as possible, download the iOS SDK from GitHub and add it to your Xcode project.
如果您不打算使用Spotify的iOS SDK,请跳过本节。 如果您想使用户的体验尽可能愉悦,请从GitHub下载iOS SDK ,并将其添加到您的Xcode项目中。
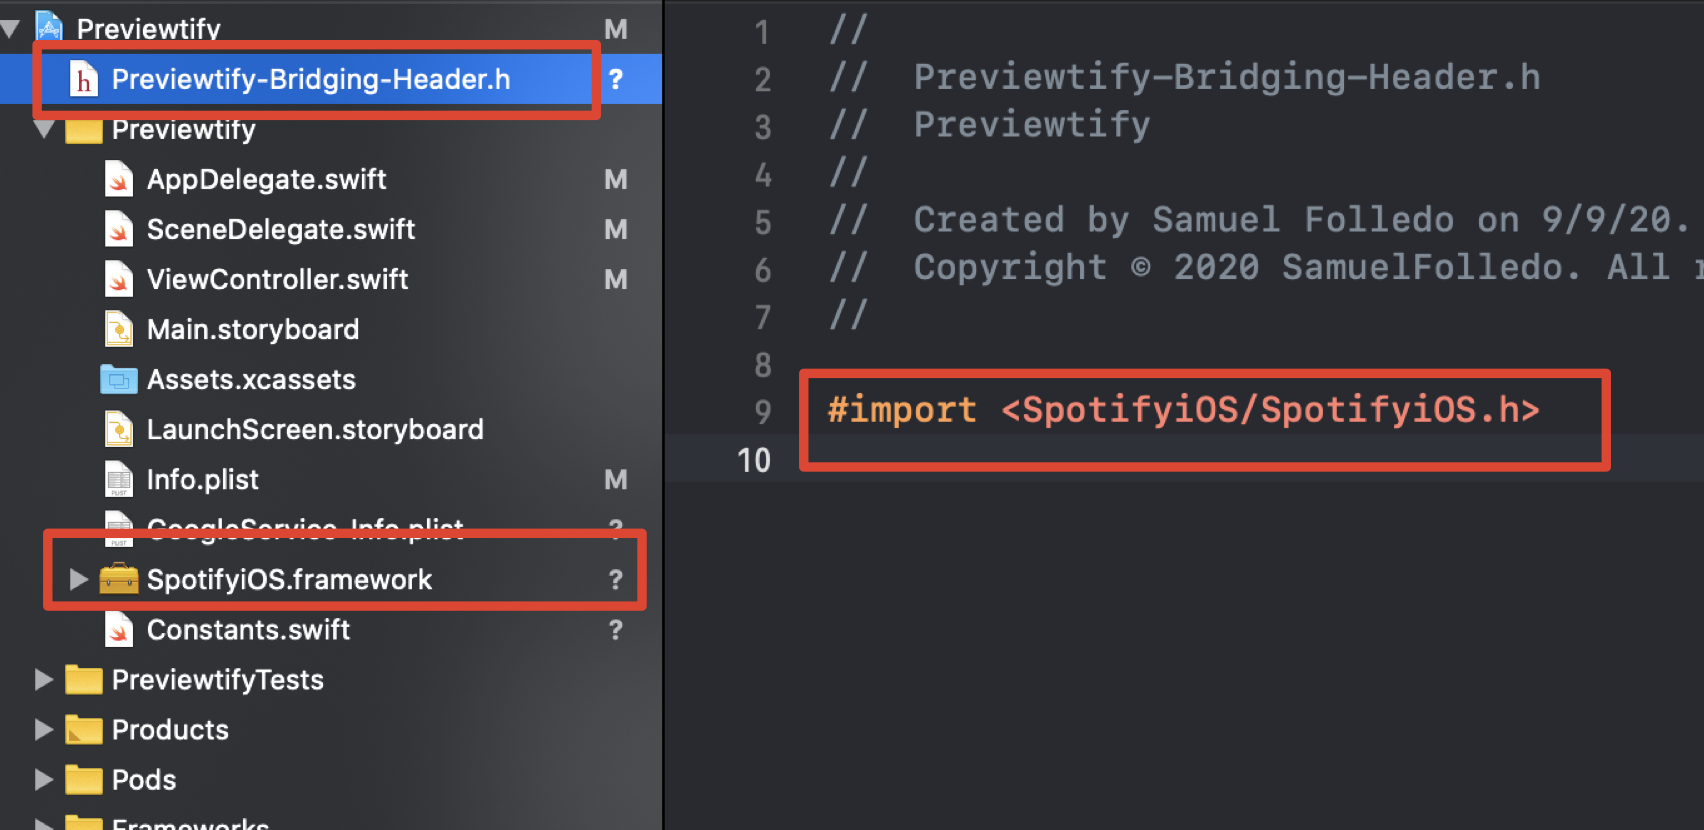
Create a new file, header file, and name it like so AppName-Bridging-Header. Then replace all its contents with#import <SpotifyiOS/SpotifyiOS.h>. Your project navigator should look like the image below. Do not worry about the GoogleService-Info.plist file unless you have pods installed.
创建一个新文件,头文件,并命名为AppName-Bridging-Header 。 然后将其所有内容替换为#import <SpotifyiOS/SpotifyiOS.h> 。 您的项目导航器应如下图所示。 除非您已安装Pod,否则不必担心GoogleService-Info.plist文件。
设置-ObjC链接器标志 (Set -ObjC Linker Flag)
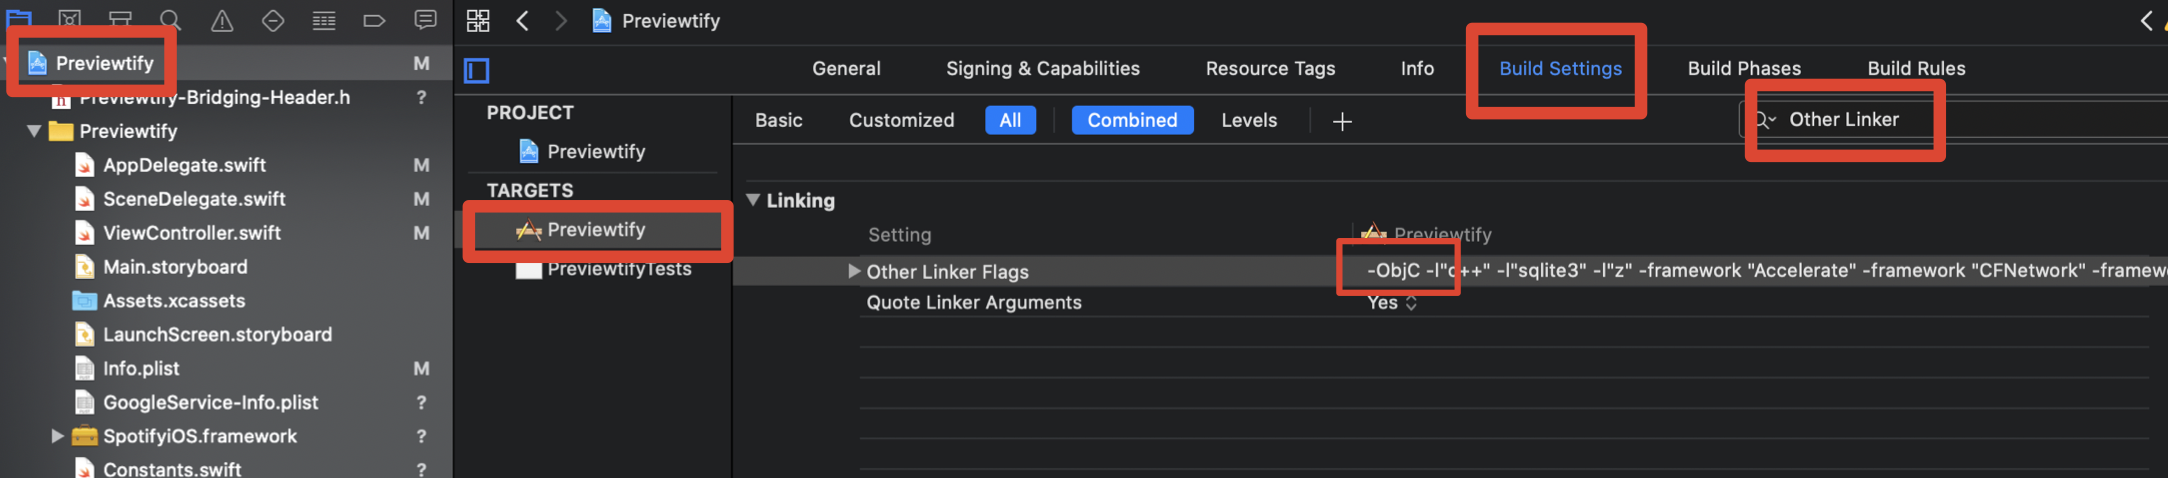
In order to support the iOS SDK and compile the Objective-C code contained inside the iOS SDK, we will need to add -Objc linker flag. In Xcode, add the linker flag like the image below.
为了支持iOS SDK并编译iOS SDK中包含的Objective-C代码,我们需要添加-Objc链接器标志。 在Xcode中,添加链接器标志,如下图所示。
添加桥接标题 (Add Bridging Header)
Then we need to add a bridging header next that will allow us to include Objective-C binaries inside our Swift app. We can do that by searching Objective-C Bridging Header in Build Settings and settings its value the same as the name of our header file like the image below
然后,我们需要添加一个桥接标头,该标头将使我们能够在Swift应用程序中包含Objective-C二进制文件。 我们可以通过在“构建设置”中搜索“ Objective-C桥接头”并将其值设置为与我们的头文件的名称相同的方式来做到这一点,如下图所示

确认信息(Confirm Info)
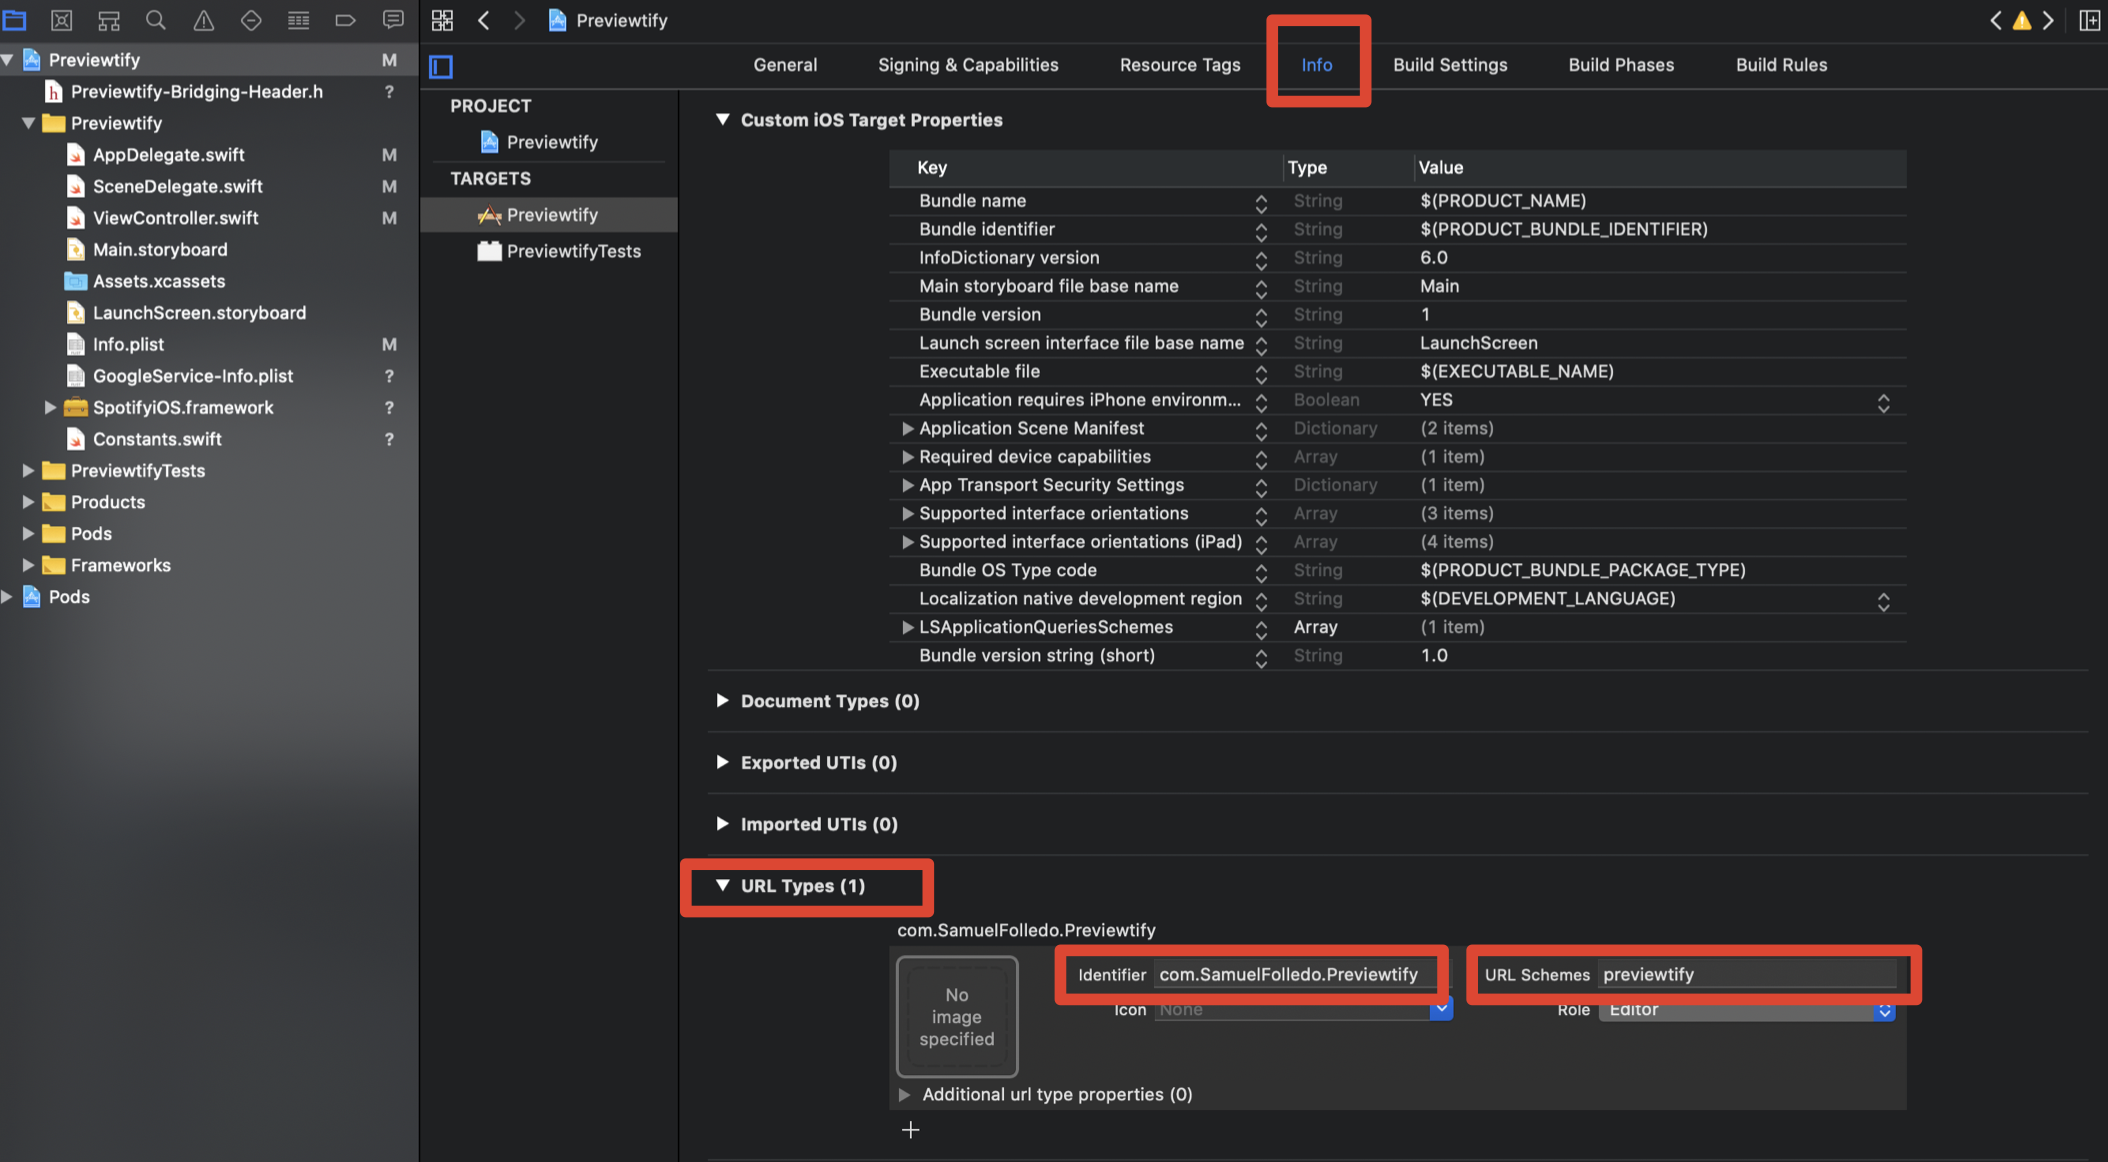
You will also need to add a new URL Types in Info tab. Give the identifier as your Bundle Id, and the value as your callback without the :// like the image below.
您还需要在“信息”选项卡中添加新的URL类型。 给出标识符作为您的Bundle ID,并给值作为不带://回调, ://图所示。
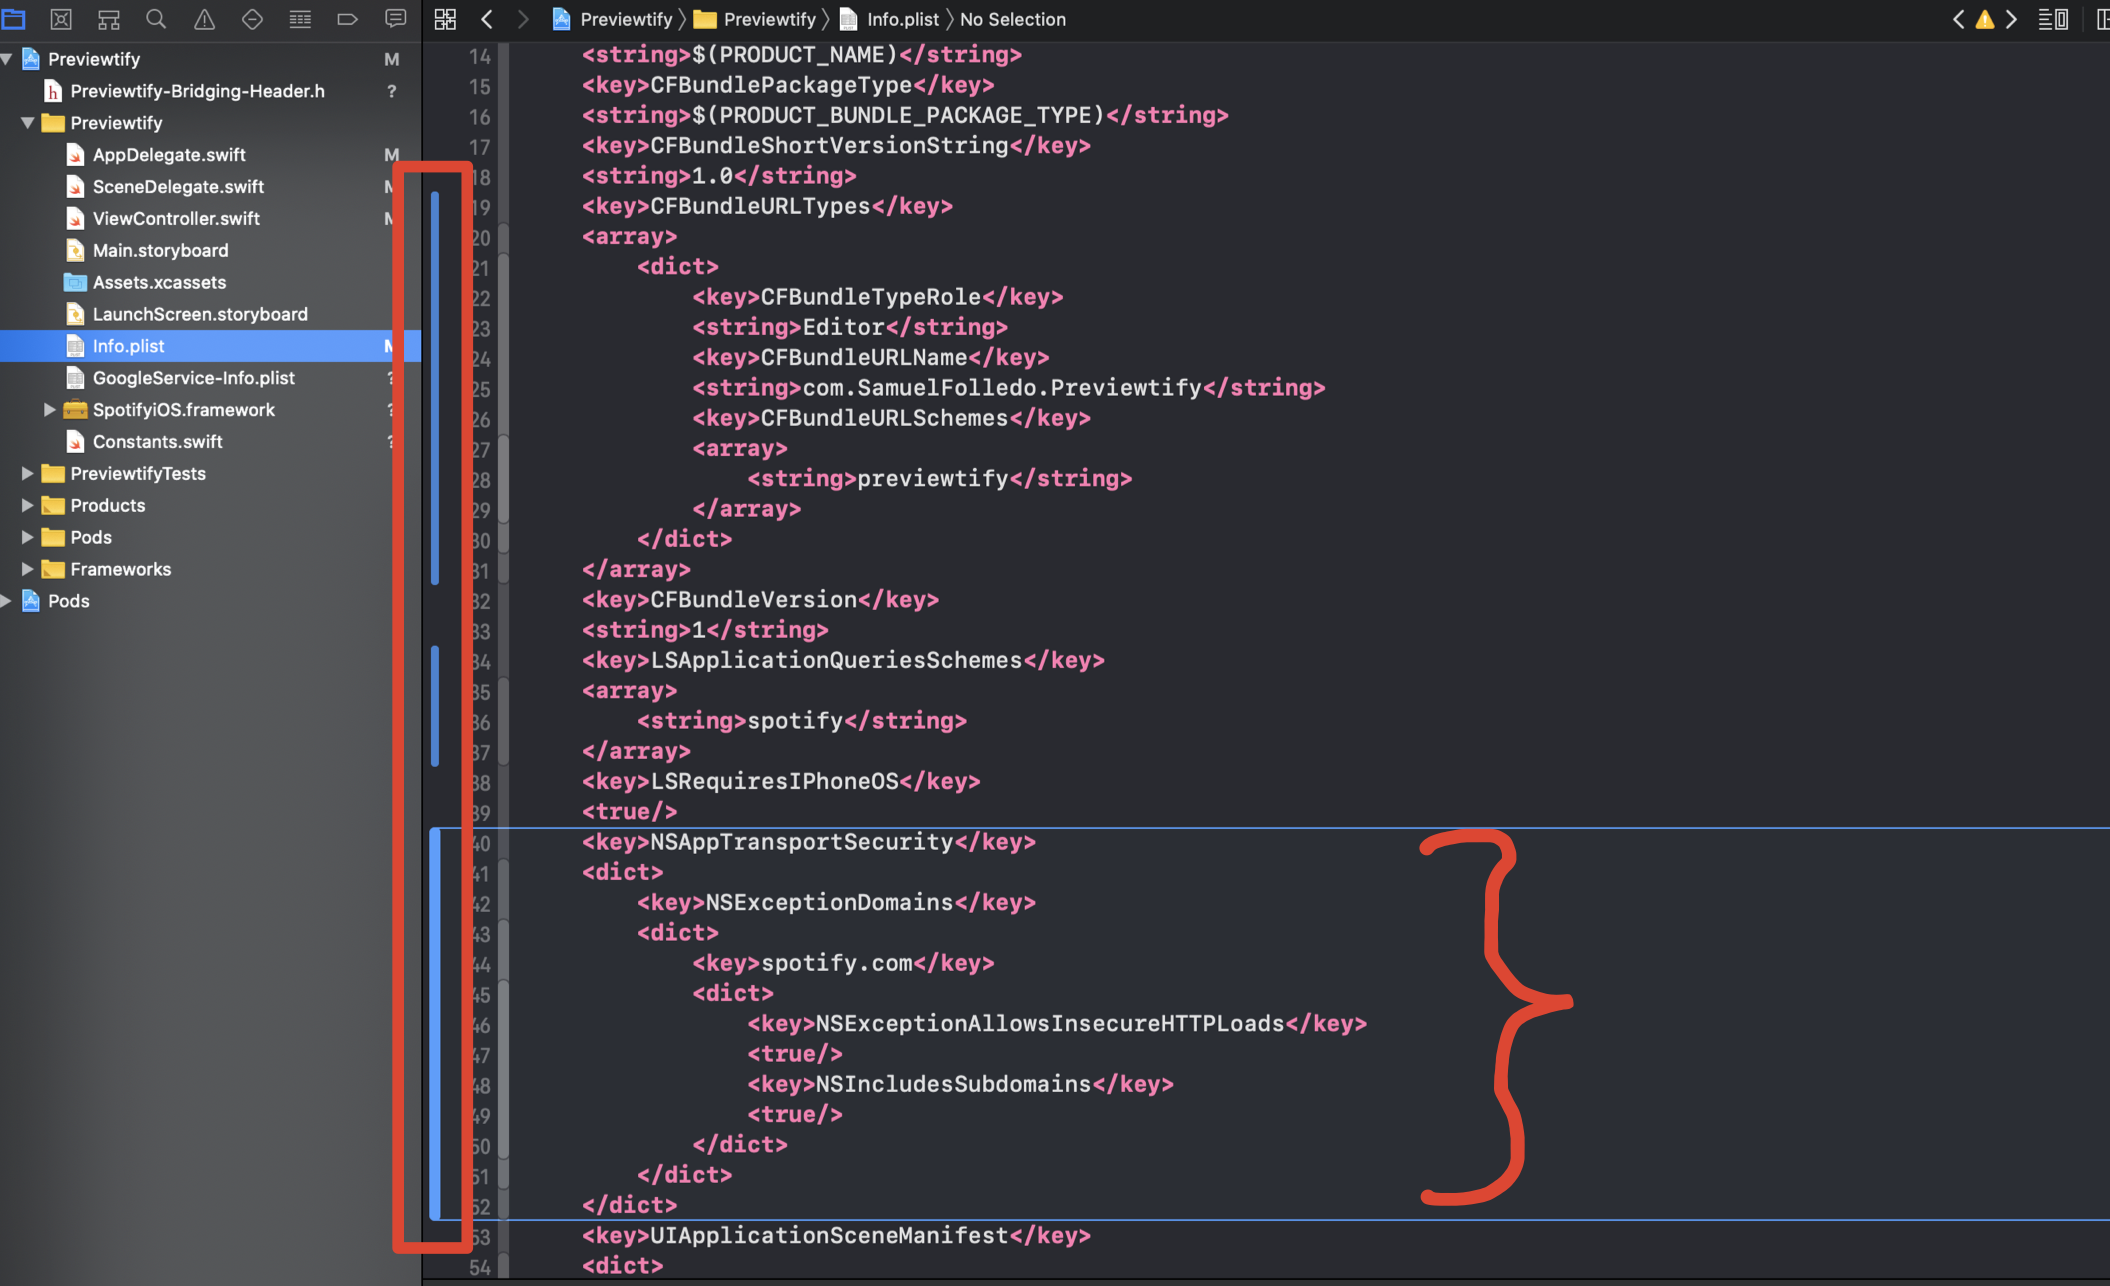
Lastly for security purposes, you will need to open Info.plist as source code and make sure you tell NSAppTransportSecurity that you are supporting the domain, spotify.com. Take this time to also make sure that you have the same changes on your Info.plist as mine that are marked with blue horizontal lines.
最后,出于安全性考虑,您需要打开Info.plist作为源代码,并确保告知NSAppTransportSecurity您正在支持域Spotify.com。 请花一些时间确保在Info.plist上所做的更改与用蓝色水平线标记的更改相同。
 最低0.47元/天 解锁文章


 3505
3505

 被折叠的 条评论
为什么被折叠?
被折叠的 条评论
为什么被折叠?
 到【灌水乐园】发言


