vue中为每个vue-router跳转的页面设置单独的页面title

一般来说,如果不对vue中新打开的页面进行设置,会默认使用首页的title作为新打开的vue页面title。对vue-router跳转到的页面设置单独的页面title,分为如下2步:

  1. 在src中的router的index.js文件中
    在这里插入图片描述
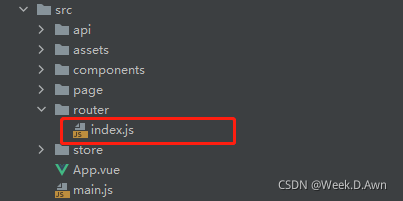
    对需要单独设置页面title的路由,增加meta属性,在meta里面新增页面的title名字属性:
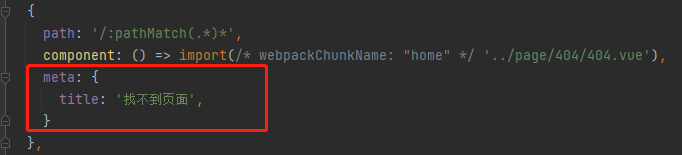
    在这里插入图片描述
    具体代码:
  {
    path: '/:pathMatch(.*)*',
    component: () => import(/* webpackChunkName: "home" */ '../page/404/404.vue'),
    meta: {
      title: '找不到页面',
    }
  }
  1. 在路由配置的下方,把新增meta的title属性设置为页面title的方法:
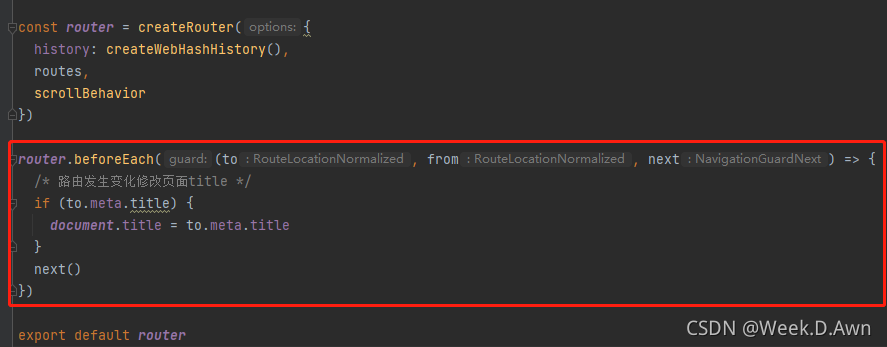
    在这里插入图片描述
    具体代码:
router.beforeEach((to, from, next) => {
  /* 路由发生变化修改页面title */
  if (to.meta.title) {
    document.title = to.meta.title
  }
  next()
})

这样设置以后,就可以实现对vue中为每个vue-router跳转的页面设置单独的页面title了。

### 实现轮播图中的路由跳转功能 在 Vue.js 中,`<router-link>` 是用于声明式导航的核心组件之一。为了实现在轮播图中点击图片或其他元素后跳转到指定页面的功能,可以将 `<router-link>` 嵌套在轮播图的模板结构中。 以下是具体实现方法: #### HTML 结构与逻辑 假设我们正在使用一个简单的轮播图插件(如 Swiper 或者手动构建),可以通过以下方式嵌入 `router-link` 来完成跳转需求。 ```html <div class="carousel"> <!-- 轮播项 --> <div v-for="(item, index) in carouselItems" :key="index" class="carousel-item"> <!-- 使用 router-link 包裹可点击区域 --> <router-link :to="item.path" class="carousel-link"> <img :src="item.imageSrc" alt="Carousel Image" /> <p>{{ item.title }}</p> </router-link> </div> </div> <!-- 定义路由视图 --> <router-view></router-view> ``` #### 数据定义 在 Vue 的数据部分,我们需要提供轮播图的数据源,其中每张图片对应的目标路径应被明确设置。 ```javascript export default { data() { return { carouselItems: [ { title: 'Home', imageSrc: '/images/home.jpg', path: '/' }, { title: 'About', imageSrc: '/images/about.jpg', path: '/about' }, { title: 'Contact', imageSrc: '/images/contact.jpg', path: '/contact' } ] }; } }; ``` #### 样式调整 为了让用户体验更佳,可以在 CSS 中为 `.carousel-link` 添加一些过渡效果或者鼠标悬停样式。 ```css .carousel-link img { width: 100%; height: auto; } .carousel-link:hover { cursor: pointer; opacity: 0.8; /* 鼠标悬浮时降低透明度 */ } ``` --- ### 关于 Vue2 和 Vue3 的兼容性注意事项 由于 Vue2 和 Vue3 对某些特性的支持存在差异,在实际开发过程中需要注意以下几点: 1. **动态绑定属性** 在 Vue3 中,`v-bind` 可以简化写法,例如 `:to="item.path"` 替代了 Vue2 中可能使用的完整形式 `v-bind:to="item.path"`[^4]。 2. **自定义激活类名** 如果需要更改默认的激活状态类名(`.router-link-active`),可以利用 `active-class` 属性来覆盖它。但在 Vue3 中,需注意 Scoped CSS 的作用域限制可能导致样式不生效的情况[^2]。 3. **编程式导航作为备选方案** 当遇到复杂场景无法直接应用 `<router-link>` 时,也可以考虑通过事件监听器调用 `$router.push()` 方法实现相同的效果[^3]。 --- ### 示例代码总结 最终完整的示例代码如下所示: ```html <template> <div class="carousel"> <div v-for="(item, index) in carouselItems" :key="index" class="carousel-item"> <router-link :to="item.path" class="carousel-link"> <img :src="item.imageSrc" alt="Carousel Image" /> <p>{{ item.title }}</p> </router-link> </div> </div> <router-view></router-view> </template> <script> export default { data() { return { carouselItems: [ { title: 'Home', imageSrc: '/images/home.jpg', path: '/' }, { title: 'About', imageSrc: '/images/about.jpg', path: '/about' }, { title: 'Contact', imageSrc: '/images/contact.jpg', path: '/contact' } ] }; } }; </script> <style scoped> .carousel-link img { width: 100%; height: auto; } .carousel-link p { font-size: 1rem; margin-top: 0.5rem; } .carousel-link:hover { cursor: pointer; opacity: 0.8; } </style> ``` --- ###
评论
添加红包

请填写红包祝福语或标题

红包个数最小为10个

红包金额最低5元

当前余额3.43前往充值 >
需支付:10.00
成就一亿技术人!
领取后你会自动成为博主和红包主的粉丝 规则
hope_wisdom
发出的红包
实付
使用余额支付
点击重新获取
扫码支付
钱包余额 0

抵扣说明:

1.余额是钱包充值的虚拟货币,按照1:1的比例进行支付金额的抵扣。
2.余额无法直接购买下载,可以购买VIP、付费专栏及课程。

余额充值