


 本文介绍了如何在SpringBoot项目中集成邮件发送功能,包括添加mail starter依赖、配置application.yml、编写主入口程序及测试类。通过实例演示了如何使用JavaMailSender发送邮件。
SpringBoot 项目发邮件
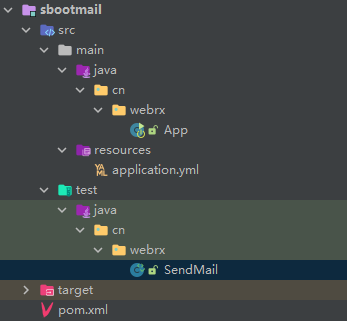
1、建立项目springboot项目
<!-- pom.xml 文件添加starter mail依赖 -->
<dependency>
    <groupId>org.springframework.boot</groupId>
    <artifactId>spring-boot-starter-mail</artifactId>
</dependency>
项目pom.xml内容如下
<?xml version="1.0" encoding="UTF-8"?>
<project xmlns="http://maven.apache.org/POM/4.0.0"
         xmlns:xsi="http://www.w3.org/2001/XMLSchema-instance"
         xsi:schemaLocation="http://maven.apache.org/POM/4.0.0 http://maven.apache.org/xsd/maven-4.0.0.xsd">
    <modelVersion>4.0.0</modelVersion>
    <parent>
        <groupId>org.springframework.boot</groupId>
        <artifactId>spring-boot-starter-parent</artifactId>
        <version>2.7.1</version>
        <relativePath/>
    </parent>
    <groupId>org.example</groupId>
    <artifactId>sbootmail</artifactId>
    <version>1.0-SNAPSHOT</version>

    <properties>
        <maven.compiler.source>17</maven.compiler.source>
        <maven.compiler.target>17</maven.compiler.target>
        <java.version>17</java.version>
    </properties>

    <dependencies>
        <dependency>
            <groupId>org.springframework.boot</groupId>
            <artifactId>spring-boot-starter-mail</artifactId>
        </dependency>

        <dependency>
            <groupId>org.springframework.boot</groupId>
            <artifactId>spring-boot-starter-test</artifactId>
            <scope>test</scope>
        </dependency>

        <dependency>
            <groupId>org.springframework.boot</groupId>
            <artifactId>spring-boot-maven-plugin</artifactId>
            <version>2.7.1</version>
        </dependency>
    </dependencies>

    <build>
        <plugins>
            <plugin>
                <groupId>org.springframework.boot</groupId>
                <artifactId>spring-boot-maven-plugin</artifactId>
            </plugin>
        </plugins>
    </build>

</project>
2、 建立项目配置文件yml
src/main/resources/application.yml
spring:
  mail:
    default-encoding: utf-8
    host: smtp.126.com
    username: webrx@126.com
    #此处为邮件服务器的授权码,不是密码
    password: XQUJQKBFBYWRFBKS
3、编写主入口程序
src/main/java/cn/webrx/App.java
package cn.webrx;
import org.springframework.boot.SpringApplication;
import org.springframework.boot.autoconfigure.SpringBootApplication;
@SpringBootApplication
public class App {
    public static void main(String[] args) {
        SpringApplication.run(App.class,args);
    }
}
4、编写测试程序
src/test/java/cn/webrx/SendMail.java
package cn.webrx;
import org.junit.jupiter.api.Test;
import org.springframework.beans.factory.annotation.Autowired;
import org.springframework.boot.SpringBootVersion;
import org.springframework.boot.test.context.SpringBootTest;
import org.springframework.mail.SimpleMailMessage;
import org.springframework.mail.javamail.JavaMailSender;
@SpringBootTest
public class SendMail {
@Autowired
JavaMailSender sender;
@Test
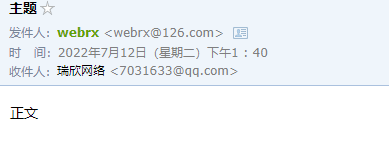
void send() {
SimpleMailMessage smm = new SimpleMailMessage();
smm.setTo("7031633@qq.com");
smm.setSubject("主题");
smm.setText("正文");
smm.setFrom("webrx@126.com");
sender.send(smm);
}
@Test
void test() {
System.out.println("hello ");
System.out.println(SpringBootVersion.getVersion());
}
}
执行SendMail类的send()方法,测试通过。


 833
833

 被折叠的 条评论
为什么被折叠?
被折叠的 条评论
为什么被折叠?
 到【灌水乐园】发言


