


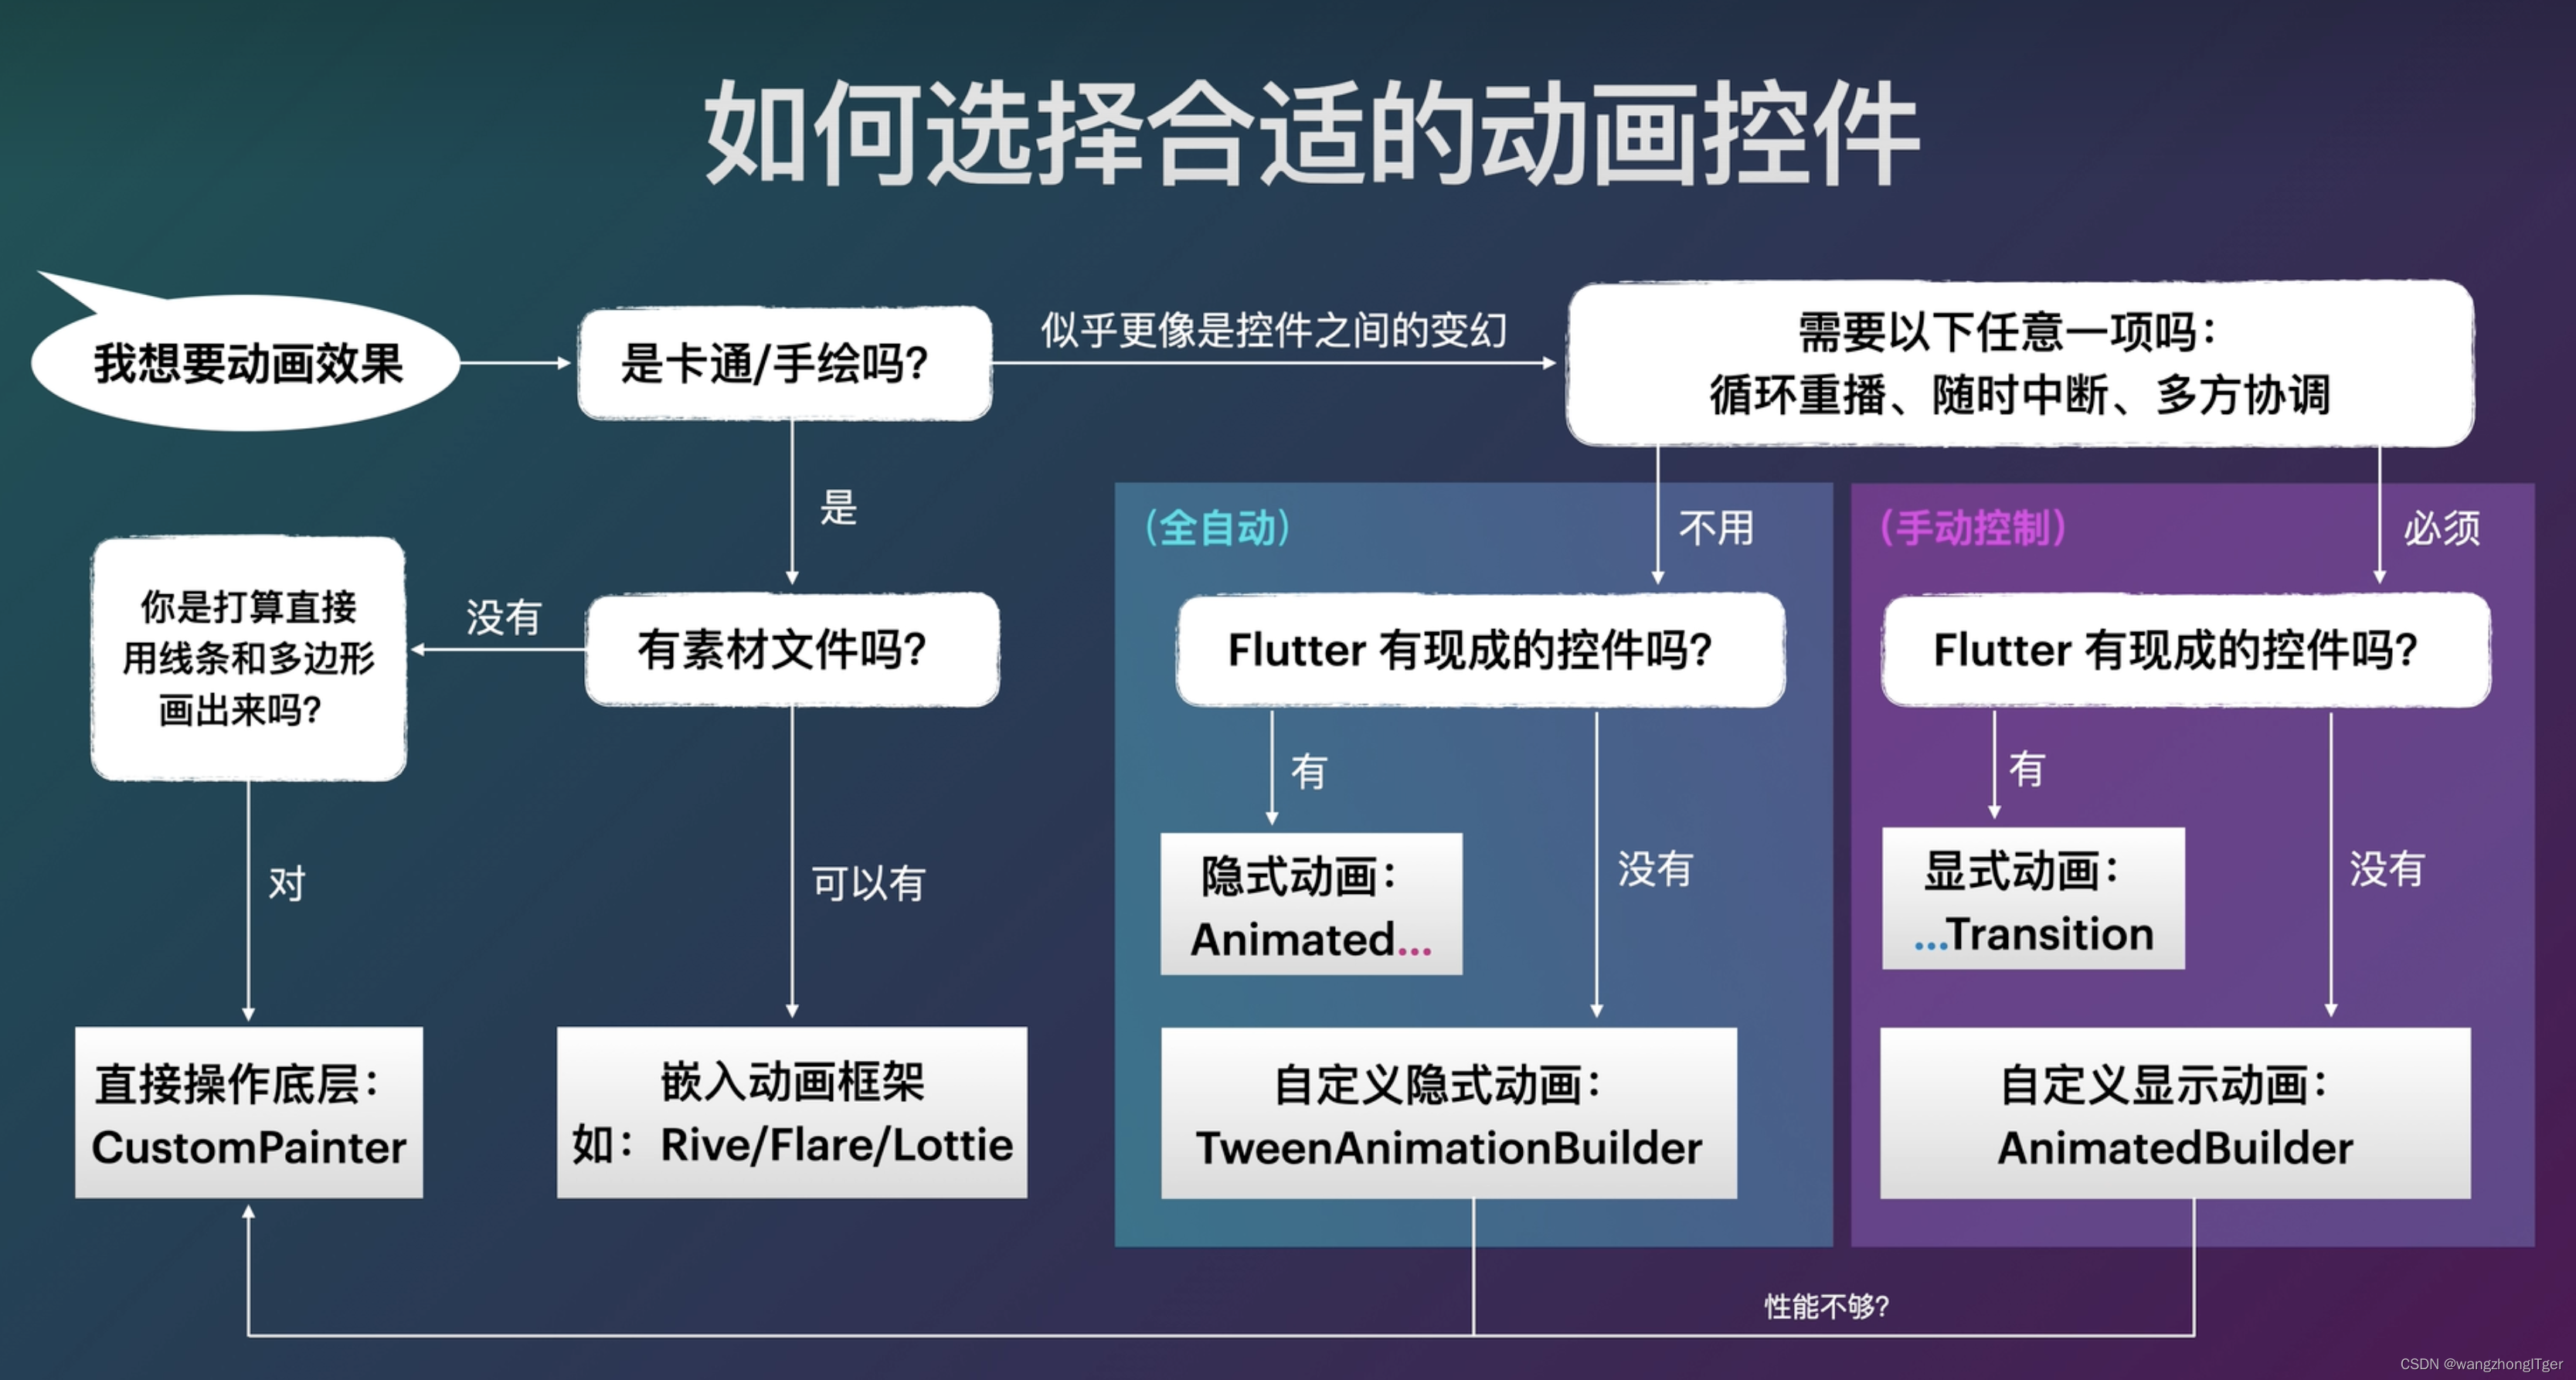
第一章 隐式(全自动)动画
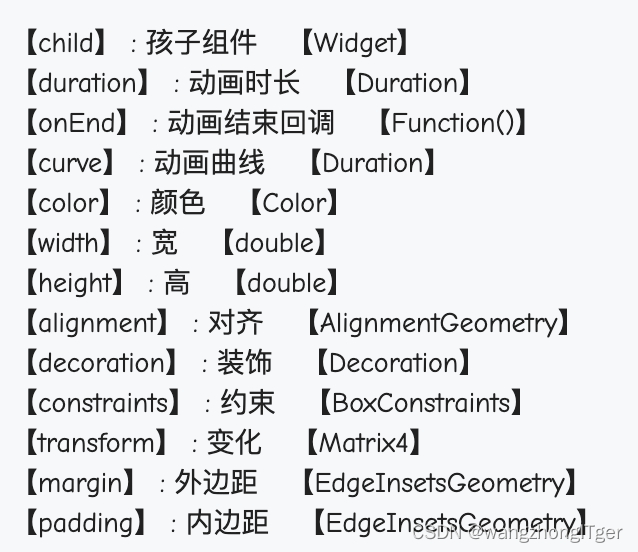
1.两行代码就能动起来(
AnimatedContainer)
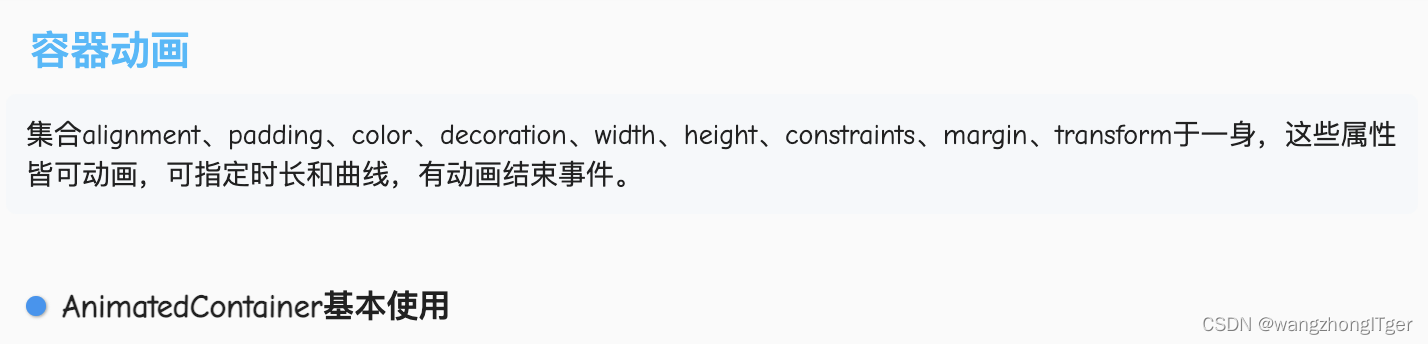
个人理解:该组件在内部属性发生变化时会自动使用默认的动画。如高度、宽度、内外边距、约束、颜色等发生变化。当child内的组件发生变化时不会有任何动画效果。
本小节代码如下:
AnimatedContainer(
duration: const Duration(milliseconds: 2000),
width: 0.5.sw,
height: cHeight.h,
decoration: BoxDecoration(
// color: Colors.blue,
borderRadius: BorderRadius.circular(50),
boxShadow: const [
BoxShadow(
spreadRadius: 10,
blurRadius: 20,
color: Colors.yellowAccent)
],
gradient: const LinearGradient(
begin: Alignment.topLeft,
stops: [0.2, 0.8],
colors: [Colors.lightGreen, Colors.orange])),
child: Container(
child: Center(
child: Text(
'Hi!!!',
textAlign: TextAlign.center,
style: TextStyle(
color: Colors.white,
fontSize: 200.sp,
fontWeight: FontWeight.bold),
),
),
)
,
)
,
2.在不同控件之间切换的过渡动画(
AnimatedSwitcher
)
就上面的
AnimatedContainer 组件所实现的简单动画。在child属性中组件发生变化切换(如从Center组件切换成Text组件) 是没有任何动画发生的。这时候我们在其内部引用AnimatedSwitcher组件并传入duration参数就可以进行组件切换的过渡动画。
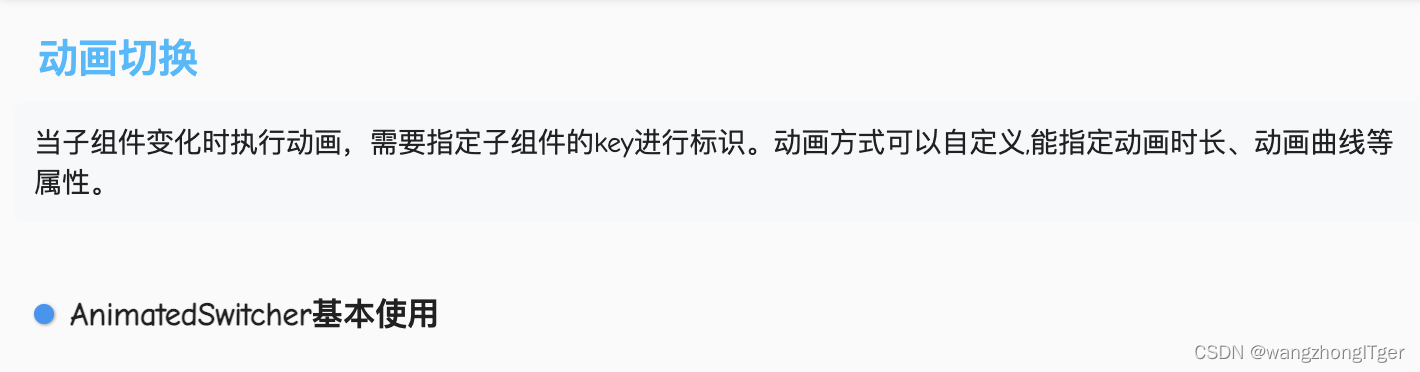
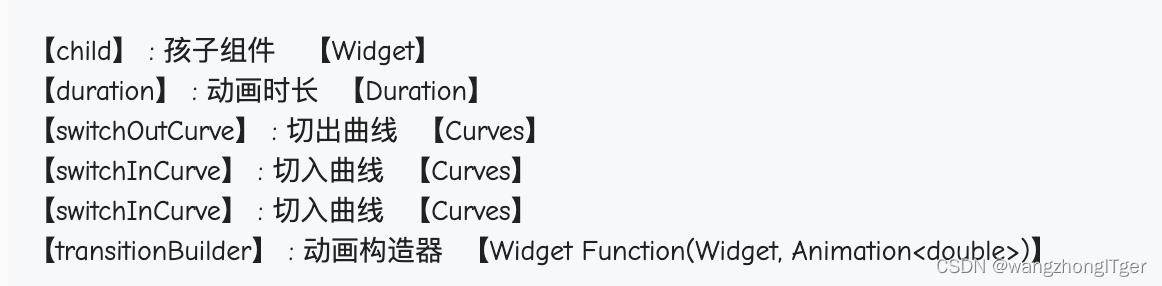
AnimatedSwitcher在child内组件发生变化时会有动画伴随,如从Image组件变成Text组件这样,但是比如Text组件只改变其中文字时是默认没有变化的,因为系统认为它是同一个组件,并没有发生变化。这时候可以通过key来让其判定是否是同一类组件,设置不同的key就可以区分组件视其为组件发生切换播放动画。模式是渐变动画,也可以以通过transitionBuilder属性来自定义动画样式。
代码如下:
AnimatedContainer(
duration: const Duration(milliseconds: 2000),
width: 0.5.sw,
height: cHeight.h,
decoration: BoxDecoration(
// color: Colors.blue,
borderRadius: BorderRadius.circular(50),
boxShadow: const [
BoxShadow(
spreadRadius: 10,
blurRadius: 20,
color: Colors.yellowAccent)
],
gradient: const LinearGradient(
begin: Alignment.topLeft,
stops: [0.2, 0.8],
colors: [Colors.lightGreen, Colors.orange])),
child: AnimatedSwitcher(
duration: const Duration(seconds: 2),
transitionBuilder: (widget, animation) {
return FadeTransition(
opacity: animation,
child: ScaleTransition(
scale: animation,
child: widget,
),
);
},
child: Text(
'Hello',
// key: ValueKey('Hi'),
key: UniqueKey(),
textAlign: TextAlign.center,
style: TextStyle(
color: Colors.white,
fontSize: 200.sp,
fontWeight: FontWeight.bold),
),
),
),
如果只有两个控件切换就可以使用
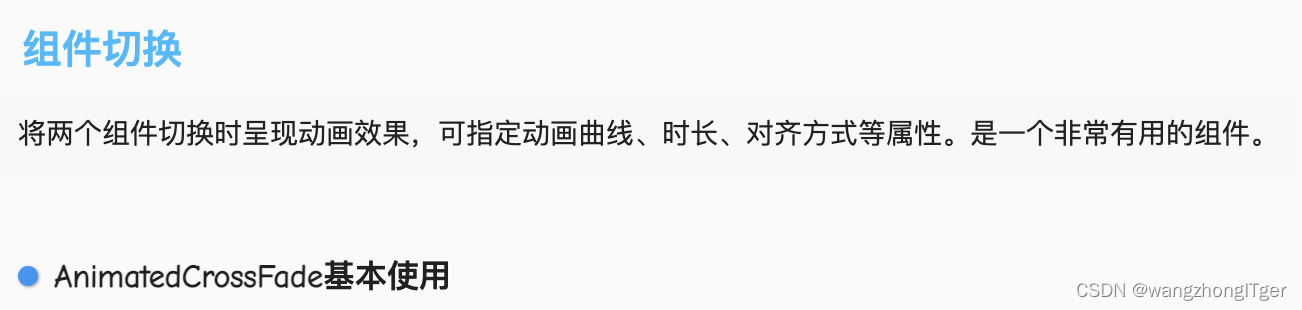
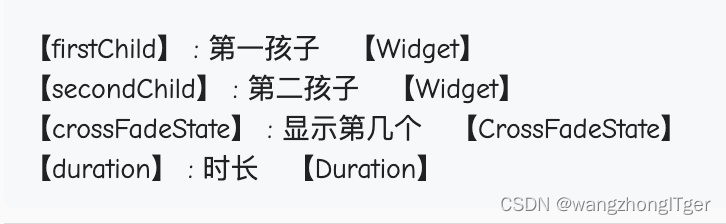

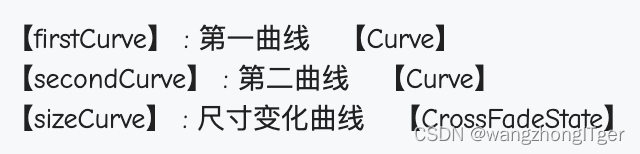
该控件通过crossFadeState参数来变化显示第几个控件并进行两个控件之间动画的切换。
代码如下:
AnimatedCrossFade
(
firstChild: Text(
'Hello',
textAlign: TextAlign.center,
style: TextStyle(
color: Colors.white,
fontSize: 200.sp,
fontWeight:
FontWeight
.
bold
)
,
),
secondChild: const Text(
'World',
textAlign: TextAlign.center,
style: TextStyle(
color: Colors.white,
fontSize: 50,
fontWeight: FontWeight.bold),
),
crossFadeState: CrossFadeState.showFirst,
duration: const Duration(seconds: 2)),
)
,
3.更多动画控件即曲线(Curves)
相应的还有其的动画控件:
AnimatedOpacity


通过改变opacity属性的值来实现一个简单的透明度动画,值范围在0.0-1.0之间。
AnimatedOpacity(
opacity: 1,
duration: Duration(seconds: 2),
child: Text(
'Hello',
textAlign: TextAlign.center,
style: TextStyle(
color: Colors.white,
fontSize: 200.sp,
fontWeight: FontWeight.bold),
))
AnimatedPadding

通过改变padding的值来实现组件相较于原始位置的的移动动画。
AnimatedPadding(
padding: EdgeInsets.only(
top: paddingValue, left: paddingValue),
child: Container(
width: 100,
height: 100,
color:
Colors
.
blue
,
),
duration: Duration(
seconds: 2,
)
)
,
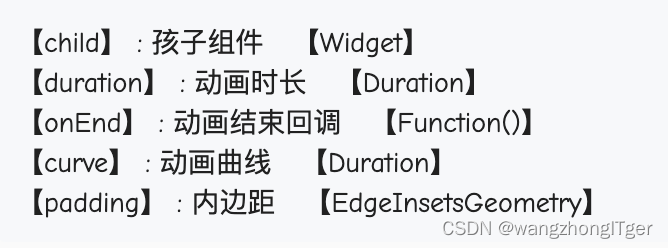
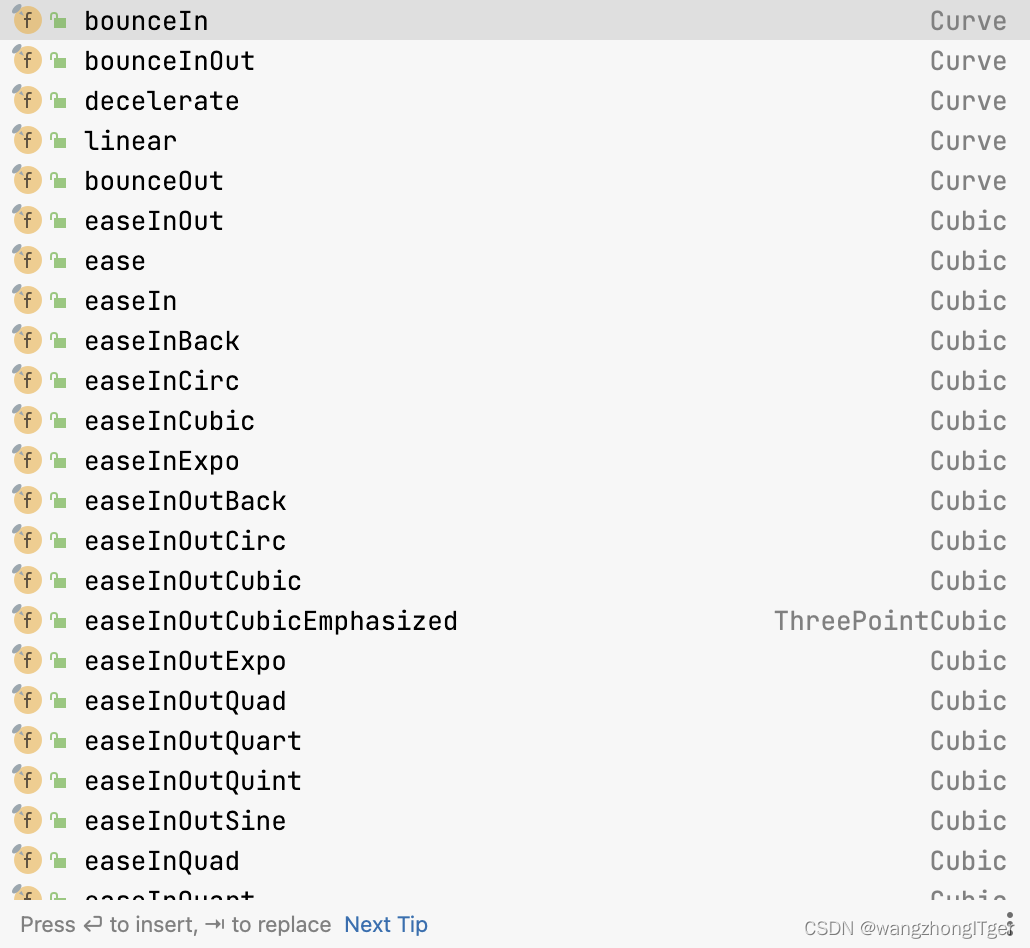
Curves
这些控件中都有一个参数就是curve,curve属性是用来控制动画曲线,默认是
Curves
.
linear,一种线性变化.
也可以是下面以及更多 的属性中的一种,根据自己需要选择。
补充:
4.内置的还不够?万能的补间动画(
TweenAnimationBuilder
)
TweenAnimationBuilder可以通过tween一个区间值,duration完成时间来构建想要的动画,原理就是在设定的duration时间内完成Tween区间值的变动,然后在builder构造中返回的widget通过对value值的监听变动来执行动画。
并且,通过Transform为我们提供的scale、rotate、translate可以快速完成缩放、旋转、平移动画。


children: [
TweenAnimationBuilder(
tween: Tween(begin: 0.0, end: 1.0),
duration: const Duration(seconds: 3),
builder: (BuildContext context, double value, Widget? child) {
return Opacity(
opacity: value,
child: Container(
width: 100,
height: 100,
color: Colors.blue,
),
);
},
),
Container(
margin: const EdgeInsets.only(top: 10),
height: 100,
width: 100,
color: Colors.green,
child: TweenAnimationBuilder(
tween: Tween(begin: 30.0, end: 80.0),
duration: const Duration(seconds: 3),
builder: (BuildContext context, double value, Widget? child) {
return Text(
'Hi',
style: TextStyle(fontSize: value, color: Colors.white),
);
},
),
),
Container(
margin: const EdgeInsets.only(top: 10),
height: 100,
width: 100,
color: Colors.red,
child: TweenAnimationBuilder(
tween: Tween(begin: 1.0, end: 2.0),
duration: const Duration(seconds: 3),
builder: (BuildContext context, double value, Widget? child) {
return Center(
child: Transform.scale(
// transform:Matrix4,
scale: value,
child: const Text(
'I',
style: TextStyle(fontSize: 30, color: Colors.white),
),
),
);
},
),
),
Container(
margin: const EdgeInsets.only(top: 10),
height: 100,
width: 100,
color: Colors.red,
child: TweenAnimationBuilder(
tween: Tween(begin: 0.0, end: 6.28),
duration: const Duration(seconds: 3),
builder: (BuildContext context, double value, Widget? child) {
return Center(
child: Transform.rotate(
// transform:Matrix4,
angle: value,
child: const Text(
'I',
style: TextStyle(fontSize: 50, color: Colors.white),
),
),
);
},
),
),
Container(
margin: const EdgeInsets.only(top: 10),
height: 100,
width: 100,
color: Colors.red,
child: TweenAnimationBuilder(
tween: Tween(begin: 0.0, end: 10.0),
duration: const Duration(seconds: 3),
builder: (BuildContext context, double value, Widget? child) {
return Center(
child: Transform.translate(
// transform:Matrix4,
offset:
Offset
(
value, value
)
,
child: const Text(
'I',
style: TextStyle(fontSize: 50, color: Colors.white),
),
)
,
);
}
,
),
),
]
,
5.实例(上) 翻滚吧,计数器
6.一枚动画控件的诞生
int value = 7.5;
final whole = value ~/1;
结果
value = 7
这里~/是 dart中的一种特定语法,表示取整。
import 'package:flutter/material.dart';
///author: wangzhong
///create: 2022-11-21 12:55
///Description: xxxx
class AnimatedCounter extends StatelessWidget {
final int count;
final
Duration
duration
;
const AnimatedCounter({required this.count, required this.duration});
@override
Widget build(BuildContext context) {
return TweenAnimationBuilder(
tween: Tween(end: count.toDouble()),
duration: duration,
builder: (BuildContext context, double value, Widget? child) {
final whole = value ~/ 1;
final decimal = value - whole;
// print('${whole} + ${decimal}');
return Stack(
children: [
Positioned(
top: -100 * decimal, // 0 → -100
child: Opacity(
opacity: 1 - decimal, //1 → 0
child: Text(
'$whole',
style: TextStyle(fontSize: 100),
),
),
),
Positioned(
top: (1 - decimal) * 100, // 100 → 0
child: Opacity(
opacity: decimal, //0 → 1
child: Text(
'${whole + 1}',
style: TextStyle(fontSize: 100),
),
),
)
],
);
},
);
}
}
第二章 显示(手动控制)动画
第一章所提到的控件是系统为我们提供的动画控件,他们都是从一种状态到另一种状态,我没办法直接控制动画结束开始重复等操作。所以系统也提供了各种Transition组件来让我们实现这些需求。
1.可无尽旋转的显示动画
2.动画控制器到底是个什么东西
RotationTransition(旋转动画)、
FadeTransition(透明度动画)、
ScaleTransition(缩放动画)分别要传入turns、opacity、scale参数,他们的参数类型是
Animation
<
double
>类型,而所以需要配合AnimationController,
AnimationController就是继承自Animation<double>类。AnimationController实例化时需要传入一个vsync参数,通常情况下我们只需要让类继承SingleTickerProvederStateMixin就可以,tick是秒针滴答滴答的意思,这里我们就可以理解为我们的屏幕刷新率是多少帧,比如现在的120帧或者60帧,当我们的屏幕在刷新的时候就会产生一个tick,60帧的屏幕就是每秒要tick60下,而120次的就是每秒会有120次tick,而我们的类继承
SingleTickerProvederStateMixin时每次tick就会进行回调。当前控件只是用可一个ticker所以只需要
SingleTickerProvederStateMixin就可以,还有其他的实现类按需使用。 此时我们将vsync参数设为当前类实例就可以得到屏幕刷新的数据了,
当我们配合duration参数动画执行时,就可以在listener中通过后去controller获取value值来获取当前数据了,而控件的内部实际也就是根据value值来实现动画的。还有lowerbound和upperbound参数来控制起始数值和Tween中的start和end一样。
下面是代码实例
import 'package:flutter/material.dart';
///author: wangzhong
///create: 2022-11-21 16:52
///Description: xxxx
class XxTransitionExample extends StatefulWidget {
XxTransitionExample({Key? key}) : super(key: key);
@override
_XxTransitionExampleState createState() => _XxTransitionExampleState();
}
class _XxTransitionExampleState extends State<XxTransitionExample>
with SingleTickerProviderStateMixin {
bool flag = false;
late AnimationController _controller;
@override
void initState() {
_controller = AnimationController(
vsync: this,
duration: const Duration(seconds: 3),
// : 3,
// upperBound: 5
);
_controller.addListener(() {
print(_controller.value);
});
super.initState();
}
@override
void dispose() {
_controller.dispose();
super.dispose();
}
@override
Widget build(BuildContext context) {
return Scaffold(
appBar: AppBar(
title: const Text('XxTransitionExample'),
// titleTextStyle: TextStyle(fontSize: 20,color: Colors.black),
),
body: Container(
width: double.infinity,
child: Column(
children: [
RotationTransition(
turns: _controller,
child: const Icon(
Icons.refresh,
size: 100,
)),
FadeTransition(
opacity: _controller,
child: const Icon(
Icons.refresh,
size: 100,
),
),
ScaleTransition(
scale: _controller,
child: const Icon(
Icons.refresh,
size: 100,
),
),
],
),
),
floatingActionButton: FloatingActionButton(
onPressed: () {
setState(() {
if (flag) {
_controller.stop();//动画暂停播放,控件保持当前状态,当动画继续开始时继续由当前状态播放动画
// _controller.reset();//回到控件初始状态
} else {
_controller.repeat();//重复从初始状态执行动画
// _controller.reverse();//反复播放动画,从开始到结束状态再到开始再到结束这要周而复始
}
flag = !flag;
});
},
child: Icon(flag ? Icons.pause : Icons.play_arrow),
),
);
}
}
3.控制器串联补间(Tween)和曲线
如下述买大SlideTransition中,需要传入position值来实现位移动画,它是一个Animation<Offset>属性的参数,这里我们直接传AnimationController和Tween都是不行的。所以需要借助AnimationController的drive驱动Tween转变成为所需类型参数才可以运行动画。
通过Tween的animate方法也可以进行转化。同时,我们还可以解除chain函数来实现一个串联的叠加的动画效果。
SlideTransition(
// position: _controller
// .drive(Tween(begin: Offset(0, 0), end: Offset(0.5, 0))),
position: Tween(begin: Offset(0, 0), end: Offset(0.5, 0))
.chain(Tween(begin: 0, end: 2.0))
.chain(CurveTween(curve: Interval(0.1, 1.0)))
.chain(CurveTween(curve: Curves.bounceInOut))
.animate
(
_controller
)
,
child: const Icon(
Icons.refresh,
size: 100,
),
)
4.交错动画! 管理区间和曲线
基于上一节中提到的一个参数curve中的一个Interval(begin,end)我们来实现一个交错动画。
import 'package:flutter/material.dart';
import 'package:flutter_screenutil/flutter_screenutil.dart';
///author: wangzhong
///create: 2022-11-21 23:56
///Description: xxxx
class InterlacedAnimationExample extends StatefulWidget {
InterlacedAnimationExample({Key? key}) : super(key: key);
@override
_InterlacedAnimationExampleState createState() =>
_InterlacedAnimationExampleState();
}
class _InterlacedAnimationExampleState extends State<InterlacedAnimationExample>
with SingleTickerProviderStateMixin {
late final AnimationController _controller;
@override
void initState() {
// TODO: implement initState
_controller =
AnimationController(vsync: this, duration: Duration(seconds: 1))
..repeat(reverse: true);
super.initState();
}
@override
void dispose() {
// TODO: implement dispose
_controller.dispose();
super.dispose();
}
@override
Widget build(BuildContext context) {
return Scaffold(
appBar: AppBar(
title: Text('InterlacedAnimationExample'),
// titleTextStyle: TextStyle(fontSize: 20,color: Colors.black),
),
body: Container(
width: double.infinity,
margin: EdgeInsets.only(top: 20),
child: Column(
children: [
InterlacedSliding(
_controller, Colors.blue[100]!, Interval(0.0, 0.1)),
InterlacedSliding(
_controller, Colors.blue[200]!, Interval(0.1, 0.2)),
InterlacedSliding(
_controller, Colors.blue[300]!, Interval(0.2, 0.3)),
InterlacedSliding(
_controller, Colors.blue[400]!, Interval(0.3, 0.4)),
InterlacedSliding(
_controller, Colors.blue[500]!, Interval(0.4, 0.5)),
InterlacedSliding(
_controller, Colors.blue[600]!, Interval(0.5, 0.6)),
InterlacedSliding(
_controller, Colors.blue[700]!, Interval(0.6, 0.7)),
InterlacedSliding(
_controller, Colors.blue[800]!, Interval(0.7, 0.8)),
InterlacedSliding(
_controller, Colors.blue[900]!, Interval(0.8, 0.9)),
],
),
),
);
}
}
class InterlacedSliding extends StatelessWidget {
final AnimationController animationController;
final Color color;
final Interval interval;
InterlacedSliding(this.animationController, this.color, this.interval);
@override
Widget build(BuildContext context) {
return SlideTransition(
position: Tween(begin: Offset(-0.2, 0), end: Offset(0.2, 0))
.chain(CurveTween(curve: interval))
.chain(CurveTween(curve: Curves.bounceOut))
.animate(animationController),
child: Container(
width: 300,
height: 80,
color: color,
),
);
}
}
5.内置的又不够?万能的自定义动画
下面的代码中主要是有两点需要注意:
在我们使用AnimationBuilder组件来构建自定义动画时。
首先是动画值的获取方式
double height = Tween(begin: 100.0, end: 200.0).animate(_controller).value;
double width
=
Tween
(
begin:
200.0
, end:
300.0
)
.evaluate
(
_controller
)
;
还有一点就是对于没有动画的部分可以将其抽离至Builder之外的child函数中。
import 'package:flutter/material.dart';
///author: wangzhong
///create: 2022-11-22 07:57
///Description: xxxx
class AnimationBuilderExample extends StatefulWidget {
AnimationBuilderExample({Key? key}) : super(key: key);
@override
_AnimationBuilderExampleState createState() =>
_AnimationBuilderExampleState();
}
class _AnimationBuilderExampleState extends State<AnimationBuilderExample>
with SingleTickerProviderStateMixin {
late final AnimationController _controller;
@override
void initState() {
// TODO: implement initState
_controller =
AnimationController(vsync: this, duration: const Duration(seconds: 5))
..repeat(reverse: true);
super.initState();
}
@override
void dispose() {
// TODO: implement dispose
_controller.dispose();
super.dispose();
}
@override
Widget build(BuildContext context) {
return Scaffold(
appBar: AppBar(
title: const Text('AnimationBuilderExample'),
// titleTextStyle: TextStyle(fontSize: 20,color: Colors.black),
),
body: Center(
child: AnimatedBuilder(
animation: _controller,
builder: (BuildContext context, Widget? child) {
//获取动画变化值方式一
double height =
Tween(begin: 100.0, end: 200.0).animate(_controller).value;
//获取动画变化值方式二
double width =
Tween(begin: 200.0, end: 300.0).evaluate(_controller);
return Opacity(
opacity: _controller.value,
child: Container(
color: Colors.blue,
height:
Tween(begin: 100.0, end: 200.0).animate(_controller).value,
width: Tween(begin: 200.0, end: 300.0).evaluate(_controller),
child:
child, //外部的Opacity和Container都有动画效果,而内部的文字始终没有改变没有动画效果,所以此时可以进行优化,将没有动画播放的部分提到外面减少绘制,节约性能 。
// child: Center(
// child: AnimatedRotation(
// turns: _controller.value,
// duration: Duration(seconds: 5),
// child: Container(
// width: 80,
// height: 80,
// decoration: BoxDecoration(
// borderRadius: BorderRadius.circular(800),
// gradient: const LinearGradient(colors: [
// Colors.orange,
// Colors.green,
// Colors.black,
// Colors.blue,
// Colors.red
// ])),
// child: Container(child: child),
// ),
// ),
// ),
),
);
},
child: const Center(
//不需动画的部分为了提升性能节约资源可以放在这里,然后在builder函数中引用
child: Text(
'Hi',
style: TextStyle(
fontSize: 30,
color: Colors.white,
fontWeight: FontWeight.bold),
),
),
),
),
);
}
}
6.实例(上) 478呼吸法的动画演示
7.实例(下) 多个动画控制器的示范
本实例就是对前期所学的以个运用,在这个案例里也可以看到使用多个AnimationController的情况,必须使用
TickerProviderStateMixin,而不能用Single
TickerProviderStateMixin,否则就会报错。
import 'package:flutter/material.dart';
///author: wangzhong
///create: 2022-11-22 20:06
///Description: xxxx
class CaseOf478AnimationExample extends StatefulWidget {
CaseOf478AnimationExample({Key? key}) : super(key: key);
@override
_CaseOf478AnimationExampleState createState() =>
_CaseOf478AnimationExampleState();
}
class _CaseOf478AnimationExampleState extends State<CaseOf478AnimationExample>
with TickerProviderStateMixin {
late AnimationController _animationController;
late AnimationController _opacityController;
@override
void initState() {
// TODO: implement initState
_animationController = AnimationController(vsync: this);
_opacityController = AnimationController(vsync: this);
super.initState();
}
@override
void dispose() {
// TODO: implement dispose
_animationController.dispose();
_opacityController.dispose();
super.dispose();
}
@override
Widget build(BuildContext context) {
return Scaffold(
appBar: AppBar(
title: Text('CaseOf478AnimationExample'),
// titleTextStyle: TextStyle(fontSize: 20,color: Colors.black),
),
body: Center(
child: FadeTransition(
opacity: Tween(begin: 1.0, end: 0.5).animate(_opacityController),
child: AnimatedBuilder(
animation: _animationController,
builder: (BuildContext context, Widget? child) {
return Container(
width: 300,
height: 300,
decoration: BoxDecoration(
color: Colors.blue,
gradient: RadialGradient(stops: [
_animationController.value,
_animationController.value + 0.1
], colors: [
Colors.blue[600]!,
Colors.blue[100]!
]),
shape: BoxShape.circle),
);
},
),
),
),
floatingActionButton: FloatingActionButton(onPressed: () async {
_animationController.duration = Duration(seconds: 4);
_animationController.forward();
await Future.delayed(Duration(seconds: 4));
_opacityController.duration = Duration(milliseconds: 1750);
_opacityController
.repeat
(
reverse:
true
)
;
await Future.delayed(Duration(seconds: 7));
_opacityController.reset();
_animationController.duration = Duration(seconds: 8);
_animationController.reverse();
// _animationController.reset();
}),
);
}
}
第三章 其他动画
1.Flutter动画背后的机制和原理
首先我们这里可以看下隐式动画AnimatedXx组件的源码。
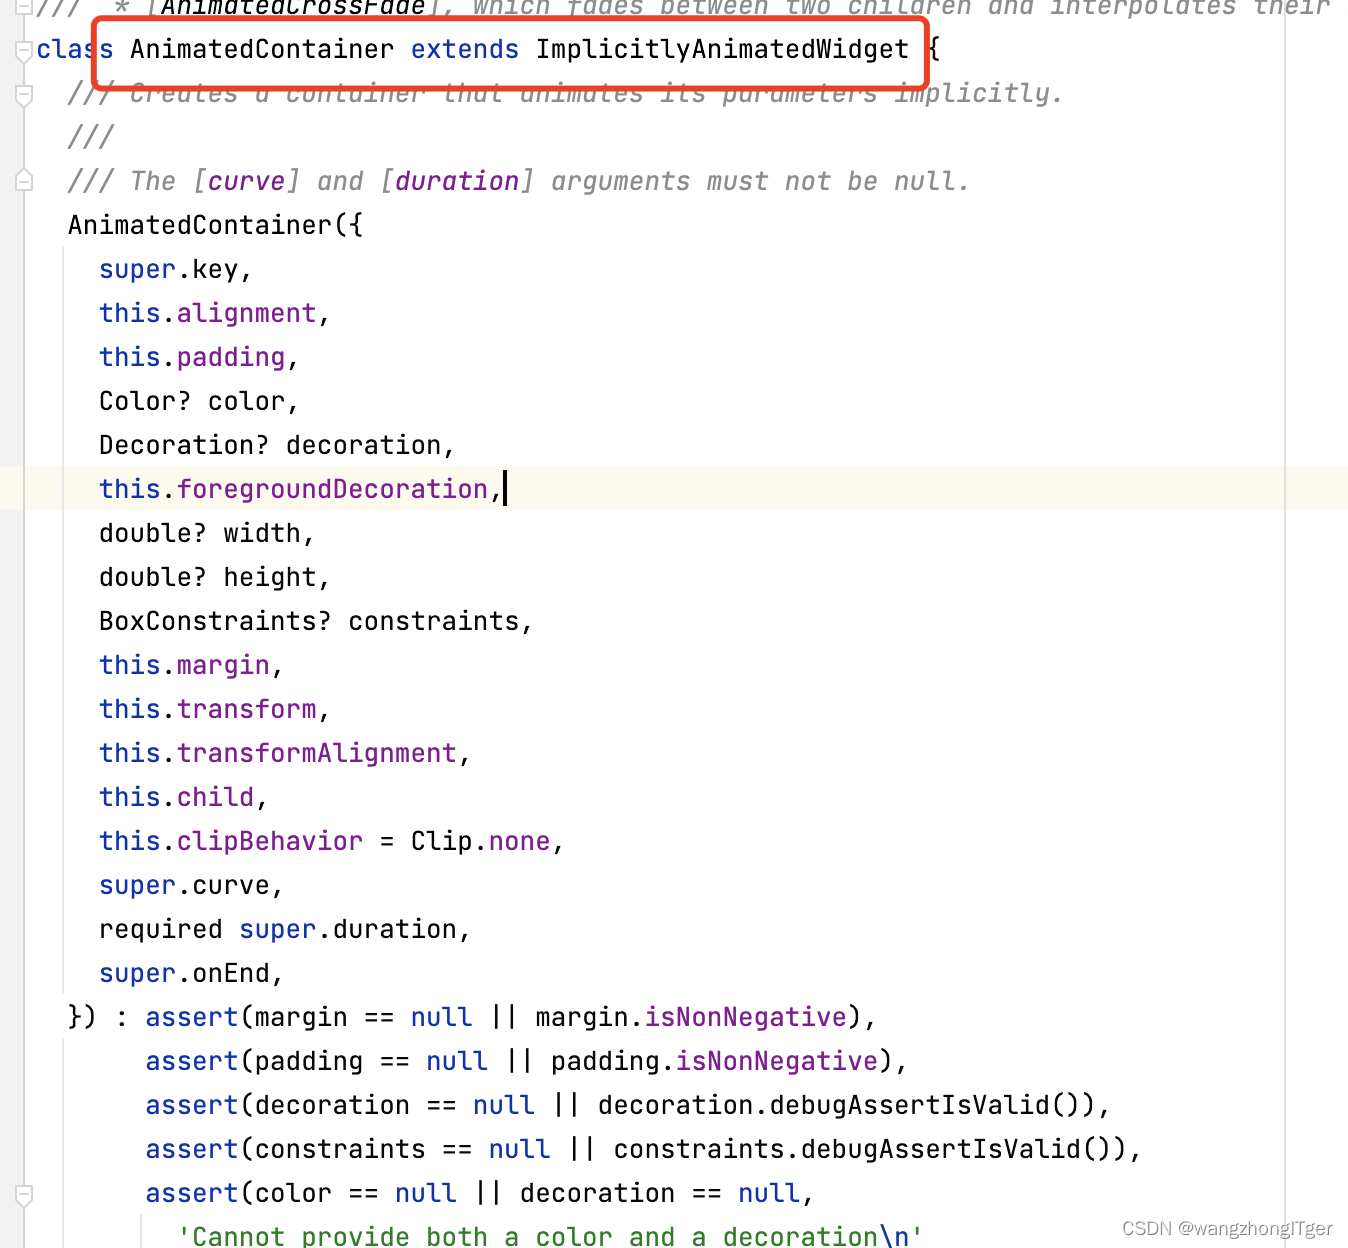
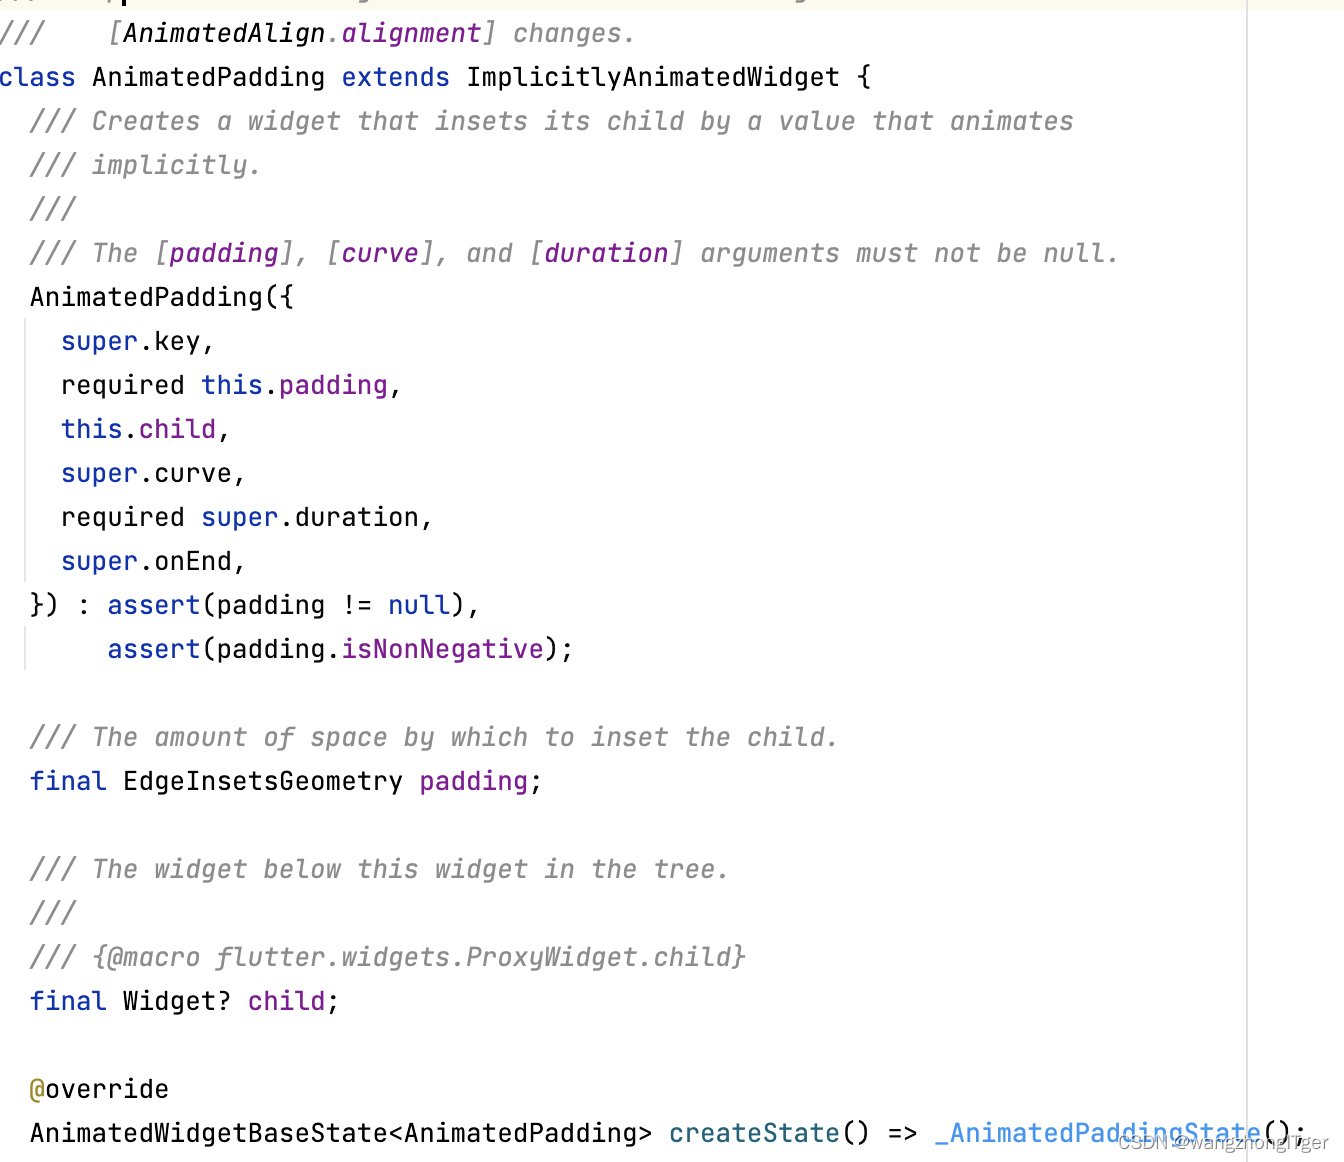
可以看到该类型的组件都是继承自
ImplicitlyAnimatedWidget,
意思就是隐式动态小部件。继续看其源码:
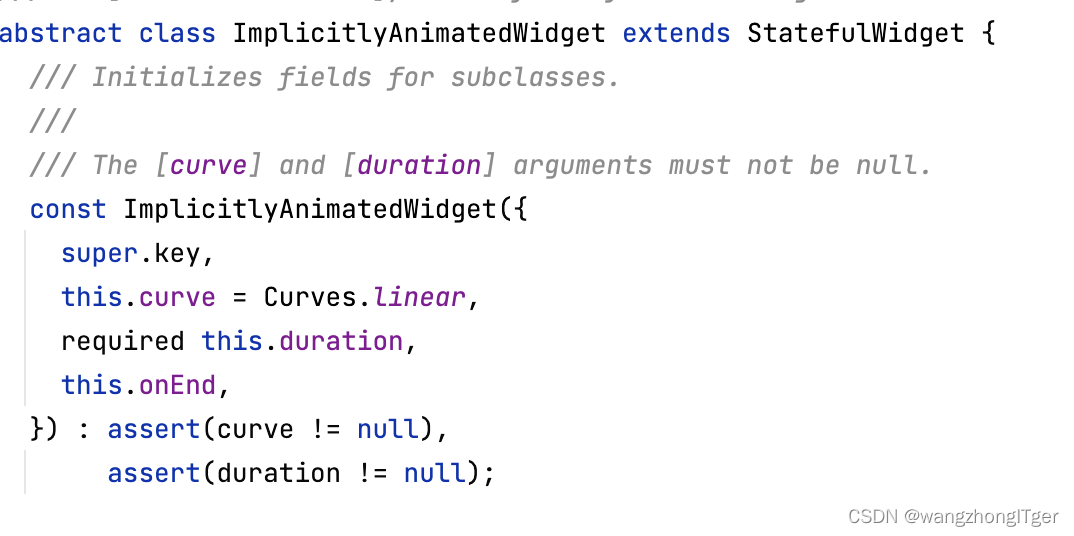
可以看到它也是一个StatefulWidget
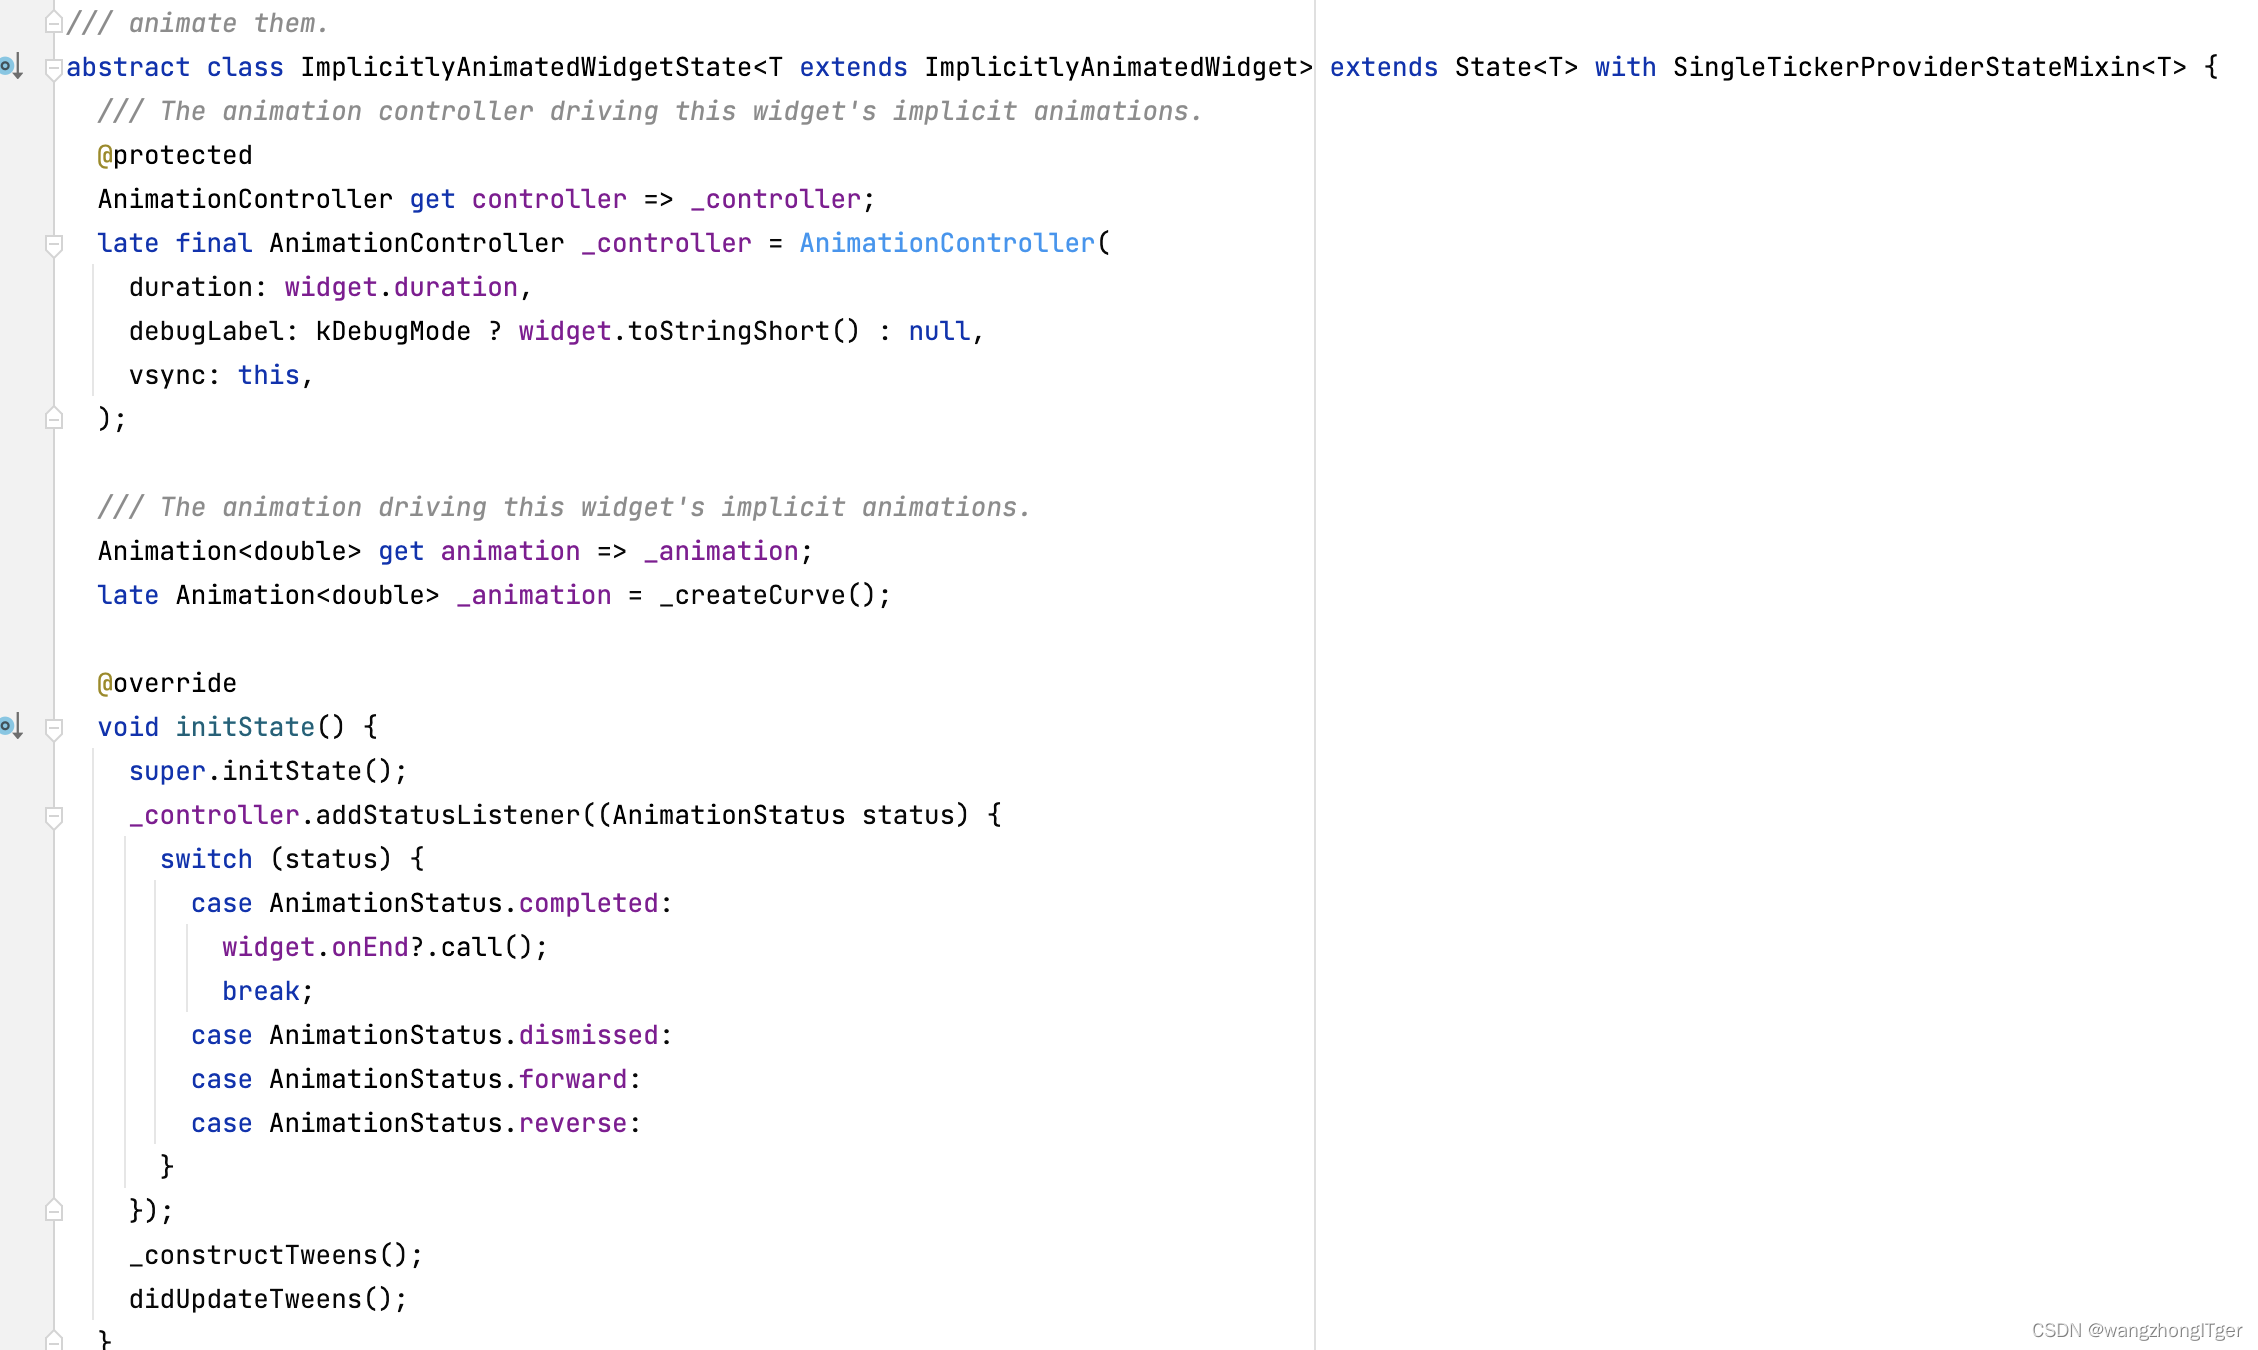
可以看到源码中也是有一个AnimationController在背后来帮我们完成动画 。
接下来我们来看一下显示动画的原理机制。
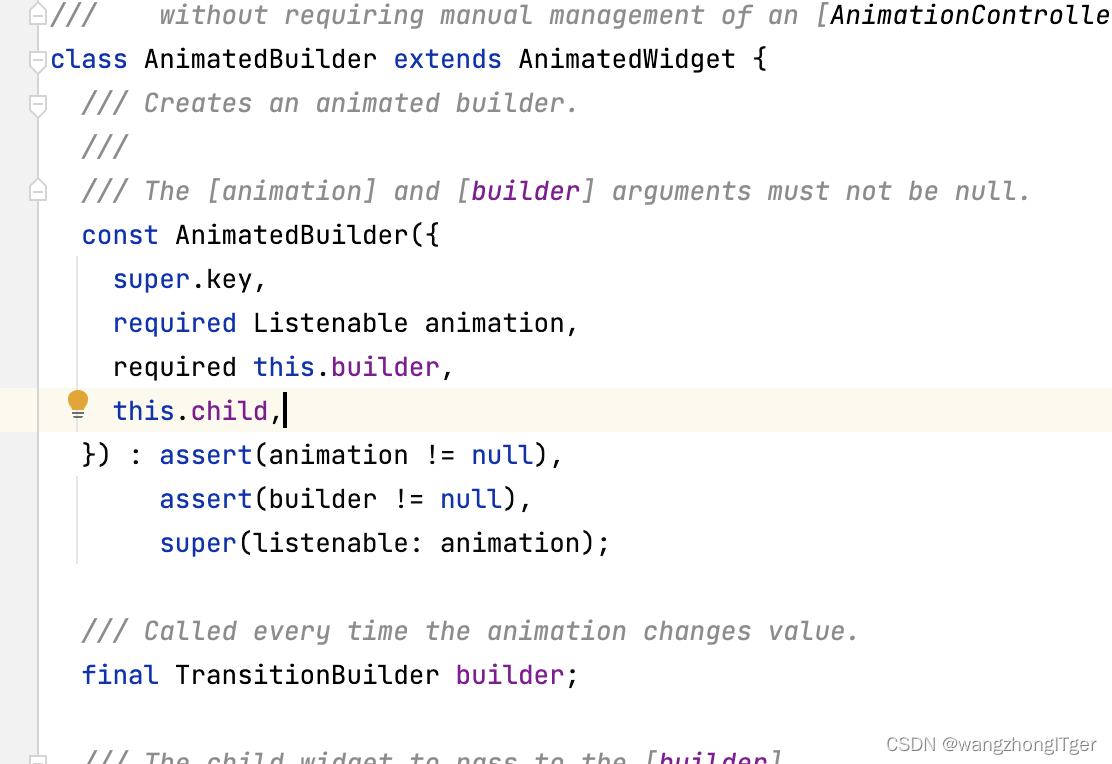
我们来看AnimatedBuilder的源码传入的是一个builder类和一个animation的Listenable类,Listenable是一个监听类
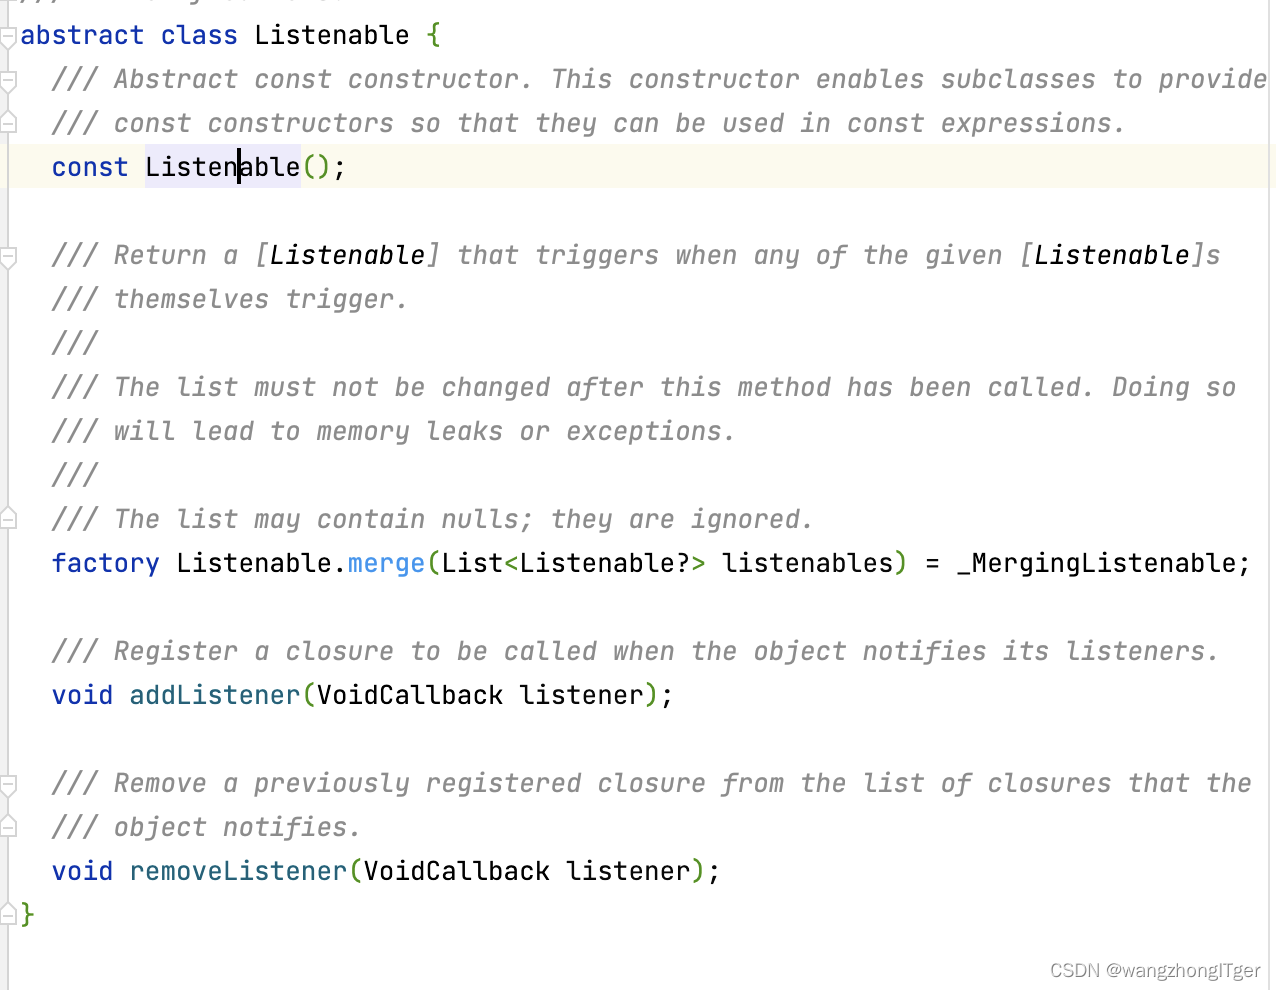
我们去看AnimatedBuilder的父类AnimatedWidget所传入的Listenable
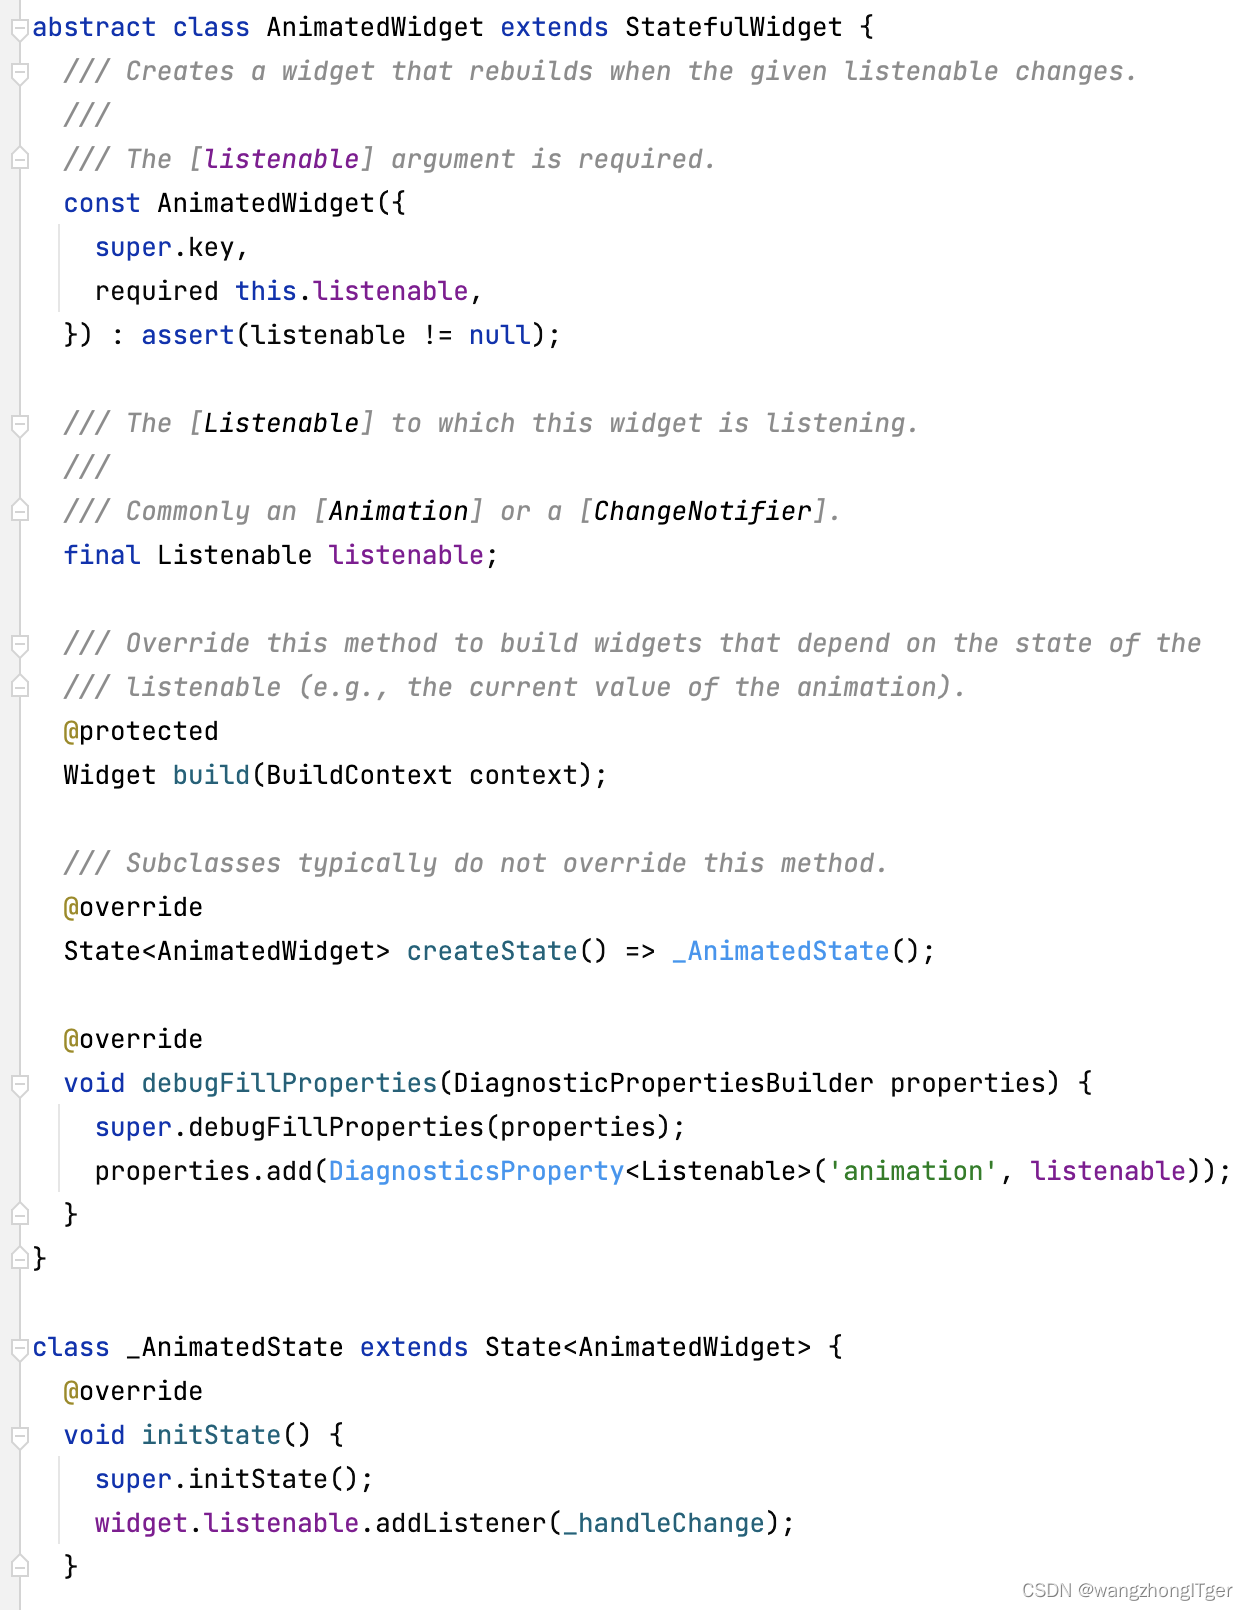
然后动画值发生改变时,调用了_handleChange方法
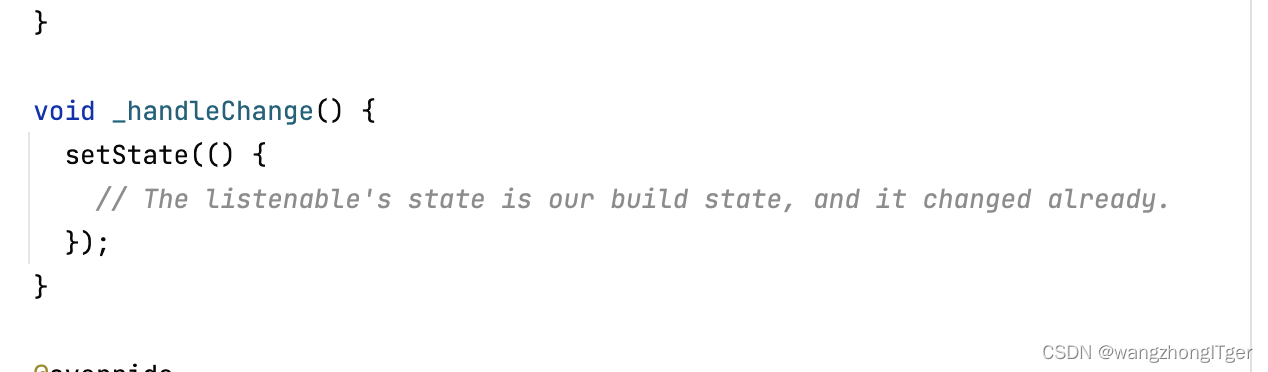
而这个方法实际上就是调用了setState方法 。
所以无论是隐式动画还是显示动画,终归都是通过监动画控制器 ,当动画的数值发生变化 就调用setState方法让控件重新渲染。
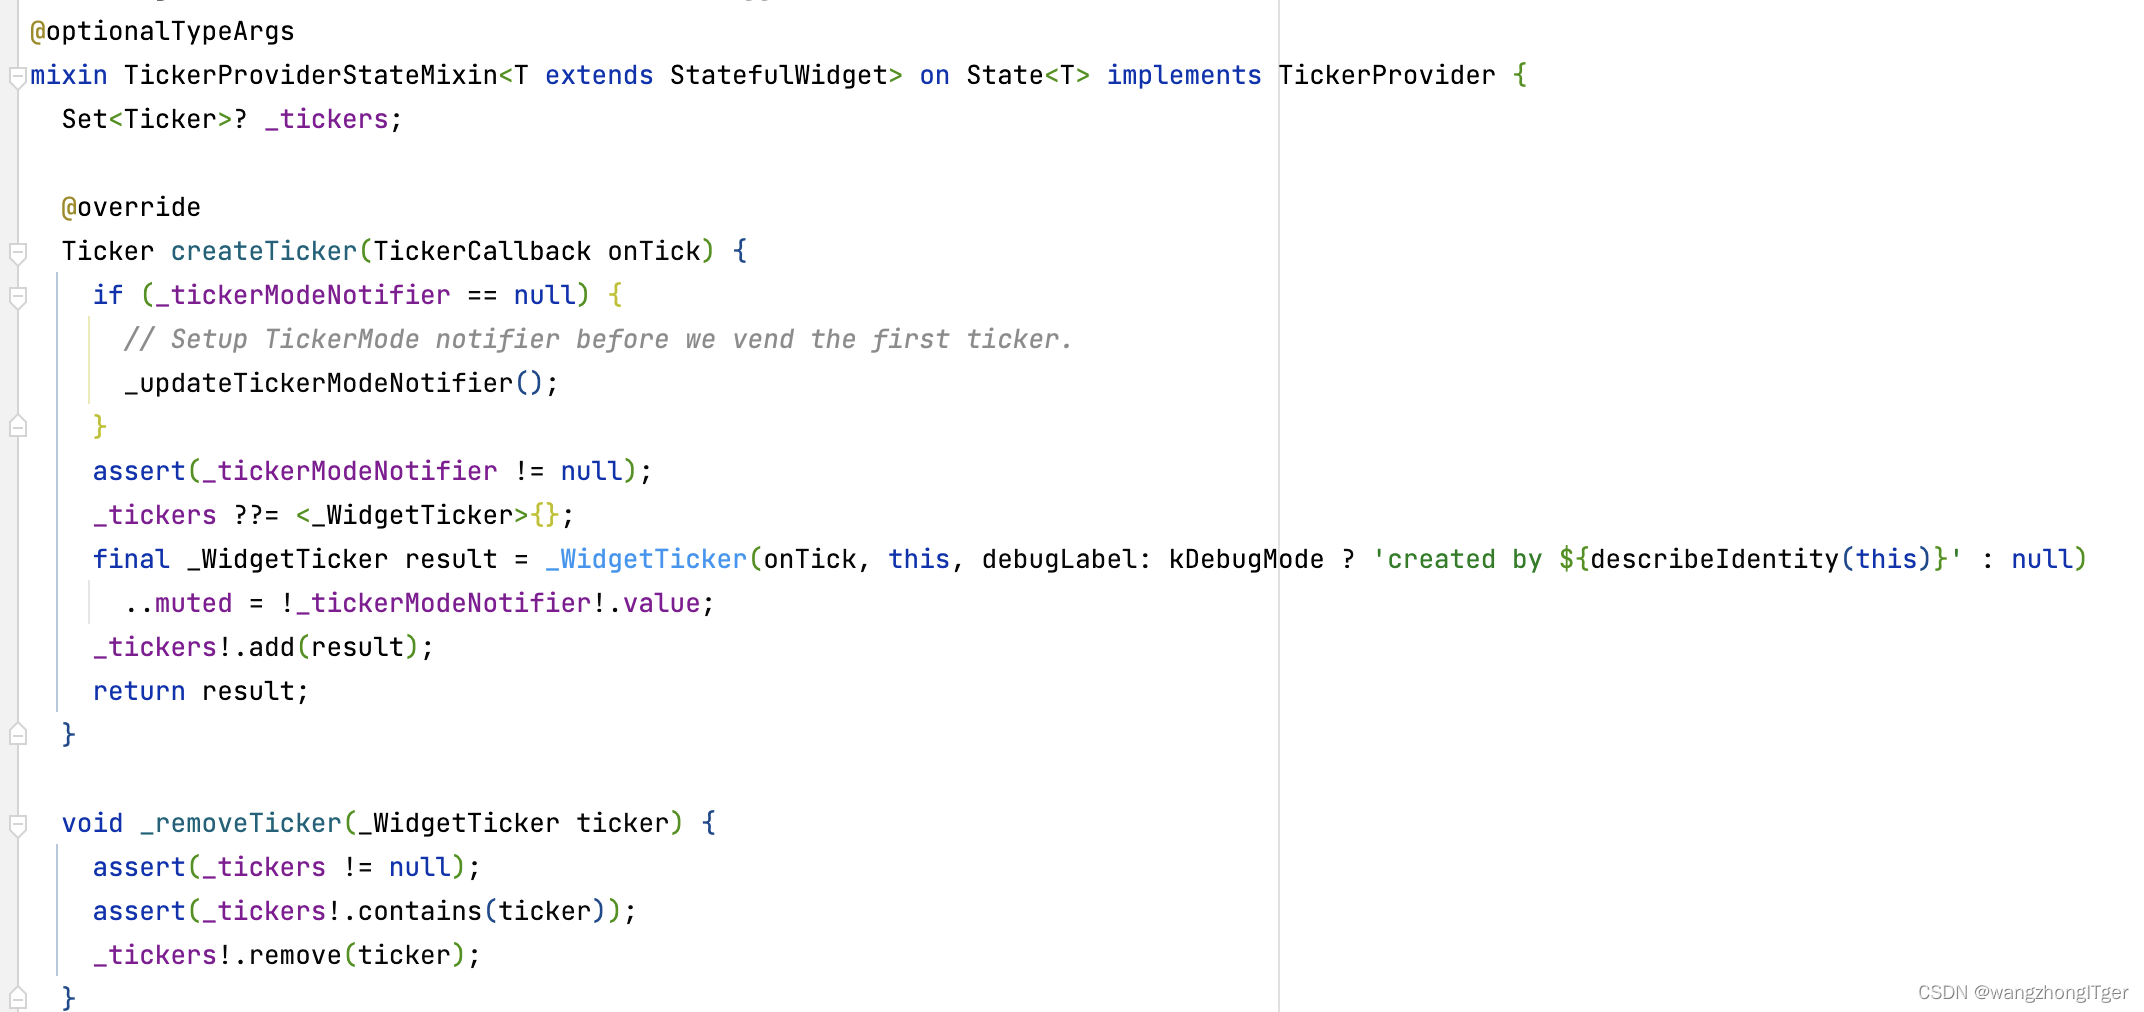
我们也可以看到不论显示动画还是隐式动画也都有Ticker的存在 。Ticker每当屏幕刷新的时候就会有一个回传。
我们继承实现
TickerProviderStateMixin类时源码中可以看到就存在Ticker。
我们也可以自己创建一个Ticker,如下所示看到的日志就是Ticker开启后所打印的日志
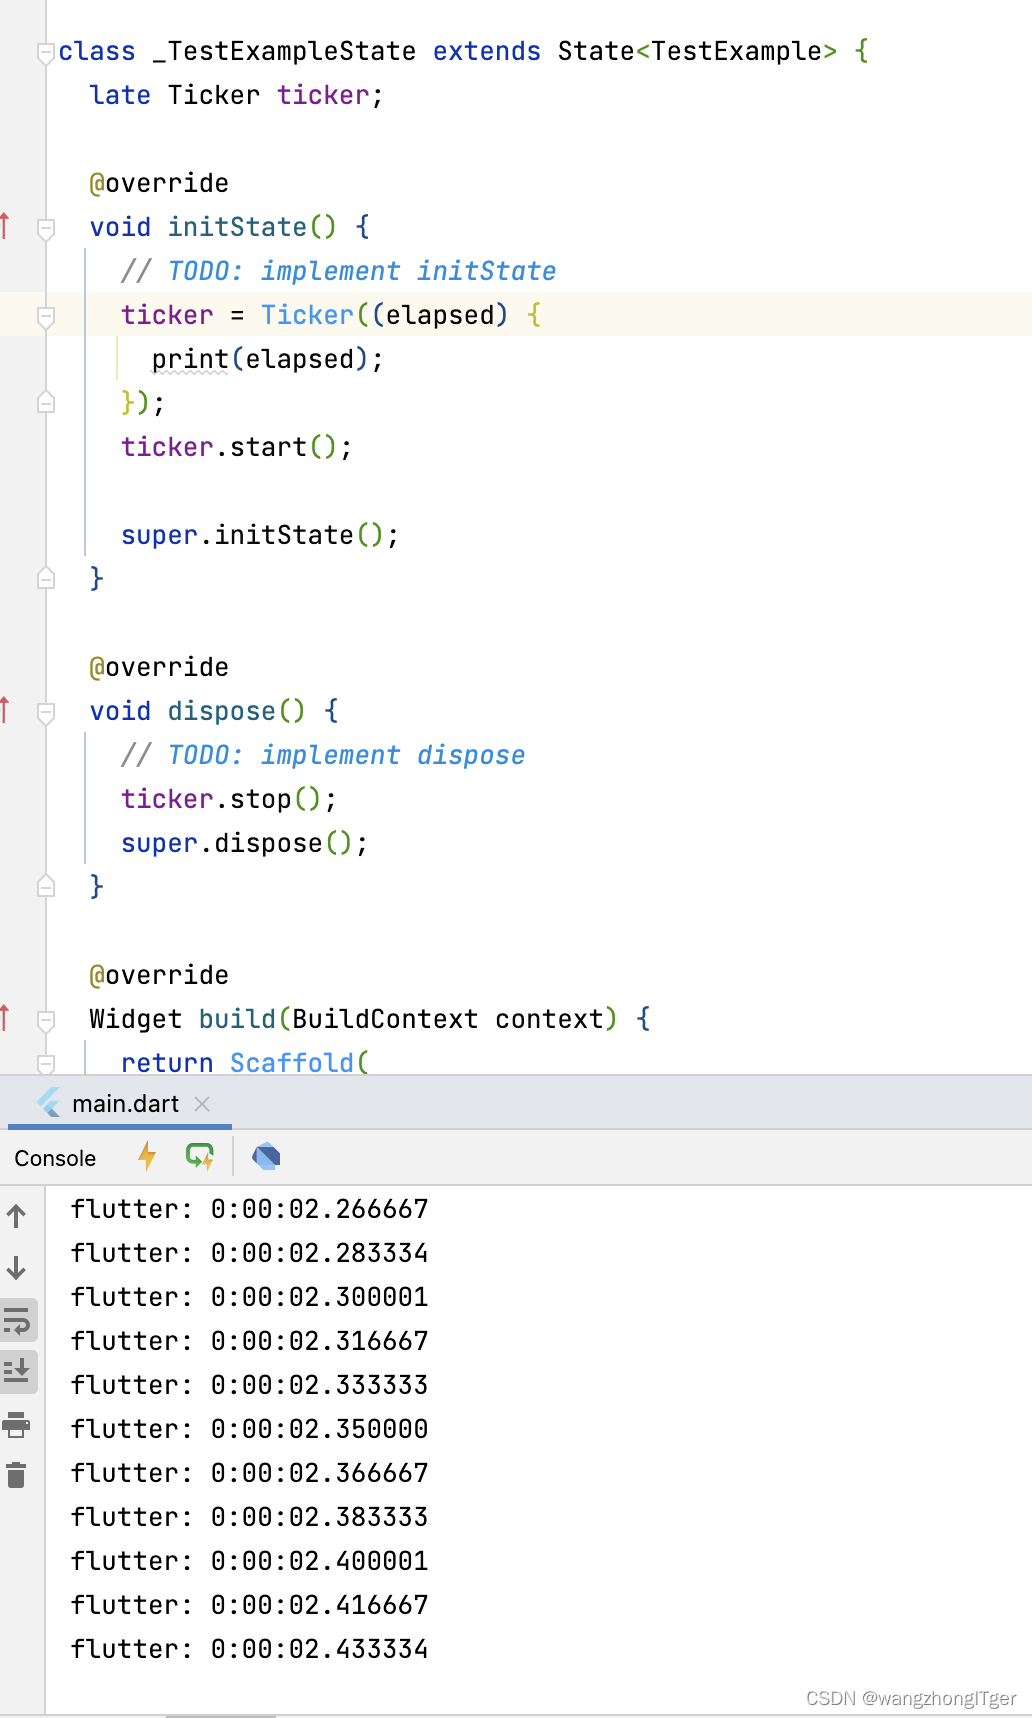
所以上图所示的我们也可以利用他来自己实现动画,但是考虑到系统已经为我们封装好了一系列的插件,以及多种情况的考虑,所以不建议自己来实现这个形式的动画,因此这里只做了解。
2.Hero动画(主动画)
下面面就是一段Hero动画的事例,需要传入tag参数,最后衔接的两端的控件是一样的,否则效果不太友好。
还要注意的一点的是高亮显示的部分,可以控制Hero动画的执行时间。
import 'package:flutter/material.dart';
import 'package:get/get.dart';
import 'package:yhm_app/page/test_example/animation_example/hero/hero_detail.dart';
import 'package:yhm_app/utils/resource_utils.dart';
import 'package:flutter/scheduler.dart' show timeDilation;
///author: wangzhong
///create: 2022-11-23 15:28
///Description: xxxx
class HeroAnimation extends StatefulWidget {
HeroAnimation({Key? key}) : super(key: key);
@override
_HeroAnimationState
createState
()
=>
_HeroAnimationState
()
;
}
class _HeroAnimationState extends State<HeroAnimation> {
@override
void initState() {
// TODO: implement initState
// timeDilation = 1;
super.initState();
}
@override
Widget build(BuildContext context) {
return Scaffold(
appBar: AppBar(
title: Text('HeroAnimation'),
// titleTextStyle: TextStyle(fontSize: 20,color: Colors.black),
),
body: Container(
width: double.infinity,
child: GridView.count(
crossAxisCount: 5,
children: List.generate(7, (index) {
final path = ResourceUtils.assetJpg('banner${index + 1}');
return GestureDetector(
onTap: () {
Get.to(HeroDetail(), arguments: path);
},
child: Hero(tag: path, child: Image.asset(path)),
);
}),
),
),
);
}
}
import 'package:flutter/material.dart';
import 'package:get/get.dart';
///author: wangzhong
///create: 2022-11-23 16:24
///Description: xxxx
class HeroDetail extends StatelessWidget {
HeroDetail({Key? key}) : super(key: key);
@override
Widget build(BuildContext context) {
return Scaffold(
appBar: AppBar(
title: Text('HeroDetail'),
// titleTextStyle: TextStyle(fontSize: 20,color: Colors.black),
),
body: Container(
child: Column(
mainAxisAlignment: MainAxisAlignment.center,
crossAxisAlignment: CrossAxisAlignment.start,
children: [
Hero(tag: Get.arguments, child: Image.asset(Get.arguments)),
Padding(
padding: EdgeInsets.all(20),
child: Text(
'测试标题',
style: TextStyle(fontSize: 40, fontWeight: FontWeight.bold),
),
),
Padding(
padding: EdgeInsets.symmetric(horizontal: 30, vertical: 10),
child:
Text
(
'测试文本测试文本测试文本测试文本测试文本测试文本测试文本测试文本测试文本测试文本测试文本测试文本测试文本测试文本测试文本测试文本测试文本测试文本测试文本测试文本测试文本测试文本测试文本测试文本测试文本测试文本测试文本测试文本测试文本测试文本测试文本测试文本测试文本测试文本测试文本测试文本测试文本测试文本测试文本测试文本测试文本测试文本测试文本测试文本测试文本测试文本测试文本测试文本测试文本测试文本测试文本测试文本',
style: TextStyle(fontSize: 20),
),
)
],
),
),
);
}
}
3.直接操作底层的CutomPainter
这里直接通过一个事例来进行了解,效果如下:
代码如下:
import 'dart:math';
import 'package:flutter/material.dart';
///author: wangzhong
///create: 2022-11-23 18:39
///Description: xxxx
class Customepainterexample extends StatefulWidget {
Customepainterexample({Key? key}) : super(key: key);
@override
_CustomepainterexampleState createState() => _CustomepainterexampleState();
}
class _CustomepainterexampleState extends State<Customepainterexample>
with SingleTickerProviderStateMixin {
List<SnowFake> snowFakes = List.generate(1000, (index) => SnowFake());
late AnimationController _controller;
@override
void initState() {
// TODO: implement initState
_controller =
AnimationController(vsync: this, duration: const Duration(seconds: 1))
..repeat();
super.initState();
}
@override
Widget build(BuildContext context) {
return Scaffold(
appBar: AppBar(
backgroundColor: Colors.white,
title: const Text('Customepainterexample'),
// titleTextStyle: TextStyle(fontSize: 20,color: Colors.black),
),
body: Container(
constraints: const BoxConstraints.expand(),
decoration: const BoxDecoration(
color: Colors.blue,
gradient: LinearGradient(
begin: Alignment.topCenter,
end: Alignment.bottomCenter,
stops: [0.0, 0.5, 0.9],
colors: [Colors.blue, Colors.lightBlue, Colors.white])),
child: AnimatedBuilder(
animation: _controller,
builder: (BuildContext context, Widget? child) {
snowFakes.forEach((element) {
element.fall();
});
return CustomPaint(
painter: MyPainter(snowFakes),
);
},
),
),
);
}
}
class MyPainter extends CustomPainter {
List<SnowFake> snowFaskes;
final Paint _mPaint = Paint()..color = Colors.white;
MyPainter(this.snowFaskes);
@override
void paint(Canvas canvas, Size size) {
canvas.drawCircle(size.center(const Offset(0, 160)), 60, _mPaint);
canvas.drawOval(
Rect.fromCenter(
center: size.center(const Offset(0, 350)), width: 200, height: 300),
_mPaint);
snowFaskes.forEach((snowFake) {
canvas.drawCircle(
Offset(snowFake.x, snowFake.y), snowFake.radius, _mPaint);
});
}
@override
bool shouldRepaint(covariant CustomPainter oldDelegate) {
return true;
}
}
class SnowFake {
double x = Random().nextDouble() * 430;
double y = Random().nextDouble() * 800;
double radius = Random().nextDouble() * 2 + 2;
double acceleration = Random().nextDouble() * 4 + 2;
void fall() {
y += acceleration;
if (y > 800) {
y = 0;
x = Random().nextDouble() * 430;
radius = Random().nextDouble() * 2 + 2;
acceleration = Random().nextDouble() * 4 + 2;
}
}
}


 185
185

 被折叠的 条评论
为什么被折叠?
被折叠的 条评论
为什么被折叠?
 到【灌水乐园】发言


