


 本文介绍了如何使用Docker安装Nexus 3.36.0,包括拉取镜像、创建映射目录、启动及授权,详细阐述了访问、设置仓库和配置Maven的过程,同时讲解了本地开发环境的配置以及通过Jenkins自动化上传jar到Nexus的流程。
1、nexus介绍
1、简介
nexus是maven私服,全称是:sonatype/nexus。
私服是什么?非官方组织创建的服务,nexus支持我们自己创建仓库。
maven库包括:本地库+远程仓库
远程仓库最普遍的就是官方提供的maven仓库(中央仓库),也有第三方仓库,比如我们经常会配置的aliyun仓库。
我们自己也可以搭建远程仓库,搭建自己的远程仓库是为了:
-
为了维护自己开发的jar
-
为了节省资源、时间
当需要拉取依赖时,会先到本地仓库找,然后到远程仓库找,最后才会到中央仓库找,在中间的某个环节找到了,就不再向下去找,这样就节省了时间和资源。
2、安装nexus
基于Docker version 20.10.23安装
1、拉取镜像
安装版本:3.36.0 cd 下拉取
docker pull sonatype/nexus3:3.36.0
若拉取不成功,可执行以下语句:
docker search ubantu
docker image pull sonatype/nexus3:3.36.0
2、创建映射路径
在/usr/local/创建nexus目录,在这个目录下再创建data目录
3、启动nexus
注意: nexus 默认端口号8081
docker run -d --name nexus3 -p 8081:8081 --restart always -v /usr/local/nexus/data:/nexus-data sonatype/nexus3:3.36.0
启动会不成功,因为挂载目录后,docker没有对这个目录写操作的权限,导致不能再目录下创建其他的目录文件
4、目录文件授权
cd /usr/local/nexus
chmod 777 data
777是对应了三种用户的权限,分别是ugo,三种权限可以用二进制标识,7对应二进制的111,代表用于读写执行三种权限,三个7代表三类用户都有7的这种权限。
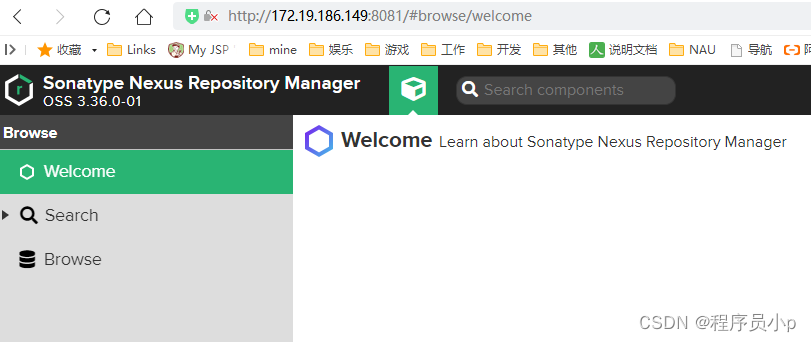
5、访问nexus
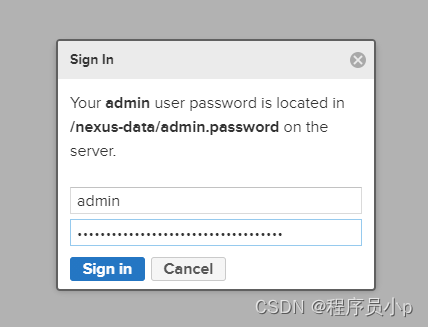
6、查看登录密码
/nexus-data/admin.password是容器内的路径,已经映射到操作系统上了,找到对应的目录查看
cat /nexus-data/admin.password
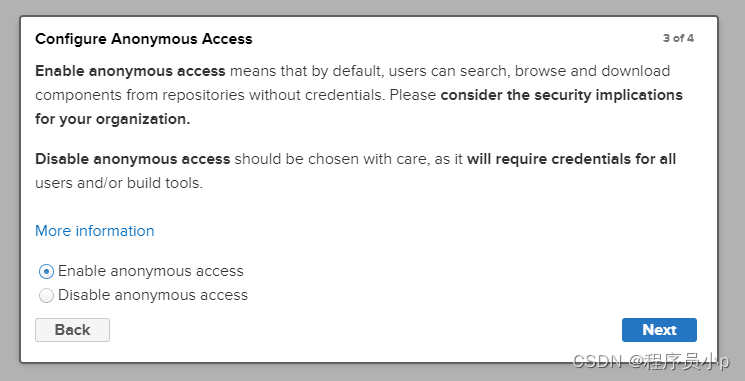
设置是否允许匿名访问,我们设置成允许匿名访问。
7、设置仓库
创建一个代理仓库,代理aliyun仓库
http://maven.aliyun.com/nexus/content/groups/public/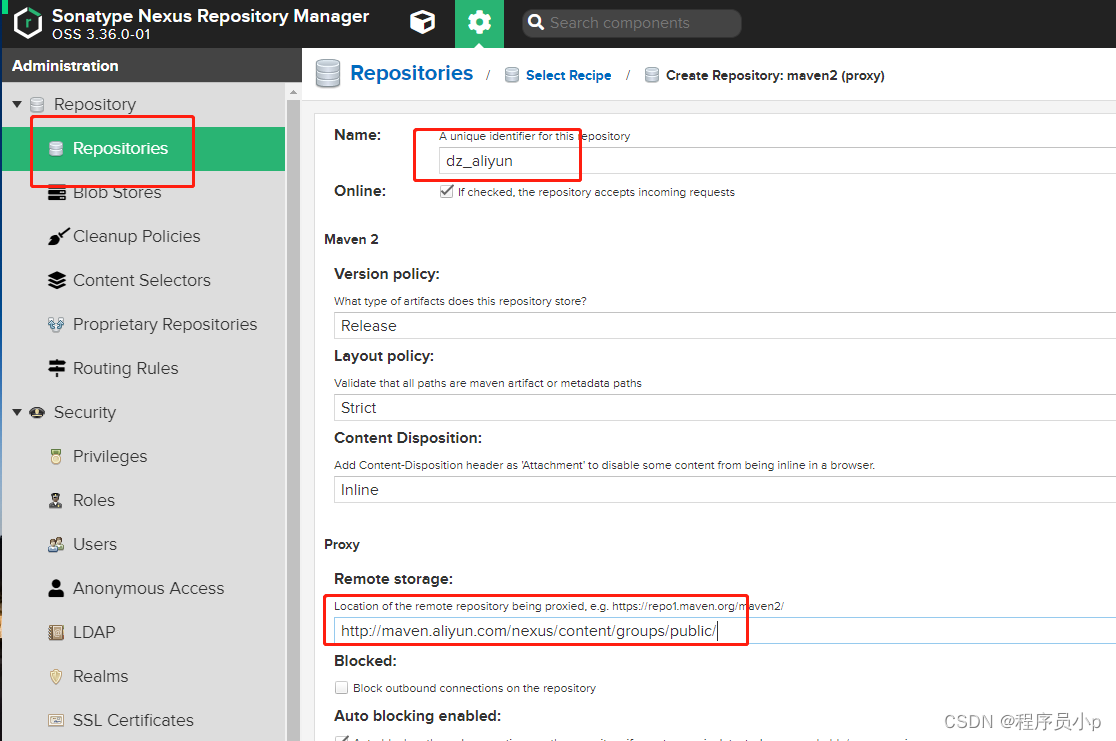 http://maven.aliyun.com/nexus/content/groups/public/
创建一个本地的快照仓库
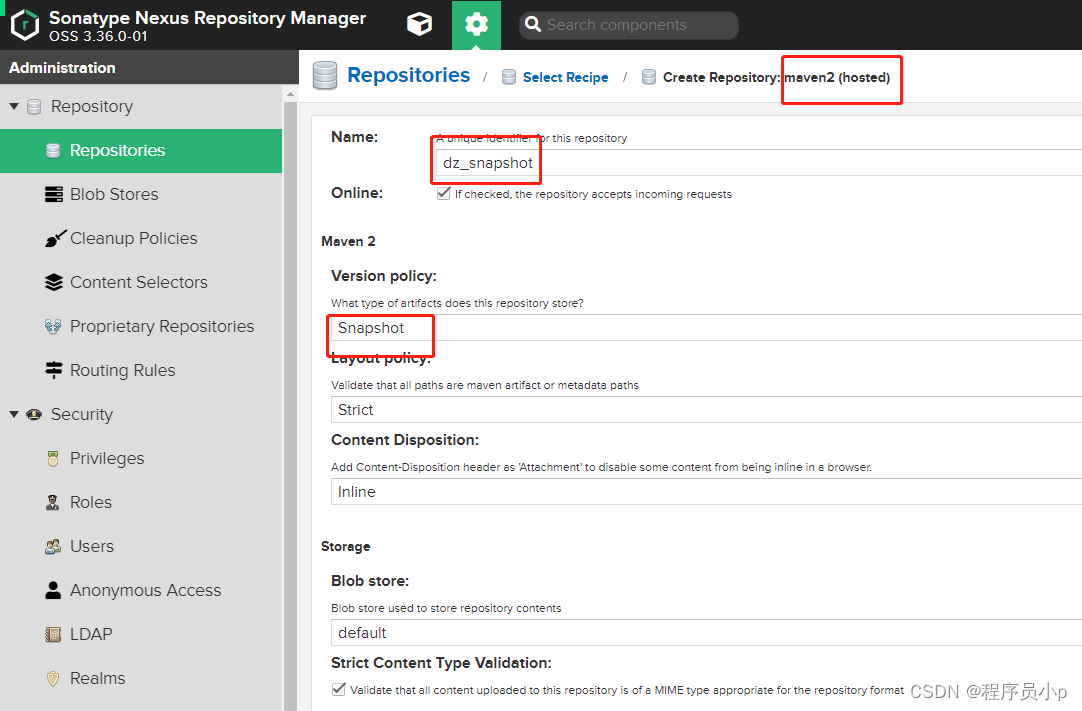
创建一个发布版仓库

最后再创建一个仓库组
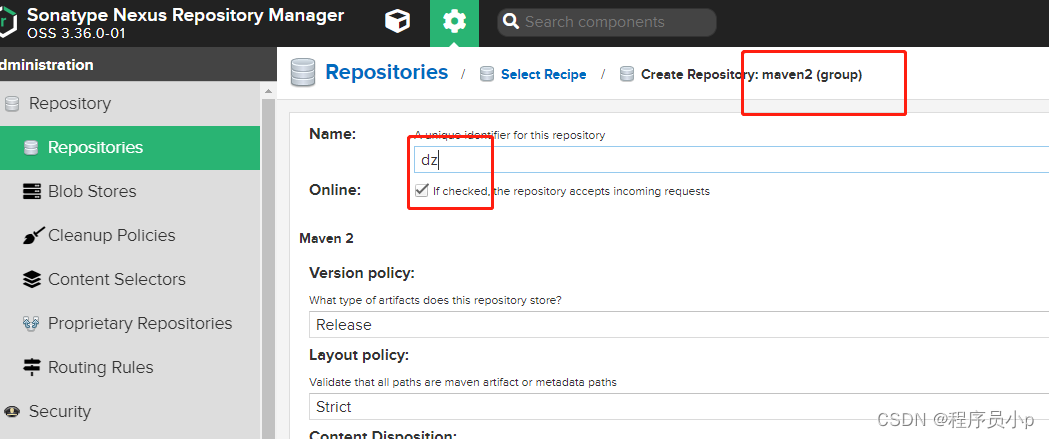
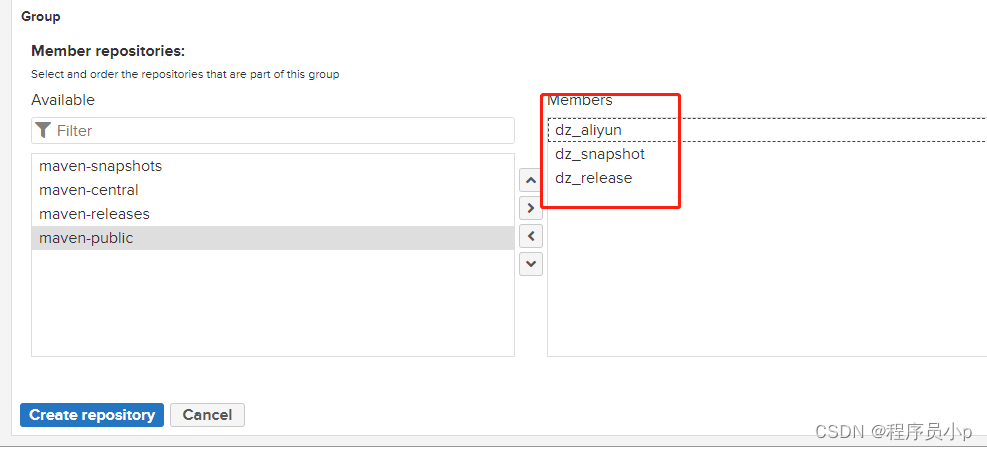
注意仓库组中仓库的顺序和我保持一致。
8、修改配置文件
打开maven下conf文件夹的settings.xml文件,在对应的位置添加如下配置。
对应位置就是找到原配置文件中类似的位置,可以看配置文件中注释的配置中相同的标签。
<server>
    <id>dz_release</id>
    <username>admin</username>
    <password>123456</password>
</server>
<server>
    <id>dz_snapshot</id>
    <username>admin</username>
    <password>123456</password>
</server>
<mirror>
    <id>nexus</id>
    <mirrorOf>*</mirrorOf>
    <url>http://172.19.186.149:8081/repository/dz/</url>
</mirror>
<profile>
    <id>nexus</id>
    <repositories>
        <repository>
            <id>central</id>
            <url>http://172.19.186.149:8081/repository/dz/</url>
            <releases>
                <enabled>true</enabled>
            </releases>
            <snapshots>
                <enabled>true</enabled>
                <updatePolicy>always</updatePolicy>
            </snapshots>
        </repository>
    </repositories>
    <pluginRepositories>
        <pluginRepository>
            <id>central</id>
            <url>http://172.19.186.149:8081/repository/dz/</url>
            <releases>
                <enabled>true</enabled>
            </releases>
            <snapshots>
                <enabled>true</enabled>
                <updatePolicy>always</updatePolicy>
            </snapshots>
        </pluginRepository>
    </pluginRepositories>
</profile>
<activeProfiles>
     <activeProfile>nexus</activeProfile>
</activeProfiles>
9、maven仓库jar类型
jar类型主要分两种,分别是release版和snapshot版。release是稳定版本,也是发布版本,是被定义为一个可用版本的jar。snapshot是临时版本,也是快照版本,用于临时打的jar,在开发一段时间后,这个版本的jar趋于稳定,会将它更新成release版本。snapshot版是在release版之前出现的,一定有这个过程,经历快照版后才会编程release版。
3、本地开发环境配置
1、项目的pom文件配置
<!--私服配置-->
<distributionManagement>
    <repository>
        <id>my-neuse-releases</id>
        <name>Nexus Release Repository</name>
        <url>http://ip:8081/repository/IntelligentNetwork/</url>
    </repository>
    <snapshotRepository>
        <id>my_repo_snapshot</id>
        <name>Nexus Snapshot Repository</name>
        <url>http://ip:8081/repository/IntelligentNetwork/</url>
    </snapshotRepository>
</distributionManagement>
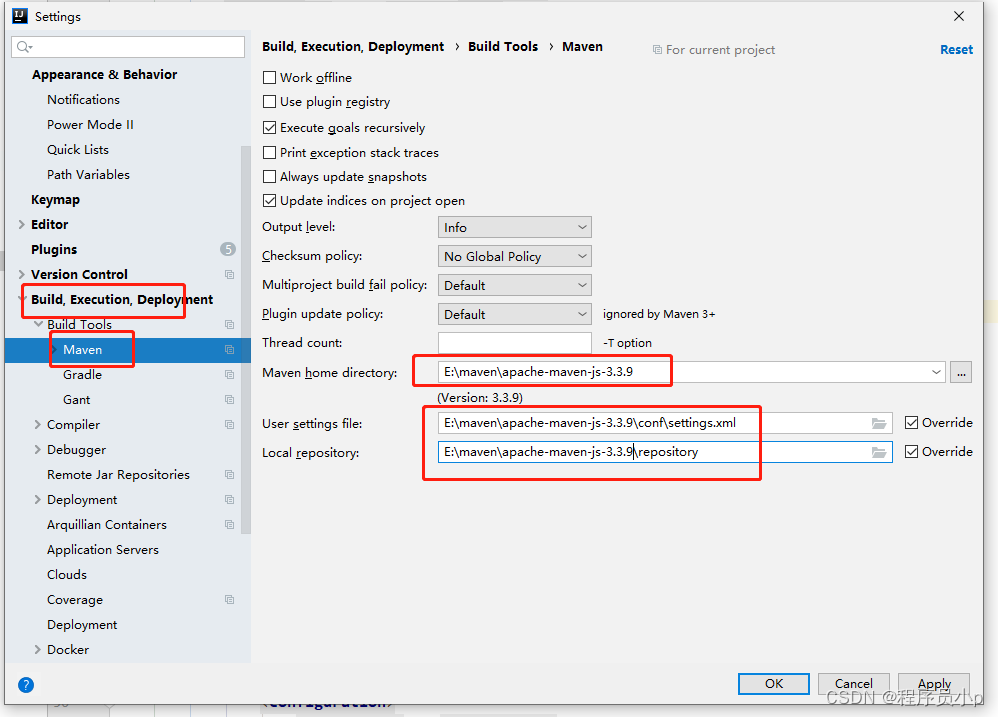
2、修改当前工作空间下的maven引用
4、Jenkins上传jar到nexus
1、流水线代码
node("master"){
    stage('download code'){
        git(
            branch: 'develop', credentialsId: '8977004d-6900-46be-80e4-d8e7d34b7262', url: 'https://gitee.com/wztsl/dz7-demo01.git'
        )
    }
    stage('compile'){
        dir('/var/lib/jenkins/workspace/dz7b-demo02'){
            sh "mvn clean install"
        }
    }
    stage('upload jar to nexus'){
        sh "mvn deploy:deploy-file -DgroupId=com.wztsl \
            -DartifactId=t-springboot \
            -Dversion=1.0-SNAPSHOT \
            -Dpackaging=jar \
            -Dfile=/var/lib/jenkins/workspace/dz7b-demo02/target/t-springboot-1.0-SNAPSHOT.jar \
            -Dsources=/var/lib/jenkins/workspace/dz7b-demo02/target/t-springboot-1.0-SNAPSHOT-sources.jar \
            -DpomFile=/usr/local/maven/apache-maven-3.3.9/repository/com/wztsl/t-springboot/1.0-SNAPSHOT/t-springboot-1.0-SNAPSHOT.pom \
            -DrepositoryId=dz_snapshot \
            -Durl=http://172.19.186.149:8081/repository/dz_snapshot/"
    }
}
第一阶段:从git下载代码
stage('download code'){
    git(
        branch: 'develop', credentialsId: '8977004d-6900-46be-80e4-d8e7d34b7262', url: 'https://gitee.com/wztsl/dz7-demo01.git'
    )
}
第二阶段:maven打包
stage('compile'){
    dir('/var/lib/jenkins/workspace/dz7b-demo02'){
        sh "mvn clean install"
    }
}
<build>
    <plugins>
        <plugin>
            <groupId>org.apache.maven.plugins</groupId>
            <artifactId>maven-compiler-plugin</artifactId>
            <version>3.6.0</version>
            <configuration>
                <source>1.8</source>
                <target>1.8</target>
            </configuration>
        </plugin>
        <plugin>
            <groupId>org.apache.maven.plugins</groupId>
            <artifactId>maven-source-plugin</artifactId>
            <version>3.0.0</version>
            <configuration>
                <attach>true</attach>
            </configuration>
            <executions>
                <execution>
                    <phase>compile</phase>
                    <goals>
                        <goal>jar</goal>
                    </goals>
                </execution>
            </executions>
        </plugin>
    </plugins>
</build>
第三阶段:上传nexus
stage('upload jar to nexus'){
    sh "mvn deploy:deploy-file -DgroupId=com.wztsl \
-DartifactId=t-springboot \
-Dversion=1.0-SNAPSHOT \
-Dpackaging=jar \
-Dfile=/var/lib/jenkins/workspace/dz7b-demo02/target/t-springboot-1.0-SNAPSHOT.jar \
-Dsources=/var/lib/jenkins/workspace/dz7b-demo02/target/t-springboot-1.0-SNAPSHOT-sources.jar \
-DpomFile=/usr/local/maven/apache-maven-3.3.9/repository/com/wztsl/t-springboot/1.0-SNAPSHOT/t-springboot-1.0-SNAPSHOT.pom \
-DrepositoryId=dz_snapshot \
-Durl=http://172.19.186.149:8081/repository/dz_snapshot/"
}
-DgroupId:对应工程pom文件下的声明 -DartifactId:对应工程pom文件下的声明 -Dversion:对应工程pom文件下的声明 -Dpackaging:我要打包成jar -Dfile:jar的路径 -Dsources:源码的路径 -DpomFile:.pom文件的路径,注意不是pom.xml文件,是maven仓库中的.pom文件,用于自动引入父级依赖 -DrepositoryId:要上传到仓库的id -Durl:仓库对应的地址,可以在nexus中查到


 2637
2637

 被折叠的 条评论
为什么被折叠?
被折叠的 条评论
为什么被折叠?
 到【灌水乐园】发言


