


Mybatis学习笔记
一、Mybatis简介
1.1 Mybatis的历史
Mybatis最初是Apache的一个开源项目IBatis,2016年6月这个项目由Aapche Software Foundation迁移到了Google Code。随着开发团队转投到Google Code旗下,IBatis3.x正式更名为Mybatis。

Mybatis是Java的一个持久层框架,该持久层框架提供包括SQL Maps和Data Access Objects(DAO)

SQL Maps:JavaBean和数据库字段之间的映射

Data Access Objects(DAO):数据访问对象。简单的说就是将对数据库的操作都封装起来。
1.2 Mybatis特性
- Mybatis是支持定制化SQL、存储过程以及高级映射的持久层框架。
- Mybatis避免了所有的JDBC代码和手动设置参数以及获取结果集。
- Mybatis可以使用XML和注解的方式用于配置和原始映射,将接口和Java的POJO(Plain Old Java Objects,普通的Java对象)映射成数据库中的记录。
- Mybatis是一个半ORM(Object Relation Mapping,对象关系映射)框架。
1.3 Mybatis下载
Mybatis移到GitHub上了: https://github.com/mybatis/mybatis-3.
打开链接拖动到最下方
1.3 和其他持久层框架的比较
1.JDBC
	SQL夹杂在Java代码中,耦合度高。
	维护不方便。
	代码冗长,开发效率低。
2. Hibernate和JPA
	操作简便,开发效率高
	内部自动生成SQL,不容易做特殊优化。
	基于全映射的全自动框架,大量字段的POJO进行部分映射比较困难。
	反射操作多,导致数据库性能下降。
3. Mybatis
	轻量级,性能出色。
	SQL和Java编码分开,功能边界清晰。
	开发效率越逊于Hibernate,但是完全能够接受。
二、搭建Mybatis
2.1 开发环境
开发工具:IDEA
jdk1.8
MySQL 5.7
Maven
2.2 创建Maven项目
- 打包方式jar
- 引入依赖
    <dependencies>
        <!-- Mybatis核心 -->
        <dependency>
            <groupId>org.mybatis</groupId>
            <artifactId>mybatis</artifactId>
            <version>3.5.7</version>
        </dependency>
        <!-- junit测试 -->
        <dependency>
            <groupId>junit</groupId>
            <artifactId>junit</artifactId>
            <version>4.12</version>
            <scope>test</scope>
        </dependency>
        <!-- MySQL驱动 -->
        <dependency>
            <groupId>mysql</groupId>
            <artifactId>mysql-connector-java</artifactId>
            <version>8.0.28</version>
        </dependency>
    </dependencies>
2.3 创建Mybatis配置文件
习惯上命名mybatis-config.xml,这个文件名仅仅只是建议,并非强制要求。
<!-- 声明-->
<?xml version="1.0" encoding="UTF-8" ?>
<!-- 约束 -->
<!DOCTYPE configuration
PUBLIC "-//mybatis.org//DTD Config 3.0//EN"
"http://mybatis.org/dtd/mybatis-3-config.dtd">
<configuration>
	<!--设置连接数据库的环境-->
	<environments default="development">
		<environment id="development">
		<!-- transactionManger type=JDBC时,程序中关于事务提交回滚需要手动-->
			<transactionManager type="JDBC"/>
			<dataSource type="POOLED">
				<property name="driver" value="com.mysql.cj.jdbc.Driver"/>
				<property name="url" value="jdbc:mysql://localhost:3306/MyBatis"/>
				<property name="username" value="root"/>
				<property name="password" value="123456"/>
			</dataSource>
		</environment>
	</environments>
	<!--引入映射文件-->
	<mappers>
		<mapper resource="mappers/UserMapper.xml"/>
	</mappers>
</configuration>
2.4 创建Mapper接口
我们只需要创建Mapper接口即可,不需要实现类
package com.atguigu.mybatis.mapper;

public interface UserMapper {
	/**
	* 添加用户信息
	*/
	int insertUser();
}
2.5 创建Mybatis映射文件
Mybatis映射文件存储的位置可以与xxxMapper接口放在同一个目录下,也可以放在src/main/resources/下
<?xml version="1.0" encoding="UTF-8" ?>
<!DOCTYPE mapper
PUBLIC "-//mybatis.org//DTD Mapper 3.0//EN"
"http://mybatis.org/dtd/mybatis-3-mapper.dtd">
<mapper namespace="com.atguigu.mybatis.mapper.UserMapper">
	<!--int insertUser();-->
	<insert id="insertUser">
		insert into user values(null,'张三')
	</insert>
</mapper>
2.6 通过junit测试功能
- SqlSession:代表Java程序和数据库之间的会话。(HttpSession是Java程序和浏览器之间的会话)
- SqlSessionFactory:是“生产”SqlSession的“工厂”
- 工厂模式:如果创建某一个对象,使用的过程基本固定,那么我们就可以把创建这个对象的相关代码封装到一个“工厂类”中,以后都使用这个工厂类来“生产”我们需要的对象。
public class UserMapperTest {
    @Test
    public void testInsertUser() throws IOException {
        //读取MyBatis的核心配置文件
        InputStream is = Resources.getResourceAsStream("mybatis-config.xml");
        //获取SqlSessionFactoryBuilder对象
        SqlSessionFactoryBuilder sqlSessionFactoryBuilder = new SqlSessionFactoryBuilder();
        //通过核心配置文件所对应的字节输入流创建工厂类SqlSessionFactory,生产SqlSession对象
        SqlSessionFactory sqlSessionFactory = sqlSessionFactoryBuilder.build(is);
        //获取sqlSession,此时通过SqlSession对象所操作的sql都必须手动提交或回滚事务
        //SqlSession sqlSession = sqlSessionFactory.openSession();
	    //创建SqlSession对象,此时通过SqlSession对象所操作的sql都会自动提交
		SqlSession sqlSession = sqlSessionFactory.openSession(true);
        //通过代理模式创建UserMapper接口的代理实现类对象
        UserMapper userMapper = sqlSession.getMapper(UserMapper.class);
        //调用UserMapper接口中的方法,就可以根据UserMapper的全类名匹配元素文件,通过调用的方法名匹配映射文件中的SQL标签,并执行标签中的SQL语句
        int result = userMapper.insertUser();
        //提交事务
        //sqlSession.commit();
        System.out.println("result:" + result);
    }
}
- 此时需要手动提交事务,如果要自动提交事务,则在获取sqlSession对象时,使用
SqlSession sqlSession = sqlSessionFactory.openSession(true);,传入一个Boolean类型的参数,值为true,这样就可以自动提交。
2.7 加入日志功能
- 引入依赖
<!-- log4j日志 -->
<dependency>
<groupId>log4j</groupId>
<artifactId>log4j</artifactId>
<version>1.2.17</version>
</dependency>
- 引入log4j配置文件
<?xml version="1.0" encoding="UTF-8" ?>
<!DOCTYPE log4j:configuration SYSTEM "log4j.dtd">
<log4j:configuration xmlns:log4j="http://jakarta.apache.org/log4j/">
    <appender name="STDOUT" class="org.apache.log4j.ConsoleAppender">
        <param name="Encoding" value="UTF-8" />
        <layout class="org.apache.log4j.PatternLayout">
			<param name="ConversionPattern" value="%-5p %d{MM-dd HH:mm:ss,SSS} %m (%F:%L) \n" />
        </layout>
    </appender>
    <logger name="java.sql">
        <level value="debug" />
    </logger>
    <logger name="org.apache.ibatis">
        <level value="info" />
    </logger>
    <root>
        <level value="debug" />
        <appender-ref ref="STDOUT" />
    </root>
</log4j:configuration>
2.8 Mybatis核心配置文件
<?xml version="1.0" encoding="UTF-8" ?>
<!DOCTYPE configuration
        PUBLIC "-//mybatis.org//DTD Config 3.0//EN"
        "http://mybatis.org/dtd/mybatis-3-config.dtd">
<configuration>
    <!-- environments:设置多个具体的连接数据库的信息
         default:表示默认使用哪个环境, default的值是environment标签的id
    -->

    <!-- 引入外部文件 -->
    <properties resource="jdbc.properties"/>

    <!-- typeAliases:起别名
       使用场景:在xxxMapper.xml中的resultType每次都要写全类名,当xxxMapper.xml中的sql较多时,每一个都要写全类名,很麻烦
   -->
    <typeAliases>
        <!-- 有两种方式起别名: 分别是<package>和<typeAlias>
            <package>: 以包为单位, 将包下所有的映射文件引入核心配置文件,这边指定的包是xxxMapper.xml的包名
            使用<package>方式的前提有两个:
                1.mapper接口要和mapper映射文件的名字一致
                2.此方式必须保证mapper接口和mapper映射文件必须在相同的包下
            <typeAlias>:
         -->
            <!--<package name="com.atguigu.mybatis.mapper"/>-->
        <!-- 若没有指定alias,则别名默认使用类名
             若指定alias,则使用指定的别名
             注意:指定/默认的alias,是不区分大小写的
         -->
            <typeAlias type="com.atguigu.mybatis.mapper.UserMapper" alias="User"/>
    </typeAliases>

    <environments default="development">
        <!-- environment:表示某个连接数据库的信息 id:唯一标识 -->
        <environment id="development">
            <!-- transactionManager:事务管理器
                 type:有两个, 一个是JDBC,一个是Managed
                 JDBC:表示数据库的事务操作是程序式事务,需要手动提交或者回滚事务
                 Managed:表示被管理的,如被Spring管理
             -->
            <transactionManager type="JDBC"/>
            <!-- dataSource:数据源,有三个type,分别是POOLED ,UNPOOLED, JDNI
                 POOLED:使用数据库连接池, 即会将创建的连接缓存, 下次使用时可以直接在缓存中获取,不需要再次创建
                 UNPOOLED:不使用数据库连接池
                 JDNI:调用上下文的数据源
             -->
            <dataSource type="POOLED">
                <!--
                   property的value:可以直接写死, 也可以写入到文件中,通过引入文件,并获取文件中指定的key来获取值
                   具体做法:
                    1.在mybatis-config.xml中引入jdbc.properties,jdbc.properties中的内容格式key=value...
                        <properties resource="jdbc.properties"/>
                    2.通过${jdbc.properties的key}来获取对应key的值
                 -->
                <property name="driver" value="${jdbc.driver}"/>
                <property name="url" value="${jdbc.url}"/>
                <property name="username" value="${jdbc.username}"/>
                <property name="password" value="${jdbc.password}"/>
            </dataSource>
        </environment>
    </environments>
    <mappers>
        <!--<mapper resource="com\atguigu\mybatis\mapper\UserMapper.xml"/>-->
        <package name="com.atguigu.mybatis.mapper"/>
    </mappers>
</configuration>
三、Mybatis获取参数值的两种方式 (重点)
Mybatis获取参数值的两种方式:#{}和${}
${}的本质是字符串拼接,#{}的本质是占位符赋值
${}使用字符串拼接的方式拼接sql,若为字符串类型或日期类型的字段进行赋值时,需要手动加单引号。
#{}使用占位符赋值的方式拼接sql,此时为字符串类型或日期类型的字段进行赋值时,可以自动添加单引号。
3.1 单个字面量类型的参数
- 若mapper接口中的方法参数为单个的字面量类型(String),此时可以使用
${}和#{}以任意的名称(最好见名识意)获取参数的值,注意${}需要手动添加单引号。
<!--User getUserByUsername(String username);-->
<select id="getUserByUsername" resultType="User">
	select * from t_user where username = #{username}
</select>

<!--User getUserByUsername(String username);-->
<select id="getUserByUsername" resultType="User">
	select * from t_user where username = '${username}'
</select>
3.2 多个字面量类型的参数
- 若mapper接口中的方法参数为多个的字面量类型(String),此时Mybatis会自动将这些参数放入到一个map中,此时可以使用
${}和#{}以[arg0,arg1,param1,param2]获取参数的值,注意${}需要手动添加单引号 - 注意:
- arg是从0开始的,param是从1开始的
- arg和param是可以混合使用
    <!-- User checkLogin(String username,String password); -->
    <select id="checkLogin" resultType="User">
        select * from user where name=#{arg0} and password=#{arg1}
    </select>

    <!-- User checkLogin(String username,String password); -->
    <select id="checkLogin" resultType="User">
        select * from user where name=#{param1} and password=#{param2}
    </select>

    <!-- User checkLogin(String username,String password); -->
    <select id="checkLogin" resultType="User">
        select * from user where name=#{arg0} and password=#{param1}
    </select>
3.3 map集合类型的参数
- 若mapper接口中方法的参数有多个时,可以通过使用map作为参数传递,将这些参数放入到map中
通过使用#{}和${}访问map集合的键来获取参数的值 - 注意:${}需要手动添加单引号
    /**
     * 登录
     */
    @Test
    public void checkLoginByMapTest(){
        SqlSession sqlSession = SqlSessionUtil.getSqlSession();
        UserMapper userMapper = sqlSession.getMapper(UserMapper.class);
        Map<String,Object> params = new HashMap<>();
        params.put("username","admin");
        params.put("password","123456");
        User user = userMapper.checkLoginByMap(params);
        System.out.println(user);
    }
    <!-- User checkLoginByMap(Map<String,Object> params); -->
    <select id="checkLoginByMap" resultType="User">
        select * from user where name=#{username} and password=#{password}
    </select>
3.4 实体类类型的参数
- 若Mapper接口中方法的参数为实体对象时,此时可以使用#{}和${},通过访问实体对象中的属性名来获取属性值;
- 注意:使用${}时需要手动添加单引号
    <!-- void insertUser(User user); -->
    <insert id="insertUser" >
        insert into user values(null,#{name},#{password})
    </insert>
    /**
     * 新增用户
     */
    @Test
    public void insertUserTest(){
        SqlSession sqlSession = SqlSessionUtil.getSqlSession();
        UserMapper userMapper = sqlSession.getMapper(UserMapper.class);
        userMapper.insertUser(new User(null,"guest","123456"));
    }
3.5 使用注解@Param标识参数
- 可以通过@Param注解标识mapper接口中方法的参数,此时会将这些参数放入map中。
- @Param(value=“xxx”):以@Param注解的值作为key获取参数的值。
- 注意:使用${}时需要手动添加单引号
    <!-- User checkLoginByParam(@Param("username") String name,@Param("password")String password); -->
    <select id="checkLoginByParam" resultType="User">
        select * from user where name=#{username} and password=#{password}
    </select>
 @Test
    public void checkLoginByParam(){
        SqlSession sqlSession = SqlSessionUtil.getSqlSession();
        UserMapper userMapper = sqlSession.getMapper(UserMapper.class);
        User admin = userMapper.checkLoginByParam("admin", "123456");
        System.out.println(admin);
    }
总结:
- 建议使用两种方式进行处理即可
- 使用@Param注解方式
- 使用实体类对象方式
四、Mybatis的各种查询功能
- 如果查询出的数据只有一条,可以通过:
- 实体类对象接收
- List集合接收
- Map集合接收
- 如果查询出的数据有多条,一定不能使用实体类对象接收,否则会抛出TooManyResultsException异常,可以通过:
- List集合接收
- List<Map<String,Object>>接收
- 在mapper接口上添加注解@MapKey
@MapKey注解说明:使用查询出的字段中某个唯一字段作为key(如id),value为对应的查询记录。
4.1 查询一个实体类对象
User selectByName(@Param("name") String name);
    <!--User selectByName(@Param("name") String name);-->
    <select id="selectByName" resultType="User">
        select * from user where name=#{name}
    </select>
4.2 查询一个List集合
    /**
     * 查询所有用户;
     * 这边可以使用List<User>作为返回值进行接收。
     * 也可以使用List<Map<String,Object>作为返回值进行接收。
     * 对于上面具体使用哪个,根据实际需求来定
     * @return
     */
    List<User> selectAllUsers();
    <!--List<User> selectAllUsers();-->
    <select id="selectAllUsers" resultType="user">
        select * from user
    </select>
4.3 查询单个数据
    /**
     * 查询用户的总数
     * 在Mybaits中,设置了一些常用类型的别名,具体参考https://mybatis.net.cn/configuration.html#typeAliases
     * count(*)和count(1)和count(字段)的区别:
     *  count(1)和count(*)在结果上没有区别;但是count(1)和count(*)的效率高一点,可以忽略不计
     *  count(字段):若字段为null值时,不计入统计。
     * @return
     */
    Integer getCount();
   <!--Integer getCount();-->
    <select id="getCount" resultType="int">
        select count(*) from user
    </select>
4.4 查询一条数据的map集合
   /**
     * 根据id查询用户
     * @param id
     * @return Map
     */
    Map<String,Object> getUserById(@Param("id") Integer id);
    <!--Map<String,Object> getUserById(@Param("id") Integer id);-->
    <!-- resultType="map" 可以这样写的原因是Mybaits中定义了一些常用类型的别名-->
    <!--结果:{password=123456, name=guest, id=4}-->
    <select id="getUserById" resultType="map">
        select * from user where id = #{id}
    </select>
4.5 查询多条数据的map集合
- 方式一:使用List<Map<String,Object>>
List<Map<String,Object>> getAllUsersByMap();
    <!--List<Map<String,Object>> getAllUsersByMap();-->
    <!--结果:[{password=123456, name=小子, id=1}, {password=123456, name=小子2, id=2}, {password=123456, name=admin, id=3}, {password=123456, name=guest, id=4}]
-->
    <select id="getAllUsersByMap" resultType="map">
        select * from user
    </select>
- 方式二:使用注解@MapKey
/**
 * 查询所有用户信息为map集合
 * @return
 * 将表中的数据以map集合的方式查询,一条数据对应一个map;若有多条数据,就会产生多个map集合,并且最终要以一个map的方式返回数据,此时需要通过@MapKey注解设置map集合的键,值是每条数据所对应的map集合
 */
@MapKey("id")
Map<String, Object> getAllUsersByMapTwo();
    <!--Map<String,Object> getAllUsersByMapTwo();-->
    <!--结果:{1={password=123456, name=小子, id=1}, 2={password=123456, name=小子2, id=2}, 3={password=123456, name=admin, id=3}, 4={password=123456, name=guest, id=4}}
-->
    <select id="getAllUsersByMapTwo" resultType="map">
        select * from user
    </select>
五、特殊SQL的执行
5.1 模糊查询
    /**
     * 根据用户进行模糊查询
     * @param name
     * @return
     */
    List<User> getUsersByLike(@Param("name") String name);
<!-- List<User> getUsersByLike(@Param("name") String name); -->
    <!--方式一: select * from user where name like '%${name}%' -->
    <!--方式二: select * from user where name like concat('%',#{name},'%'); -->
    <!--方式三: select * from user where name like "%"#{name}"%"; -->
    <select id="getUsersByLike" resultType="user">
        select * from user where name like "%"#{name}"%"
    </select>
5.2 批量删除
只能使用${},如果使用#{},解析后的sql语句是delete from user where id in ('1,2,3') ,执行不会报错,但是语法写的不对
只有id为1,2,3的数据会被删除。正确的语句应该是delete from t_user where id in (1,2,3)。
 /**
     * 根据ids批量删除用户
     * @param ids
     */
    void deleteUserBatch(@Param("ids") String ids);
    <!--void deleteUserBatch(@Param("ids") String ids);-->
    <delete id="deleteUserBatch">
        delete from user where id in (${ids})
    </delete>
5.3 动态设置表名
只能使用${},因为表名不能加单引号
/**
 * 查询指定表中的数据
 * @param tableName
 * @return java.util.List<com.atguigu.mybatis.pojo.User>
 * @date 2022/2/27 14:41
 */
List<User> getUserByTable(@Param("tableName") String tableName);
<!--List<User> getUserByTable(@Param("tableName") String tableName);-->
<select id="getUserByTable" resultType="User">
	select * from ${tableName}
</select>
5.4 添加功能获取自增的主键
- 在xxxMapper.xml映射文件中的标签中配置两个属性
- useGenerateKey:设置true,表示使用自增的主键
- keyProperty :表示将自增的主键赋值到实体对象中的哪个属性上
  /**
     * 添加后获取自增的主键id值
     * @param user
     * @return
     */
    Integer insertUser(User user);
    <!-- Integer insertUser(User user);-->
    <insert id="insertUser" useGeneratedKeys="true" keyProperty="id">
        insert into user values(null,#{name},#{password})
    </insert>
测试类:
@Test
    public void insertUserTest(){
        SqlSession sqlSession = SqlSessionUtil.getSqlSession();
        SelectMapper mapper = sqlSession.getMapper(SelectMapper.class);
        User user = new User(null, "卡卡", "123456");
        // 结果:User{id=null, name='卡卡'}
        System.out.println(user);
        mapper.insertUser(user);
        // 结果:User{id=6, name='卡卡'}
        System.out.println(user);
    }
六、自定义映射ResultMap
6.1 resultMap处理属性和字段的映射关系
- resultMap:设置自定义映射
- 属性:
- id:唯一标识
- type:查询的数据要映射的实体类的类型
- 子标签:
- id:设置主键的映射关系
- property:设置普通字段的映射关系
- 子标签属性:
- property:对应实体类中属性名
- column: 对应数据库表中的字段名
- 子标签属性:
- 属性:
- 若数据库字段名和属性名不一致,则可以通过ResultMap设置自定义映射,一旦使用resultMap,就需要把数据库中所有字段都映射出来,不可映射一部分。
 <resultMap id="empResultMap" type="emp">
        <id property="empId" column="emp_id"/>
        <result property="empName" column="emp_name"/>
        <result property="age" column="age"/>
        <result property="sex" column="sex"/>
        <result property="email" column="email"/>
    </resultMap>
    <!--List<Emp> getAllEmps();-->
    <!-- 针对数据库字段名和属性名匹配不上解决三个方法
     第一个方法: 通过起别名的方式,使数据库字段名和属性名一致
     第二个方法: 通过使用resultMap来配置数据库字段名和实体类属性名一致
     第三个方法: 通过在mybatis核心配置文件中的settings标签配置 mapUnderscoreCamelCase标签来设置驼峰格式
     -->
    <select id="getAllEmps" resultType="emp">
        select * from emp
    </select>
/**
     * 查询所有雇员信息。
     * 注意:数据库字段名和属性名映射问题
     * @return
     */
    List<Emp> getAllEmps();
关于Mybatis其他全局配置可参考官网:https://mybatis.net.cn/configuration.html#settings
6.2 多对一映射处理
查询雇员信息以及雇员所在部门信息
public class Emp {

    private Integer empId;
    private String empName;
    private Integer age;
    private Integer sex;
    private String email;
    // 多对一关系: 在多的一方的实体类中定义 一的 实体类
    private Dept dept;
}
6.2.1 使用级联的方式映射
    <resultMap id="empResultMap" type="emp">
        <id property="empId" column="emp_id"/>
        <result property="empName" column="emp_name"/>
        <result property="age" column="age"/>
        <result property="sex" column="sex"/>
        <result property="email" column="email"/>
        <!-- 使用级联的方式映射多对一关系 -->
        <result property="dept.deptId" column="dept_id"></result>
        <result property="dept.deptName" column="dept_name"></result>
    </resultMap>

	<!-- 使用级联的方式查询雇员信息以及雇员所在部门信息 -->
    <select id="getEmpAndDeptInfOne" resultMap="empResultMap">
        select * from emp left join dept on emp.dept_id = dept.dept_id where  emp.emp_id = #{empId}
    </select>
    /**
     * 使用 级联方式 查询雇员信息以及雇员所在部门信息
     * @param empId
     * @return
     */
    List<Emp> getEmpAndDeptInfOne(@Param("empId") Integer empId);
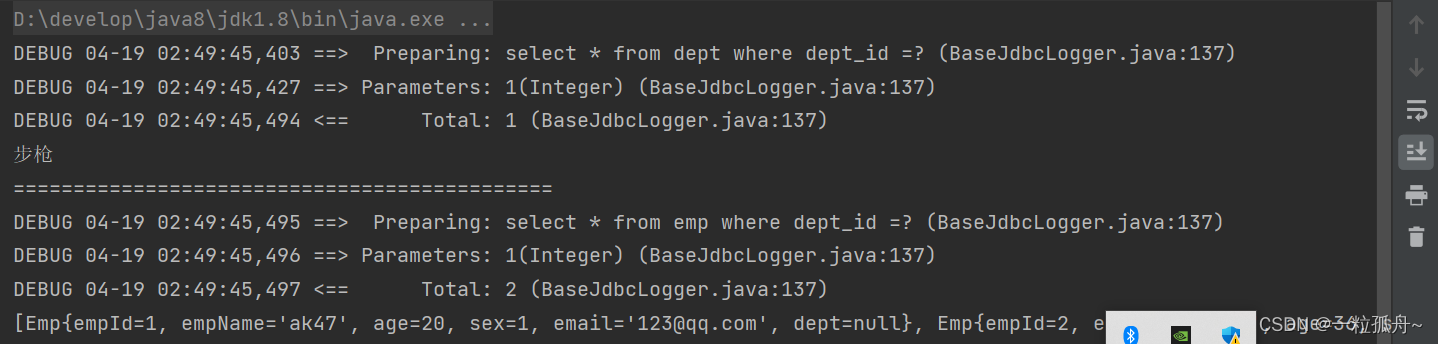
测试:
  @Test
    public void getEmpAndDeptInfOneTest(){
        SqlSession sqlSession = SqlSessionUtil.getSqlSession();
        EmpMapper empMapper = sqlSession.getMapper(EmpMapper.class);
        //[Emp{empId=1, empName='ak47', age=20, sex=1, email='123@qq.com', dept=Dept{deptId=1, deptName='步枪'}}]
        System.out.println(empMapper.getEmpAndDeptInfOne(1));
    }
6.2.2 使用association处理多对一映射关系
- assocation标签:表示多对一的映射关系,在多的哪一方的映射文件中配置一的那一方
- property:表示需要处理映射关系的属性名
- javaType:表示该属性的类型
<resultMap id="getEmpAndDeptInfoTwoResultMap" type="emp">
       <id property="empId" column="emp_id"></id>
       <result property="empName" column="emp_name"/>
       <result property="age" column="age"/>
       <result property="sex" column="sex"/>
       <result property="email" column="email"/>
       <!-- 使用association方式处理多对一映射关系
            property:表示多对一映射关系的属性,一般是n:1的1的属性名,这里指的是dept
            javaType:表示该属性所属的类
       -->
       <association property="dept" javaType="Dept">
           <id property="deptId" column="dept_id"></id>
           <result property="deptName" column="dept_name"></result>
       </association>
   </resultMap>

   <!-- 使用association方式 处理多对一映射关系 -->
   <select id="getEmpAndDeptInfoTwo" resultMap="getEmpAndDeptInfoTwoResultMap">
       select * from emp left join dept on emp.dept_id = dept.dept_id where emp.emp_id = #{empId}
   </select>
  /**
     * 使用association的方式 查询雇员信息以及雇员所在部门信息
     * @param empId
     * @return
     */
    List<Emp> getEmpAndDeptInfoTwo(@Param("empId")Integer empId);
测试:
    @Test
    public void getEmpAndDeptInfTwoTest(){
        SqlSession sqlSession = SqlSessionUtil.getSqlSession();
        EmpMapper empMapper = sqlSession.getMapper(EmpMapper.class);
        // [Emp{empId=2, empName='m4a1', age=36, sex=1, email='123@qq.com', dept=Dept{deptId=1, deptName='步枪'}}]
        System.out.println(empMapper.getEmpAndDeptInfoTwo(2));
    }
6.2.3 使用分步查询
1.查询员工信息
    /**
     * 分步查询:查询员工信息
     * @param empId
     * @return
     */
    Emp getEmpAndDeptInfoByStep(@Param("empId") Integer empId);
- association标签中需要三个属性:
- property:表示多对一映射的属性名
- select:根据外键id查询另一张表的对应的
namespace + id - column:另一张表的主键id**
    <resultMap id="getEmpAndDeptInfoStepResultMap" type="emp">
        <id property="empId" column="emp_id"></id>
        <result property="empName" column="emp_name"/>
        <result property="age" column="age"/>
        <result property="sex" column="sex"/>
        <result property="email" column="email"/>
        <!-- 使用association方式处理多对一映射关系
             property:表示多对一映射关系的属性,一般是n:1的1的属性名,这里指的是dept
             javaType:表示该属性所属的类
        -->
        <association property="dept" select="com.atguigu.mybatis.mapper.DeptMapper.getDeptInfoById" column="dept_id"></association>
    </resultMap>

    <!--Emp getEmpAndDeptInfoByStep(@Param("empId") Integer empId);-->
    <select id="getEmpAndDeptInfoByStep" resultMap="getEmpAndDeptInfoStepResultMap">
        select * from emp where emp_id =#{empId}
    </select>
2.查询部门信息
   /**
    * 分步查询第二步 : 根据部门id查询部门信息
    * @param deptId
    * @return
    */
   Dept getDeptInfoById(@Param("deptId") Integer deptId);
    <resultMap id="deptResultMap" type="dept">
        <id property="deptId" column="dept_id"></id>
        <result property="deptName" column="dept_name"/>
    </resultMap>

    <!--Dept getDeptInfoById(@Param("deptId") Integer deptId);-->
    <select id="getDeptInfoById" resultMap="deptResultMap">
        select * from dept where dept_id =#{deptId}
    </select>
6.3 一对多映射处理
public class Dept {

    private Integer deptId;
    private String deptName;
    // 一对多关系
    private List<Emp> emps;
}
6.3.1 使用collection进行处理
   /**
    * 使用collection处理 一对多 映射
    * @param deptId
    * @return
    */
   Dept getDeptAndEmpsInfo(@Param("deptId") Integer deptId);
 <resultMap id="DeptAndEmpsResultMap" type="dept">
        <id property="deptId" column="dept_id"></id>
        <result property="deptName" column="dept_name"/>
        <!-- 使用collection标签来配置 一对多映射关系 -->
        <collection property="emps" ofType="emp">
            <id property="empId" column="emp_id"></id>
            <result property="empName" column="emp_name"/>
            <result property="age" column="age"/>
            <result property="sex" column="sex"/>
            <result property="email" column="email"/>
        </collection>
    </resultMap>

    <!-- 使用collection处理 一对多 映射 -->
    <!-- Dept getDeptAndEmpsInfo(@Param("deptId") Integer deptId); -->
    <select id="getDeptAndEmpsInfo" resultMap="">
        select * from dept left join emp on dept.dept_id = emp.dept_id where dept.dept_id =#{deptId}
    </select>
- ofType:表示该属性对应的集合中存储的数据的类型
- 测试:
    @Test
    public void getDeptAndEmpsTest(){
        SqlSession sqlSession = SqlSessionUtil.getSqlSession();
        DeptMapper deptMapper = sqlSession.getMapper(DeptMapper.class);
        //Dept{deptId=1, deptName='步枪', emps=[Emp{empId=1, empName='ak47', age=20, sex=1, email='123@qq.com', dept=null}, Emp{empId=2, empName='m4a1', age=36, sex=1, email='123@qq.com', dept=null}]}
        System.out.println(deptMapper.getDeptAndEmpsInfo(1));
    }
6.3.2 使用分步查询进行处理
1.查询部门信息
  /**
    * 查询部门信息以及部门下所有员工信息
    * 分步查询第一步: 根据dept_id查询部门信息
    * @param deptId
    * @return
    */
   Dept getDeptInfoByStep(@Param("deptId") Integer deptId);
<resultMap id="DeptAndEmpsStepResultMap" type="dept">
        <id property="deptId" column="dept_id"></id>
        <result property="deptName" column="dept_name"/>
        <!-- 使用collection标签来配置 一对多映射关系 -->
        <collection property="emps"
                    select="com.atguigu.mybatis.mapper.EmpMapper.getDeptAndEmpsByStep"
                    column="dept_id">
        </collection>
    </resultMap>

    <!-- Dept getDeptInfoByStep(@Param("deptId") Integer deptId); -->
    <select id="getDeptInfoByStep" resultMap="DeptAndEmpsStepResultMap" >
        select * from dept where dept_id =#{deptId}
    </select>
2.查询部门下的所有员工信息
   /** 查询部门信息以及部门下所有员工信息
     * 分步查询第二步:根据dept_id查询员工信息
     * @param deptId
     * @return
     */
    Emp getDeptAndEmpsByStep(@Param("deptId") Integer deptId);
<!-- Emp getEmpAndDeptInfoByStep(@Param("deptId") Integer deptId); -->
    <select id="getDeptAndEmpsByStep" resultType="emp" >
        select * from emp where dept_id =#{deptId}
    </select>
测试:
    @Test
    public void getDeptAndEmpsStepTest(){
        SqlSession sqlSession = SqlSessionUtil.getSqlSession();
        DeptMapper deptMapper = sqlSession.getMapper(DeptMapper.class);
        System.out.println(deptMapper.getDeptInfoByStep(1));
    }
七、延迟加载
- 分步查询的优点:可以实现延迟加载,但是必须在核心配置文件的全局配置(settings)中配置
- lazyLoadingEnabled:延迟加载的全局开关。当开启时,所有关联对象都会延迟加载
- aggressiveLazyLoading:当开启时,任何方法的调用都会加载该对象的所有属性。否则,每个属性都会按需加载。
- 此时就可以实现按需加载,获取的数据是什么,就只会执行相应的sql。此时可通过association和collection中的fetchType属性设置当前的分步查询是否使用延迟加载,
fetchType=“lazy(延迟加载)|eager(立即加载)”
延迟加载的前提是配置 lazyLoadingEnabled = true
    <!-- 全局配置 -->
    <settings>
        <setting name="lazyLoadingEnabled" value="true"/>
    </settings>
    @Test
    public void getDeptAndEmpsStepTest(){
        SqlSession sqlSession = SqlSessionUtil.getSqlSession();
        DeptMapper deptMapper = sqlSession.getMapper(DeptMapper.class);
        Dept dept = deptMapper.getDeptInfoByStep(1);
        //由于这边只调用了dept.getDeptName(),所以emps的查询是不会调用的,这就是延迟加载
        System.out.println(dept.getDeptName());
        System.out.println("=============================================");
        //当调用雇员相关的信息,雇员的查询就会使用到
        System.out.println(dept.getEmps());
    }
关闭延迟加载,两条SQL都执行了

开启延迟加载后,只有当使用到emps时,才会执行查询
fetchType:当开启了全局的延迟加载之后,可以通过该属性手动控制延迟加载的效果,fetchType=“lazy(延迟加载)|eager(立即加载)”
    <resultMap id="DeptAndEmpsStepResultMap" type="dept">
        <id property="deptId" column="dept_id"></id>
        <result property="deptName" column="dept_name"/>
        <!-- 使用collection标签来配置 一对多映射关系 -->
        <collection property="emps"
                    select="com.atguigu.mybatis.mapper.EmpMapper.getDeptAndEmpsByStep"
                    column="dept_id"
                    fetchType="lazy"
                    >
        </collection>
    </resultMap>
八、动态SQL
Mybatis框架的动态SQL技术是一种特定条件动态拼接sql语句的功能,它存在的意义是为了解决拼接SQL语句字符串时的痛点问题。
8.1 if标签
- if标签可通过test属性(即传过来的数据) 的表达式进行判断,若表达式为true,则执行标签中的内容。否则不执行
- 在where后面添加一个恒成立条件 1=1
- 这个
1=1可以用来拼接and语句,例如:当empName为null时- 如果不加上恒成立条件,则SQL语句为
select * from t_emp where and age = ? and sex = ? and email = ?,此时where会与and连用,SQL语句报错。 - 如果加上恒成立条件,则SQL语句为
select * from t_emp where 1= 1 and age = ? and sex = ? and email = ?,此时SQL语句不会报错。
- 如果不加上恒成立条件,则SQL语句为
<!-- List<Emp> getEmpByCondition(Emp emp); -->
    <select id="getEmpByCondition" resultType="emp">
        select * from emp where 1=1
        <if test="empName != null and empName !=''">
        emp_name = #{empName}
        </if>

        <if test="age != null and age !=''">
           and age = #{age}

        </if>
        <if test="sex != null and sex !=''">
           and sex = #{sex}

        </if>
        <if test="email != null and email !=''">
           and email = #{email}

        </if>
    </select>
8.2 where标签
- where和if一般结合使用;
- 若where标签中的if条件都不满足,则where标签没有任何功能,Mybatis也不会生成where关键字
- 若where标签中的if条件满足,Myabtis会生成where关键字,并且将
条件前方多余的and/or去掉
 <select id="getEmpByCondition" resultType="emp">
        select * from emp
        <where>
            <if test="empName != null and empName !=''">
                emp_name = #{empName}
            </if>

            <if test="age != null and age !=''">
                and age = #{age}

            </if>
            <if test="sex != null and sex !=''">
                and sex = #{sex}

            </if>
            <if test="email != null and email !=''">
                and email = #{email}
            </if>
        </where>
注意:where标签不能去掉条件后多余的and/or
<!--这种用法是错误的,只能去掉条件前面的and/or,条件后面的不行-->
<if test="empName != null and empName !=''">
emp_name = #{empName} and
</if>
<if test="age != null and age !=''">
	age = #{age}
</if>
8.3 trim标签
- trim标签用于去除或添加标签中的内容
- trim标签常用属性:
- prefix:在trim标签中的内容的前面添加某些内容
- suffix:在trim标签中的内容的后面添加某些内容
- prefixOverrides:在trim标签中的内容的前面去掉某些内容
- suffixOverrides:在trim标签中的内容的后面去掉某些内容
- 若trim标签中都不满足条件,则trim标签没有任何效果,也就是只剩下
select * from emp
 <select id="getEmpByCondition" resultType="emp">
        select * from emp
    <trim prefix="where" prefixOverrides="and|or">
        <if test="empName != null and empName !=''">
            emp_name = #{empName}
        </if>

        <if test="age != null and age !=''">
            and age = #{age}

        </if>
        <if test="sex != null and sex !=''">
            and sex = #{sex}

        </if>
        <if test="email != null and email !=''">
            and email = #{email}
        </if>
    </trim>
    </select>
测试:
    @Test
    public void test(){
        SqlSession sqlSession = SqlSessionUtil.getSqlSession();
        DynamicMapper dynamicMapper = sqlSession.getMapper(DynamicMapper.class);
        List<Emp> emps = dynamicMapper.getEmpByCondition(new Emp(null, "", 30, null, ""));
        System.out.println(emps);
    }
运行结果:

8.4 choose when otherwise标签
choose when otherwise相当于if .. else if ... elsewhen至少要一个,otherwise至多只有一个
<select id="getEmpByCondition" resultType="emp">
        select * from emp
        <where>
            <choose>
                <when test="empName != null and empName !=''">
                    emp_name = #{empName}
                </when>
                <when test="age != null and age !=''">
                    and age = #{age}

                </when>
                <when test="sex != null and sex !=''">
                    and sex = #{sex}

                </when>
                <when test="email != null and email !=''">
                    and email = #{email}
                </when>
                <otherwise>
                    dept_id = 3
                </otherwise>
            </choose>
        </where>
    </select>
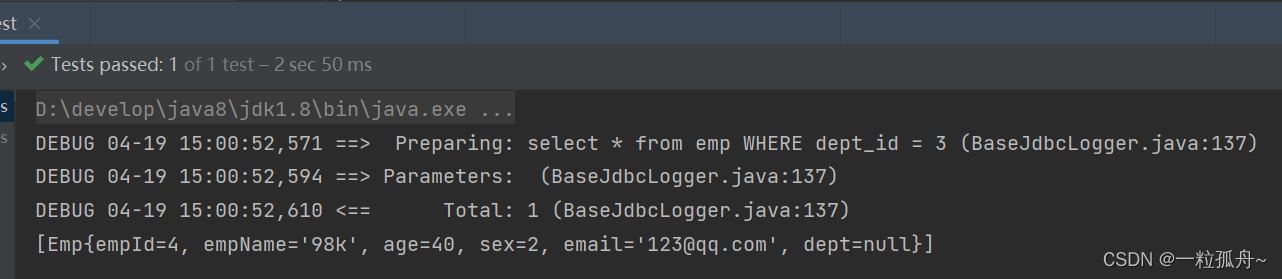
测试:
 @Test
    public void test(){
        SqlSession sqlSession = SqlSessionUtil.getSqlSession();
        DynamicMapper dynamicMapper = sqlSession.getMapper(DynamicMapper.class);
        List<Emp> emps = dynamicMapper.getEmpByCondition(new Emp(null, "", null, null, ""));
        System.out.println(emps);
    }
运行结果:
8.5 foreach标签
- 属性:
- collection:设置要循环的数组或集合
- item:表示集合或数组中的每一个数据
- separator:表示循环体内每个数据的分隔符
- open:设置foreach标签中的内容的开始符
- close:设置foreach标签中的内容的结束符
- 批量删除
    /**
     * 根据雇员id进行批量删除
     * @param eids
     * @return
     */
    Integer removeMoreBatch(@Param("eids") Integer[] eids);
    <!--Integer removeMoreBatch(Integer[] eids);-->
    <delete id="removeMoreBatch">
        delete from emp where emp_id in
        <foreach collection="eids" item="eid" open="(" close=")" separator=",">
            #{eid}
        </foreach>
    </delete>
测试
    @Test
    public void removeMoreTest(){
        SqlSession sqlSession = SqlSessionUtil.getSqlSession();
        DynamicMapper dynamicMapper = sqlSession.getMapper(DynamicMapper.class);
        System.out.println(dynamicMapper.removeMoreBatch(new Integer[]{5, 6, 7}));
    }

- 批量新增
    /**
     * 批量新增雇员
     * @param emps
     * @return
     */
    Integer insertMoreBatch(@Param("emps") List<Emp> emps);
    <!--Integer insertMoreBatch(List<Emp> emps);-->
    <insert id="insertMoreBatch">
        insert into emp(emp_name) values
        <foreach collection="emps" item="emp" separator=",">
            (#{emp.empName})
        </foreach>
    </insert>
测试:
    @Test
    public void insertMoreTest(){
        SqlSession sqlSession = SqlSessionUtil.getSqlSession();
        DynamicMapper dynamicMapper = sqlSession.getMapper(DynamicMapper.class);
        Emp emp1 = new Emp(null, "vb", null, null, null);
        Emp emp2 = new Emp(null, "vb", null, null, null);
        Emp emp3 = new Emp(null, "vb", null, null, null);
        System.out.println(dynamicMapper.insertMoreBatch(Arrays.asList(emp1, emp2, emp3)));
    }

8.6 SQL片段
- SQL片段:可以记录一段公共SQL片段,在使用的地方通过include标签进行引入
- 声明SQL片段:
<sql标签>
<sql id="empColumns">eid,emp_name,age,sex,email</sql>
- 引用sql片段:
<include>标签
<!--List<Emp> getEmpByCondition(Emp emp);-->
<select id="getEmpByCondition" resultType="Emp">
	select <include refid="empColumns"></include> from t_emp
</select>
九、Mybatis缓存
9.1 Mybatis一级缓存
一级缓存是SqlSession级别的,通过同一个SqlSession查询的数据会被缓存,下次查询相同的数据时,就会从缓存中直接获取,不会从数据库重新访问
- 使一级缓存失效的四种情况:
- 不同的sqlSession对应不同的一级缓存
- 同一个SqlSession但是查询条件不同
- 同一个SqlSession两次查询期间执行了任何一次增删改操作
- 同一个SqlSession两次查询期间手动清空了缓存
9.2 Mybatis二级缓存
- 二级缓存是SqlSesionFactory级别,通过同一个SqlSessionFactory创建的SqlSession查询的结果会被缓存;此后若再次执行相同的查询语句,结果就会从缓存中获取。
- 二级缓存开启的步骤:
- 在Mybatis核心配置文件中,设置全局配置属性cacheEnabled=“true”,默认为true,不需要设置
- 在映射文件中添加
<cache/>标签 - 二级缓存必须在SqlSession关闭或提交之后有效。
- 查询的数据所转换的实体类型必须实现序列化接口
- 使二级缓存失效的情况:两次查询期间执行了任意的增删改操作,会使一级和二级缓存同时失效。
Emp getEmpByEid(@Param("eid") Integer eid);
 <!-- 开启二级缓存  -->
    <cache/>

    <select id="getEmpByEid" resultType="emp">
        select * from emp where emp_id = #{eid}
    </select>
// 转换的实体类需要实现序列化接口
public class Emp implements Serializable {

    private Integer empId;
    private String empName;
    private Integer age;
    private Integer sex;
    private String email;
    // 多对一关系: 在多的一方的实体类中定义 一的 实体类
    private Dept dept;
    getter/setter省略...
}
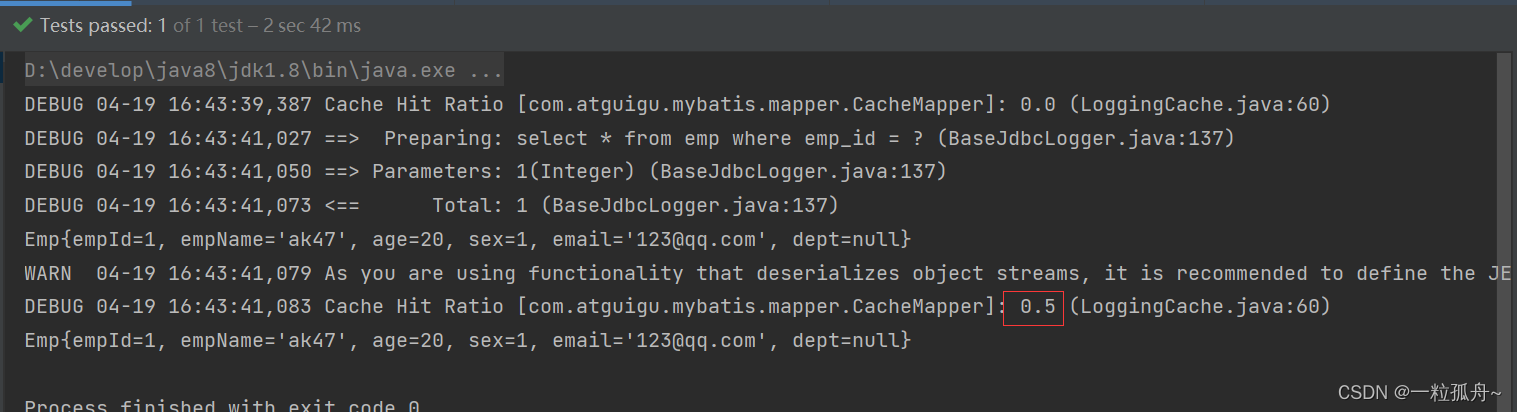
测试
@Test
    public void cacheTwoTest(){
        try {
            InputStream is = Resources.getResourceAsStream("mybatis-config.xml");
            SqlSessionFactory sqlSessionFactory = new SqlSessionFactoryBuilder().build(is);
            SqlSession sqlSession1 = sqlSessionFactory.openSession();
            CacheMapper mapper1 = sqlSession1.getMapper(CacheMapper.class);
            System.out.println(mapper1.getEmpByEid(1));
            // 关闭SqlSession
            sqlSession1.close();
            SqlSession sqlSession2 = sqlSessionFactory.openSession();
            CacheMapper mapper2 = sqlSession2.getMapper(CacheMapper.class);
            System.out.println(mapper2.getEmpByEid(1));
            // 关闭SqlSession
            sqlSession2.close();
        } catch (IOException e) {
            e.printStackTrace();
        }
    }
运行结果
9.3 二级缓存的相关配置
- 映射文件中
<cache/>标签的一些属性说明:-
type:指定二级缓存的类型,若不设置默认使用mybatis的二级缓存。
-
size:代表缓存最多可以存储多少数据,太大容易造成内存溢出。
-
readOnly:只读,true/false
- true:只读缓存;会给所有调用者返回缓存对象的相同实例。因此这些对象不能被修改。这提供了很重要的性能优势。
- false: 都写缓存;会返回缓存对象的拷贝(通过序列化)。这会慢一些,但是安全,因此默认是false
-
flushInterval:刷新间隔,单位毫秒
- 默认情况下不设置,也就是没有刷新间隔,缓存仅仅调用语句(增删改)时刷新
-
eviction:缓存回收策略
- LRU(Least Recently Used) – 最近最少使用的:移除最长时间不被使用的对象。
- FIFO(First in First out) – 先进先出:按对象进入缓存的顺序来移除它们。
- SOFT – 软引用:移除基于垃圾回收器状态和软引用规则的对象。
- WEAK – 弱引用:更积极地移除基于垃圾收集器状态和弱引用规则的对象。
- 默认的是 LRU
-
9.4 缓存查询的顺序
- 先查询二级缓存,因为二级缓存的范围比一级缓存大,因此二级缓存中可能会有其他程序已经查出来的数据,可以拿来直接使用。
- 如果二级缓存没有命中,再查询一级缓存。
- 如果一级缓存也没有命中,则查询数据库。
- SqlSession关闭之后,一级缓存的数据会写入到二级缓存
9.5 整合第三方缓存EHCache
9.5.1 添加依赖
<!-- Mybatis EHCache整合包 -->
<dependency>
	<groupId>org.mybatis.caches</groupId>
	<artifactId>mybatis-ehcache</artifactId>
	<version>1.2.1</version>
</dependency>
<!-- slf4j日志门面的一个具体实现 -->
<dependency>
	<groupId>ch.qos.logback</groupId>
	<artifactId>logback-classic</artifactId>
	<version>1.2.3</version>
</dependency>
9.5.2 各个jar包的功能
| jar包名称 | 作用 |
|---|---|
| mybatis-ehcache | Mybatis和EHCache的整合包 |
| ehcache | EHCache核心包 |
| slf4j-api | SLF4J日志门面包 |
| logback-classic | 支持SLF4J门面接口的一个具体实现 |
9.5.2 创建EHCache的配置文件ehcache.xml
- 名字必须是
ehcache.xml
<?xml version="1.0" encoding="utf-8" ?>
<ehcache xmlns:xsi="http://www.w3.org/2001/XMLSchema-instance"
         xsi:noNamespaceSchemaLocation="../config/ehcache.xsd">
    <!-- 磁盘保存路径 -->
    <diskStore path="D:\atguigu\ehcache"/>
    <defaultCache
            maxElementsInMemory="1000"
            maxElementsOnDisk="10000000"
            eternal="false"
            overflowToDisk="true"
            timeToIdleSeconds="120"
            timeToLiveSeconds="120"
            diskExpiryThreadIntervalSeconds="120"
            memoryStoreEvictionPolicy="LRU">
    </defaultCache>
</ehcache>
9.5.3 设置二级缓存的类型
- 在xxxMapper.xml文件中设置二级缓存类型
<cache type="org.mybatis.caches.ehcache.EhcacheCache"/>
9.5.4 加入logback日志
- 存在SLF4J时,作为简易日志的log4j将失效,此时我们需要借助SLF4J的具体实现logback来打印日志。创建logback的配置文件
logback.xml,名字固定,不可改变
<?xml version="1.0" encoding="UTF-8"?>
<configuration debug="true">
    <!-- 指定日志输出的位置 -->
    <appender name="STDOUT"
              class="ch.qos.logback.core.ConsoleAppender">
        <encoder>
            <!-- 日志输出的格式 -->
            <!-- 按照顺序分别是:时间、日志级别、线程名称、打印日志的类、日志主体内容、换行 -->
            <pattern>[%d{HH:mm:ss.SSS}] [%-5level] [%thread] [%logger] [%msg]%n</pattern>
        </encoder>
    </appender>
    <!-- 设置全局日志级别。日志级别按顺序分别是:DEBUG、INFO、WARN、ERROR -->
    <!-- 指定任何一个日志级别都只打印当前级别和后面级别的日志。 -->
    <root level="DEBUG">
        <!-- 指定打印日志的appender,这里通过“STDOUT”引用了前面配置的appender -->
        <appender-ref ref="STDOUT" />
    </root>
    <!-- 根据特殊需求指定局部日志级别 -->
    <logger name="com.atguigu.crowd.mapper" level="DEBUG"/>
</configuration>
9.5.5 EHCache配置文件说明
| 属性名 | 是否必须 | 作用 |
|---|---|---|
| maxElementsInMemory | 是 | 在内存中缓存的element的最大数目 |
| maxElementsOnDisk | 是 | 在磁盘上缓存的element的最大数目,若是0表示无穷大 |
| eternal | 是 | 设定缓存的elements是否永远不过期。 如果为true,则缓存的数据始终有效, 如果为false那么还要根据timeToIdleSeconds、timeToLiveSeconds判断 |
| overflowToDisk | 是 | 设定当内存缓存溢出的时候是否将过期的element缓存到磁盘上 |
| timeToIdleSeconds | 否 | 当缓存在EhCache中的数据前后两次访问的时间超过timeToIdleSeconds的属性取值时, 这些数据便会删除,默认值是0,也就是可闲置时间无穷大 |
| timeToLiveSeconds | 否 | 缓存element的有效生命期,默认是0.,也就是element存活时间无穷大 |
| diskSpoolBufferSizeMB | 否 | DiskStore(磁盘缓存)的缓存区大小。默认是30MB。每个Cache都应该有自己的一个缓冲区 |
| diskPersistent | 否 | 在VM重启的时候是否启用磁盘保存EhCache中的数据,默认是false |
| diskExpiryThreadIntervalSeconds | 否 | 磁盘缓存的清理线程运行间隔,默认是120秒。每个120s, 相应的线程会进行一次EhCache中数据的清理工作 |
| memoryStoreEvictionPolicy | 否 | 当内存缓存达到最大,有新的element加入的时候, 移除缓存中element的策略。 默认是LRU(最近最少使用),可选的有LFU(最不常使用)和FIFO(先进先出 |
十、Mybatis的逆向工程
- 正向工程:先创建Java实体类,由框架负责根据实体类生成数据库表。Hibernate是支持正向工程的
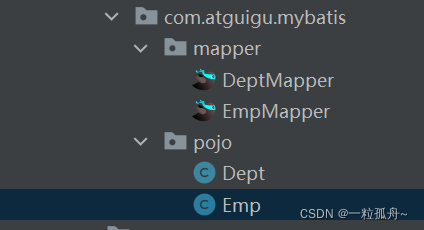
- 逆向工程:先创建数据库表,由框架负责根据数据库表生成
实体类,Mapper接口,Mapper映射文件
10.1 逆向工程步骤
10.1.1 引入依赖和插件
<dependencies>
        <!-- MyBatis核心依赖包 -->
        <dependency>
            <groupId>org.mybatis</groupId>
            <artifactId>mybatis</artifactId>
            <version>3.5.7</version>
        </dependency>
        <!-- junit测试 -->
        <dependency>
            <groupId>junit</groupId>
            <artifactId>junit</artifactId>
            <version>4.12</version>
            <scope>test</scope>
        </dependency>
        <!-- MySQL驱动 -->
        <dependency>
            <groupId>mysql</groupId>
            <artifactId>mysql-connector-java</artifactId>
            <version>8.0.28</version>
        </dependency>
        <!-- log4j日志 -->
        <dependency>
            <groupId>log4j</groupId>
            <artifactId>log4j</artifactId>
            <version>1.2.17</version>
        </dependency>
    </dependencies>
    <!-- 控制Maven在构建过程中相关配置 -->
    <build>
        <!-- 构建过程中用到的插件 -->
        <plugins>
            <!-- 具体插件,逆向工程的操作是以构建过程中插件形式出现的 -->
            <plugin>
                <groupId>org.mybatis.generator</groupId>
                <artifactId>mybatis-generator-maven-plugin</artifactId>
                <version>1.3.0</version>
                <!-- 插件的依赖 -->
                <dependencies>
                    <!-- 逆向工程的核心依赖 -->
                    <dependency>
                        <groupId>org.mybatis.generator</groupId>
                        <artifactId>mybatis-generator-core</artifactId>
                        <version>1.3.2</version>
                    </dependency>
                    <!-- 数据库连接池 -->
                    <dependency>
                        <groupId>com.mchange</groupId>
                        <artifactId>c3p0</artifactId>
                        <version>0.9.2</version>
                    </dependency>
                    <!-- MySQL驱动 -->
                    <dependency>
                        <groupId>mysql</groupId>
                        <artifactId>mysql-connector-java</artifactId>
                        <version>8.0.28</version>
                    </dependency>
                </dependencies>
            </plugin>
        </plugins>
    </build>
10.1.2 添加逆向工程的配置文件
- MBG配置文件名固定:
generatorConfig.xml - 修改配置文件中对应的包
targetRuntime: 执行生成的逆向工程的版本MyBatis3Simple: 生成基本的CRUD(清新简洁版)MyBatis3: 生成带条件的CRUD(奢华尊享版)
<?xml version="1.0" encoding="UTF-8"?>
<!DOCTYPE generatorConfiguration
        PUBLIC "-//mybatis.org//DTD MyBatis Generator Configuration 1.0//EN"
        "http://mybatis.org/dtd/mybatis-generator-config_1_0.dtd">
<generatorConfiguration>
    <!--
    targetRuntime: 执行生成的逆向工程的版本
    MyBatis3Simple: 生成基本的CRUD(清新简洁版)
    MyBatis3: 生成带条件的CRUD(奢华尊享版)
    -->
    <context id="DB2Tables" targetRuntime="MyBatis3Simple">
        <!-- 数据库的连接信息 -->
        <jdbcConnection driverClass="com.mysql.cj.jdbc.Driver"
                        connectionURL="jdbc:mysql://localhost:3306/mybatisdemo"
                        userId="root"
                        password="root">
        </jdbcConnection>
        <!-- javaBean的生成策略-->
        <javaModelGenerator targetPackage="com.atguigu.mybatis.pojo" targetProject=".\src\main\java">
            <property name="enableSubPackages" value="true" />
            <property name="trimStrings" value="true" />
        </javaModelGenerator>
        <!-- SQL映射文件的生成策略 -->
        <sqlMapGenerator targetPackage="com.atguigu.mybatis.mapper"
                         targetProject=".\src\main\resources">
            <property name="enableSubPackages" value="true" />
        </sqlMapGenerator>
        <!-- Mapper接口的生成策略 -->
        <javaClientGenerator type="XMLMAPPER"
                             targetPackage="com.atguigu.mybatis.mapper" targetProject=".\src\main\java">
            <property name="enableSubPackages" value="true" />
        </javaClientGenerator>
        <!-- 逆向分析的表 -->
        <!-- tableName设置为*号,可以对应所有表,此时不写domainObjectName -->
        <!-- domainObjectName属性指定生成出来的实体类的类名 -->
        <table tableName="emp" domainObjectName="Emp"/>
        <table tableName="dept" domainObjectName="Dept"/>
    </context>
</generatorConfiguration>
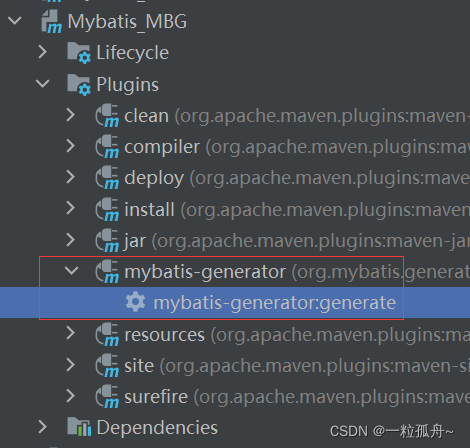
10.1.3 执行插件的mybatis-generator:generate
10.2 QBC风格的CRUD
10.2.1 查询
selectByExample:按条件查询,需要传入一个example对象或者null;如果传入一个null,则表示没有条件,也就是查询所有数据example.createCriteria().xxx:创建条件对象,通过andXXX方法为SQL添加查询添加,每个条件之间是and关系example.or().xxx:将之前添加的条件通过or拼接其他条件
@Test
public void testMBG() {
try {
InputStream is = Resources.getResourceAsStream("mybatis-config.xml");
SqlSessionFactoryBuilder sqlSessionFactoryBuilder = new SqlSessionFactoryBuilder();
SqlSessionFactory sqlSessionFactory = sqlSessionFactoryBuilder.build(is);
SqlSession sqlSession = sqlSessionFactory.openSession(true);
EmpMapper mapper = sqlSession.getMapper(EmpMapper.class);
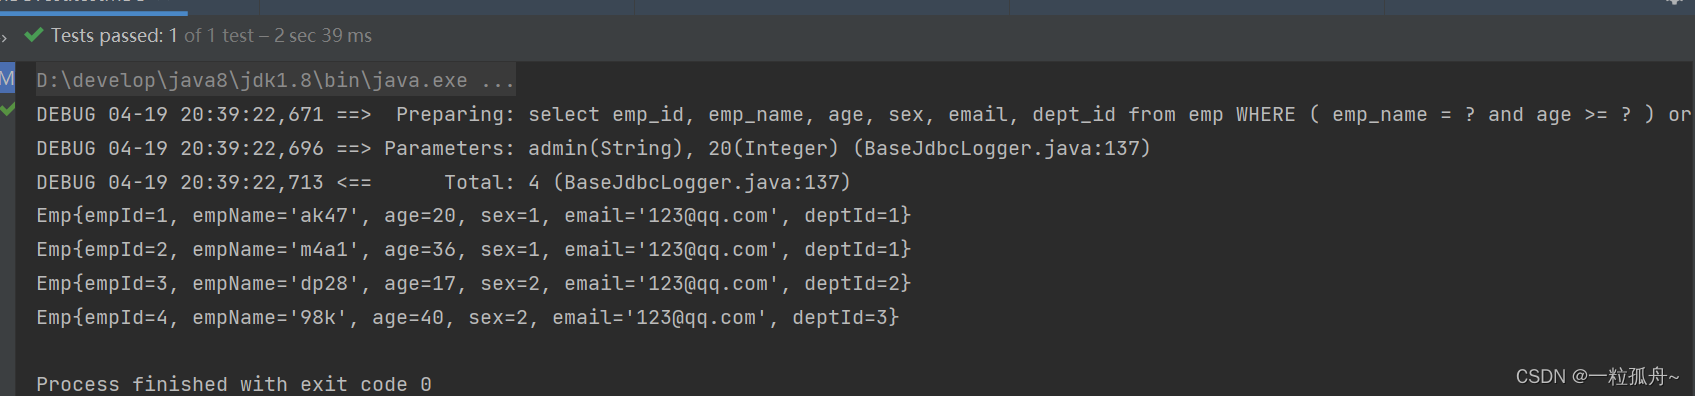
EmpExample example = new EmpExample();
//名字为张三,且年龄大于等于20
example.createCriteria().andEmpNameEqualTo("admin").andAgeGreaterThanOrEqualTo(20);
//或者did不为空
example.or().andDeptIdIsNotNull();
List<Emp> emps = mapper.selectByExample(example);
emps.forEach(System.out::println);
} catch (IOException e) {
e.printStackTrace();
}
}
10.1.2 增改
updateByPrimaryKey:通过主键进行数据修改,如果某一个值为null,也会将对应的字段改为nullmapper.updateByPrimaryKey(new Emp(1,"admin",22,null,"456@qq.com",3));
updateByPrimaryKeySelective():通过主键进行选择性数据修改,如果某个值为null,则不修改这个字段
十一、分页插件
11.1 分页插件使用步骤
11.1.1 引入依赖
 <!-- 分页插件 -->
        <!-- https://mvnrepository.com/artifact/com.github.pagehelper/pagehelper -->
        <dependency>
            <groupId>com.github.pagehelper</groupId>
            <artifactId>pagehelper</artifactId>
            <version>5.2.0</version>
        </dependency>
11.1.2 配置分页插件
    <plugins>
        <!-- 分页插件 -->
        <plugin interceptor="com.github.pagehelper.PageInterceptor"></plugin>
    </plugins>
11.1.3 使用分页
开启分页功能:
在查询功能之前使用PageHelper.startPage(int pageNum,int pageSize) 开启分页功能
pageNum:当前页的页码
pageSize:当前页的条数
pageIndex:当前页的起始索引
pageIndex = (pageNum-1) * pageSize
@Test
public void pageTest(){
try {
InputStream is = Resources.getResourceAsStream("mybatis-config.xml");
SqlSessionFactory sqlSessionFactory = new SqlSessionFactoryBuilder().build(is);
SqlSession sqlSession = sqlSessionFactory.openSession(true);
EmpMapper mapper = sqlSession.getMapper(EmpMapper.class);
// 分页操作
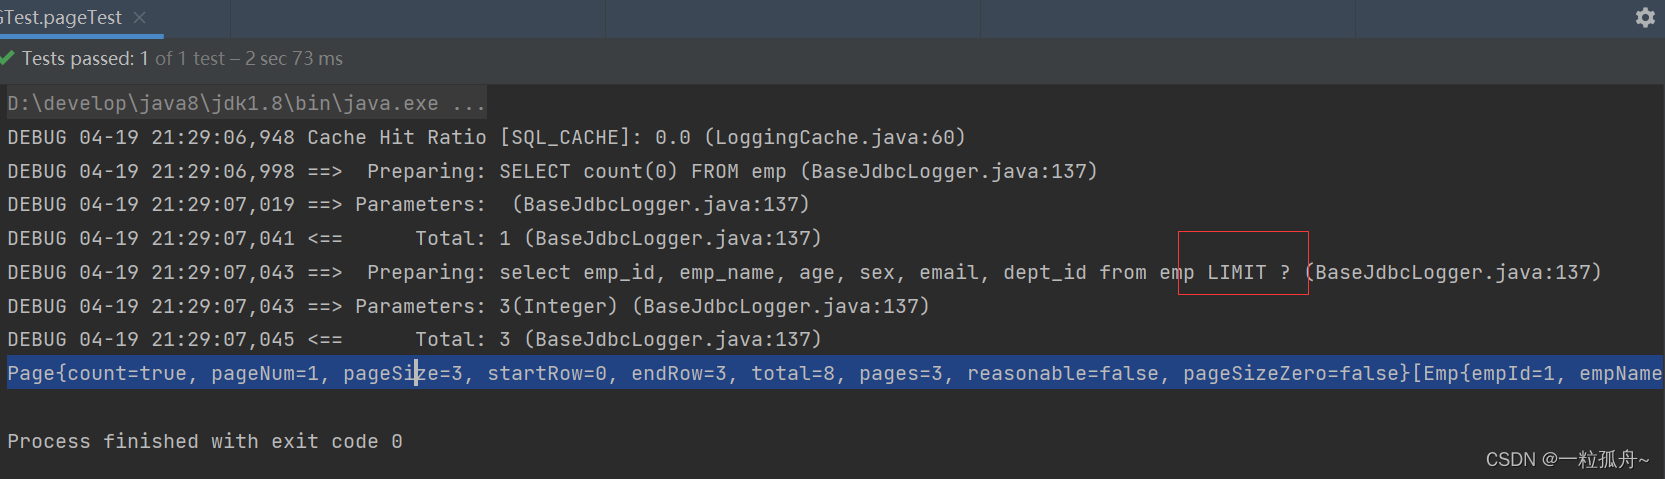
Page<Object> page = PageHelper.startPage(1, 3);
List<Emp> emps = mapper.selectByExample(null);
System.out.println(page);
} catch (IOException e) {
e.printStackTrace();
}
}
11.2 分页的返回数据
11.2.1 返回相对较少数据的分页对象(Page page)
@Test
public void testPageHelper() throws IOException {
	InputStream is = Resources.getResourceAsStream("mybatis-config.xml");
	SqlSessionFactoryBuilder sqlSessionFactoryBuilder = new SqlSessionFactoryBuilder();
	SqlSessionFactory sqlSessionFactory = sqlSessionFactoryBuilder.build(is);
	SqlSession sqlSession = sqlSessionFactory.openSession(true);
	EmpMapper mapper = sqlSession.getMapper(EmpMapper.class);
	//访问第一页,每页四条数据
	Page<Emp> page = PageHelper.startPage(1, 4);
	List<Emp> emps = mapper.selectByExample(null);
	//在查询到List集合后,打印分页数据
	System.out.println(page);
}
Page{count=true, pageNum=1, pageSize=3, startRow=0, endRow=3, total=8, pages=3, reasonable=false, pageSizeZero=false}[Emp{empId=1, empName='ak47', age=20, sex=1, email='123@qq.com', deptId=1}, Emp{empId=2, empName='m4a1', age=36, sex=1, email='123@qq.com', deptId=1}, Emp{empId=3, empName='dp28', age=17, sex=2, email='123@qq.com', deptId=2}]
11.2.2 返回相对较多数据的分页对象(PageInfo)
- 使用
PageInfo<T> pageInfo = new PageInfo<>(List<T> list, intnavigatePages)对象来封装分页查询后的数据集.- list:分页查询后的数据集
- intnavigatePages:导航分页的个数
 @Test
    public void pageTest(){
        try {
            InputStream is = Resources.getResourceAsStream("mybatis-config.xml");
            SqlSessionFactory sqlSessionFactory = new SqlSessionFactoryBuilder().build(is);
            SqlSession sqlSession = sqlSessionFactory.openSession(true);
            EmpMapper mapper = sqlSession.getMapper(EmpMapper.class);
            // 分页操作
            PageHelper.startPage(1, 3);
            List<Emp> emps = mapper.selectByExample(null);
            //使用PageInfo封装分页数据
            PageInfo<Emp> page = new PageInfo<>(emps, 3);
            System.out.println(page);
        } catch (IOException e) {
            e.printStackTrace();
        }
    }
分页相关数据
PageInfo{pageNum=1, pageSize=3, size=3, startRow=1, endRow=3, total=8, pages=3,
list=Page{count=true, pageNum=1, pageSize=3, startRow=0, endRow=3, total=8, pages=3, reasonable=false, pageSizeZero=false}[Emp{empId=1, empName='ak47', age=20, sex=1, email='123@qq.com', deptId=1}, Emp{empId=2, empName='m4a1', age=36, sex=1, email='123@qq.com', deptId=1}, Emp{empId=3, empName='dp28', age=17, sex=2, email='123@qq.com', deptId=2}], prePage=0, nextPage=2, isFirstPage=true, isLastPage=false, hasPreviousPage=false, hasNextPage=true, navigatePages=3, navigateFirstPage=1, navigateLastPage=3, navigatepageNums=[1, 2, 3]}
常用数据说明:
- pageNum:当前页的页码
- pageSize:当前页的条数
- size:当前页显示的真实条数
- startRow:当前页的初始条数
- endRow:当前页的最后条数
- total:总共数据数量
- pages:总页码
- navigatePages:当前页的导航页的个数
- navigateFirstPage:导航页的第一页页码
- navigateLastPage:导航页的最后一页页码
- navigatepageNums:导航分页的页码
- hasPreviousPage/hasNextPage:是否存在上一页/下一页
- isFirstPage/isLastPage:是否为第一页/最后一页
- prePage:上一页的页码
nextPage:下一页的页码


 904
904

 被折叠的 条评论
为什么被折叠?
被折叠的 条评论
为什么被折叠?
 到【灌水乐园】发言


