


 本文详细介绍了如何在SpringBoot项目中配置和使用定时任务,包括使用@Scheduled注解创建定时任务的方法,如fixedRate、fixedDelay及cron表达式的应用。同时,展示了如何通过@EnableScheduling注解开启定时任务,并提供了启动类的示例代码。
1.定时任务demo类:
import org.springframework.scheduling.annotation.Scheduled;
import org.springframework.stereotype.Component;
import java.time.LocalDateTime;
@Component // 注解为组件
public class ScheduledDemo {
@Scheduled(fixedDelay = 1000) //间隔1秒
public void printDemo() {
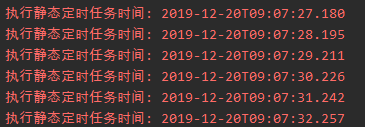
System.err.println("执行静态定时任务时间: " + LocalDateTime.now());
}
}
@Scheduled注解:
- fixedRate 以固定速率执行。
- fixedDelay 以上一个任务开始时间为基准,从上一任务开始执行后再次调用。
- cron表达式。可以实现定时调用。
2.写一个SpringBoot的启动类:
import org.mybatis.spring.annotation.MapperScan;
import org.springframework.boot.SpringApplication;
import org.springframework.boot.autoconfigure.SpringBootApplication;
import org.springframework.scheduling.annotation.EnableScheduling;
@EnableScheduling // 开启定时任务
@SpringBootApplication // 集成了@ComponentScan的功能
public class WtEmsApplication {

    public static void main(String[] args) {
        SpringApplication.run(WtEmsApplication.class, args);
    }
}
3.执行启动类,查看效果:


 1179
1179

 被折叠的 条评论
为什么被折叠?
被折叠的 条评论
为什么被折叠?
 到【灌水乐园】发言


