


 本文详细介绍了如何在SpringBoot项目中整合Nacos实现服务注册与发现,包括配置依赖、创建服务提供者与消费者,以及使用Feign进行远程调用。
首先启动我们上篇说的Nacos应用点击查看Nacos的安装与使用
一、SpringBoot与Nacos整合
首先我们要创建一个服务提供者名称为provider-nacos 加入以下依赖
<?xml version="1.0" encoding="UTF-8"?>
<project xmlns="http://maven.apache.org/POM/4.0.0" xmlns:xsi="http://www.w3.org/2001/XMLSchema-instance"
         xsi:schemaLocation="http://maven.apache.org/POM/4.0.0 http://maven.apache.org/xsd/maven-4.0.0.xsd">
    <modelVersion>4.0.0</modelVersion>
    <parent>
        <groupId>org.springframework.boot</groupId>
        <artifactId>spring-boot-starter-parent</artifactId>
        <version>2.0.5.RELEASE</version>
        <relativePath/> <!-- lookup parent from repository -->
    </parent>

    <!--因为spring-cloud-alibaba未纳入springcloud主版本管理 这里要手动添加 -->
    <dependencyManagement>
        <dependencies>
            <dependency>
                <groupId>org.springframework.cloud</groupId>
                <artifactId>spring-cloud-dependencies</artifactId>
                <version>Finchley.SR1</version>
                <type>pom</type>
                <scope>import</scope>
            </dependency>
            <dependency>
                <groupId>org.springframework.cloud</groupId>
                <artifactId>spring-cloud-alibaba-dependencies</artifactId>
                <version>0.2.1.RELEASE</version>
                <type>pom</type>
                <scope>import</scope>
            </dependency>
        </dependencies>
    </dependencyManagement>

    <groupId>com.example</groupId>
    <artifactId>provider-nacos</artifactId>
    <version>0.0.1-SNAPSHOT</version>
    <name>provider-nacos</name>
    <description>Demo project for Spring Boot</description>

    <properties>
        <java.version>1.8</java.version>
    </properties>

    <dependencies>
        <dependency>
            <groupId>org.springframework.boot</groupId>
            <artifactId>spring-boot-starter-web</artifactId>
        </dependency>

        <dependency>
            <groupId>org.springframework.cloud</groupId>
            <artifactId>spring-cloud-starter-alibaba-nacos-discovery</artifactId>
        </dependency>
    </dependencies>

    <build>
        <plugins>
            <plugin>
                <groupId>org.springframework.boot</groupId>
                <artifactId>spring-boot-maven-plugin</artifactId>
            </plugin>
        </plugins>
    </build>

</project>
二、Nacos服务注册
应用主类上加上@EnableDiscoveryClient
package com.example.provider;

import org.springframework.boot.SpringApplication;
import org.springframework.boot.autoconfigure.SpringBootApplication;
import org.springframework.cloud.client.discovery.EnableDiscoveryClient;


/**
 * @author MrWang
 * @version v1.0
 * @date 2019-04-25
 * @Description
 */

@EnableDiscoveryClient
@SpringBootApplication
public class ProviderNacosApplication {

    public static void main(String[] args) {
        SpringApplication.run(ProviderNacosApplication.class, args);
    }

}
EnableDiscoveryClient含义:
我们之前用的开启服务发现是用的EnableEurekaClient,而EnableEurekaClient中是包括EnableDiscoveryClient的。但是EnableEurekaClient只能用于Eureka,所以用其他的服务注册可以使用EnableDiscoveryClient,只换个注解,其他都不用换,我们的服务注册就已经完成了。
新建一个controller完成一个hello的方法
package com.example.provider.controller;

import org.springframework.web.bind.annotation.RequestMapping;
import org.springframework.web.bind.annotation.RestController;

/**
 * @author MrWang
 * @version v1.0
 * @date 2019-04-25
 * @Description
 */

@RestController
public class ProviderController {


    @RequestMapping("/hello")
    public String hello(String name){
        return "hello:"+name;
    }
}
配置文件:
server.port=8001
spring.application.name=provider-nacos-1
spring.cloud.nacos.discovery.server-addr=127.0.0.1:8848
spring.cloud.nacos.discovery.server-addr用于配置注册中心的地址;spring.application.name则为实例名称启动项目
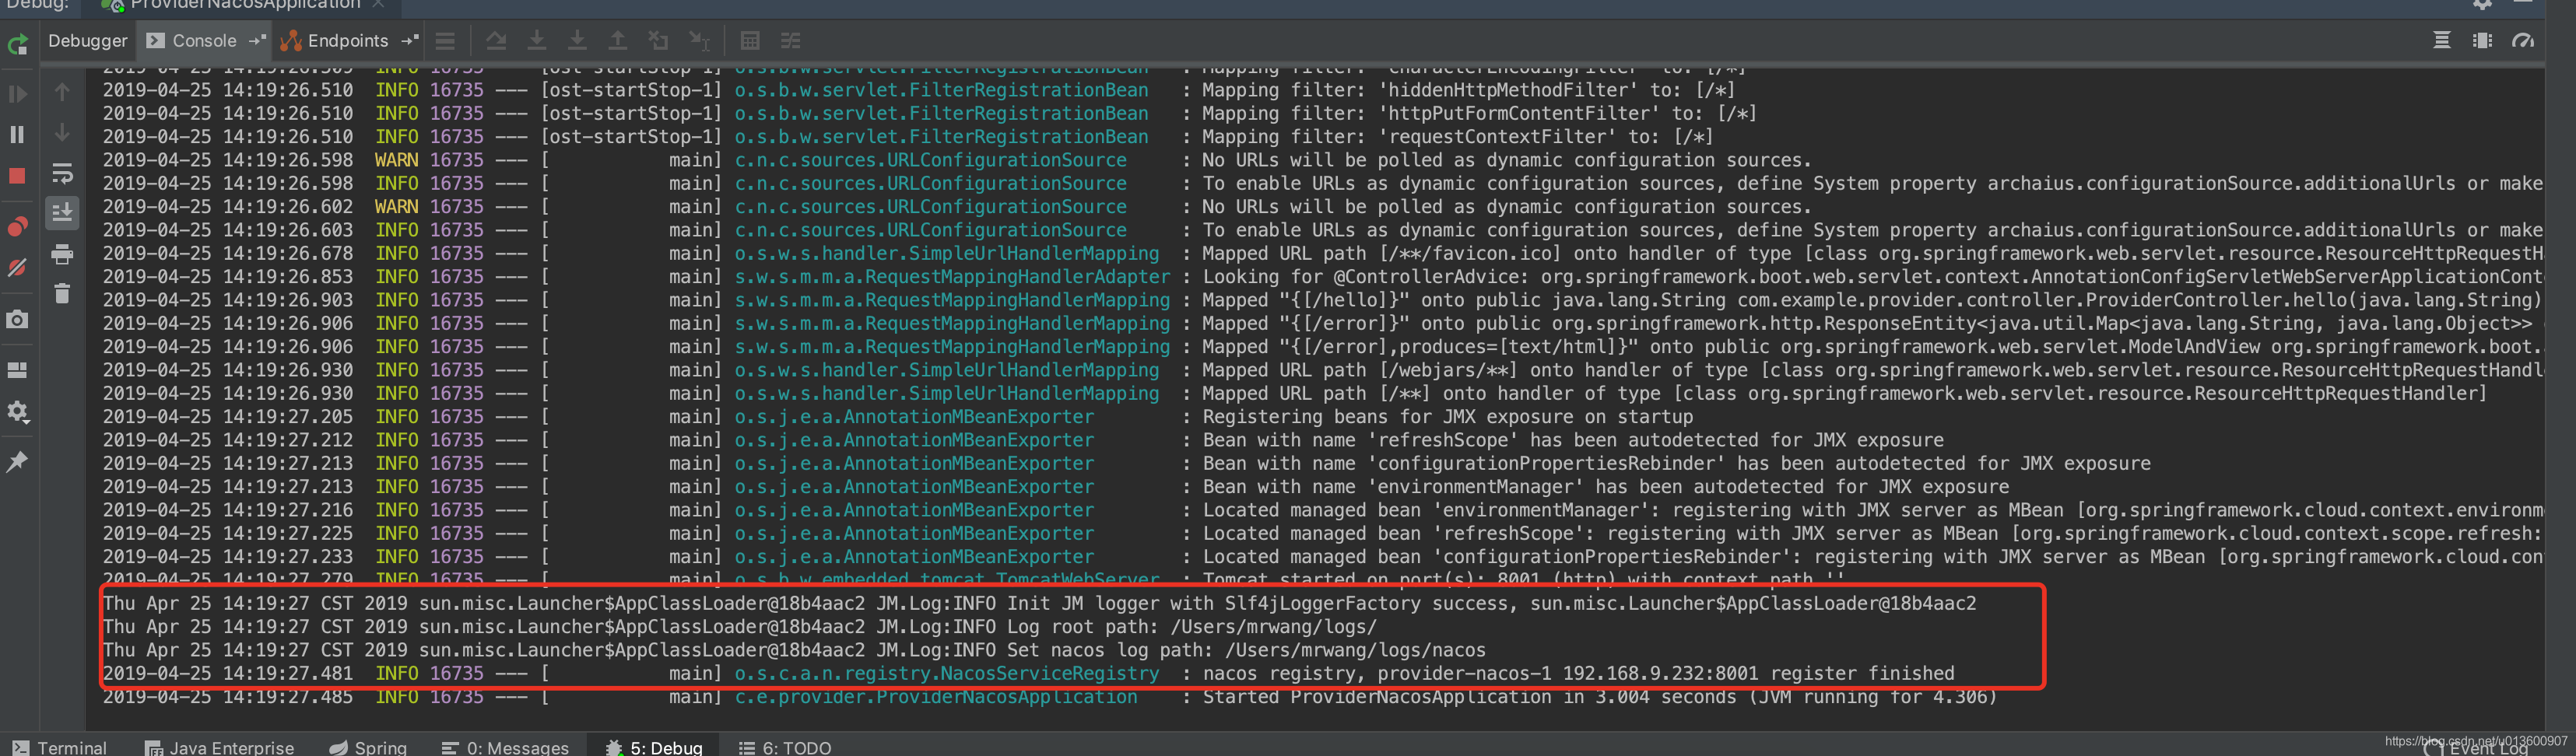
可以看到控制台输出的数据,nacos输出logs目录以及实例
注册完毕。
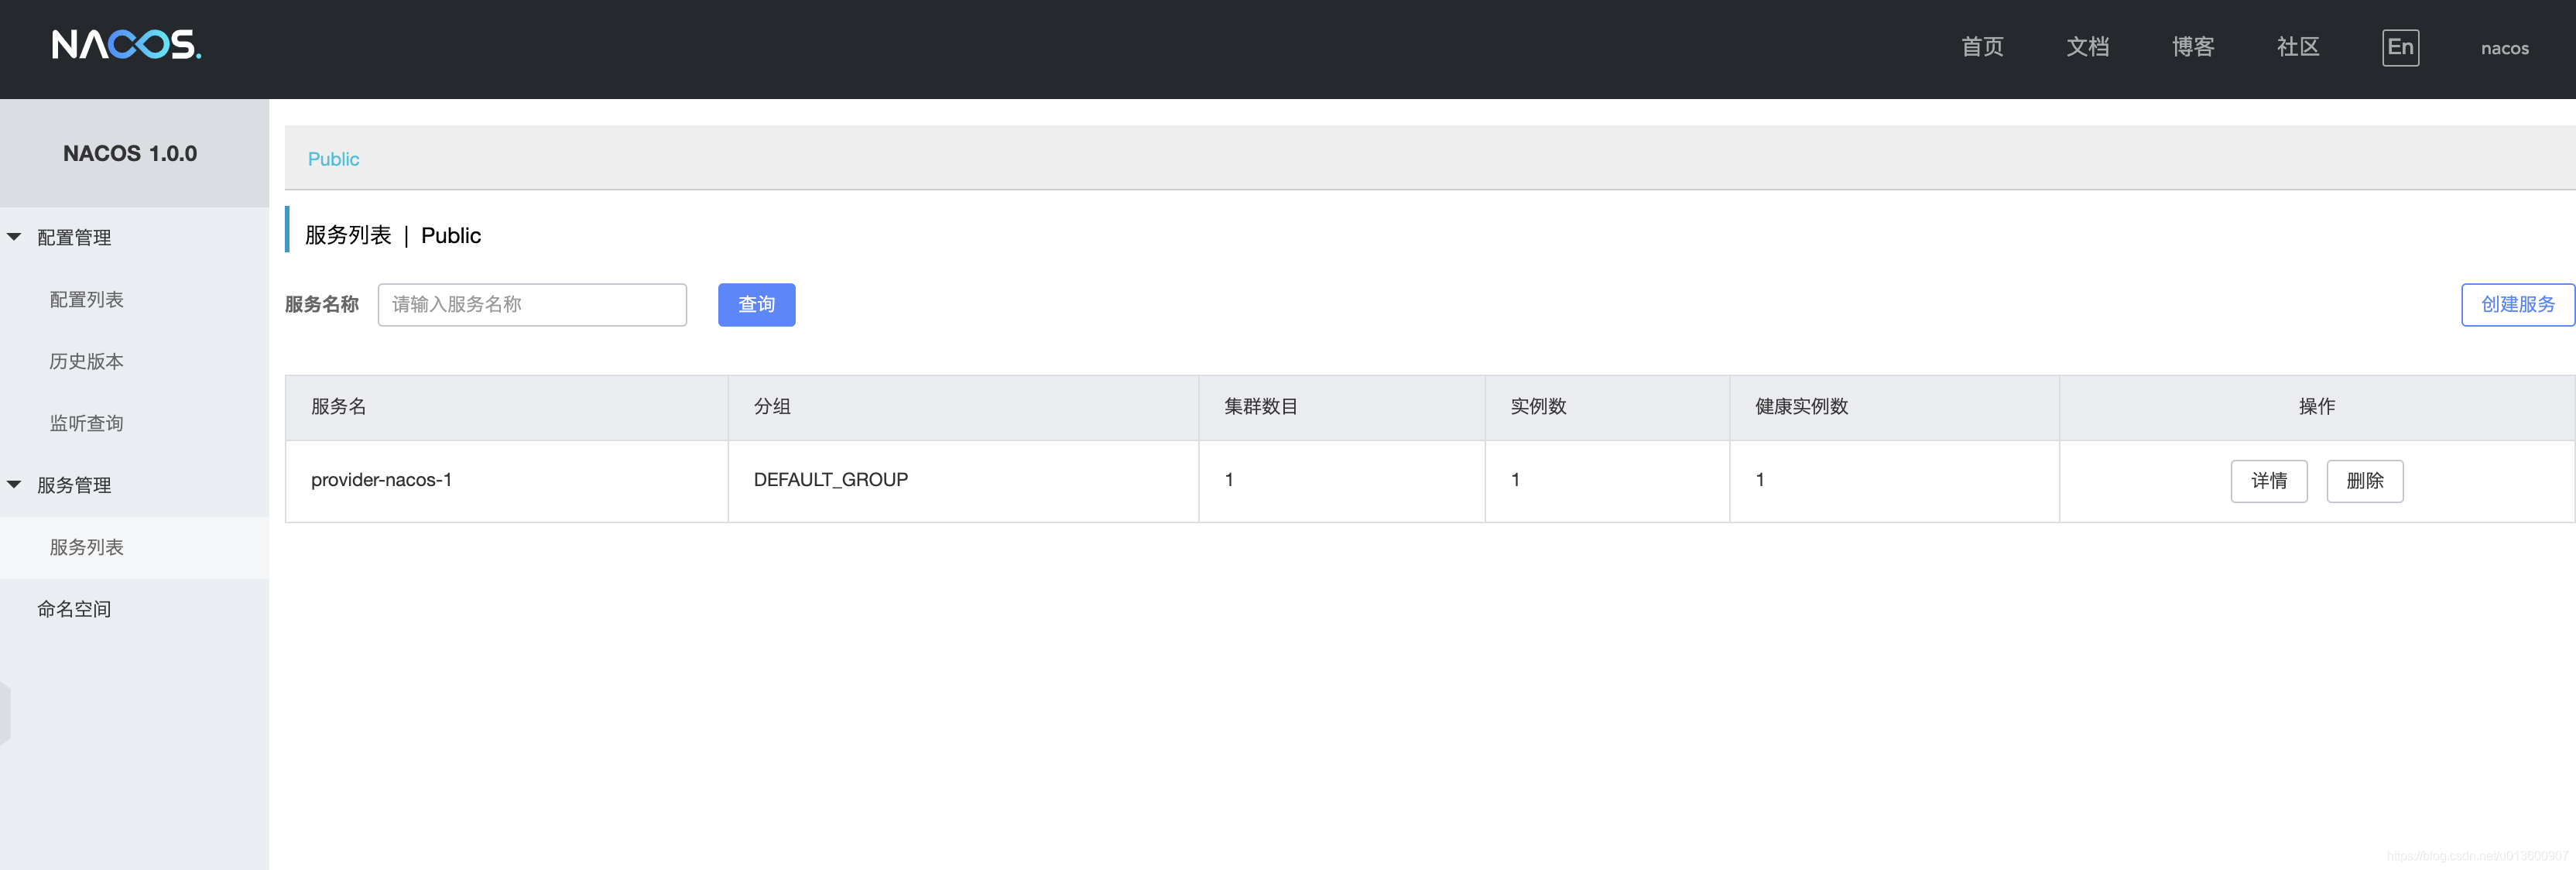
查看我们的nacos控制台-服务管理-服务列表可以看到我们刚起的服务。

接下来我们把当前项目稍微改一下,打出两个jar包出来,一个8001端口,一个8002端口
mvn clean install三、服务消费
创建一个consumer-nacos项目,pom文件同上。添加feign pom文件
        <dependency>
            <groupId>org.springframework.cloud</groupId>
            <artifactId>spring-cloud-starter-openfeign</artifactId>
        </dependency>
应用主类:
package com.example.consumer;

import org.springframework.boot.SpringApplication;
import org.springframework.boot.autoconfigure.SpringBootApplication;
import org.springframework.cloud.client.discovery.EnableDiscoveryClient;
import org.springframework.cloud.openfeign.EnableFeignClients;

/**
 * @author MrWang
 * @version v1.0
 * @date 2019-04-25
 * @Description
 */

@EnableFeignClients
@EnableDiscoveryClient
@SpringBootApplication
public class ConsumerNacosApplication {

    public static void main(String[] args) {
        SpringApplication.run(ConsumerNacosApplication.class, args);
    }

}
@EnableFeignClients 开启feign远程调用
feign类
package com.example.consumer.feign;

import org.springframework.cloud.openfeign.FeignClient;
import org.springframework.web.bind.annotation.RequestMapping;
import org.springframework.web.bind.annotation.RequestParam;

/**
 * @author MrWang
 * @version v1.0
 * @date 2019-04-25
 * @Description
 */

@FeignClient("provider-nacos")
public interface ConsumerFeign {

    /**
     * @param name
     * @return
     */
    @RequestMapping("/hello")
    String hello(@RequestParam("name")String name);
}
这个类上的注释代表要调用哪一个服务
controller类
package com.example.provider.controller;

import org.springframework.web.bind.annotation.RequestMapping;
import org.springframework.web.bind.annotation.RestController;

import javax.servlet.http.HttpServletRequest;

/**
 * @author MrWang
 * @version v1.0
 * @date 2019-04-25
 * @Description
 */

@RestController
public class ProviderController {


    @RequestMapping("/hello")
    public String hello(String name, HttpServletRequest request){
        return "hello:"+name+"port:"+request.getServerPort();
    }
}
我们把feign注入进来,调用我们的服务提供者。
配置文件
server.port=9001
spring.application.name=consumer-nacos
spring.cloud.nacos.discovery.server-addr=127.0.0.1:8848
启动consumer-nacos
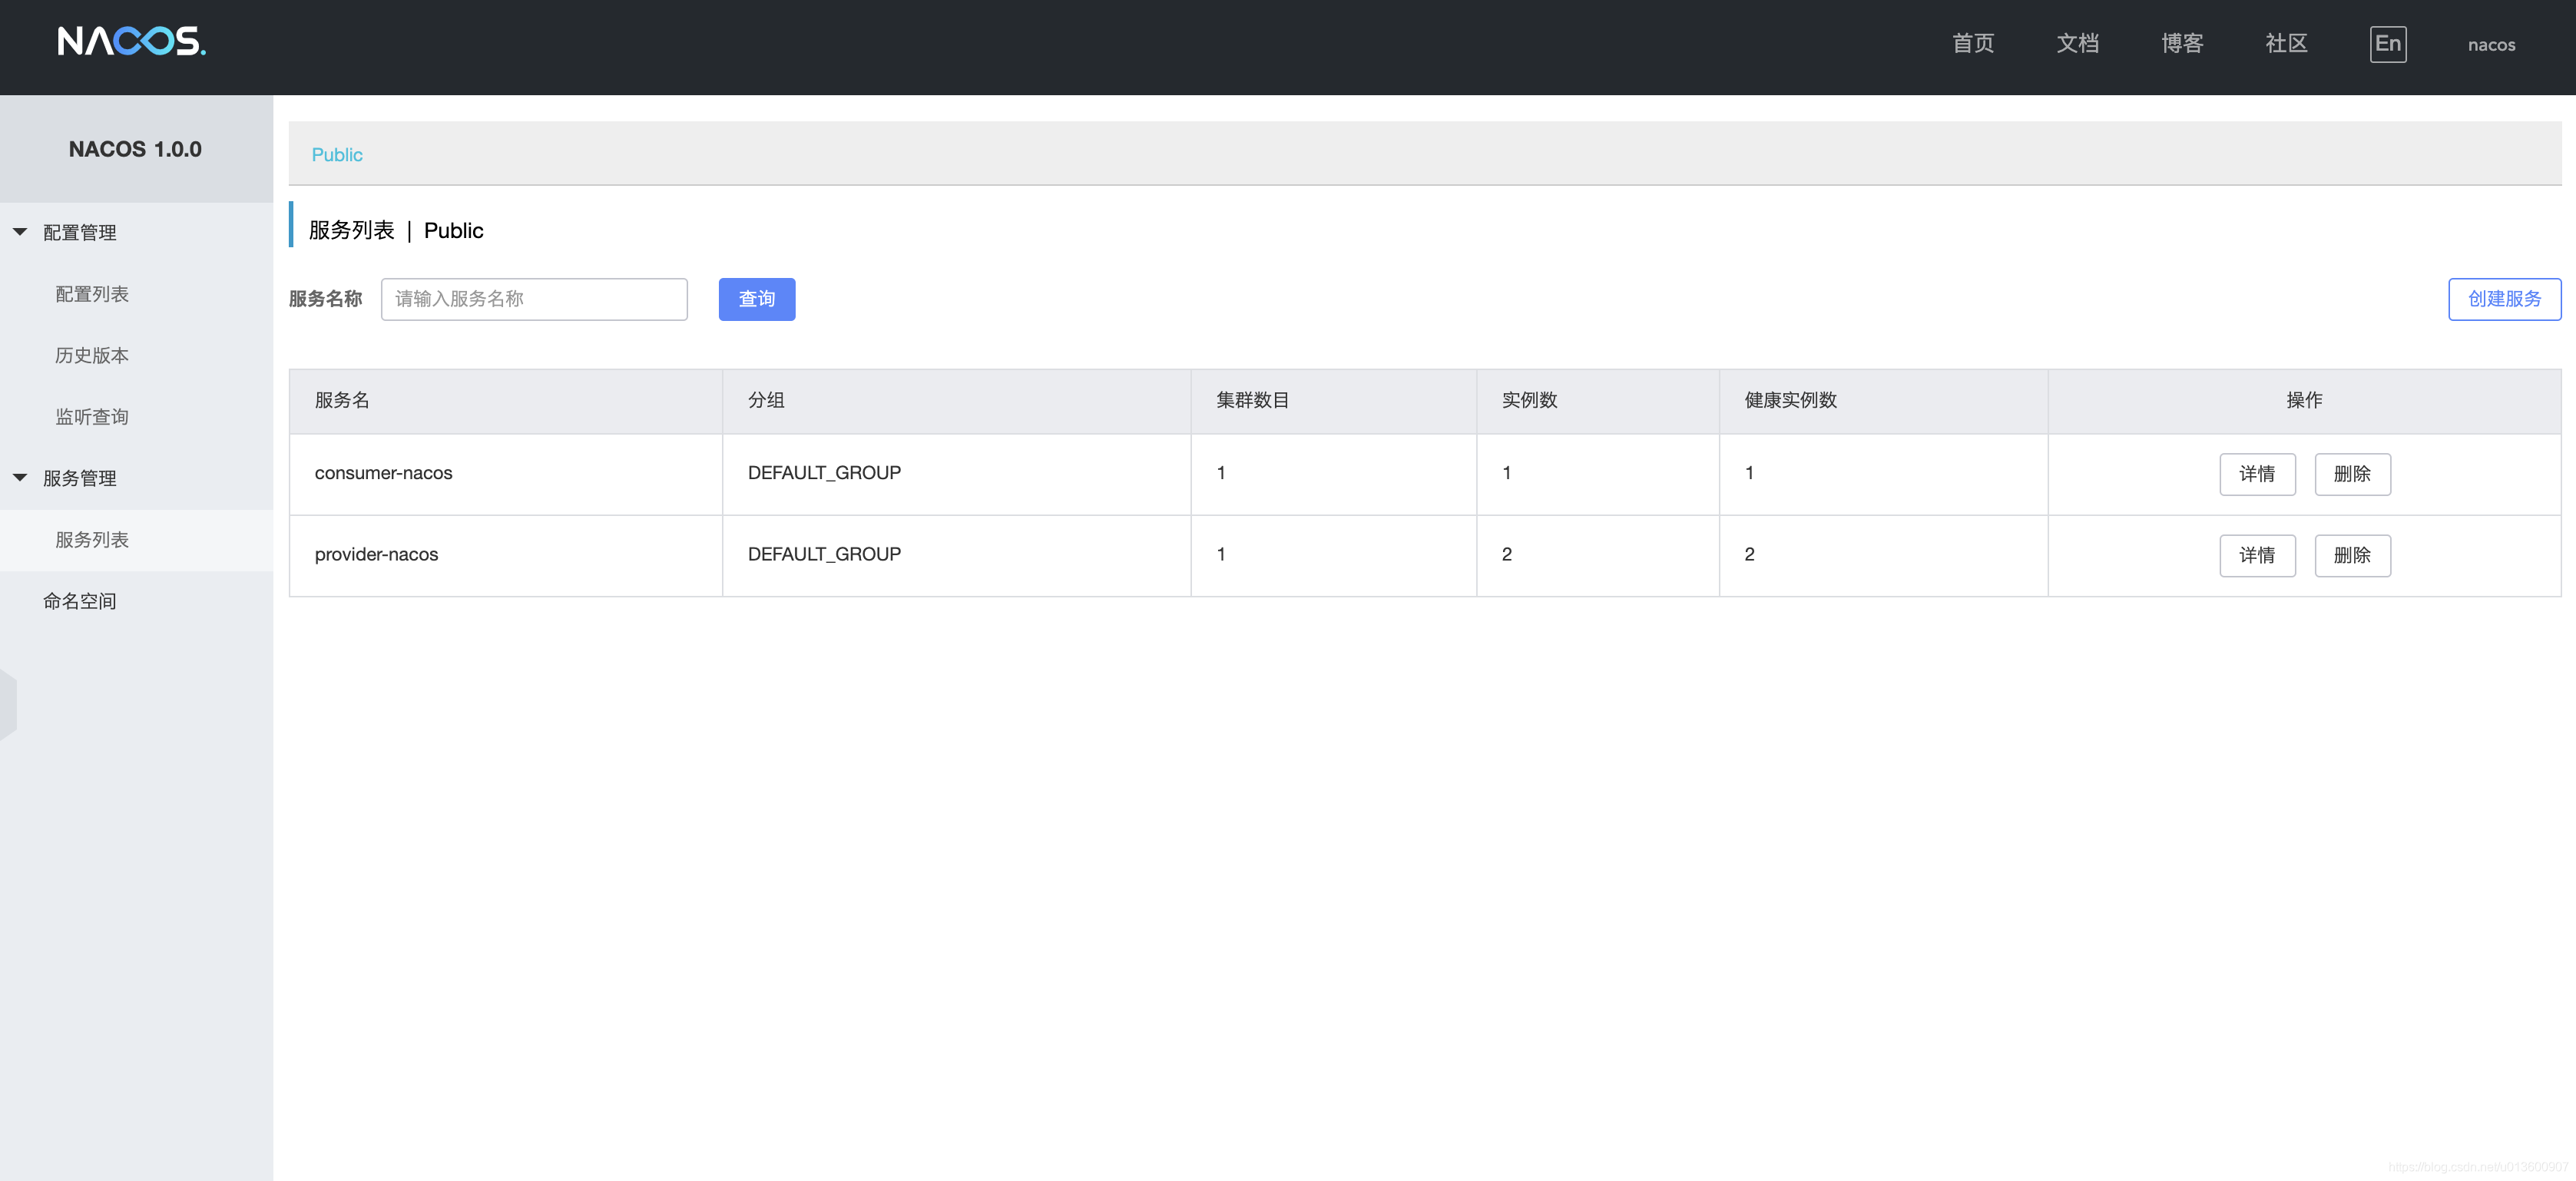
现在打开我们的Nacos管理界面
我们看到我们的三个服务分别都成功启动。
现在我们调用我们的服务提供者的接口
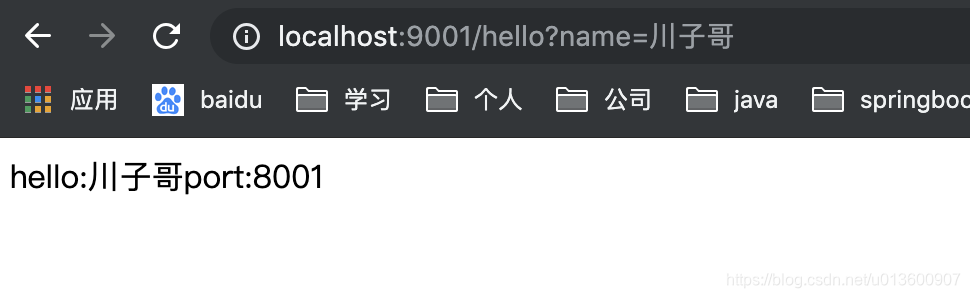
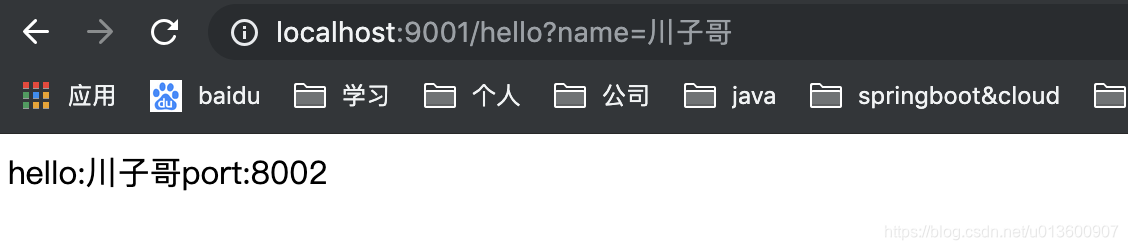
服务消费完成。
源码地址:GitHub:https://github.com/chuanzige/SpringCloud_Nacos


 1664
1664

 被折叠的 条评论
为什么被折叠?
被折叠的 条评论
为什么被折叠?
 到【灌水乐园】发言


