


 本文详细介绍如何在SpringBoot项目中集成Swagger2,包括添加Maven依赖、配置Swagger类、解决404问题等关键步骤,助您快速上手API文档自动生成。
一、springboot中配置swagger
1、maven依赖
<dependency>
    <groupId>com.spring4all</groupId>
    <artifactId>swagger-spring-boot-starter</artifactId>
    <version>1.7.0.RELEASE</version>
</dependency>
2、在系统中的swagger类
import org.springframework.context.annotation.Bean;
import org.springframework.context.annotation.Configuration;
import springfox.documentation.builders.ApiInfoBuilder;
import springfox.documentation.builders.PathSelectors;
import springfox.documentation.builders.RequestHandlerSelectors;
import springfox.documentation.service.ApiInfo;
import springfox.documentation.service.Contact;
import springfox.documentation.spi.DocumentationType;
import springfox.documentation.spring.web.plugins.Docket;
import springfox.documentation.swagger2.annotations.EnableSwagger2;

@Configuration
@EnableSwagger2
public class swagger2 {
    //swagger2的配置文件,这里可以配置swagger2的一些基本的内容,比如扫描的包等等
    @Bean
    public Docket createResApi(){
        return new Docket(DocumentationType.SWAGGER_2)
                .apiInfo(apiInfo())
                .select()
                //为当前包路径
                .apis(RequestHandlerSelectors.basePackage("com.inspur.controller"))
                .paths(PathSelectors.any())
                .build();
    }
    //构建 api文档的详细信息函数,注意这里的注解引用的是哪个
    private ApiInfo apiInfo(){
        return new ApiInfoBuilder()
                //页面标题
                .title("SpringBoot 接口")
                //创建人
                .contact(new Contact("EdwardChe","",""))
                //版本号
                .version("1.0")
                //描述
                .description("API描述")
                .build();
    }
}
3、使用
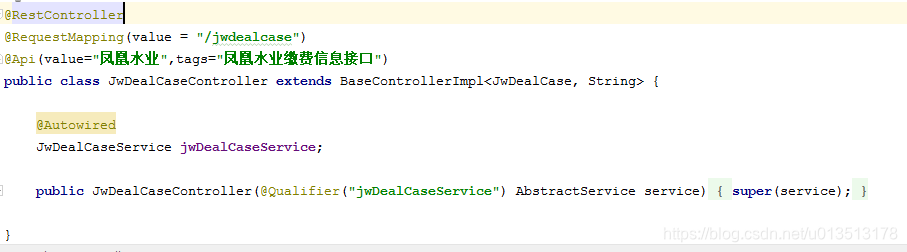
通过扫描指定的controller包,即可将该包下的所有接口来进行注释以及页面展示的操作。使用方式如下:
@Api(value="主题",tags="主题备注")用法如下图所示:
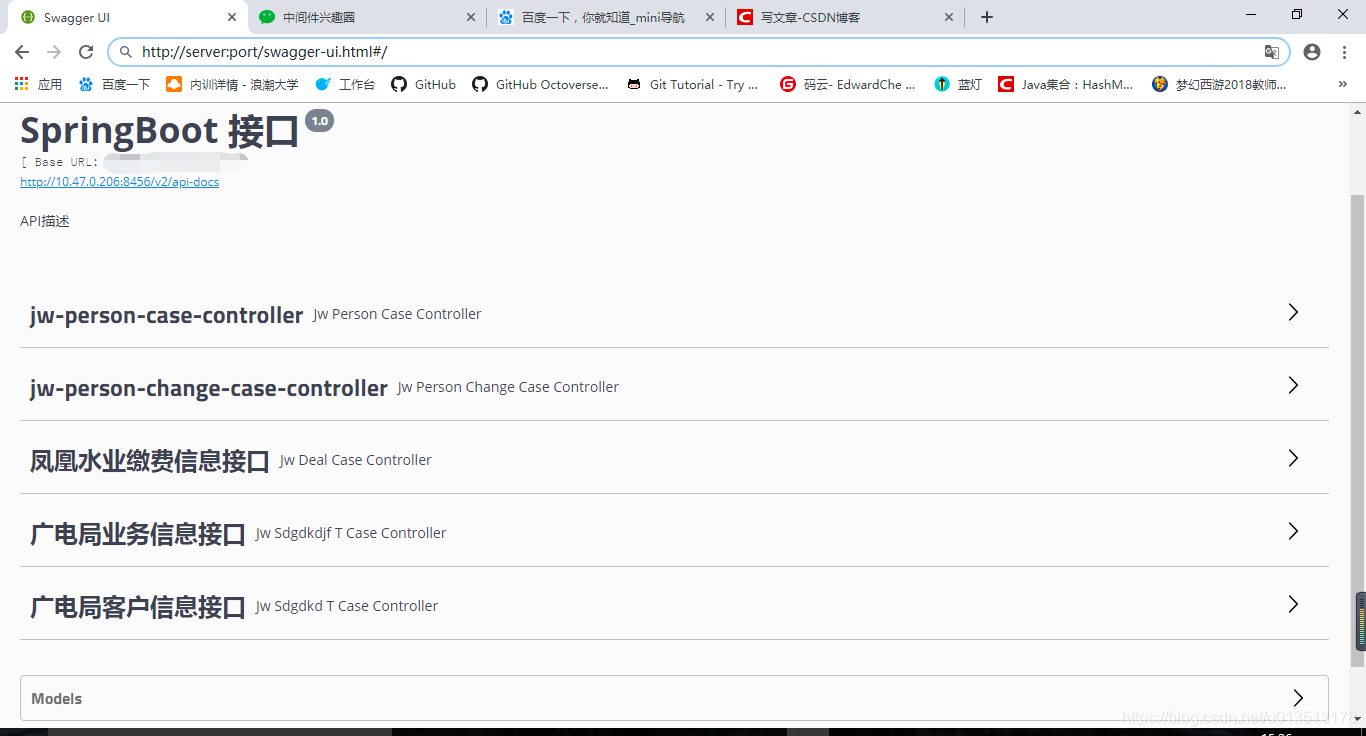
展示效果,当运行主类即可通过浏览器访问指定服务器及端口的路径,来进行展示接口页面,来进行相应的测试工作,工作界面如下所示:http://server:port/swagger-ui.html#/
二、当访问出现404问题的解决方案
1、问题:404众所周知就是找不到页面
2、解释:我们这个页面是在jar包里并且我们配置好并没有动它,可见404的问题就是因为映射不到该页面所导致的。
3、解决方案:
添加映射类:WebMVCConfig
import org.springframework.context.annotation.Configuration;
import org.springframework.web.servlet.config.annotation.ResourceHandlerRegistry;
import org.springframework.web.servlet.config.annotation.WebMvcConfigurerAdapter;

@Configuration
public class WebMVCConfig extends WebMvcConfigurerAdapter {
    @Override
    public void addResourceHandlers(ResourceHandlerRegistry registry) {
        registry.addResourceHandler("swagger-ui.html")
                .addResourceLocations("classpath:/META-INF/resources/");
        registry.addResourceHandler("/webjars/**")
                .addResourceLocations("classpath:/META-INF/resources/webjars/");

    }
}
在添加完该映射类之后,即可解决访问swagger页面404问题。


 402
402

 被折叠的 条评论
为什么被折叠?
被折叠的 条评论
为什么被折叠?
 到【灌水乐园】发言


