


声明:本篇教程实用于openfire 4.2.x版本,如果你使用的是其他版本的源码,可能会遇到其他的问题。在本篇文章中,我会告诉你怎么在IDEA环境中搭建该项目,同时告诉你出现错误问题的解决方案,但更重要的是告诉你出现错误问题的根本原因,而不是像其他教程那样随便粘贴复制文章。
一、环境准备
下载IDEA工具,下载jdk 1.8.0版本,下载openfire源码openfire 4.2.x并解压到任意目录。
二、项目初始化
1.打开IDEA,点击File,选择Open,然后选择项目文件夹所在目录,记住这里是Open而不是Import选项。
2.打开项目之后第一步是设置项目SDK,右键点击项目,选择Open Module Settings选项:
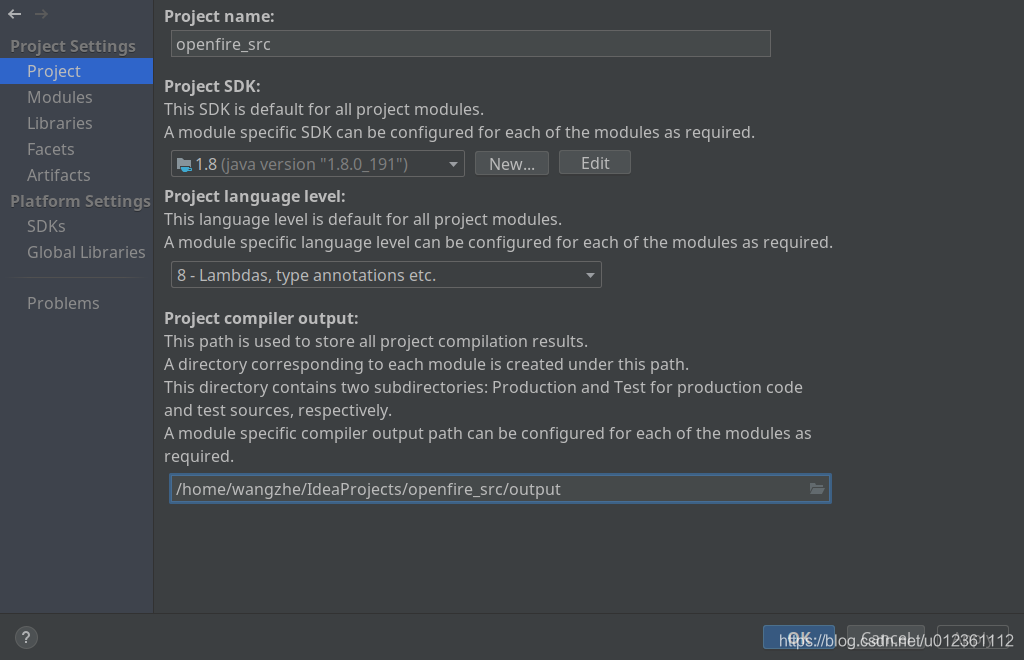
记住这个Project compiler output选项一定要设置好,它是项目编译后的class文件的存放目录。如果程序启动时报找不到ServerStart类时,你应该去检查这个目录下是否有相应的内容。
3. 设置java source和项目依赖:在src/java文件上右键点击,弹出菜单选择Mark Directory as -> Sources Root。此时点开src/java目录下的类,许多会报依赖错误。此时把build/lib目录下的所有jar包都添加到项目依赖中,记住这里不要直接在lib目录上右键选择Add as library选项,这样会导致lib目录子文件夹里面的jar包不会添加到依赖中,要点开lib目录,选择那些jar包,然后添加到依赖中。
4. 右键点击build/build.xml文件,选择add as ant build file. 此时IDEA右边会出现ant build选项,如下图所示:
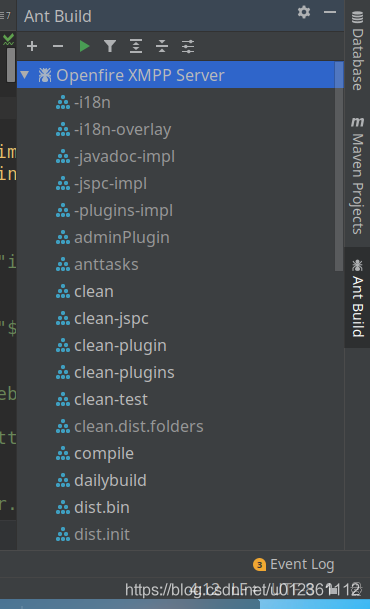
直接点击图中绿色按钮开始执行ant任务构建,执行完成后会在项目根目录下生成target目录,至于target目录的作用在接下来会讲到。
5. 打开application运行配置:
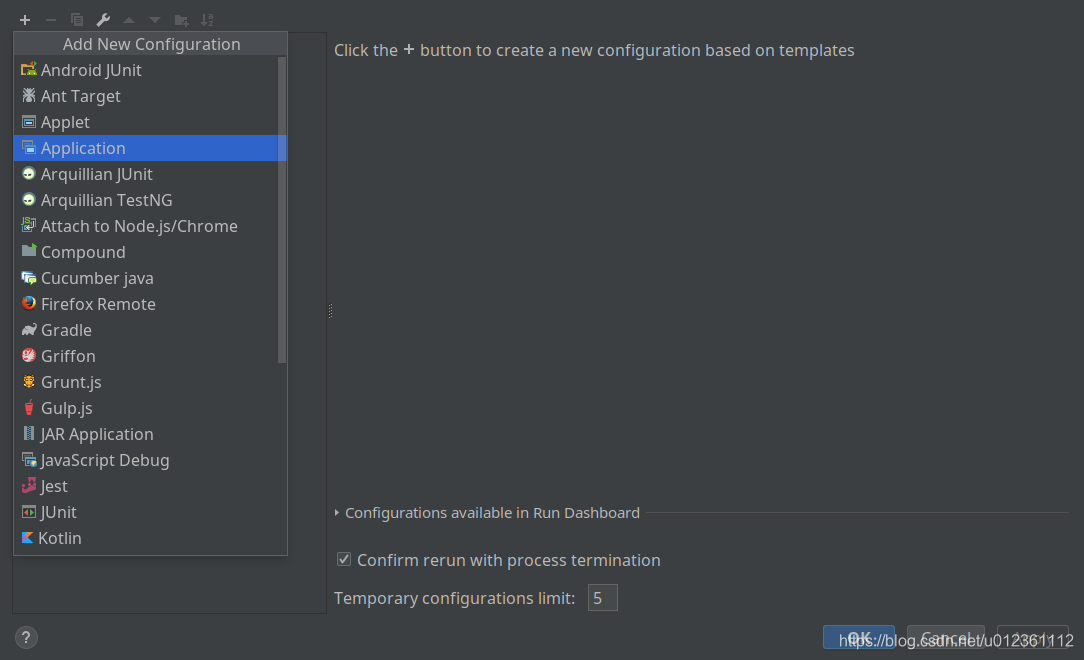
点击 + 号,选择Application选项,然后按照下图所示配置:
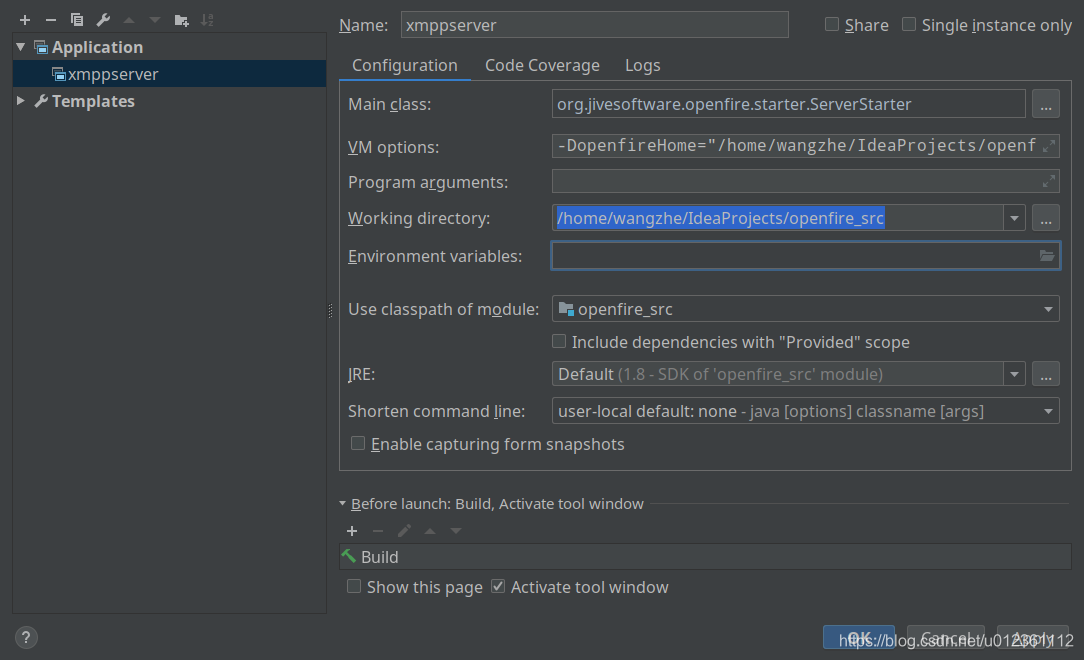
MainClass作为程序主入口比较好理解,那VM options 的-Dopenfire=""选项是什么含义呢?其实它是定义了一个系统变量,类似于c语言的宏定义,java通过System.getProperties()可以取到该定义变量。如果不配置该选项点击启动,会得到如下错误:
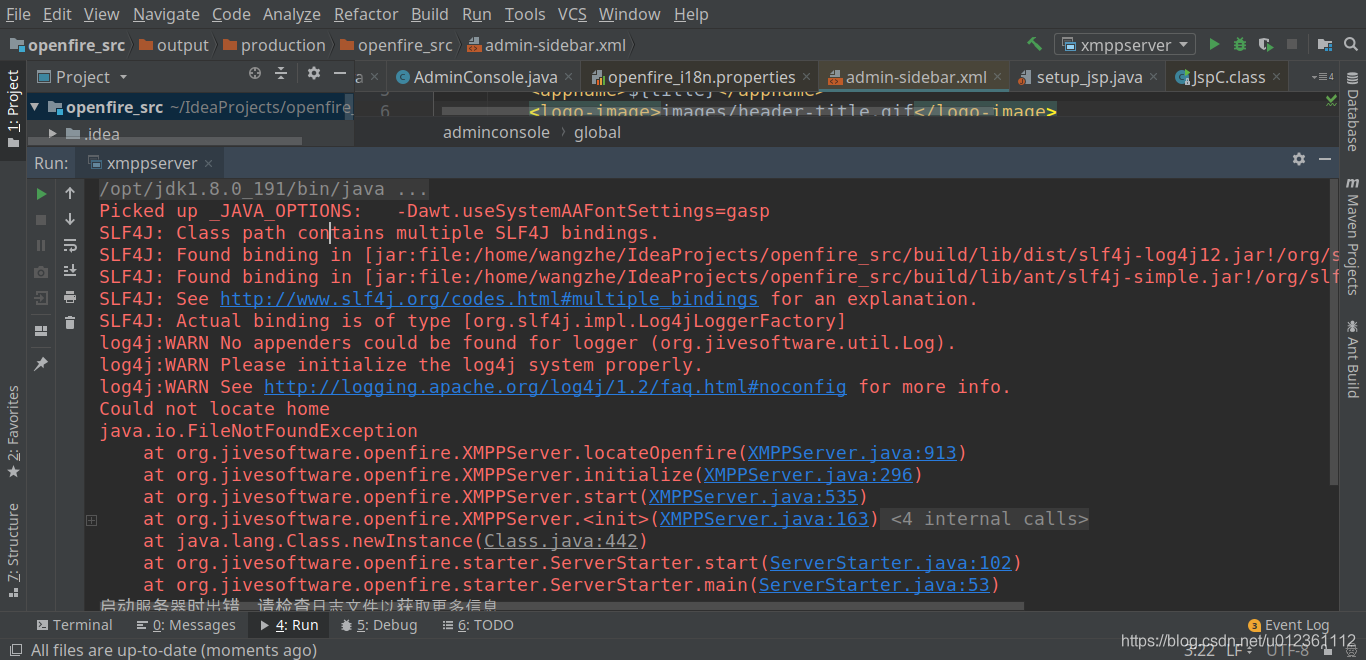
点击错误代码,查看XMPPServer.locateOpenfire()方法:
private void locateOpenfire() throws FileNotFoundException {
        String jiveConfigName = "conf" + File.separator + "openfire.xml";
        // First, try to load it openfireHome as a system property.
        if (openfireHome == null) {
            String homeProperty = System.getProperty("openfireHome");
            try {
                if (homeProperty != null) {
                    openfireHome = verifyHome(homeProperty, jiveConfigName);
                }
            }
            catch (FileNotFoundException fe) {
                // Ignore.
            }
        }
}

private File verifyHome(String homeGuess, String jiveConfigName) throws FileNotFoundException {
        File openfireHome = new File(homeGuess);
        File configFile = new File(openfireHome, jiveConfigName);
        if (!configFile.exists()) {
            throw new FileNotFoundException();
        }
        else {
            try {
                return new File(openfireHome.getCanonicalPath());
            }
            catch (Exception ex) {
                throw new FileNotFoundException();
            }
        }
}
从上图代码中可以看出, 程序首先通过获取系统变量openfireHome得到配置文件根目录,然后在该目录下找到配置文件conf/openfire.xml。这也就解释了为什么需要配置openfireHome选项,以及为什么需要执行ant 构建任务。
配置好openfireHome变量后,点击启动程序,会得到如下错误:
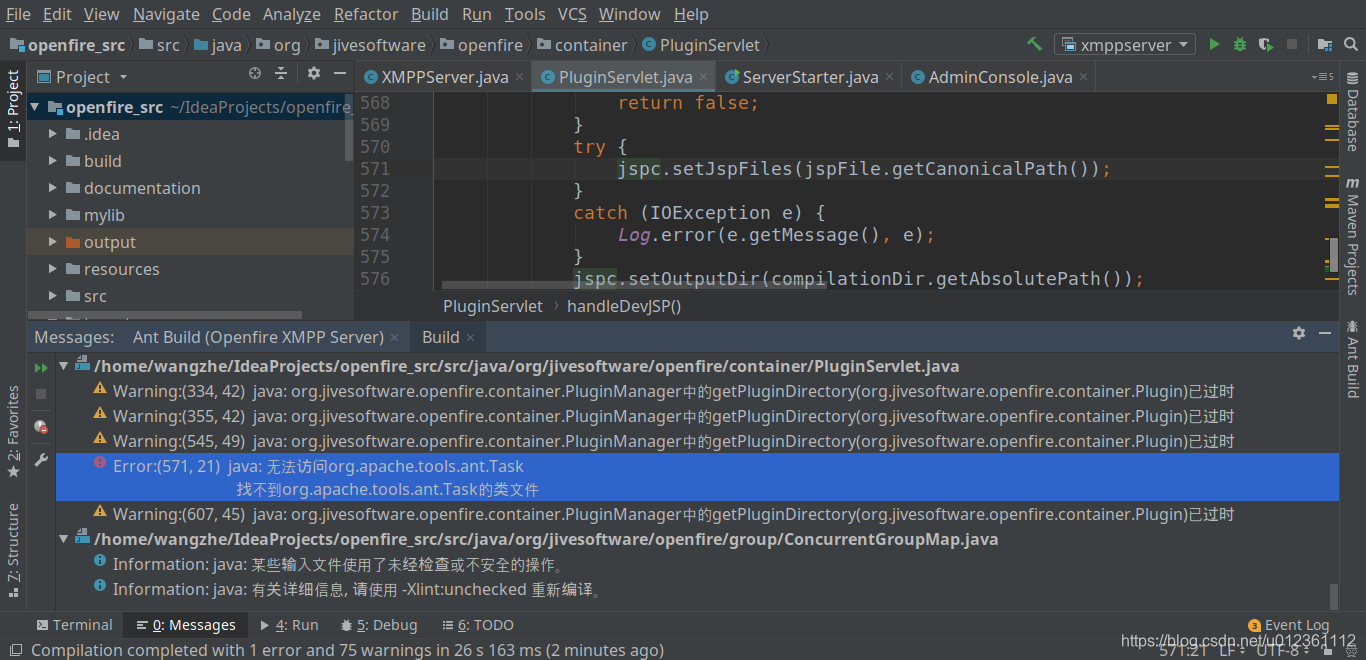
看见这个错误,很多童鞋都会觉得莫名其妙,打开PluginServlet文件,也没看见报错信息,还是要追踪源码信息,定位到错误提示的571行:
 JspC jspc = new JspC();
 if (!jspFile.exists()) {
       return false;
 }
 try {
     jspc.setJspFiles(jspFile.getCanonicalPath());
 }
 catch (IOException e) {
     Log.error(e.getMessage(), e);
 }
可以看到代码依赖JspC文件,打开jspc类:
import org.apache.tools.ant.Task;
import org.apache.tools.ant.util.FileUtils;
import org.xml.sax.SAXException;

public class JspC extends Task implements Options {

}
在这里可以看到Jspc类依赖ant jar包的Task类,而项目没有该jar包,所以需要添加ant jar包依赖。
6. 添加ant 依赖包:下载ant jar包,并当将ant jar包添加到项目依赖中。配置好依赖后,点击启动程序,此时程序可以正常启动,如下图所示:
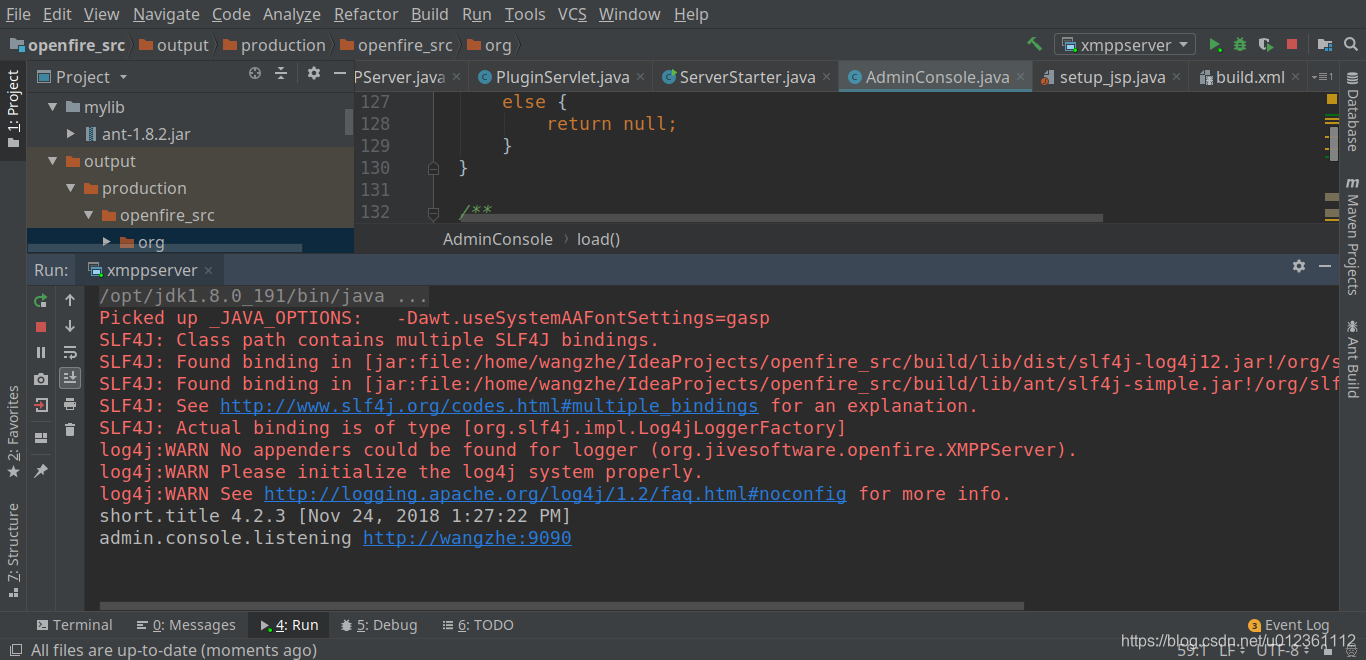
此时打开浏览器输入http://localhost:9090,却会得到下面的错误:
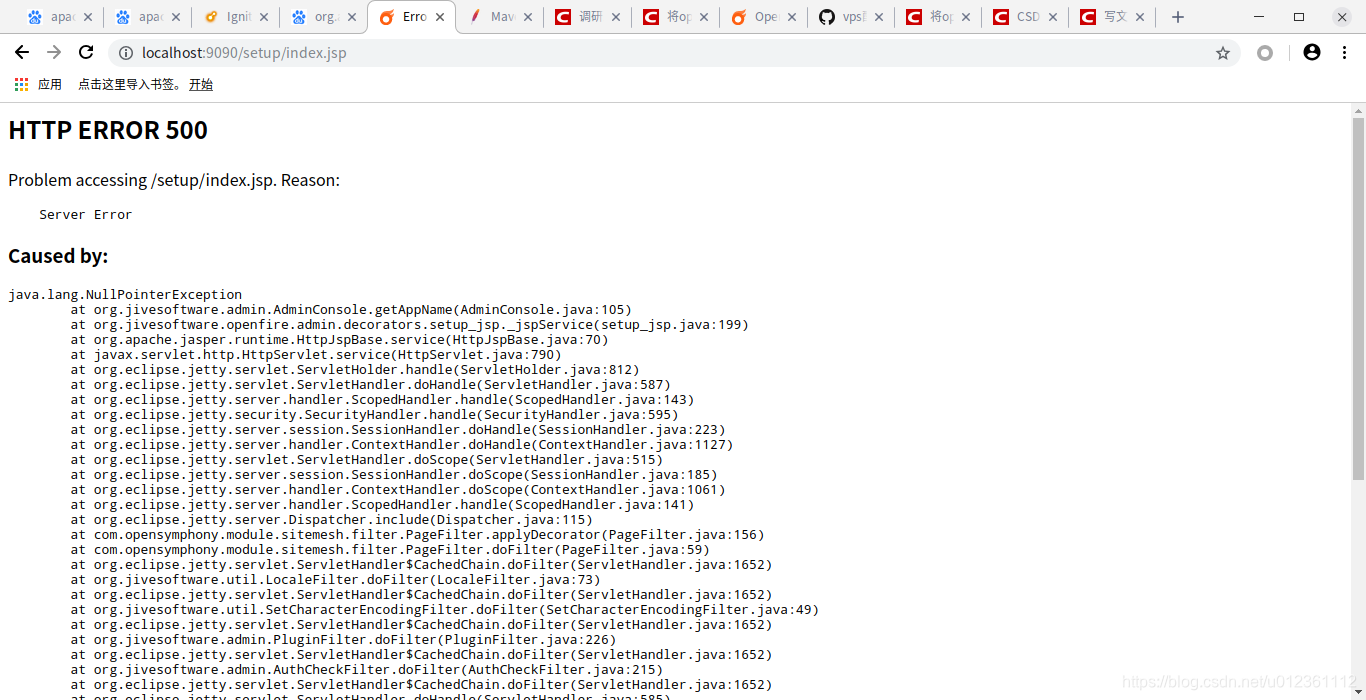
至于出现这个问题的原因,有兴趣的同学可以去深读源码,我这里讲下大概流程:openfire启动时会加载各种插件,没有在网页上按照openfire的配置向导完成必要的配置时,openfire都会认为是setup 模式。在setup模式下只会加载AdminConsole插件。看下AdminConsole类的源码:
public class AdminConsole {

    private static final Logger Log = LoggerFactory.getLogger(AdminConsole.class);

    private static Element coreModel;
    private static Map<String,Element> overrideModels;
    private static Element generatedModel;

    static {
        overrideModels = new LinkedHashMap<>();
        load();
    }

    /** Not instantiatable */
    private AdminConsole() {

    private static void load() {
        // Load the core model as the admin-sidebar.xml file from the classpath.
        InputStream in = ClassUtils.getResourceAsStream("/admin-sidebar.xml");
        if (in == null) {
            Log.error("Failed to load admin-sidebar.xml file from Openfire classes - admin "
                    + "console will not work correctly.");
            return;
        }
    }


    public static synchronized String getAppName() {
        Element appName =
        (Element)generatedModel.selectSingleNode("//adminconsole/global/appname");
        if (appName != null) {
            String pluginName = appName.attributeValue("plugin");
            return getAdminText(appName.getText(), pluginName);
        }
        else {
            return null;
        }
    }
}
从报错信息中可以看出是getAppName()方法报空指针异常,很明显是gereratedModel对象为空,而gereratedModel对象是通过在类的静态块里的load()方法完成初始化的(代码太多,后面代码我没有贴出来),load()方法一开始会去找classpath下的admin-sidebar.xml文件,如果没找到,则直接返回,因此generatedModel对象也不会被初始化。按照下面的方法即可解决。
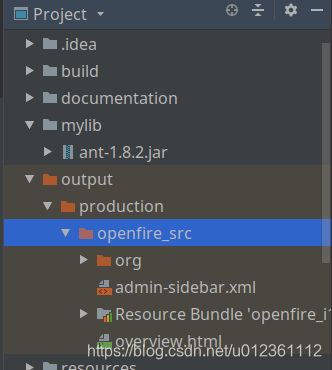
7. 复制必须的资源文件:将src/i18n下的资源文件以及resources/jar/admin-sidebar文件拷贝到/home/wangzhe/IdeaProjects/openfire_src/output/production下:
然后点击启动程序,程序正常运行,打开浏览器,输入localhost:9090:
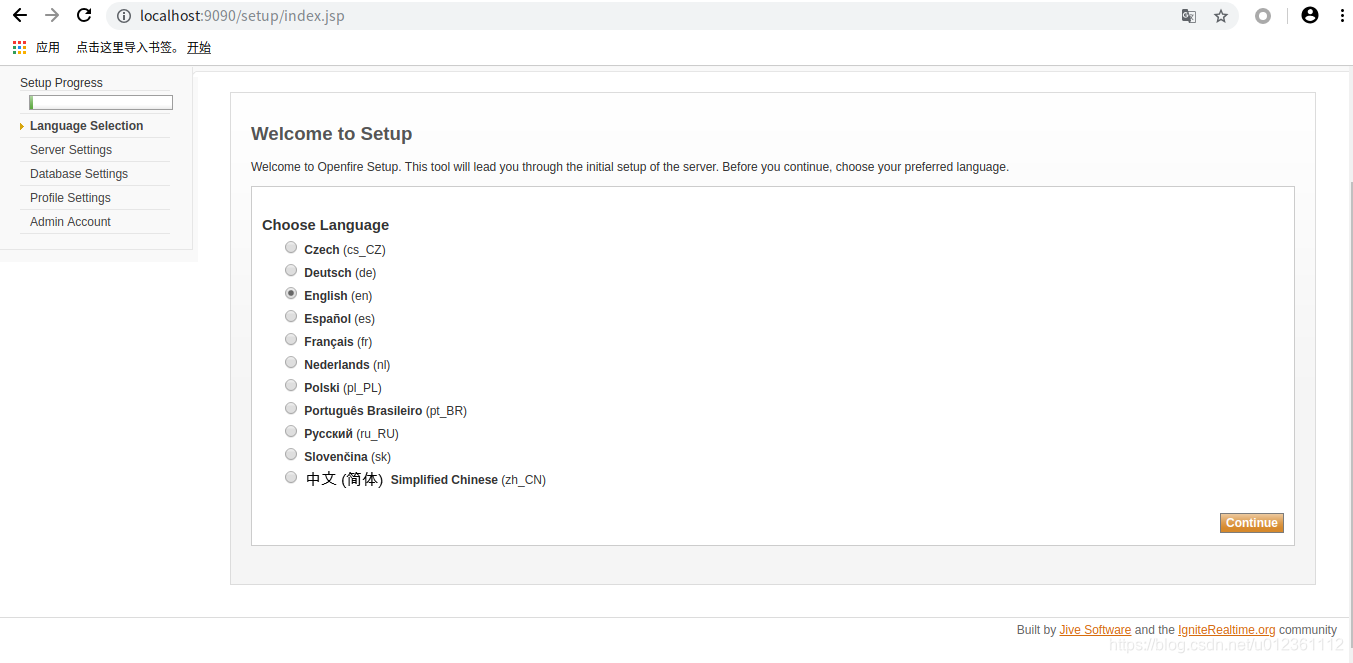
至此,整个环境部署完成,只需要按照向导配置,一步步配置好即可。


 1178
1178

 被折叠的 条评论
为什么被折叠?
被折叠的 条评论
为什么被折叠?
 到【灌水乐园】发言


