


纠结数天,终于下定决心开始搭建属于自己的记事本。
写在最前面:这两天是有些彷徨,加上重感冒,难受的要死。思路有些混乱,界面想了一下大概,就胡乱的开始了。但是总算是迈出了第一步。
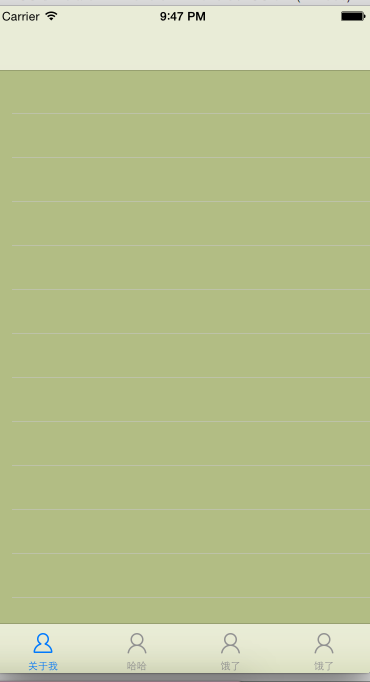
将rootviewcontroller设置为tabbar
   application.statusBarHidden = YES;

    self.window = [[UIWindow alloc]init];
    self.window.frame = [[UIScreen mainScreen]bounds];

    self.window.rootViewController = [[CSMainBarController alloc]init];

    [self.window makeKeyAndVisible  ];
采用的tabbarcontroller 上面套上uinavcontroller 在加上tableviewcontroller 代码如下:
- (void)viewDidLoad {
    [super viewDidLoad];
    // Do any additional setup after loading the view.
//    CSMineTableViewController *mineTabelview = [[CSMineTableViewController alloc]init];
    CSMineTableViewController *mineTable =[[CSMineTableViewController alloc ]init];
    [self setTabbarController:mineTable Title:@"关于我" image:@"tabbar_profile_os7" selectImage:@"tabbar_profile_selected"];
    CSDiaryTableViewController *diaryTable = [[CSDiaryTableViewController alloc]init];
    [self setTabbarController:diaryTable Title:@"哈哈" image:@"tabbar_profile_os7" selectImage:@"tabbar_profile_selected"];

    CSSettingViewController *setView = [[CSSettingViewController alloc]init];
    [self setTabbarController:setView Title:@"饿了" image:@"tabbar_profile_os7" selectImage:@"tabbar_profile_selected"];

    CSDuanZiViewController *duanzi  = [[CSDuanZiViewController alloc]init];
    [self setTabbarController:duanzi Title:@"饿了" image:@"tabbar_profile_os7" selectImage:@"tabbar_profile_selected"];
}
/**
 *   设置对应的tabbar的属性
 *
 *  @param childVC     <#childVC description#>
 *  @param tile        <#tile description#>
 *  @param image       <#image description#>
 *  @param selectImage <#selectImage description#>
 */
-(void)setTabbarController:(UIViewController *)childVC Title:(NSString *)tile image:(NSString *)image selectImage: (NSString *)selectImage
{
//    childVC.title  =tile;
//    childVC.tabBarItem.image = [UIImage imageNamed:image];
//    childVC.tabBarItem.selectedImage = [UIImage imageNamed:selectImage];

    childVC.view.backgroundColor = CSRandomColor;
    childVC.tabBarItem.title = tile;
    childVC.tabBarItem.image = [UIImage imageNamed:image];
    childVC.tabBarItem.selectedImage = [UIImage imageNamed:selectImage];
    [self addChildViewController:childVC];

    CSNavigationViewController *myNav =[[CSNavigationViewController alloc]initWithRootViewController:childVC];
    [self addChildViewController:myNav];
}
通过重构nav中的push方法来判断对应的数据:判断通过push的viewcontroller是不是存在,count>0将隐藏对应的tabbar
/**
 *  拦截push进来的视图
 *
 */
-(void)pushViewController:(UIViewController *)viewController animated:(BOOL)animated
{
    if (self.viewControllers.count>0) {   //如果push进来的不是栈底控制器的话
        viewController.hidesBottomBarWhenPushed = YES;
    }
    [super pushViewController:viewController animated:YES];
}
给对应的子视图设置对应的伪数据,并且做好相应的点击时间的跳转:
- (NSInteger)tableView:(UITableView *)tableView numberOfRowsInSection:(NSInteger)section {
#warning Incomplete method implementation.
    // Return the number of rows in the section.
    return 20;
}


- (UITableViewCell *)tableView:(UITableView *)tableView cellForRowAtIndexPath:(NSIndexPath *)indexPath {
    static NSString * ID = @"cell";
    UITableViewCell *cell = [tableView dequeueReusableCellWithIdentifier:ID ];

    if (!cell) {
        cell = [[UITableViewCell alloc]initWithStyle:UITableViewCellStyleDefault reuseIdentifier:ID];
    }
    cell.textLabel.text = [NSString stringWithFormat:@"我是第 %ld",(long)indexPath.row];
    return cell;
}

-(void)tableView:(UITableView *)tableView didSelectRowAtIndexPath:(NSIndexPath *)indexPath
{
    UIViewController *myView = [[UIViewController alloc]init];
    myView.view.backgroundColor = [UIColor redColor];
    myView.title = @"diary跳转";
    [self.navigationController pushViewController:myView animated:YES];
}
对应顶部的UIBarButtonItem的点击,建立对应UIBarButtonItem的分类
//重构代码实现点击
    self.navigationItem.leftBarButtonItem = [UIBarButtonItem itemWithImage:@"navigationbar_friendsearch" highImage:@"navigationbar_friendsearch_highlighted" target:self action:@selector(pop)];


-(void)pop
{
    UIViewController *aboutView = [[UIViewController alloc]init];
    [aboutView.view setBackgroundColor:[UIColor redColor]];
    [self.navigationController pushViewController:aboutView animated:YES];
}
分类中对应的代码:
+(UIBarButtonItem *)itemWithImage:(NSString *)imageName highImage:(NSString *)highImage target:(id)target action:(SEL)action
{
    UIButton *button = [[UIButton alloc]init];
//    button  setImage:imageName forState:<#(UIControlState)#>
    [button   setBackgroundImage:[UIImage imageNamed:imageName ] forState:UIControlStateNormal];
    [button setBackgroundImage:[UIImage imageNamed:highImage] forState:UIControlStateHighlighted];

//    button.frame.size = button.currentBackgroundImage.size;
    CGRect frame = button.frame;
    frame.size = button.currentBackgroundImage.size;
    button.frame = frame;

    [button   addTarget:target action:action forControlEvents:UIControlEventTouchUpInside];
    return [[UIBarButtonItem alloc]initWithCustomView:button];

}


 318
318

 被折叠的 条评论
为什么被折叠?
被折叠的 条评论
为什么被折叠?
 到【灌水乐园】发言


