


 本文介绍了如何将Spring Boot项目按模块打包,以便于实现局部升级。通过将项目拆分为multi-module-core、multi-module-service和multi-module-api三个模块,实现了模块间的独立性。在修改特定模块后,只需替换对应的jar包即可完成更新,降低了部署风险。详细阐述了各模块的配置及打包过程,并提供了相关配置文件示例。
这段时间接到了一个任务,就是将项目按照模块打jar包。这样的目的是:
1.按照模块分别打包,方便升级
2.模块分包之后,哪个模块修改了,就去单独更新对应模块,不用担心整体更新之后,由于其他模块的修改导致项目运行异常
在网上搜寻了很久没找到了一些相关文章,但是没有详细介绍按照模块打jar包的相关文章。经过我这几天的摸索,实现了相关功能。
首先说下思路:
我们之前接触到的打包方式基本有两种:1.将整个项目打包成一个完整jar包运行 2.把项目打包成war包,丢到tomcat中运行。
multi-module-很显然,这两种方式都满足不了上述需求。于是,我开始另辟蹊径,将原来的项目分成3个module(multi-module-core:主要是依赖包, multi-module-service:各种接口实现 ,,ulti-module-api:项目配置文件等)。这样就将项目分成了三大块,每大块相互独立。multi-module-service模块中涉及到各个接口实现,如果有需要的话,还可以将此模块继续细分成多个module进行依赖。
打包完成之后,multi-module-service被单独打成了一个jar,在后续开发过程中,直接在发布包中替换这个jar就可以完成局部更新了,是不是很神奇呢,哈哈!
具体的依赖关系如下图所示:
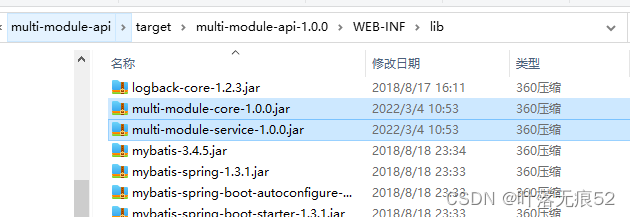
打包之后的文件如下图所示,后续更新只需要替换multi-module-core和multi-module-service的jar包即可:

全局pom文件,这里主要是<modules>标签中需要声明当前项目中包含的module:
<?xml version="1.0" encoding="UTF-8"?>
<project xmlns="http://maven.apache.org/POM/4.0.0"
         xmlns:xsi="http://www.w3.org/2001/XMLSchema-instance"
         xsi:schemaLocation="http://maven.apache.org/POM/4.0.0 http://maven.apache.org/xsd/maven-4.0.0.xsd">
    <modelVersion>4.0.0</modelVersion>

    <groupId>com.multimodule</groupId>
    <artifactId>multi-module-parent</artifactId>
    <version>1.0.0</version>
    <packaging>pom</packaging>

    <parent>
        <groupId>org.springframework.boot</groupId>
        <artifactId>spring-boot-starter-parent</artifactId>
        <version>2.0.4.RELEASE</version>
        <relativePath/> <!-- lookup parent from mapper -->
    </parent>

    <modules>
        <module>multi-module-service</module>
        <module>multi-module-core</module>
        <module>multi-module-api</module>
    </modules>

    <properties>
        <project.build.sourceEncoding>UTF-8</project.build.sourceEncoding>
        <maven.compiler.source>1.8</maven.compiler.source>
        <project.reporting.outputEncoding>UTF-8</project.reporting.outputEncoding>
        <maven.compiler.target>1.8</maven.compiler.target>
        <java.version>1.8</java.version>
    </properties>

    <dependencies>
        <dependency>
            <groupId>org.springframework.boot</groupId>
            <artifactId>spring-boot-starter</artifactId>
        </dependency>

        <dependency>
            <groupId>org.springframework.boot</groupId>
            <artifactId>spring-boot-starter-test</artifactId>
            <scope>test</scope>
        </dependency>
    </dependencies>

    <build>
        <plugins>
            <plugin>
                <groupId>org.apache.maven.plugins</groupId>
                <artifactId>maven-compiler-plugin</artifactId>
                <version>3.1</version>
                <configuration>
                    <source>${java.version}</source>
                    <target>${java.version}</target>
                </configuration>
            </plugin>
            <plugin>
                <groupId>org.apache.maven.plugins</groupId>
                <artifactId>maven-surefire-plugin</artifactId>
                <version>2.19.1</version>
                <configuration>
                    <skipTests>true</skipTests>    <!--默认关掉单元测试 -->
                </configuration>
            </plugin>
        </plugins>
    </build>


</project>
multi-module-core:
这里的重点是:
1.添加springboot相关依赖
2.添加诸如mysql等相关依赖
<?xml version="1.0" encoding="UTF-8"?>
<project xmlns="http://maven.apache.org/POM/4.0.0"
         xmlns:xsi="http://www.w3.org/2001/XMLSchema-instance"
         xsi:schemaLocation="http://maven.apache.org/POM/4.0.0 http://maven.apache.org/xsd/maven-4.0.0.xsd">
    <parent>
        <artifactId>multi-module-parent</artifactId>
        <groupId>com.multimodule</groupId>
        <version>1.0.0</version>
    </parent>
    <modelVersion>4.0.0</modelVersion>

    <artifactId>multi-module-core</artifactId>

    <dependencies>

        <dependency>
            <groupId>org.springframework.boot</groupId>
            <artifactId>spring-boot-starter</artifactId>
        </dependency>
        <dependency>
            <groupId>org.springframework.boot</groupId>
            <artifactId>spring-boot-starter-test</artifactId>
            <scope>test</scope>
        </dependency>

        <!-- 添加MySQL依赖 -->
        <dependency>
            <groupId>mysql</groupId>
            <artifactId>mysql-connector-java</artifactId>
        </dependency>

        <!-- 添加MyBatis依赖 -->
        <dependency>
            <groupId>org.mybatis.spring.boot</groupId>
            <artifactId>mybatis-spring-boot-starter</artifactId>
            <version>1.3.1</version>
        </dependency>
        <dependency>
            <groupId>org.springframework.boot</groupId>
            <artifactId>spring-boot-starter-web</artifactId>
        </dependency>
    </dependencies>
</project>
multi-module-service:
这里的重点是:
1.声明依赖核心module:multi-module-core
<?xml version="1.0" encoding="UTF-8"?>
<project xmlns="http://maven.apache.org/POM/4.0.0" xmlns:xsi="http://www.w3.org/2001/XMLSchema-instance"
         xsi:schemaLocation="http://maven.apache.org/POM/4.0.0 http://maven.apache.org/xsd/maven-4.0.0.xsd">
    <modelVersion>4.0.0</modelVersion>
    <parent>
        <artifactId>multi-module-parent</artifactId>
        <groupId>com.multimodule</groupId>
        <version>1.0.0</version>
    </parent>
    <groupId>com.multimodule</groupId>
    <artifactId>multi-module-service</artifactId>
    <version>1.0.0</version>
    <name>multi-module-service</name>
    <description>multi-module-service</description>

    <properties>
        <java.version>1.8</java.version>
        <logback.version>1.2.9</logback.version>
    </properties>

    <dependencies>
        <dependency>
            <groupId>org.springframework.boot</groupId>
            <artifactId>spring-boot-configuration-processor</artifactId>
            <optional>true</optional>
        </dependency>

        <dependency>
            <groupId>com.multimodule</groupId>
            <artifactId>multi-module-core</artifactId>
            <version>1.0.0</version>
        </dependency>

    </dependencies>

</project>
multi-module-api:
这里的重点是:
1.<build> <plugins> <plugin>标签中需要声明主启动类
2.声明依赖service module:multi-module-service
<?xml version="1.0" encoding="UTF-8"?>
<project xmlns="http://maven.apache.org/POM/4.0.0"
xmlns:xsi="http://www.w3.org/2001/XMLSchema-instance"
xsi:schemaLocation="http://maven.apache.org/POM/4.0.0 http://maven.apache.org/xsd/maven-4.0.0.xsd">
<parent>
<artifactId>multi-module-parent</artifactId>
<groupId>com.multimodule</groupId>
<version>1.0.0</version>
</parent>
<packaging>war</packaging>
<modelVersion>4.0.0</modelVersion>
<artifactId>multi-module-api</artifactId>
<dependencies>
<dependency>
<groupId>com.multimodule</groupId>
<artifactId>multi-module-service</artifactId>
<version>1.0.0</version>
</dependency>
</dependencies>
<build>
<plugins>
<plugin>
<groupId>org.springframework.boot</groupId>
<artifactId>spring-boot-maven-plugin</artifactId>
<configuration>
<!-- 指定该Main Class为全局的唯一入口 -->
<mainClass>com.multi.moduleapi.MultiModuleServiceApplication</mainClass>
<layout>ZIP</layout>
</configuration>
<executions>
<execution>
<goals>
<goal>repackage</goal><!--可以把依赖的包都打包到生成的Jar包中-->
</goals>
</execution>
</executions>
</plugin>
</plugins>
</build>
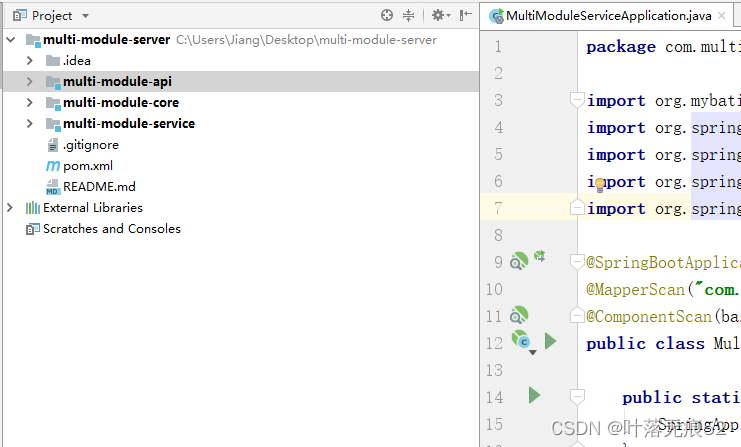
</project>上述是配置文件的相互依赖,下面介绍下重点,启动类:
其中需要声明:
1.@MapperScan("com.multi.module.mapper"):这个的主要功能是声明数据库mapper所在位置
2.@ComponentScan(basePackages = {"com.multi.module.*"}):这个声明的主要功能是加载各种类
package com.multi.moduleapi;

import org.mybatis.spring.annotation.MapperScan;
import org.springframework.boot.SpringApplication;
import org.springframework.boot.autoconfigure.SpringBootApplication;
import org.springframework.boot.web.servlet.support.SpringBootServletInitializer;
import org.springframework.context.annotation.ComponentScan;

@SpringBootApplication
@MapperScan("com.multi.module.mapper")
@ComponentScan(basePackages = {"com.multi.module.*"})
public class MultiModuleServiceApplication extends SpringBootServletInitializer {

    public static void main(String[] args) {
        SpringApplication.run(MultiModuleServiceApplication.class, args);
    }

}
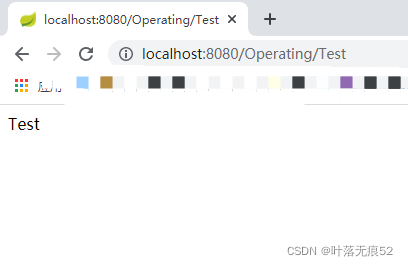
接口测试:
我在multi-module-service module中写了个测试接口:
package com.multi.module.test;

import org.springframework.web.bind.annotation.*;

/**
 * @Author: Jiang
 * @Description: 字典表管理
 * @Date: 2022-03-04 10:29
 * @Version: 1.0
 * @Update:
 */
@RestController
@RequestMapping("/Operating")
public class MultiModuleController {

    /**
     * 测试接口
     *
     * @return
     */
    @GetMapping("Test")
    public String test() {
        return "Test";
    }

}
测试结果:
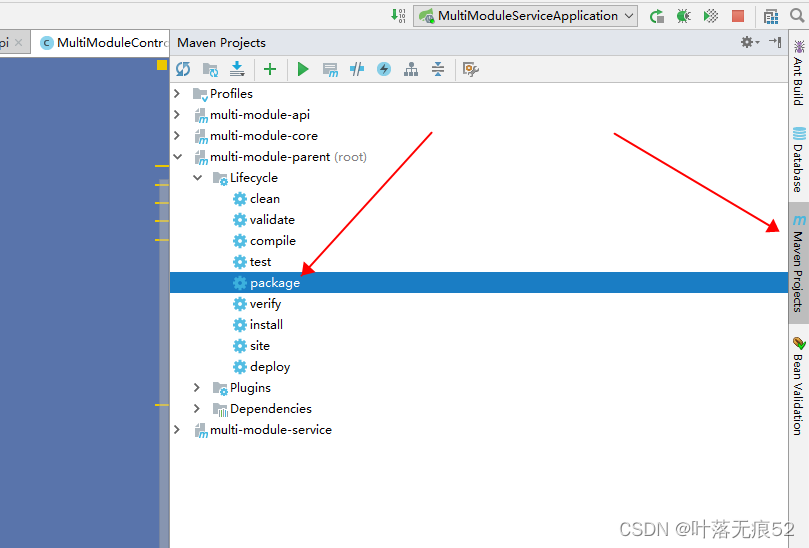
打包方式:
首先点击右侧栏的mavean,接着展开multi-module-parent,找到package按钮,即可执行打包
打包后的文件:
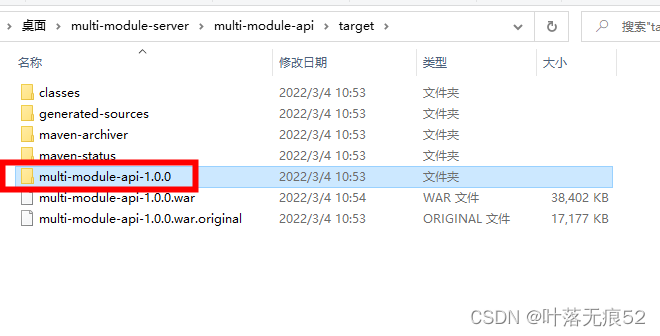
此后只需要更新multi-module-core以及multi-module-service两个jar包即可实现项目升级:
资源传送门:项目地址


 2853
2853

 被折叠的 条评论
为什么被折叠?
被折叠的 条评论
为什么被折叠?
 到【灌水乐园】发言


