


一. 资源准备
ES 7.8下载地址:
https://artifacts.elastic.co/downloads/elasticsearch/elasticsearch-7.8.0-linux-x86_64.tar.gz
安装ES 7.8需要 JDK9及以上版本。
cd /usr/local/src
wget https://artifacts.elastic.co/downloads/elasticsearch/elasticsearch-7.8.0-linux-x86_64.tar.gz

二. 安装和配置
解压
cd /usr/local/src
tar -zxvf elasticsearch-7.8.0-linux-x86_64.tar.gz
mv elasticsearch-7.8.0 /usr/local
修改elasticsearch.yml配置文件
vim /usr/local/elasticsearch-7.8.0/config/elasticsearch.yml
cluster.name: es-zqs   	#为集群提供一个名称
node.name: zqs-1 		  	#此节点名称
path.data: /opt/es/data  	#数据存放的地址
path.logs: /opt/es/logs  	#日志存放地址
network.host: 0.0.0.0 		#网络绑定这样设置就好了
cluster.initial_master_nodes: ["zqs-1"] #将es-node1设置为master节点
修改系统进程内存限制
vim /etc/security/limits.conf
添加数据
* soft nofile 65536
* hard nofile 131072
* soft nproc 2048
* hard nproc 4096
vim /etc/sysctl.conf
-----------------------------------------------------------------------------------------------------------------------
vm.max_map_count=262145 	 #(es需要262144,我们在基础上+1,保证它启动)
-----------------------------------------------------------------------------------------------------------------------
sysctl -p 	#刷新
创建用户
由于elasticsearch不允许root用户操作,所以需要建立子用户
useradd esuser  #增加一个子用户
chown -R esuser:esuser /usr/local/elasticsearch-7.8.0  #赋权
chown -R esuser:esuser /opt/es
su esuser 	#切换成子用户
#进入 es/bin命令启动
cd /usr/local/elasticsearch-7.8.0/bin
./elasticsearch -d    #-d表示后台启动

ps aux | grep elasticsearch   # 查看是否启动成功

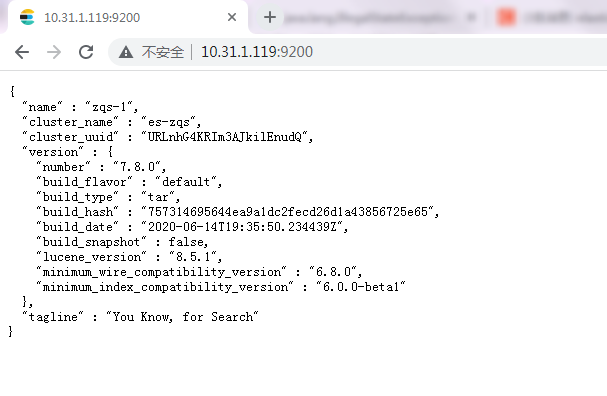
校验:
出现如下,代表安装成功


 被折叠的 条评论
为什么被折叠?
被折叠的 条评论
为什么被折叠?
 到【灌水乐园】发言


