


Ice Cream Sandwich explained: MTP - what is it, why use it, and how to set it up
By
Jerry Hildenbrand 25 Nov 2011 5:04 pm
MTP (Media Transfer Protocol) first showed up as default on Android devices with Honeycomb. It's a bit of a change from the normal USB Mass Storage (UMS) file transfer that we're used to, where you plug in your phone, hit "USB mode" and start moving files. And because it's become the standard in Ice Cream Sandwich on the Galaxy Nexus, it's time to have a look at it. Hit the break where we see what it is, why we're using it, and how to set it up on your computer for easy file transfer. Check out our Ultimate Ice Cream Sandwich Guide What is MTP?
MTP is a set of custom extensions for PTP (Picture Transfer Protocol) that is beefed up to allow files and their associated metadata to be transferred across USB. Still with us? Originally part of the Windows Media framework, in 2008 the USB Implementers Forum device working group standardized MTP as a USB device type, making it a recognized standard. If you had an old iriver or Creative MP3 player, or an old PDA device, you've probably used MTP. If you use a standalone digital camera that automatically mounts as a device when you plug it in, you're using PTP, which is essentially the same thing. It's not new, but it's new to Android as of Honeycomb, and it's about to be seen by a lot more eyeballs in Ice Cream Sandwich. If you're like me, change is scary and nobody likes it. Chances are you aren't like me and want new features and ideas, so let's have a look at why it's used, and more importantly, how to set it up. Why use MTP instead of USB Mass Storage?
Simply put, MTP is now the standard being used to stop OEM's and carriers from giving you oodles of "storage space" and very little application space. That's not the ramblings of a crotchety old Android geek, but the word right from Android engineer Dan Morril: We didn't do this because we wanted to use ext3 (although that is a side benefit.) We did it because we wanted to be able to merge the "public shared storage" (i.e. for music and photos) with the internal private app storage. We got tired of seeing OEMs include many GB of internal storage for music, while users were still running out of space for apps and data. This approach lets us merge everything on one volume, which is way better. USB Mass Storage has one big drawback -- when you mount the storage partition (whether it's an SD card or an internal block like the Nexus S has), you've dedicated the entire partition as in use by another machine. This means the original host (that'd be your phone or tablet) doesn't have access to it, and the new host (the computer you've plugged your phone or tablet into) is allowed to do bad things that might mess it all up. That's why moving some applications to the SD card -- and especially widgets -- would sometimes end up in wonkiness. As a bonus, using MTP means that Android device makers no longer have to use FAT file systems on device storage, and can use ext formatting to make things work a bit better and faster. Devices will still be sold with SDcard slots, and they will be able to use the same USB Mass Storage mode that we're used to, but new devices without removable storage should all use MTP from Ice Cream Sandwich forward. Setting it up
Since Windows XP, MTP devices "just work" in Windows. Plug your Galaxy Nexus in, choose MTP as the connection type, and Windows will find the driver and you're ready to go. You can browse and transfer files between your phone and computer without any issues, and it's easy and magical. But not everyone uses Windows, do they? Here's how to set up things on the other 10 percent of computers out there, Linux and Mac. Mac OS
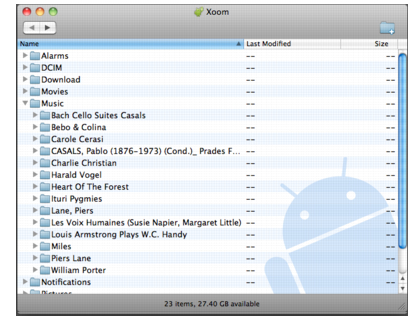
The folks at Android have made it easy as possible to use MTP devices on a Mac. Simply download and install the Android File Transfer program, connect your device to your computer, and double click the AFT application to start it up. You can then drag and drop any file (up to 4GB in size) to and from the device. There's even a dedicated help page in case you hit a snag. Linux
On a Linux install, things aren't quite as easy. On the plus side you have a bit of control how things are mounted, but there's no one click solution. Don't be discouraged, you can have MTP set up and running in no time with a bit of terminal command fun. Here's a walkthrough for using the Galaxy Nexus with Ubuntu: Set up a UDEV rule via the terminal by opening the rules file sudo nano -w /etc/udev/rules.d/51-android.rules And entering the following line at the end of the file (be sure to use your user name at the end!): SUBSYSTEM=="usb", ATTR{idVendor}=="04e8", ATTR{idProduct}=="6860", MODE="0600", OWNER="<your-username>" Now install the tools and set a mount point by entering the following commands one line at a time
Plug your Galaxy Nexus in, and enter the next line in the same terminal window: sudo mtpfs -o allow_other /media/GNexus Drag and drop through Nautilus, and when you're done and need to unmount, enter the following: sudo umount mtpfs This will have to suffice until someone writes a couple scripts or a front end. You don't have to install mtpfs, make the mount point, or chmod it after the first time. You may have to mount the device manually each time, I'll know more when I get one to play with. An alternative
I have a Galaxy Tab 10.1, that uses MTP for transfer mode, and never ever hook it up to the PC. I use a combination of and from the market and transfer files across my LAN at home. You might want to look into this yourself if you're like me and hate wires. Related devices: |
ICS MTP; GB UMS
最新推荐文章于 2025-12-15 16:08:35 发布


 191
191

 被折叠的 条评论
为什么被折叠?
被折叠的 条评论
为什么被折叠?
 到【灌水乐园】发言


