


目录
前言:为什么 TableLayout 是 Android 表格布局的 “最优解”?
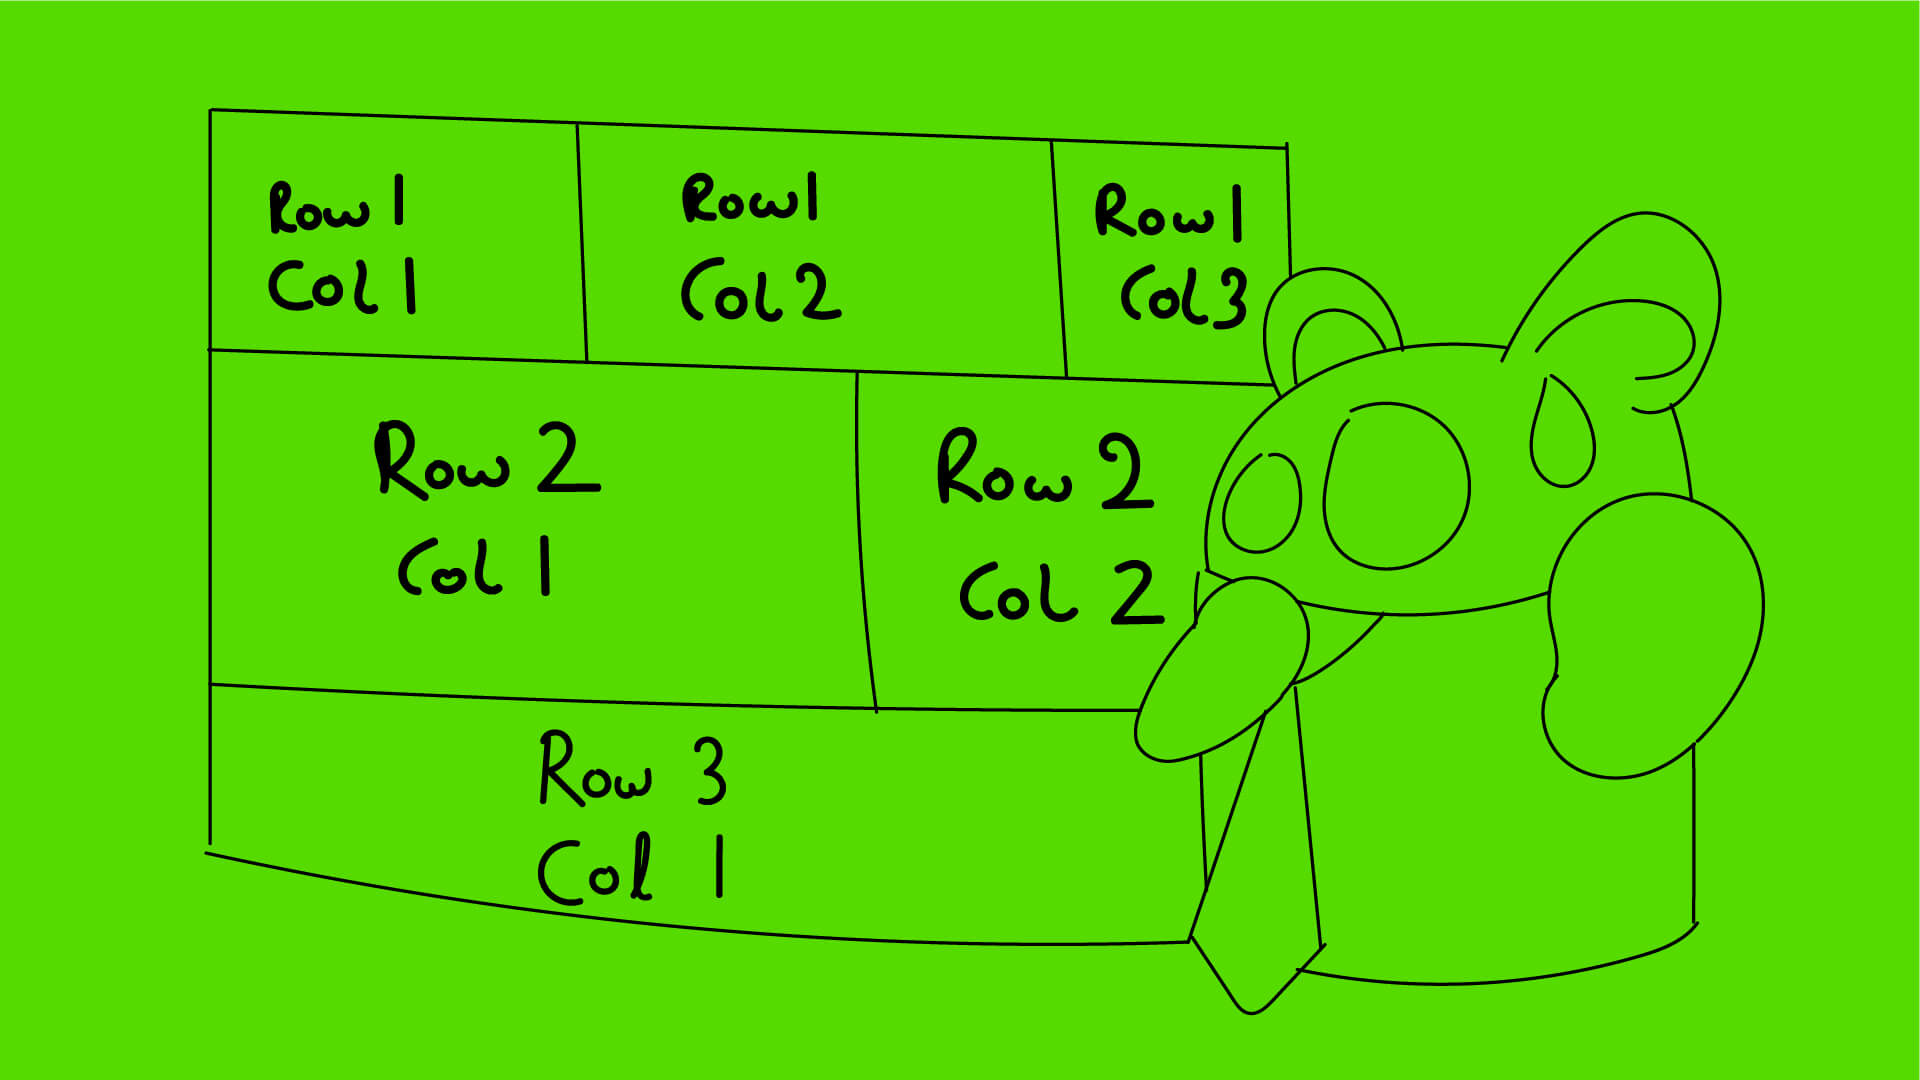
一、TableLayout 基础认知:到底什么是 “表格布局”?
三、TableLayout 实战布局:覆盖高频场景,直接复用
四、TableLayout 进阶技巧:合并单元格、样式美化与优化
示例 9:TableLayout + ScrollView + LinearLayout(带操作栏的滚动表格)
五、TableLayout 常见坑点与避坑指南(实战经验总结)

class 卑微码农:
    def __init__(self):
        self.技能 = ['能读懂十年前祖传代码', '擅长用Ctrl+C/V搭建世界', '信奉"能跑就别动"的玄学']
        self.发量 = 100  # 初始发量
        self.咖啡因耐受度 = '极限'

    def 修Bug(self, bug):
        try:
            # 试图用玄学解决问题
            if bug.严重程度 == '离谱':
                print("这一定是环境问题!")
            else:
                print("让我看看是谁又没写注释...哦,是我自己。")
        except Exception as e:
            # 如果try块都救不了,那就...
            print("重启一下试试?")
            self.发量 -= 1  # 每解决一个bug,头发-1


# 实例化一个我
我 = 卑微码农()
前言:为什么 TableLayout 是 Android 表格布局的 “最优解”?
刚做 Android 开发时,我曾用 LinearLayout 嵌套了 5 层才实现一个简单的 3 行 3 列表格 —— 代码冗余到不敢轻易修改,不同屏幕下还容易错位。直到发现 TableLayout,才明白它的核心价值:以 “表格行列” 为核心,零嵌套搞定结构化数据展示,无需手动计算宽高,自动适配屏幕。
TableLayout(表格布局)就像 “Android 自带的 Excel 表格”,通过<TableRow>标签定义行,子 View 直接作为列,支持自动列数、拉伸 / 收缩列、合并单元格等功能。不管是数据报表、设置页面表单、商品规格选择,还是复杂的多列列表,用它实现都只需 1-2 层布局,代码简洁且维护成本低。
但很多开发者觉得 TableLayout “小众”,只会用基础的行列布局,不懂拉伸列、合并单元格、自适应屏幕等核心技巧,导致本该用它的场景却用了复杂嵌套。本文会把 TableLayout 的基础概念、核心属性、实战布局、进阶技巧、样式美化、避坑指南全讲透。全文包含 15 个完整可运行的原创 XML/Java 示例,新手能直接上手,进阶开发者能挖掘它的隐藏潜力。
建议先收藏,再跟着示例一步步实操,遇到问题可以在评论区交流~
一、TableLayout 基础认知:到底什么是 “表格布局”?
1.1 一句话搞懂 TableLayout 的核心作用
TableLayout 是 Android 专门用于展示结构化数据的布局容器,核心作用是按 “行列” 形式排列子 View—— 用<TableRow>标签定义表格行,每个<TableRow>中的子 View 自动作为一列,支持列宽自适应、拉伸 / 收缩列、合并单元格等表格特有功能,是展示多列数据的最优解。
简单说:TableLayout 就像 “一张空白表格”——<TableLayout>是整个表格的外框,<TableRow>是表格的每一行,TextView、Button 等子 View 是表格的单元格。比如 APP 的设置页面(图标 + 功能名称 + 开关,3 列多行)、电商的商品规格表(尺寸 + 颜色 + 库存,多列多行)、数据报表(日期 + 销量 + 营收,多列数据),用它实现无需手动控制列宽和对齐,表格自动排版。
1.2 必须澄清的 3 个常见误解
- 误解 1:TableLayout 只能做 “固定列数” 表格?—— 错!支持自动列数(每行列数可不同)、动态列数(Java 代码添加行 / 列),灵活适配不同数据场景;
- 误解 2:TableLayout 不能自适应屏幕?—— 错!通过
stretchColumns(拉伸列)、shrinkColumns(收缩列)属性,能完美适配所有屏幕尺寸,列宽自动调整; - 误解 3:TableLayout 不如 RecyclerView+GridLayoutManager 灵活?—— 各有优势!TableLayout 适合静态 / 半静态表格(如设置页、表单),无需写适配器,代码更简洁;RecyclerView 适合动态大数据列表(如商品列表),支持复用和滑动优化。
1.3 TableLayout 与其他布局的核心区别
| 特性 | TableLayout | LinearLayout | RelativeLayout | GridLayout |
|---|---|---|---|---|
| 核心定位 | 结构化表格布局(行列排列) | 线性排列(水平 / 垂直) | 相对位置定位(无行列) | 网格布局(固定行列数) |
| 列宽控制 | 自动适配 + 拉伸 / 收缩属性,无需手动计算 | 需手动设置权重或固定宽高 | 需通过相对定位控制宽度 | 需指定列数和列宽比例 |
| 嵌套需求 | 1-2 层(TableLayout+TableRow) | 复杂表格需多层嵌套(≥3 层) | 复杂表格需多层定位 | 1 层即可,但列数固定 |
| 上手难度 | 中等(属性少,逻辑清晰) | 低(线性逻辑) | 中等(相对关系复杂) | 中等(需理解网格规则) |
| 典型场景 | 静态表格、表单、数据报表 | 线性排版(表单、列表项) | 相对定位(个人中心、商品卡片) | 固定网格(图标矩阵、键盘) |
1.4 TableLayout 的典型适用场景
- 设置页面表单:图标(列 1)+ 功能名称(列 2)+ 开关 / 箭头(列 3),多行表格;
- 商品规格选择:尺寸(列 1)+ 颜色(列 2)+ 库存(列 3)+ 选择按钮(列 4);
- 数据报表展示:日期(列 1)+ 销量(列 2)+ 营收(列 3)+ 增长率(列 4);
- 个人信息表单:标签(列 1)+ 内容(列 2),多行两列表格;
- 复杂表单布局:多列多行的填写表单(如订单详情页、报名表单);
- 动态数据表格:Java 代码动态添加行 / 列,展示后端返回的结构化数据。
二、TableLayout 核心属性:少而精,直击表格需求

TableLayout 的核心属性分为 “表格整体属性”“TableRow 属性”“单元格属性” 三类,每个属性都针对表格的核心需求(列宽控制、对齐、隐藏列等),下面结合示例逐个讲解。
2.1 核心属性 1:表格整体属性(控制列宽与布局)
这类属性作用于<TableLayout>标签,控制整个表格的列宽策略、对齐方式、边框等,是 TableLayout 的核心能力。
| 属性 | 含义 | 取值 | 核心作用 |
|---|---|---|---|
| stretchColumns | 设置可拉伸的列(占满剩余空间) | 列索引(0 开始)、*(所有列)、,分隔多列(如 0,2) | 让指定列拉伸,填充表格剩余空间(自适应屏幕) |
| shrinkColumns | 设置可收缩的列(超出时换行) | 同 stretchColumns | 列内容过长时,让指定列收缩换行,避免超出屏幕 |
| collapseColumns | 设置要隐藏的列 | 同 stretchColumns | 隐藏指定列,不显示在表格中 |
| layout_column | (单元格属性)指定单元格所在列 | 列索引 | 让单元格跳过指定列,直接显示在目标列 |
| gravity | 控制表格内所有单元格的对齐方式 | left/right/center/center_horizontal/center_vertical | 让所有单元格统一对齐(如整体居中) |
| stretchAllColumns | 是否拉伸所有列(API 17+) | true/false | 简化stretchColumns="*",让所有列平均拉伸 |
示例 1:拉伸列(自适应屏幕,占满剩余空间)
<!-- 3列表格,第2列拉伸,占满剩余空间 -->
<TableLayout
    xmlns:android="http://schemas.android.com/apk/res/android"
    android:layout_width="match_parent"
    android:layout_height="wrap_content"
    android:stretchColumns="1" <!-- 第2列(索引1)可拉伸 -->
    android:padding="16dp"
    android:background="#FFFFFF">

    <!-- 第1行 -->
    <TableRow
        android:layout_height="48dp"
        android:background="#F5F5F5">

        <TextView
            android:text="姓名"
            android:textSize="16sp"
            android:gravity="center"
            android:padding="8dp" />

        <TextView
            android:text="张三"
            android:textSize="16sp"
            android:gravity="center"
            android:padding="8dp" />

        <TextView
            android:text="25"
            android:textSize="16sp"
            android:gravity="center"
            android:padding="8dp" />

    </TableRow>

    <!-- 第2行 -->
    <TableRow
        android:layout_height="48dp"
        android:background="#FFFFFF">

        <TextView
            android:text="职业"
            android:textSize="16sp"
            android:gravity="center"
            android:padding="8dp" />

        <TextView
            android:text="Android开发者"
            android:textSize="16sp"
            android:gravity="center"
            android:padding="8dp" />

        <TextView
            android:text="3年"
            android:textSize="16sp"
            android:gravity="center"
            android:padding="8dp" />

    </TableRow>

</TableLayout>
效果:表格宽度占满屏幕,第 2 列(内容列)自动拉伸,占满剩余空间,第 1 列和第 3 列保持包裹内容宽度 —— 完美适配所有屏幕,无需手动设置权重。
示例 2:收缩列(内容过长时自动换行)
<!-- 2列表格,第2列可收缩(内容过长换行) -->
<TableLayout
    xmlns:android="http://schemas.android.com/apk/res/android"
    android:layout_width="match_parent"
    android:layout_height="wrap_content"
    android:shrinkColumns="1" <!-- 第2列可收缩 -->
    android:padding="16dp"
    android:background="#FFFFFF">

    <TableRow
        android:layout_height="wrap_content"
        android:padding="8dp">

        <TextView
            android:text="描述:"
            android:textSize="16sp"
            android:textStyle="bold"
            android:layout_marginRight="16dp" />

        <TextView
            android:text="这是一段超长的描述文本,TableLayout的shrinkColumns属性会让它自动换行,避免超出屏幕,无需手动控制宽度"
            android:textSize="16sp" />

    </TableRow>

</TableLayout>
效果:第 2 列的超长文本自动换行,表格高度自适应,不会超出屏幕 —— 用 LinearLayout 实现需要手动设置maxWidth,TableLayout 一句话搞定。
示例 3:隐藏列(不显示指定列)
<!-- 3列表格,隐藏第3列(索引2) -->
<TableLayout
    xmlns:android="http://schemas.android.com/apk/res/android"
    android:layout_width="match_parent"
    android:layout_height="wrap_content"
    android:collapseColumns="2" <!-- 隐藏第3列 -->
    android:stretchColumns="1"
    android:padding="16dp"
    android:background="#FFFFFF">

    <!-- 第1行 -->
    <TableRow
        android:layout_height="48dp"
        android:background="#F5F5F5">

        <TextView
            android:text="商品"
            android:textSize="16sp"
            android:gravity="center"
            android:padding="8dp" />

        <TextView
            android:text="价格"
            android:textSize="16sp"
            android:gravity="center"
            android:padding="8dp" />

        <TextView
            android:text="库存(隐藏)"
            android:textSize="16sp"
            android:gravity="center"
            android:padding="8dp" />

    </TableRow>

    <!-- 第2行 -->
    <TableRow
        android:layout_height="48dp"
        android:background="#FFFFFF">

        <TextView
            android:text="手机"
            android:textSize="16sp"
            android:gravity="center"
            android:padding="8dp" />

        <TextView
            android:text="¥1999"
            android:textSize="16sp"
            android:gravity="center"
            android:padding="8dp" />

        <TextView
            android:text="100"
            android:textSize="16sp"
            android:gravity="center"
            android:padding="8dp" />

    </TableRow>

</TableLayout>
效果:表格只显示前 2 列,第 3 列(库存)被隐藏 —— 适合根据用户权限动态控制列的显示 / 隐藏,无需修改布局结构。
2.2 核心属性 2:TableRow 属性(控制行样式)
这类属性作用于<TableRow>标签,控制单行的高度、背景、对齐方式等,让表格行样式更灵活。
| 属性 | 含义 | 取值 | 核心作用 |
|---|---|---|---|
| layout_height | 行高 | wrap_content/match_parent/ 固定值(如 48dp) | 控制单行高度,wrap_content 自适应内容 |
| background | 行背景 | 颜色(@color/xxx)、图片(@drawable/xxx) | 设置行背景色或背景图(如交替行色) |
| gravity | 行内所有单元格的对齐方式 | 同 TableLayout 的 gravity | 让当前行的所有单元格统一对齐(覆盖表格整体对齐) |
示例 4:交替行色(表格美化)
<!-- 4列表格,行背景交替显示(灰白相间) -->
<TableLayout
    xmlns:android="http://schemas.android.com/apk/res/android"
    android:layout_width="match_parent"
    android:layout_height="wrap_content"
    android:stretchColumns="1,2" <!-- 第2、3列拉伸 -->
    android:padding="16dp"
    android:background="#FFFFFF">

    <!-- 表头(深色背景) -->
    <TableRow
        android:layout_height="56dp"
        android:background="#333333">

        <TextView
            android:text="日期"
            android:textSize="16sp"
            android:textColor="#FFFFFF"
            android:gravity="center"
            android:padding="8dp" />

        <TextView
            android:text="销量"
            android:textSize="16sp"
            android:textColor="#FFFFFF"
            android:gravity="center"
            android:padding="8dp" />

        <TextView
            android:text="营收"
            android:textSize="16sp"
            android:textColor="#FFFFFF"
            android:gravity="center"
            android:padding="8dp" />

        <TextView
            android:text="增长率"
            android:textSize="16sp"
            android:textColor="#FFFFFF"
            android:gravity="center"
            android:padding="8dp" />

    </TableRow>

    <!-- 第1行(白色背景) -->
    <TableRow
        android:layout_height="48dp"
        android:background="#FFFFFF">

        <TextView
            android:text="2024-01-01"
            android:textSize="16sp"
            android:gravity="center"
            android:padding="8dp" />

        <TextView
            android:text="1000"
            android:textSize="16sp"
            android:gravity="center"
            android:padding="8dp" />

        <TextView
            android:text="¥100000"
            android:textSize="16sp"
            android:gravity="center"
            android:padding="8dp" />

        <TextView
            android:text="+12%"
            android:textSize="16sp"
            android:textColor="#FF6B6B"
            android:gravity="center"
            android:padding="8dp" />

    </TableRow>

    <!-- 第2行(灰色背景) -->
    <TableRow
        android:layout_height="48dp"
        android:background="#F5F5F5">

        <TextView
            android:text="2024-01-02"
            android:textSize="16sp"
            android:gravity="center"
            android:padding="8dp" />

        <TextView
            android:text="1200"
            android:textSize="16sp"
            android:gravity="center"
            android:padding="8dp" />

        <TextView
            android:text="¥120000"
            android:textSize="16sp"
            android:gravity="center"
            android:padding="8dp" />

        <TextView
            android:text="+20%"
            android:textSize="16sp"
            android:textColor="#4ECDC4"
            android:gravity="center"
            android:padding="8dp" />

    </TableRow>

</TableLayout>
效果:表头深色背景,数据行灰白交替,表格美观清晰 —— 这是数据报表的经典样式,用 TableLayout 实现无需嵌套,代码简洁。
2.3 核心属性 3:单元格属性(控制单个单元格)
这类属性作用于<TableRow>中的子 View(单元格),控制单个单元格的对齐、合并、列宽等,是实现复杂表格的关键。
| 属性 | 含义 | 取值 | 核心作用 |
|---|---|---|---|
| layout_gravity | 单元格对齐方式 | left/right/center/top/bottom | 单个单元格的对齐方式(覆盖行和表格的对齐) |
| layout_span | 横向合并单元格(跨列) | 合并的列数(如 2 表示跨 2 列) | 让单元格占据多个列的宽度(如表头跨列) |
| layout_rowSpan | 纵向合并单元格(跨行) | 合并的行数(如 2 表示跨 2 行) | 让单元格占据多个行的高度 |
| minWidth | 单元格最小宽度 | 固定值(如 80dp) | 确保单元格不会过窄,内容显示完整 |
| maxWidth | 单元格最大宽度 | 固定值(如 200dp) | 限制单元格最大宽度,避免过宽 |
示例 5:横向合并单元格(跨列)
<!-- 3列表格,表头跨3列,数据行正常显示 -->
<TableLayout
    xmlns:android="http://schemas.android.com/apk/res/android"
    android:layout_width="match_parent"
    android:layout_height="wrap_content"
    android:stretchColumns="0,1,2"
    android:padding="16dp"
    android:background="#FFFFFF">

    <!-- 表头(跨3列) -->
    <TableRow
        android:layout_height="56dp"
        android:background="#FF6B6B">

        <TextView
            android:text="2024年1月销售报表"
            android:textSize="18sp"
            android:textColor="#FFFFFF"
            android:gravity="center"
            android:layout_span="3" /> <!-- 跨3列 -->

    </TableRow>

    <!-- 列名行 -->
    <TableRow
        android:layout_height="48dp"
        android:background="#F5F5F5">

        <TextView
            android:text="日期"
            android:textSize="16sp"
            android:gravity="center"
            android:padding="8dp" />

        <TextView
            android:text="销量"
            android:textSize="16sp"
            android:gravity="center"
            android:padding="8dp" />

        <TextView
            android:text="营收"
            android:textSize="16sp"
            android:gravity="center"
            android:padding="8dp" />

    </TableRow>

    <!-- 数据行 -->
    <TableRow
        android:layout_height="48dp"
        android:background="#FFFFFF">

        <TextView
            android:text="2024-01-01"
            android:textSize="16sp"
            android:gravity="center"
            android:padding="8dp" />

        <TextView
            android:text="1000"
            android:textSize="16sp"
            android:gravity="center"
            android:padding="8dp" />

        <TextView
            android:text="¥100000"
            android:textSize="16sp"
            android:gravity="center"
            android:padding="8dp" />

    </TableRow>

</TableLayout>
效果:表头文本跨 3 列显示,居中对齐,数据行列数正常 —— 这是报表类表格的常用布局,用 TableLayout 的layout_span属性一句话实现,无需复杂嵌套。
示例 6:纵向合并单元格(跨行)
<!-- 3列表格,第1列的单元格跨行合并 -->
<TableLayout
    xmlns:android="http://schemas.android.com/apk/res/android"
    android:layout_width="match_parent"
    android:layout_height="wrap_content"
    android:stretchColumns="1,2"
    android:padding="16dp"
    android:background="#FFFFFF">

    <!-- 第1行 -->
    <TableRow
        android:layout_height="48dp"
        android:background="#F5F5F5">

        <TextView
            android:text="手机"
            android:textSize="16sp"
            android:gravity="center"
            android:layout_rowSpan="2" /> <!-- 跨2行 -->

        <TextView
            android:text="华为Mate 60"
            android:textSize="16sp"
            android:gravity="center"
            android:padding="8dp" />

        <TextView
            android:text="¥5999"
            android:textSize="16sp"
            android:gravity="center"
            android:padding="8dp" />

    </TableRow>

    <!-- 第2行 -->
    <TableRow
        android:layout_height="48dp"
        android:background="#FFFFFF">

        <!-- 第1列被上一行合并,无需重复添加 -->
        <TextView
            android:text="苹果iPhone 15"
            android:textSize="16sp"
            android:gravity="center"
            android:padding="8dp" />

        <TextView
            android:text="¥7999"
            android:textSize="16sp"
            android:gravity="center"
            android:padding="8dp" />

    </TableRow>

</TableLayout>
效果:第 1 列的 “手机” 单元格跨 2 行显示,与下方两行的第 2、3 列对齐 —— 纵向合并适合分类展示数据,同一分类下的多行共用一个分类标签。
三、TableLayout 实战布局:覆盖高频场景,直接复用

掌握核心属性后,结合实际开发中的高频场景,实现从简单到复杂的布局案例,每个案例都附完整代码和效果说明,可直接复制到项目中使用。
3.1 场景 1:设置页面表单(APP 通用)
<!-- 设置页面:3列多行表格(图标+功能名称+箭头) -->
<TableLayout
    xmlns:android="http://schemas.android.com/apk/res/android"
    android:layout_width="match_parent"
    android:layout_height="match_parent"
    android:stretchColumns="1" <!-- 第2列(功能名称)拉伸 -->
    android:background="#F5F5F5">

    <!-- 第1行:账号设置 -->
    <TableRow
        android:layout_height="56dp"
        android:background="#FFFFFF"
        android:layout_marginTop="8dp">

        <ImageView
            android:layout_width="24dp"
            android:layout_height="24dp"
            android:src="@android:drawable/ic_menu_person"
            android:layout_gravity="center"
            android:layout_marginLeft="16dp"
            android:layout_marginRight="16dp" />

        <TextView
            android:text="账号设置"
            android:textSize="16sp"
            android:layout_gravity="center_vertical" />

        <ImageView
            android:layout_width="24dp"
            android:layout_height="24dp"
            android:src="@android:drawable/ic_menu_arrow_right"
            android:layout_gravity="center"
            android:layout_marginRight="16dp" />

    </TableRow>

    <!-- 第2行:通知设置 -->
    <TableRow
        android:layout_height="56dp"
        android:background="#FFFFFF">

        <ImageView
            android:layout_width="24dp"
            android:layout_height="24dp"
            android:src="@android:drawable/ic_menu_notifications"
            android:layout_gravity="center"
            android:layout_marginLeft="16dp"
            android:layout_marginRight="16dp" />

        <TextView
            android:text="通知设置"
            android:textSize="16sp"
            android:layout_gravity="center_vertical" />

        <Switch
            android:layout_width="wrap_content"
            android:layout_height="wrap_content"
            android:layout_gravity="center"
            android:layout_marginRight="16dp"
            android:checked="true" />

    </TableRow>

    <!-- 第3行:隐私设置 -->
    <TableRow
        android:layout_height="56dp"
        android:background="#FFFFFF">

        <ImageView
            android:layout_width="24dp"
            android:layout_height="24dp"
            android:src="@android:drawable/ic_menu_lockscreen"
            android:layout_gravity="center"
            android:layout_marginLeft="16dp"
            android:layout_marginRight="16dp" />

        <TextView
            android:text="隐私设置"
            android:textSize="16sp"
            android:layout_gravity="center_vertical" />

        <ImageView
            android:layout_width="24dp"
            android:layout_height="24dp"
            android:src="@android:drawable/ic_menu_arrow_right"
            android:layout_gravity="center"
            android:layout_marginRight="16dp" />

    </TableRow>

    <!-- 第4行:关于我们 -->
    <TableRow
        android:layout_height="56dp"
        android:background="#FFFFFF">

        <ImageView
            android:layout_width="24dp"
            android:layout_height="24dp"
            android:src="@android:drawable/ic_menu_info_details"
            android:layout_gravity="center"
            android:layout_marginLeft="16dp"
            android:layout_marginRight="16dp" />

        <TextView
            android:text="关于我们"
            android:textSize="16sp"
            android:layout_gravity="center_vertical" />

        <ImageView
            android:layout_width="24dp"
            android:layout_height="24dp"
            android:src="@android:drawable/ic_menu_arrow_right"
            android:layout_gravity="center"
            android:layout_marginRight="16dp" />

    </TableRow>

</TableLayout>
效果:典型的 APP 设置页面,3 列布局(图标 + 功能名称 + 箭头 / 开关),第 2 列拉伸占满剩余空间,适配所有屏幕 —— 用 LinearLayout 实现需要 4 层嵌套,TableLayout 仅 1 层,代码简洁易维护。
3.2 场景 2:商品规格选择表(电商 APP)
<!-- 商品规格表:4列多行(尺寸+颜色+库存+选择按钮) -->
<TableLayout
    xmlns:android="http://schemas.android.com/apk/res/android"
    android:layout_width="match_parent"
    android:layout_height="wrap_content"
    android:stretchColumns="1,2" <!-- 颜色和库存列拉伸 -->
    android:padding="16dp"
    android:background="#FFFFFF">

    <!-- 表头 -->
    <TableRow
        android:layout_height="56dp"
        android:background="#333333">

        <TextView
            android:text="尺寸"
            android:textSize="16sp"
            android:textColor="#FFFFFF"
            android:gravity="center"
            android:padding="8dp" />

        <TextView
            android:text="颜色"
            android:textSize="16sp"
            android:textColor="#FFFFFF"
            android:gravity="center"
            android:padding="8dp" />

        <TextView
            android:text="库存"
            android:textSize="16sp"
            android:textColor="#FFFFFF"
            android:gravity="center"
            android:padding="8dp" />

        <TextView
            android:text="选择"
            android:textSize="16sp"
            android:textColor="#FFFFFF"
            android:gravity="center"
            android:padding="8dp" />

    </TableRow>

    <!-- 规格1 -->
    <TableRow
        android:layout_height="48dp"
        android:background="#F5F5F5">

        <TextView
            android:text="S"
            android:textSize="16sp"
            android:gravity="center"
            android:padding="8dp" />

        <TextView
            android:text="黑色"
            android:textSize="16sp"
            android:gravity="center"
            android:padding="8dp" />

        <TextView
            android:text="50件"
            android:textSize="16sp"
            android:gravity="center"
            android:padding="8dp" />

        <RadioButton
            android:layout_gravity="center"
            android:padding="8dp" />

    </TableRow>

    <!-- 规格2 -->
    <TableRow
        android:layout_height="48dp"
        android:background="#FFFFFF">

        <TextView
            android:text="M"
            android:textSize="16sp"
            android:gravity="center"
            android:padding="8dp" />

        <TextView
            android:text="白色"
            android:textSize="16sp"
            android:gravity="center"
            android:padding="8dp" />

        <TextView
            android:text="30件"
            android:textSize="16sp"
            android:gravity="center"
            android:padding="8dp" />

        <RadioButton
            android:layout_gravity="center"
            android:padding="8dp" />

    </TableRow>

    <!-- 规格3 -->
    <TableRow
        android:layout_height="48dp"
        android:background="#F5F5F5">

        <TextView
            android:text="L"
            android:textSize="16sp"
            android:gravity="center"
            android:padding="8dp" />

        <TextView
            android:text="蓝色"
            android:textSize="16sp"
            android:gravity="center"
            android:padding="8dp" />

        <TextView
            android:text="20件"
            android:textSize="16sp"
            android:gravity="center"
            android:padding="8dp" />

        <RadioButton
            android:layout_gravity="center"
            android:padding="8dp" />

    </TableRow>

</TableLayout>
效果:电商 APP 常用的商品规格选择表,4 列布局,颜色和库存列拉伸适配,单选按钮实现规格选择 —— 用 GridLayout 实现需要指定列数,TableLayout 自动适配列数,更灵活。
3.3 场景 3:个人信息表单(两列多行)
<!-- 个人信息表单:2列多行(标签+内容) -->
<TableLayout
    xmlns:android="http://schemas.android.com/apk/res/android"
    android:layout_width="match_parent"
    android:layout_height="wrap_content"
    android:stretchColumns="1" <!-- 内容列拉伸 -->
    android:padding="20dp"
    android:background="#FFFFFF">

    <!-- 姓名 -->
    <TableRow
        android:layout_height="56dp">

        <TextView
            android:text="姓名:"
            android:textSize="16sp"
            android:textStyle="bold"
            android:layout_gravity="center_vertical"
            android:layout_marginRight="16dp" />

        <TextView
            android:text="张三"
            android:textSize="16sp"
            android:layout_gravity="center_vertical" />

    </TableRow>

    <!-- 性别 -->
    <TableRow
        android:layout_height="56dp">

        <TextView
            android:text="性别:"
            android:textSize="16sp"
            android:textStyle="bold"
            android:layout_gravity="center_vertical"
            android:layout_marginRight="16dp" />

        <TextView
            android:text="男"
            android:textSize="16sp"
            android:layout_gravity="center_vertical" />

    </TableRow>

    <!-- 年龄 -->
    <TableRow
        android:layout_height="56dp">

        <TextView
            android:text="年龄:"
            android:textSize="16sp"
            android:textStyle="bold"
            android:layout_gravity="center_vertical"
            android:layout_marginRight="16dp" />

        <TextView
            android:text="25岁"
            android:textSize="16sp"
            android:layout_gravity="center_vertical" />

    </TableRow>

    <!-- 手机号 -->
    <TableRow
        android:layout_height="56dp">

        <TextView
            android:text="手机号:"
            android:textSize="16sp"
            android:textStyle="bold"
            android:layout_gravity="center_vertical"
            android:layout_marginRight="16dp" />

        <TextView
            android:text="138****1234"
            android:textSize="16sp"
            android:layout_gravity="center_vertical" />

    </TableRow>

    <!-- 地址 -->
    <TableRow
        android:layout_height="wrap_content">

        <TextView
            android:text="地址:"
            android:textSize="16sp"
            android:textStyle="bold"
            android:layout_gravity="top"
            android:layout_marginRight="16dp"
            android:layout_marginTop="8dp" />

        <TextView
            android:text="北京市朝阳区建国路88号某小区1号楼1单元101室"
            android:textSize="16sp"
            android:layout_gravity="top"
            android:layout_marginTop="8dp"
            android:maxLines="2"
            android:ellipsize="end" />

    </TableRow>

</TableLayout>
效果:个人信息展示表单,2 列布局(标签 + 内容),内容列拉伸占满剩余空间,地址列支持换行 —— 用 LinearLayout 实现需要 5 层嵌套,TableLayout 仅 1 层,维护成本极低。
3.4 场景 4:动态表格(Java 代码添加行 / 列)
public class DynamicTableActivity extends AppCompatActivity {
    private TableLayout mTableLayout;
    private String[][] mData = {
            {"2024-01-01", "1000", "¥100000", "+12%"},
            {"2024-01-02", "1200", "¥120000", "+20%"},
            {"2024-01-03", "1500", "¥150000", "+25%"},
            {"2024-01-04", "1300", "¥130000", "-13%"}
    };

    @Override
    protected void onCreate(Bundle savedInstanceState) {
        super.onCreate(savedInstanceState);
        setContentView(R.layout.activity_dynamic_table);

        mTableLayout = findViewById(R.id.table_layout);
        // 设置表格属性:拉伸所有列
        mTableLayout.setStretchAllColumns(true);
        // 添加表头
        addTableHeader();
        // 添加数据行
        addDataRows();
    }

    // 添加表头
    private void addTableHeader() {
        TableRow headerRow = new TableRow(this);
        headerRow.setLayoutParams(new TableLayout.LayoutParams(
                TableLayout.LayoutParams.MATCH_PARENT,
                dp2px(56)
        ));
        headerRow.setBackgroundColor(Color.parseColor("#333333"));

        // 表头文本数组
        String[] headers = {"日期", "销量", "营收", "增长率"};
        for (String header : headers) {
            TextView textView = new TextView(this);
            textView.setText(header);
            textView.setTextSize(TypedValue.COMPLEX_UNIT_SP, 16);
            textView.setTextColor(Color.WHITE);
            textView.setGravity(Gravity.CENTER);
            textView.setPadding(dp2px(8), dp2px(8), dp2px(8), dp2px(8));
            headerRow.addView(textView);
        }

        mTableLayout.addView(headerRow);
    }

    // 添加数据行
    private void addDataRows() {
        for (int i = 0; i < mData.length; i++) {
            TableRow dataRow = new TableRow(this);
            dataRow.setLayoutParams(new TableLayout.LayoutParams(
                    TableLayout.LayoutParams.MATCH_PARENT,
                    dp2px(48)
            ));
            // 交替行色
            dataRow.setBackgroundColor(i % 2 == 0 ? Color.parseColor("#F5F5F5") : Color.WHITE);

            String[] rowData = mData[i];
            for (int j = 0; j < rowData.length; j++) {
                TextView textView = new TextView(this);
                textView.setText(rowData[j]);
                textView.setTextSize(TypedValue.COMPLEX_UNIT_SP, 16);
                textView.setGravity(Gravity.CENTER);
                textView.setPadding(dp2px(8), dp2px(8), dp2px(8), dp2px(8));

                // 增长率列设置颜色(正增长绿色,负增长红色)
                if (j == 3) {
                    if (rowData[j].contains("+")) {
                        textView.setTextColor(Color.parseColor("#4ECDC4"));
                    } else if (rowData[j].contains("-")) {
                        textView.setTextColor(Color.parseColor("#FF6B6B"));
                    }
                }

                dataRow.addView(textView);
            }

            mTableLayout.addView(dataRow);
        }
    }

    // dp转px工具方法
    private int dp2px(int dp) {
        return (int) (dp * getResources().getDisplayMetrics().density + 0.5f);
    }
}
配套 XML 布局(activity_dynamic_table.xml):
<ScrollView
    xmlns:android="http://schemas.android.com/apk/res/android"
    android:layout_width="match_parent"
    android:layout_height="match_parent"
    android:padding="16dp"
    android:background="#F5F5F5">

    <TableLayout
        android:id="@+id/table_layout"
        android:layout_width="match_parent"
        android:layout_height="wrap_content"
        android:background="#FFFFFF" />

</ScrollView>
效果:Java 代码动态添加表头和 4 行数据,交替行色,增长率列根据正负值设置不同颜色,表格可滚动 —— 适合展示后端返回的动态数据,无需提前写 XML 布局,灵活性极高。
四、TableLayout 进阶技巧:合并单元格、样式美化与优化

基础布局满足静态需求,实际开发中还需要实现复杂表格(如合并单元格)、美化表格样式、优化性能,下面讲解进阶技巧。
4.1 进阶技巧 1:复杂合并单元格(跨行列组合)
合并单元格是 TableLayout 的进阶功能,支持横向 + 纵向组合合并,实现复杂的表格结构(如不规则表格)。
示例 7:跨行列组合合并(复杂表格)
<!-- 复杂表格:横向合并+纵向合并组合 -->
<TableLayout
    xmlns:android="http://schemas.android.com/apk/res/android"
    android:layout_width="match_parent"
    android:layout_height="wrap_content"
    android:stretchColumns="*"
    android:padding="16dp"
    android:background="#FFFFFF"
    android:collapseColumns="3"> <!-- 隐藏第4列,用于调整布局 -->

    <!-- 第1行:横向合并2列 -->
    <TableRow
        android:layout_height="48dp"
        android:background="#F5F5F5">

        <TextView
            android:text="产品分类"
            android:textSize="16sp"
            android:gravity="center"
            android:layout_span="2" /> <!-- 跨2列 -->

        <TextView
            android:text="销量"
            android:textSize="16sp"
            android:gravity="center" />

        <TextView /> <!-- 隐藏列,占位 -->

    </TableRow>

    <!-- 第2行:纵向合并2行 -->
    <TableRow
        android:layout_height="48dp"
        android:background="#FFFFFF">

        <TextView
            android:text="手机"
            android:textSize="16sp"
            android:gravity="center"
            android:layout_rowSpan="2" /> <!-- 跨2行 -->

        <TextView
            android:text="华为"
            android:textSize="16sp"
            android:gravity="center" />

        <TextView
            android:text="5000"
            android:textSize="16sp"
            android:gravity="center" />

        <TextView /> <!-- 隐藏列,占位 -->

    </TableRow>

    <!-- 第3行 -->
    <TableRow
        android:layout_height="48dp"
        android:background="#F5F5F5">

        <TextView
            android:text="苹果"
            android:textSize="16sp"
            android:gravity="center" />

        <TextView
            android:text="3000"
            android:textSize="16sp"
            android:gravity="center" />

        <TextView /> <!-- 隐藏列,占位 -->

    </TableRow>

    <!-- 第4行:横向合并3列 -->
    <TableRow
        android:layout_height="48dp"
        android:background="#FFFFFF">

        <TextView
            android:text="总计"
            android:textSize="16sp"
            android:textStyle="bold"
            android:gravity="center" />

        <TextView
            android:text="8000"
            android:textSize="16sp"
            android:textStyle="bold"
            android:gravity="center"
            android:layout_span="2" /> <!-- 跨2列 -->

        <TextView /> <!-- 隐藏列,占位 -->

    </TableRow>

</TableLayout>
效果:表格包含横向合并(产品分类跨 2 列)、纵向合并(手机跨 2 行),实现复杂的不规则表格 —— 用其他布局几乎无法实现,TableLayout 通过layout_span和layout_rowSpan组合轻松搞定。
4.2 进阶技巧 2:表格样式美化(边框、阴影、间距)
默认的 TableLayout 没有边框,通过自定义背景和属性,可实现带边框、阴影、间距的美观表格。
示例 8:带边框的表格(美化样式)
<!-- 带边框的表格:通过shape背景实现单元格边框 -->
<TableLayout
    xmlns:android="http://schemas.android.com/apk/res/android"
    android:layout_width="match_parent"
    android:layout_height="wrap_content"
    android:stretchColumns="*"
    android:padding="16dp"
    android:background="#F5F5F5">

    <!-- 表头 -->
    <TableRow
        android:layout_height="56dp">

        <TextView
            android:text="姓名"
            android:textSize="16sp"
            android:textColor="#FFFFFF"
            android:gravity="center"
            android:padding="8dp"
            android:background="@drawable/table_header_border" />

        <TextView
            android:text="年龄"
            android:textSize="16sp"
            android:textColor="#FFFFFF"
            android:gravity="center"
            android:padding="8dp"
            android:background="@drawable/table_header_border" />

        <TextView
            android:text="职业"
            android:textSize="16sp"
            android:textColor="#FFFFFF"
            android:gravity="center"
            android:padding="8dp"
            android:background="@drawable/table_header_border" />

    </TableRow>

    <!-- 数据行1 -->
    <TableRow
        android:layout_height="48dp">

        <TextView
            android:text="张三"
            android:textSize="16sp"
            android:gravity="center"
            android:padding="8dp"
            android:background="@drawable/table_cell_border" />

        <TextView
            android:text="25"
            android:textSize="16sp"
            android:gravity="center"
            android:padding="8dp"
            android:background="@drawable/table_cell_border" />

        <TextView
            android:text="Android开发者"
            android:textSize="16sp"
            android:gravity="center"
            android:padding="8dp"
            android:background="@drawable/table_cell_border" />

    </TableRow>

    <!-- 数据行2 -->
    <TableRow
        android:layout_height="48dp">

        <TextView
            android:text="李四"
            android:textSize="16sp"
            android:gravity="center"
            android:padding="8dp"
            android:background="@drawable/table_cell_border" />

        <TextView
            android:text="30"
            android:textSize="16sp"
            android:gravity="center"
            android:padding="8dp"
            android:background="@drawable/table_cell_border" />

        <TextView
            android:text="产品经理"
            android:textSize="16sp"
            android:gravity="center"
            android:padding="8dp"
            android:background="@drawable/table_cell_border" />

    </TableRow>

</TableLayout>
配套边框背景文件:
- table_header_border.xml(表头边框):
<shape xmlns:android="http://schemas.android.com/apk/res/android"
    android:shape="rectangle">
    <solid android:color="#333333" />
    <stroke android:width="1dp" android:color="#FFFFFF" /> <!-- 白色边框 -->
</shape>
- table_cell_border.xml(单元格边框):
<shape xmlns:android="http://schemas.android.com/apk/res/android"
    android:shape="rectangle">
    <solid android:color="#FFFFFF" />
    <stroke android:width="1dp" android:color="#E0E0E0" /> <!-- 灰色边框 -->
</shape>
效果:表格每个单元格都有边框,表头深色背景 + 白色边框,数据行白色背景 + 灰色边框,美观清晰 —— 这是企业级 APP 常用的表格样式,用 TableLayout+shape 背景轻松实现。
4.3 进阶技巧 3:TableLayout 性能优化
TableLayout 本身性能优秀,但在处理大数据或复杂表格时,需注意以下优化点,避免卡顿:
优化 1:控制表格行数(≤20 行)
TableLayout 的单元格没有复用机制,行数过多(如超过 50 行)会导致内存占用增加,绘制耗时变长。建议:
- 静态表格行数控制在 20 行以内;
- 动态大数据表格(如 100 行 +)改用 RecyclerView+GridLayoutManager,实现单元格复用。
优化 2:避免过度合并单元格
过多的跨行列合并会增加表格的测量和绘制耗时,建议:
- 非必要不合并单元格,尽量保持规则表格;
- 复杂合并表格的行数控制在 10 行以内。
优化 3:减少单元格嵌套
单元格内避免嵌套复杂布局(如 LinearLayout+TextView+ImageView),建议:
- 单个单元格仅放一个 View(如 TextView、ImageView);
- 复杂单元格内容用自定义 View 实现,而非嵌套布局。
优化 4:使用 ScrollView 包裹大数据表格
当表格行数超过屏幕高度时,用 ScrollView 包裹 TableLayout,实现滚动效果,避免表格超出屏幕:
<ScrollView
    android:layout_width="match_parent"
    android:layout_height="match_parent">

    <TableLayout
        android:layout_width="match_parent"
        android:layout_height="wrap_content">
        <!-- 表格内容 -->
    </TableLayout>

</ScrollView>
4.4 进阶技巧 4:与其他布局组合(互补优势)
TableLayout 适合表格布局,与 ScrollView、LinearLayout 组合,可实现更复杂的需求(如滚动表格、表格 + 按钮栏)。
示例 9:TableLayout + ScrollView + LinearLayout(带操作栏的滚动表格)
<LinearLayout
    xmlns:android="http://schemas.android.com/apk/res/android"
    android:layout_width="match_parent"
    android:layout_height="match_parent"
    android:orientation="vertical"
    android:background="#F5F5F5">

    <!-- 操作栏(水平布局) -->
    <LinearLayout
        android:layout_width="match_parent"
        android:layout_height="56dp"
        android:orientation="horizontal"
        android:background="#FFFFFF"
        android:gravity="center_vertical"
        android:paddingHorizontal="16dp">

        <Button
            android:layout_width="wrap_content"
            android:layout_height="40dp"
            android:text="导出"
            android:background="#FF6B6B"
            android:textColor="#FFFFFF" />

        <Button
            android:layout_width="wrap_content"
            android:layout_height="40dp"
            android:text="刷新"
            android:layout_marginLeft="16dp"
            android:background="#4ECDC4"
            android:textColor="#FFFFFF" />

    </LinearLayout>

    <!-- 滚动表格 -->
    <ScrollView
        android:layout_width="match_parent"
        android:layout_height="0dp"
        android:layout_weight="1"
        android:padding="16dp">

        <TableLayout
            android:layout_width="match_parent"
            android:layout_height="wrap_content"
            android:stretchColumns="*"
            android:background="#FFFFFF">

            <!-- 表格内容(复用示例4的报表表格) -->

        </TableLayout>

    </ScrollView>

</LinearLayout>
效果:顶部是操作栏(导出 + 刷新按钮),下方是可滚动的表格,兼顾了表格展示和操作功能 —— 三者组合,既发挥了 TableLayout 的表格优势,又满足了复杂布局的需求。
五、TableLayout 常见坑点与避坑指南(实战经验总结)
5.1 坑点 1:列数不一致,表格布局错乱
- 现象:不同行的列数不同,导致表格列宽混乱、单元格错位;
- 原因:TableLayout 的列数由列数最多的行决定,其他行列数不足时,会自动补空白列,导致布局错乱;
- 解决方案:
- 确保所有行的列数一致,列数不足时添加空白 View 占位;
- 如需不同列数,用
layout_span合并列,而非直接减少子 View 数量; - 隐藏列用
collapseColumns,而非直接删除单元格。
5.2 坑点 2:拉伸 / 收缩列失效,列宽不自适应
- 现象:设置
stretchColumns或shrinkColumns后,列宽未按预期拉伸 / 收缩; - 原因:
- 列索引设置错误(从 0 开始,而非 1);
- 单元格 View 的宽高设置为
match_parent,限制了拉伸 / 收缩; - 表格宽度未设为
match_parent,没有剩余空间可拉伸;
- 解决方案:
- 列索引从 0 开始(如第 2 列索引为 1),多列用逗号分隔(如 0,2);
- 单元格 View 的宽高设为
wrap_content,避免限制尺寸; - 表格
layout_width设为match_parent,确保有剩余空间。
5.3 坑点 3:合并单元格后,布局错位
- 现象:设置
layout_span或layout_rowSpan后,单元格位置错位、高度 / 宽度异常; - 原因:
- 合并列数 / 行数超过表格实际列数 / 行数;
- 合并后的单元格未设置
gravity,导致内容对齐异常; - 被合并的行 / 列未添加空白 View 占位;
- 解决方案:
- 合并列数不超过表格最大列数,合并行数不超过表格总行数;
- 合并后的单元格设置
gravity(如center),确保内容对齐; - 纵向合并时,被合并的行需删除对应列的 View;横向合并时,无需额外操作。
5.4 坑点 4:表格没有边框,样式丑陋
- 现象:默认 TableLayout 没有边框,单元格之间没有分隔,视觉效果差;
- 原因:TableLayout 默认不显示边框,需手动设置单元格背景或表格背景;
- 解决方案:
- 给每个单元格设置带边框的 shape 背景(如示例 8);
- 给 TableLayout 设置背景色,给 TableRow 设置间距,模拟边框;
- 使用第三方表格库(如 SmartTable),支持更丰富的边框样式。
5.5 坑点 5:动态添加行时,性能卡顿
- 现象:Java 代码动态添加大量行(如 50 行 +),表格加载缓慢、滑动卡顿;
- 原因:TableLayout 没有单元格复用机制,每行每列都是独立 View,大量 View 导致内存占用高、绘制耗时;
- 解决方案:
- 动态表格行数控制在 20 行以内,超过则改用 RecyclerView+GridLayoutManager;
- 动态添加行时,批量添加(如先创建所有 TableRow,再一次性添加到 TableLayout),减少刷新次数;
- 避免给动态单元格设置复杂背景或嵌套布局,简化 View 结构。
5.6 坑点 6:单元格内容显示不全,被截断
- 现象:单元格文本过长或 View 尺寸过大,导致内容被截断;
- 原因:
- 未设置
shrinkColumns,文本过长时未换行; - 单元格 View 的
maxWidth设置过小,限制了内容显示; - 表格
padding或单元格padding过大,挤压内容空间;
- 未设置
- 解决方案:
- 给文本列设置
shrinkColumns,让文本自动换行; - 合理设置
maxWidth,避免过小; - 调整
padding值,给内容留出足够空间; - 文本设置
ellipsize="end",超出时显示省略号。
- 给文本列设置
六、总结:TableLayout 核心知识点图谱
到这里,TableLayout 的核心内容已经全部讲完,我们用一张图谱梳理重点:
TableLayout核心知识点
├── 基础认知:行列结构化布局、核心特性、与其他布局的区别、典型场景
├── 核心属性:
│   - 表格整体属性:stretchColumns(拉伸列)、shrinkColumns(收缩列)、collapseColumns(隐藏列)
│   - TableRow属性:layout_height(行高)、background(行背景)、gravity(行对齐)
│   - 单元格属性:layout_gravity(单元格对齐)、layout_span(横向合并)、layout_rowSpan(纵向合并)
├── 实战布局:设置页面、商品规格表、个人信息表单、动态表格
├── 进阶技巧:
│   - 复杂合并:横向+纵向组合合并
│   - 样式美化:边框、阴影、交替行色
│   - 性能优化:控制行数、减少嵌套、批量添加行
│   - 混合布局:与ScrollView/LinearLayout组合
├── 避坑指南:列数不一致、拉伸失效、合并错位、性能卡顿、内容截断
其实 TableLayout 的学习关键是 “理解行列逻辑 + 掌握列宽控制和合并技巧”—— 它不是 “万能布局”,但在静态表格、表单、数据报表等场景下,是最简洁、最高效的选择。很多开发者忽略它的价值,用复杂嵌套布局实现本可简单搞定的需求,反而增加了代码冗余和维护成本。
把文中的示例逐个敲一遍,结合 Android Studio 的布局预览实时查看效果,很快就能熟练掌握。如果遇到具体问题,比如 “合并单元格错位”“动态表格卡顿”,可以在评论区留言,我会第一时间回复~


 999
999

 被折叠的 条评论
为什么被折叠?
被折叠的 条评论
为什么被折叠?
 到【灌水乐园】发言


