


 本文详细介绍了如何使用SpringBoot框架整合MyBatis进行数据库操作,包括项目搭建、数据库配置、实体类定义、DAO层接口编写、Service层实现及控制器设置。并通过POSTMAN验证接口功能,最后演示了如何通过HTTPClient进行模拟请求。
首先,在虚拟机上通过
mysql -uroot -p
进入mysql操作界面
create database mydemo
use mydemo
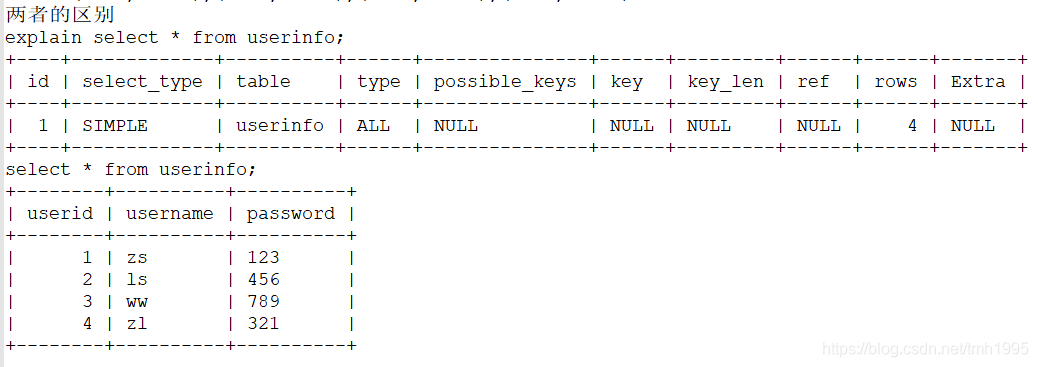
简单的完成表的创建
create table userinfo(
userid int primary key not null auto_increment,
username varchar(20) not null,
password varchar(20) not null
);
给表中添加数据
insert into userinfo(username,password)
values(‘zs’,‘123’),(‘ls’,‘456’),(‘ww’,‘789’),(‘zl’,‘321’);
#----------------------IDEA------------------------------------
new->project
Spring Initializr
Web中勾选Spring Web
SQL中勾选MyBatis Framework和MySQL Driver
版本建议调低一点(2.1.14)
将pom.xml中的
<scope>runtime</scope>
改成
<version>5.1.38</version>
目录结构

UserinfoDAO
public interface UserinfoDAO{
	@Select("select * from userinfo")
	public List<Userinfo> findAll(Userinfo user);
}
Userinfo
public class Userinfo{
	private int userid;
	private String username;
	private String password;
}
并Getter and Setter
UserService
@Service
public class UserService{
	@Autowired
	private UserinfoDAO udao;
	public List<Userinfo> searchAll(Userinfo user){
		return udao.findALL(user);
	}
}
InitCtrl
@RestController
public class InitCtrl{
	@Autowired
	private UserService userService;

	@RequestMapping("/login")
	public List<Userinfo> login(Userinfo user){
		return userService.searchAll(user);
	}
}
LogintestApplication
@SpringBootApplication
@MapperScan("com.njbdqn.logintest.dao")//这里填dao的路径
public class LogintestApplication{
	public static void main(String[] args){
		SpringApplication.run(LogintestApplication.class, args);
	}
}
application.yml
spring:
  datasource:
    driver-class-name: com.mysql.jdbc.Driver
	url: jdbc:mysql://192.168.56.99:3306/mydemo
	username: root
	password: xxxxxx
运行LogintestApplication,此时能通过localhost:8080/login看到数据则说明成功
(注:此处的/login是由InitCtrl里决定的)
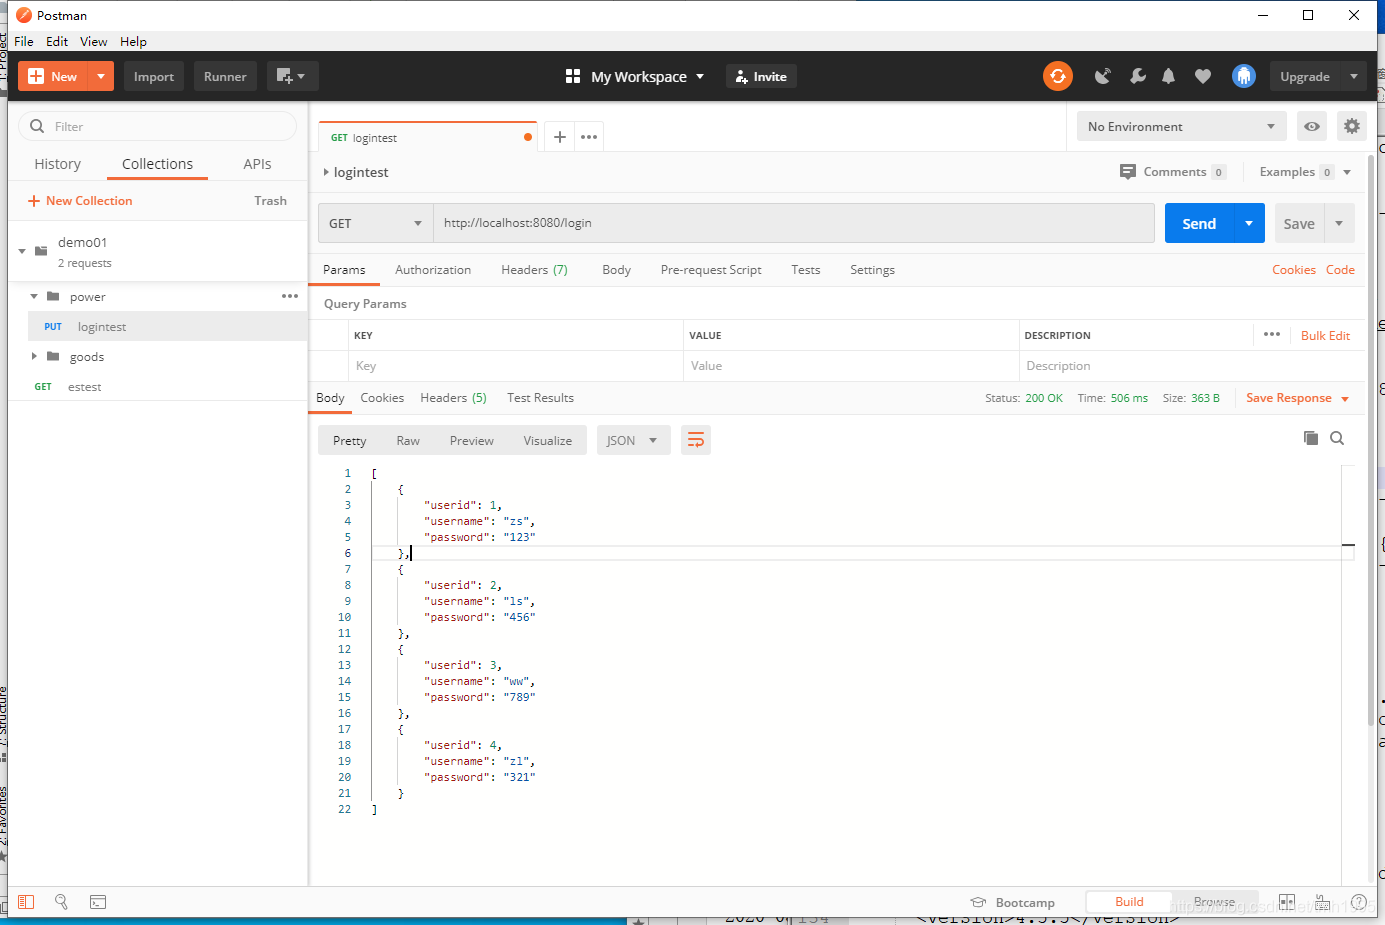
POSTMAN:
在GET栏中输入http://localhost:8080/login
可看到图片100则表示成功
#################################################################
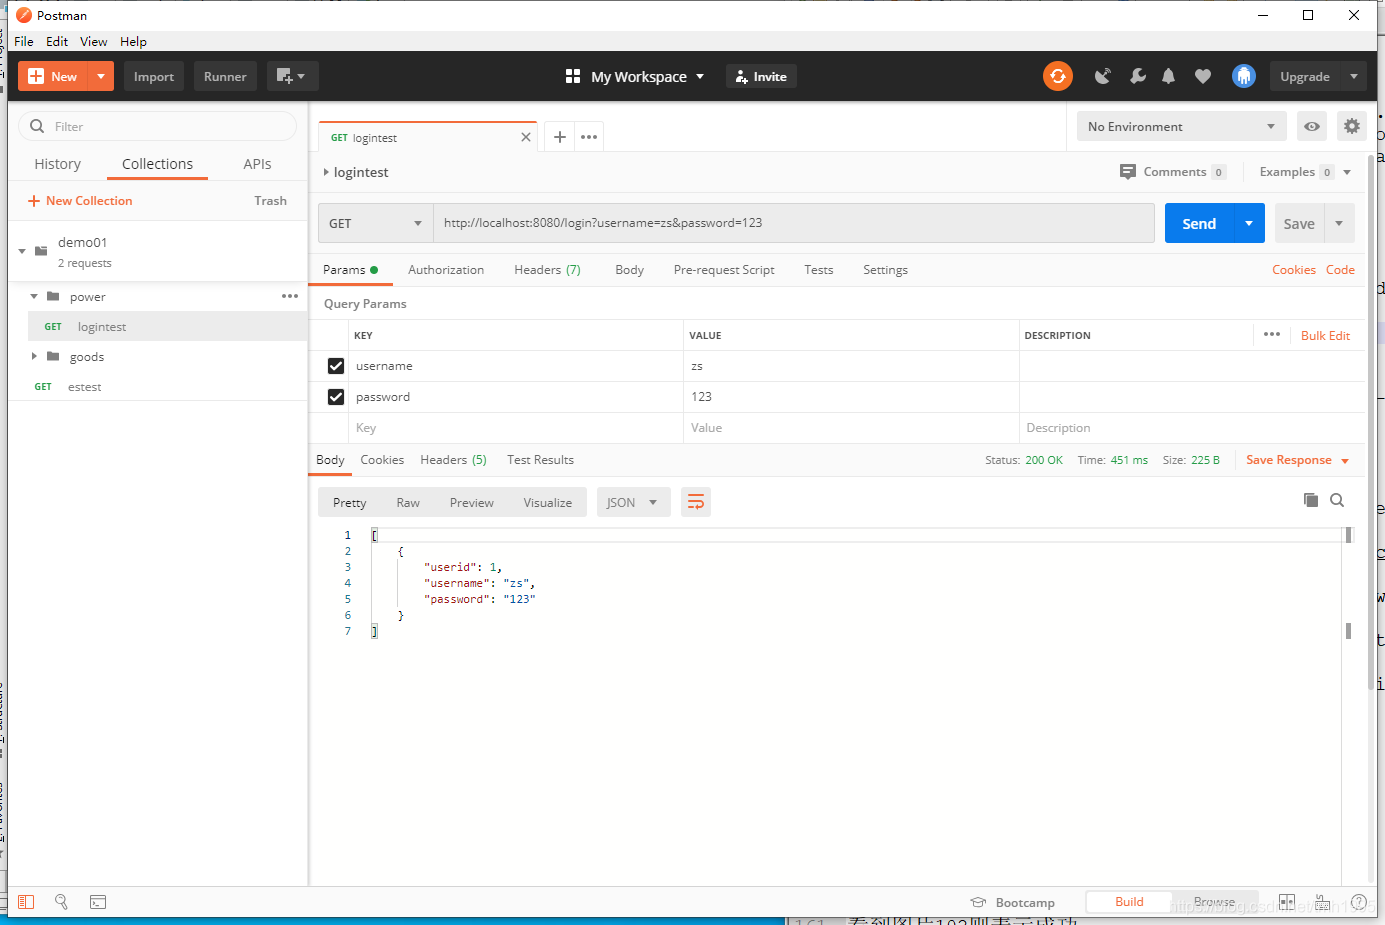
此时将logintest中的UserinfoDAO中的SQL语句改成
@Select("select * from userinfo where username=#{username} and password=#{password}")
在虚拟机中,启动elasticsearch数据库:
su tmh
cd /opt/soft/elasticsearch622/bin/
./elasticsearch
#-------------------------------------------------------------------------------------------------
New Project
Maven–>create from archetype
选择maven-archetype-quickstart完成创建
pom.xml中
将
<properties>
    <project.build.sourceEncoding>UTF-8</project.build.sourceEncoding>
    <maven.compiler.source>1.7</maven.compiler.source>
    <maven.compiler.target>1.7</maven.compiler.target>
  </properties>
中的1.7改成1.8
在
中添加
<dependency>
      <groupId>org.apache.httpcomponents</groupId>
      <artifactId>httpclient</artifactId>
      <version>4.5.5</version>
    </dependency>
  </dependencies>
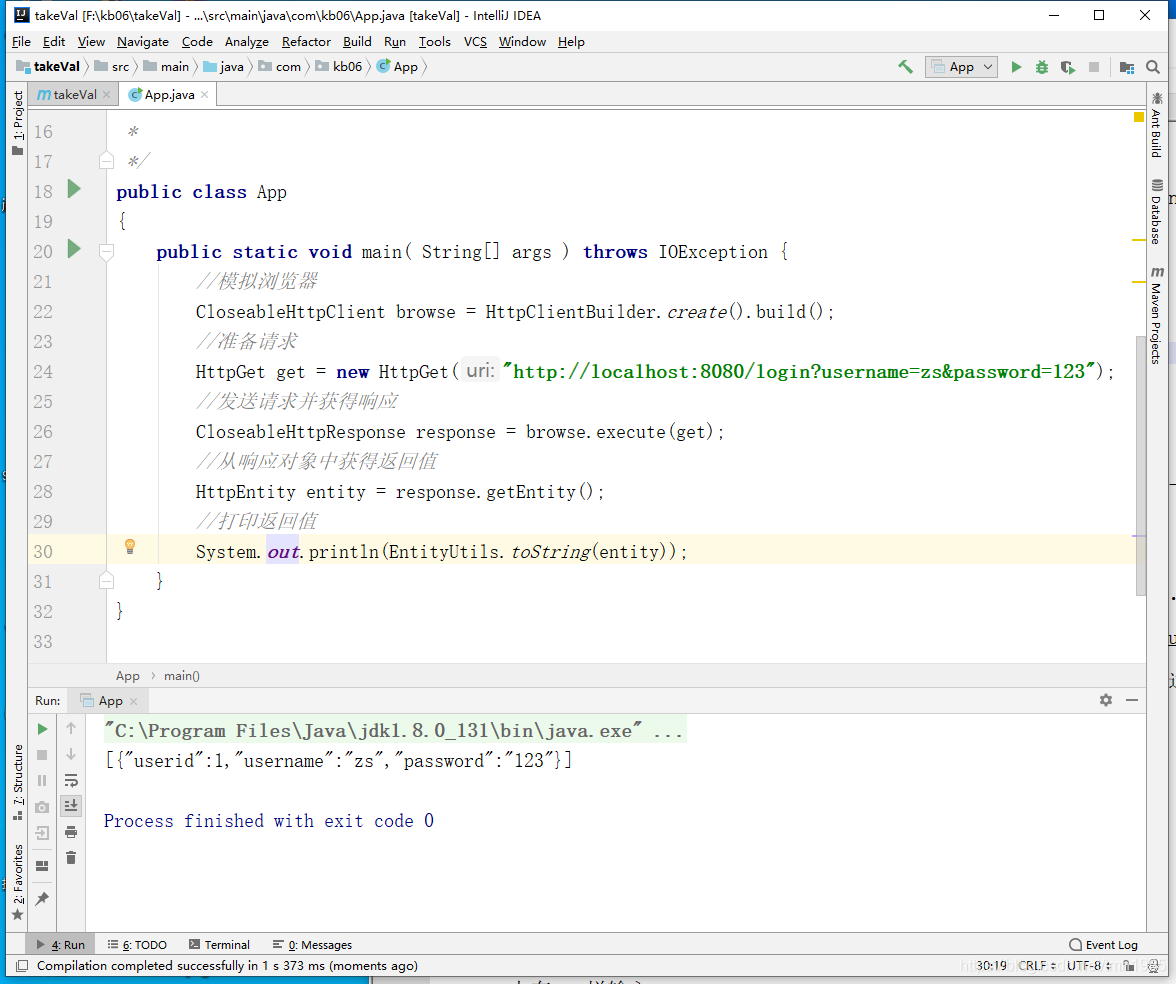
App
public class App{
	public static void main(String[] args){
		//模拟浏览器
		CloseableHttpClient browse = HttpClientBuilder.create().build();
		//准备请求
		HttpGet get = new HttpGet("http://localhost:8080/login?username=zs&password=123");
		//发送请求并获得响应
		CloseableHttpResponse response = browse.execute(get);//这里记得抛出异常
		//从响应对象中获得返回值
		HttpEntity entity = response.getEntity();
		//打印返回值
		System.out.println(EntityUtils.toString(entity));
	}
}
此时重启logintest中的LogintestApplication
再运行App若能看到图片101则表示成功
POSTMAN中在PUT栏输入http://localhost:8080/login?username=zs&password=123
看到图片102则表示成功
以上为简单操作流程。


 2461
2461

 被折叠的 条评论
为什么被折叠?
被折叠的 条评论
为什么被折叠?
 到【灌水乐园】发言


