


 本文详细介绍了一个基于Spring MVC的Web项目的搭建过程,包括项目创建、依赖引入、配置文件编写、控制器定义及视图展示等关键步骤。
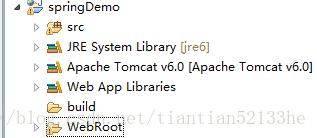
1.创建一个web项目 springDemo
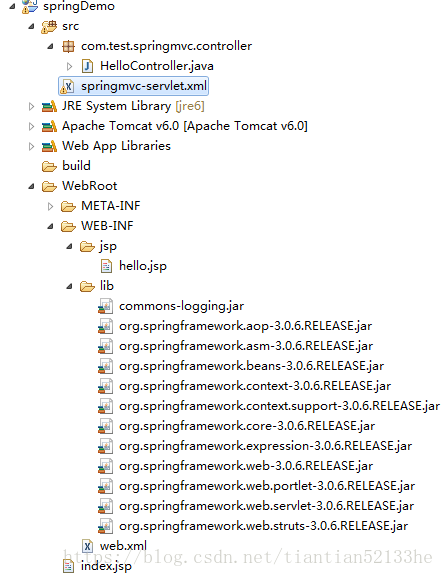
2.导入需要的jar包,版本不同,jar包不同。
commons-logging.jar
org.springframework.aop-3.0.6.RELEASE.jar
org.springframework.asm-3.0.6.RELEASE.jar
org.springframework.beans-3.0.6.RELEASE.jar
org.springframework.context-3.0.6.RELEASE.jar
org.springframework.context.support-3.0.6.RELEASE.jar
org.springframework.core-3.0.6.RELEASE.jar
org.springframework.expression-3.0.6.RELEASE.jar
org.springframework.web-3.0.6.RELEASE.jar
org.springframework.web.portlet-3.0.6.RELEASE.jar
org.springframework.web.servlet-3.0.6.RELEASE.jar
org.springframework.web.struts-3.0.6.RELEASE.jar
3. 在WEB-INF下创建web.xml
<?xml version="1.0" encoding="UTF-8"?>
<web-app xmlns:xsi="http://www.w3.org/2001/XMLSchema-instance" xmlns="http://java.sun.com/xml/ns/javaee" xmlns:web="http://java.sun.com/xml/ns/javaee/web-app_2_5.xsd" xsi:schemaLocation="http://java.sun.com/xml/ns/javaee http://java.sun.com/xml/ns/javaee/web-app_2_5.xsd" id="WebApp_ID" version="2.5">
  <display-name>springDemo</display-name>
  <welcome-file-list>
    <welcome-file>index.html</welcome-file>
    <welcome-file>index.htm</welcome-file>
    <welcome-file>index.jsp</welcome-file>
    <welcome-file>default.html</welcome-file>
    <welcome-file>default.htm</welcome-file>
    <welcome-file>default.jsp</welcome-file>
  </welcome-file-list>

<servlet>
      <servlet-name>springmvc</servlet-name>
      <servlet-class>org.springframework.web.servlet.DispatcherServlet</servlet-class>
      <init-param>
            <param-name>contextConfigLocation</param-name>
            <param-value>classpath:springmvc-servlet.xml</param-value>
        </init-param>
        <!-- <load-on-startup>1</load-on-startup> -->
  </servlet>
  <servlet-mapping>
      <servlet-name>springmvc</servlet-name>
      <url-pattern>/</url-pattern>
  </servlet-mapping>

</web-app>
4.在src下创建 springmvc-servlet.xml
<?xml version="1.0" encoding="UTF-8"?>
<beans xmlns="http://www.springframework.org/schema/beans"
    xmlns:xsi="http://www.w3.org/2001/XMLSchema-instance"
    xmlns:context="http://www.springframework.org/schema/context"
    xmlns:mvc="http://www.springframework.org/schema/mvc"
    xsi:schemaLocation="http://www.springframework.org/schema/beans http://www.springframework.org/schema/beans/spring-beans.xsd
        http://www.springframework.org/schema/context http://www.springframework.org/schema/context/spring-context.xsd
        http://www.springframework.org/schema/mvc http://www.springframework.org/schema/mvc/spring-mvc.xsd">

    <!-- scan the package and the sub package -->
    <context:component-scan base-package="com.test.springmvc.controller"/>

    <!-- don't handle the static resource -->
    <!-- <mvc:default-servlet-handler /> -->

    <!-- if you use annotation you must configure following setting -->
    <mvc:annotation-driven />

    <!-- configure the InternalResourceViewResolver -->
    <bean class="org.springframework.web.servlet.view.InternalResourceViewResolver"
            id="internalResourceViewResolver">
        <!-- 前缀 -->
        <property name="prefix" value="/WEB-INF/jsp/" />
        <!-- 后缀 -->
        <property name="suffix" value=".jsp" />
    </bean>
</beans>
5.jsp下创建hello.jsp
<%@ page language="java" contentType="text/html; charset=UTF-8"
    pageEncoding="UTF-8"%>
<!DOCTYPE html PUBLIC "-//W3C//DTD HTML 4.01 Transitional//EN" "http://www.w3.org/TR/html4/loose.dtd">
<html>
<head>
<meta http-equiv="Content-Type" content="text/html; charset=UTF-8">
<title>Insert title here</title>
</head>
<body>
欢迎!
</body>
</html>
6.创建controller
package com.test.springmvc.controller;

import org.springframework.stereotype.Controller;
import org.springframework.web.bind.annotation.RequestMapping;


@Controller
public class HelloController {


    @RequestMapping("/hello")
    public String hello(){
        return "hello";
    }
}
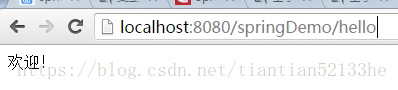
7,启动工程,访问 :http://localhost:8080/springDemo/hello
项目工程如下


 143
143

 被折叠的 条评论
为什么被折叠?
被折叠的 条评论
为什么被折叠?
 到【灌水乐园】发言


