


 本文详细解析了AQS框架中的CLH队列工作原理,包括节点结构、等待机制及核心方法实现,如enqueue、dequeue等。通过具体代码示例展示了线程如何加入并退出CLH队列。
CLH队列
在AQS类文件的开头,作者添加了很长一段注释,向开发者解释CLH队列,以及AQS对CLH队列的使用。AQS里面的CLH队列是CLH同步锁的一种变形。其主要从两方面进行了改造:节点的结构与节点等待机制。在结构上,AQS类引入了头结点和尾节点,他们分别指向队列的头和尾,尝试获取锁、入队列、释放锁等实现都与头尾节点相关:
To enqueue into a CLH lock, you atomically splice it in as new tail. To dequeue, you just set the head field.即要加入CLH锁,可以自动将其作为新尾部进行拼接。 要出队,您只需设置头字段。
Node
CLH队列由Node对象组成,Node是AQS中的内部类。
static final class Node {
            //用于标识共享锁
            static final Node SHARED = new Node();
            //用于标识独占锁
            static final Node EXCLUSIVE = null;

            /**
             * 因为超时或者中断,节点会被设置为取消状态,被取消的节点时不会参与到竞争中的,他会一直保持取         消状态不会转变为其他状态;
             */
            static final int CANCELLED = 1;

            /**
             * 当前节点释放锁的时候,需要唤醒下一个节点
             */
            static final int SIGNAL = -1;

            /**
             * 节点在等待队列中,节点线程等待Condition唤醒
             */
            static final int CONDITION = -2;

            /**
             * 表示下一次共享式同步状态获取将会无条件地传播下去
             */
            static final int PROPAGATE = -3;

            /**
             * 等待状态
             */
            volatile int waitStatus;

            /**
             * 前驱节点
             */
            volatile Node prev;

            /**
             * 后继节点
             */
            volatile Node next;

            /**
             * 节点线程
             */
            volatile Thread thread;

            Node nextWaiter;

            /**
             * Returns true if node is waiting in shared mode.
             */
            final boolean isShared() {
                return nextWaiter == SHARED;
            }


            Node() {    // Used to establish initial head or SHARED marker
            }

            Node(Thread thread, Node mode) {     // Used by addWaiter
                this.nextWaiter = mode;
                this.thread = thread;
            }

            Node(Thread thread, int waitStatus) { // Used by Condition
                this.waitStatus = waitStatus;
                this.thread = thread;
            }
......

        }
CLH队列执行
1.线程调用acquire方法获取锁,如果获取失败则会进入CLH队列
public final void acquire(int arg) {
        if (!tryAcquire(arg) &&
            acquireQueued(addWaiter(Node.EXCLUSIVE), arg))
            selfInterrupt();
    }
2.addWaiter(Node.EXCLUSIVE)方法会将当前线程封装成Node节点,追加在队尾。
private Node addWaiter(Node mode) {
        Node node = new Node(Thread.currentThread(), mode);
        // 获取原队尾
        Node pred = tail;
        if (pred != null) {
            node.prev = pred;
        //用cas更新 ,pred是原来队尾,作为预期值,node作为新值
            if (compareAndSetTail(pred, node)) {
                pred.next = node;
                return node;
            }
        }
       //前面cas更新失败后,再enq方法中循环用cas更新直到成功
        enq(node);
        return node;
    }
enq方法:
private Node enq(final Node node) {
for (;;) {
Node t = tail;
if (t == null) {
//使用cas初始化head节点
if (compareAndSetHead(new Node()))
tail = head;
} else {
//将当前节点放在clh队列尾部
node.prev = t;
if (compareAndSetTail(t, node)) {
t.next = node;
return t;
}
}
}
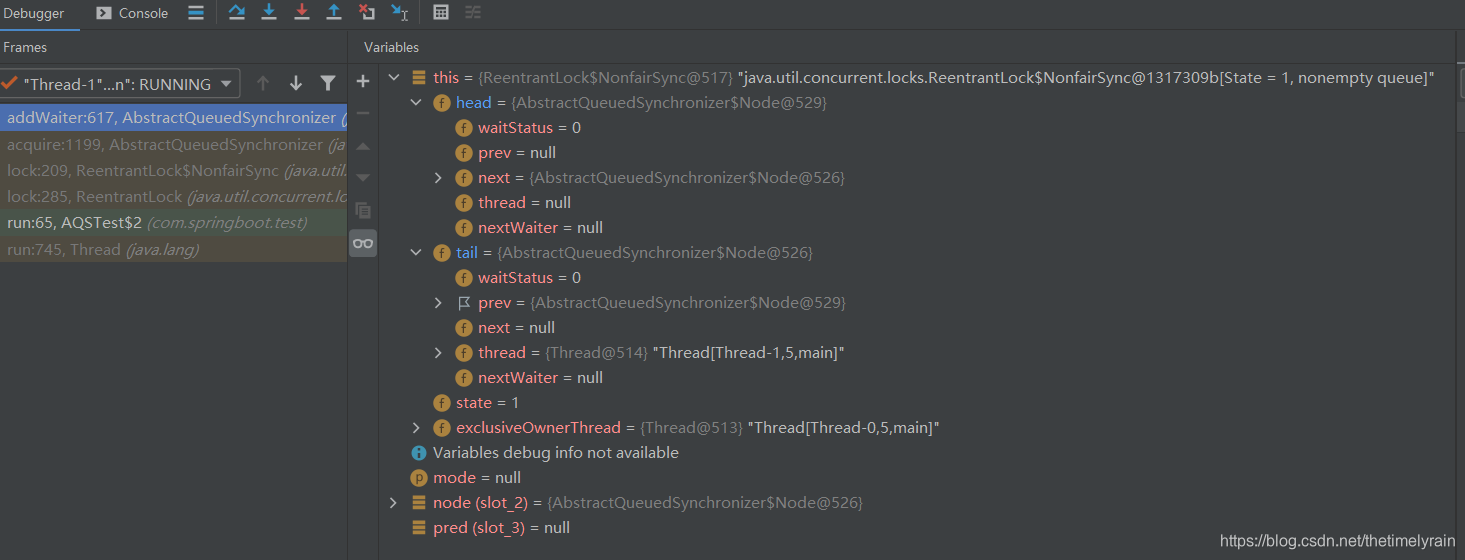
}假如有两个线程,第一个执行中,第二个在lch队列里面,在return node处,此时debug:
接下来是acquireQueued方法,他会使线程自旋阻塞,直到获取到锁。
final boolean acquireQueued(final Node node, int arg) {
       boolean failed = true;
       try {
           boolean interrupted = false;
           for (;;) {
               //1. 拿到当前节点的前置节点
               final Node p = node.predecessor();

               //2. 如果当前节点的前置节点是头节点的话,就再次尝试获取锁
               if (p == head && tryAcquire(arg)) {
                   //成功获取锁后,将节点设置为头节点
                   setHead(node);
                   p.next = null; // help GC
                   failed = false;
                   return interrupted;
               }
               /**
               更改当前节点前置节点的waitStatus,只有前置节点的waitStatus=Node.SIGNAL,当前节点才有可能被唤醒。如果前置节点的waitStatus>0(即取消),则跳过取更前面的节点。
               */
               if (shouldParkAfterFailedAcquire(p, node) &&
               //通过Unsafe.park来阻塞线程
                   parkAndCheckInterrupt())
                   interrupted = true;
           }
       } finally {
           if (failed)
               cancelAcquire(node);
       }
   }
 private final boolean parkAndCheckInterrupt() {
        //在此阻塞,收到unlock()方法的unPark()方法会被唤醒
        LockSupport.park(this);
        return Thread.interrupted();
    }
线程释放锁,从前面可以知道,获取到锁的线程会设置为CLH队列的头部。这里如果tryRelease返回true,且head的waitStatus!=0。就会更新head的waitStatus为0并且 唤醒线程head.next节点的线程。
 public final boolean release(int arg) {
       //判断是否可以释放锁。
       if (tryRelease(arg)) {
           Node h = head;
           if (h != null && h.waitStatus != 0)
               unparkSuccessor(h);
           return true;
       }
       return false;
   }
 private void unparkSuccessor(Node node) {

       int ws = node.waitStatus;
       //waitStatus不是取消状态,就设置成0
       if (ws < 0)
           compareAndSetWaitStatus(node, ws, 0);


       //获取下个waitStatus不为取消的Node
       Node s = node.next;
       if (s == null || s.waitStatus > 0) {
           s = null;
           for (Node t = tail; t != null && t != node; t = t.prev)
               if (t.waitStatus <= 0)
                   s = t;
       }
       //LockSupport.unpark是调用了Unsafe.unpark,唤醒线程。
       if (s != null)
           LockSupport.unpark(s.thread);
   }
总结:
其实aqs的核心原理无非三点:1.自旋 2.Lock.park()和unpark() 3.cas,顺着这三个关键点和加锁以及解锁过程就可以理清
参考文章:
https://blog.youkuaiyun.com/qq_26680031/article/details/82348053
https://blog.youkuaiyun.com/java_lyvee/article/details/98966684


 1393
1393

 被折叠的 条评论
为什么被折叠?
被折叠的 条评论
为什么被折叠?
 到【灌水乐园】发言


