


 本文深入探讨了Netty中Google Protobuf的使用,包括编解码器介绍、快速入门案例,以及Netty的handler调用机制。同时,文章详细分析了TCP粘包和拆包问题,提供了案例演示和解决方案。
1、Google Protobuf
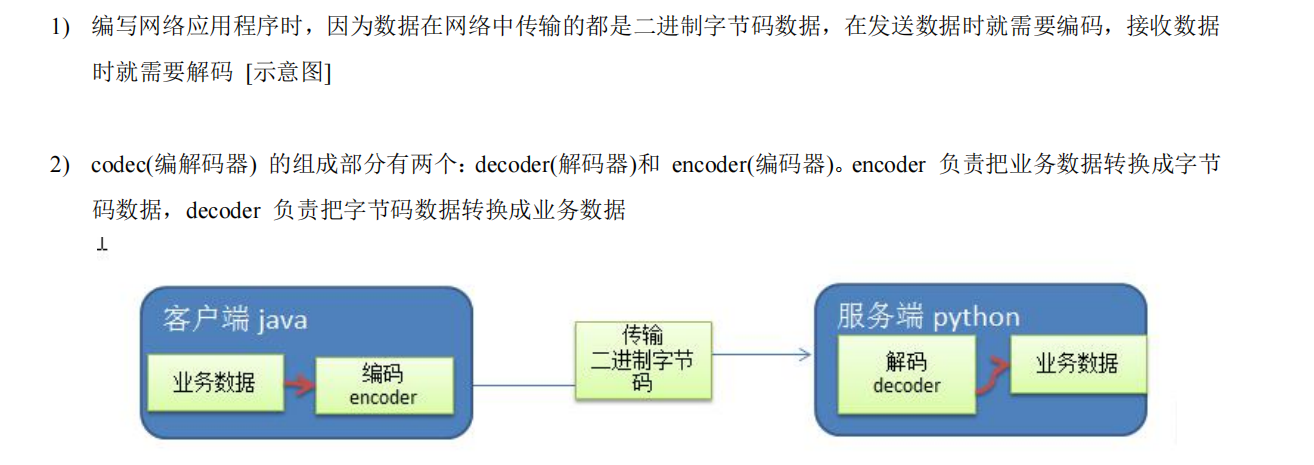
1.1、编解码器基本介绍
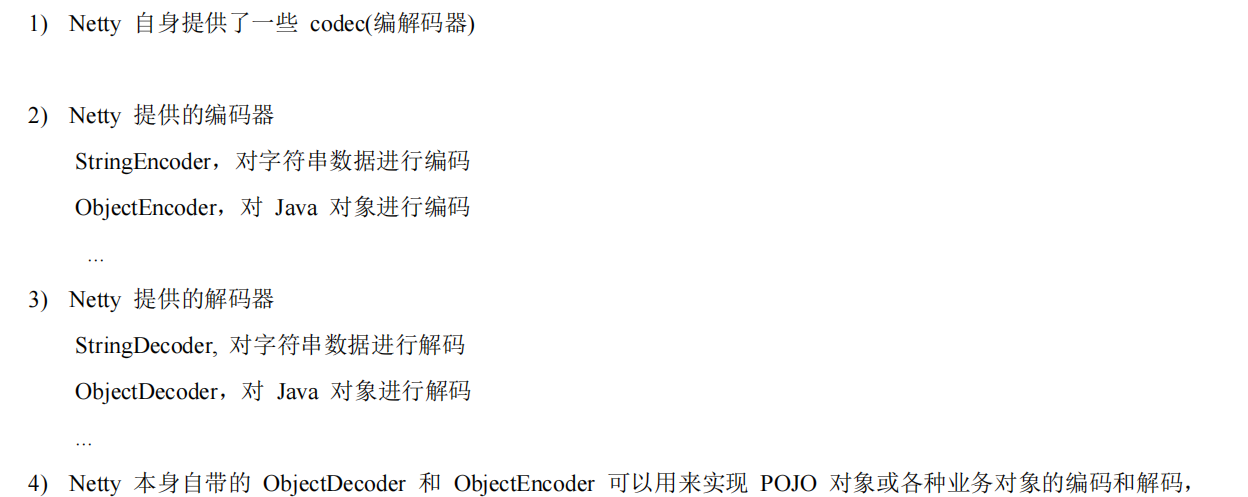
1.2、Netty本身编解码器机制及问题分析

1.3、Protobuf
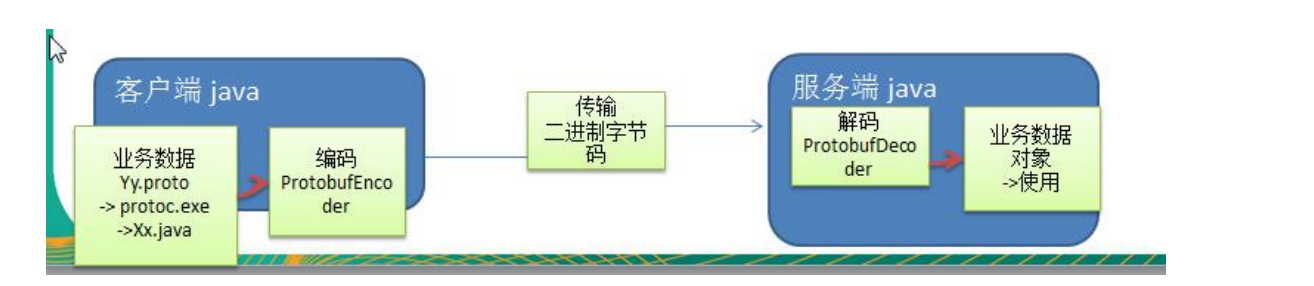
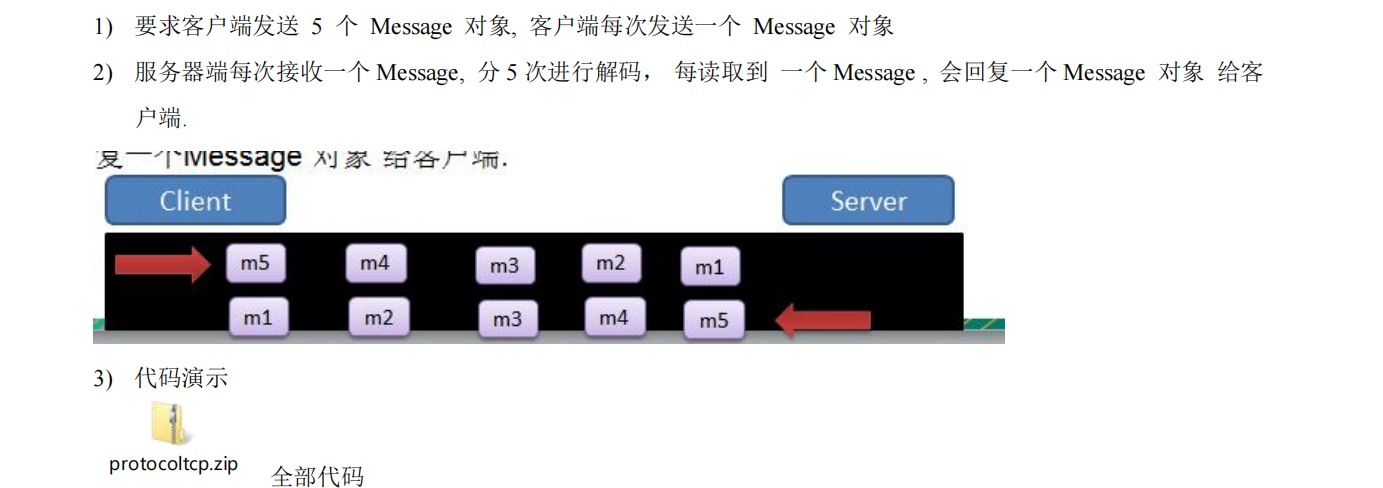
1.4、Protobuf快速入门案例

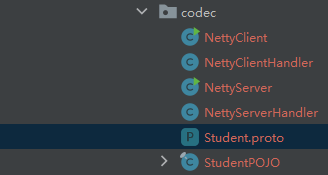
1.4.1、Student.proto
syntax="proto3";
option java_outer_classname = "StudentPOJO";//生成的外部类名,同时也是文件名
//protobuf 使用message 管理数据
message Student{//会在外部类 StudentPOJO 里生成一个内部类 Student 它是真正发送的pojo对象
  int32 id = 1;//Student 类中有一个属性 名字为 id 类型为 int32(protobuf类型)1 表示属性序号,不是值
  string name = 2;
}
1.4.2、生成StudentPOJO.java

进入cmd命令行
protoc.exe --java_out=. Student.proto
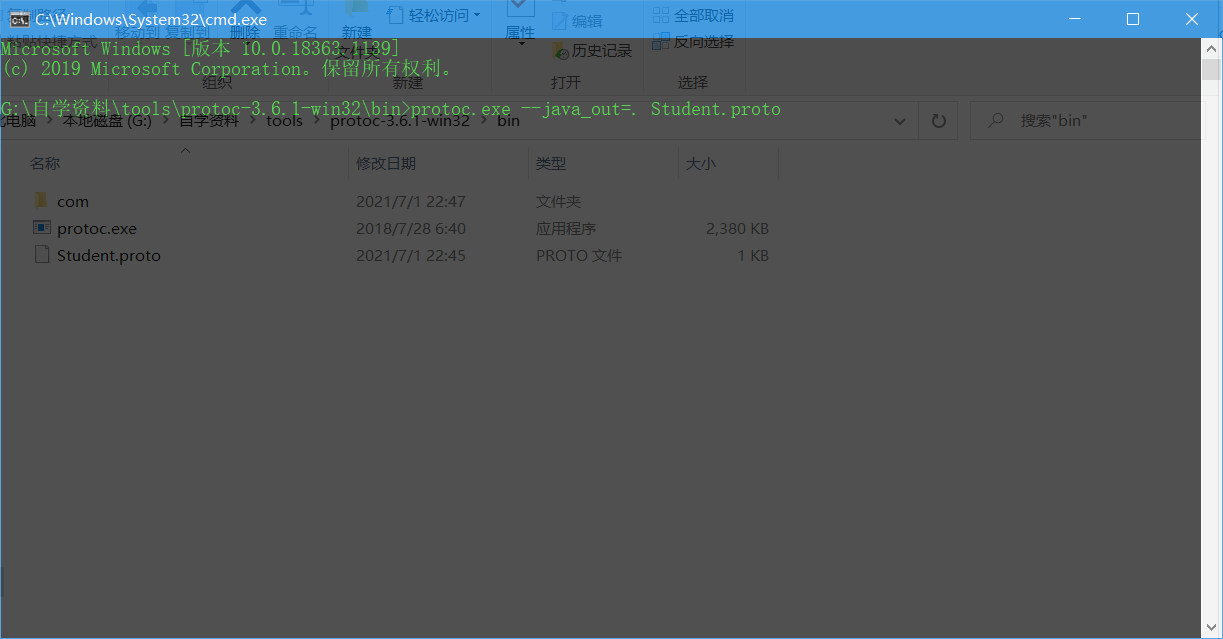
将生成的java文件拷过去即可
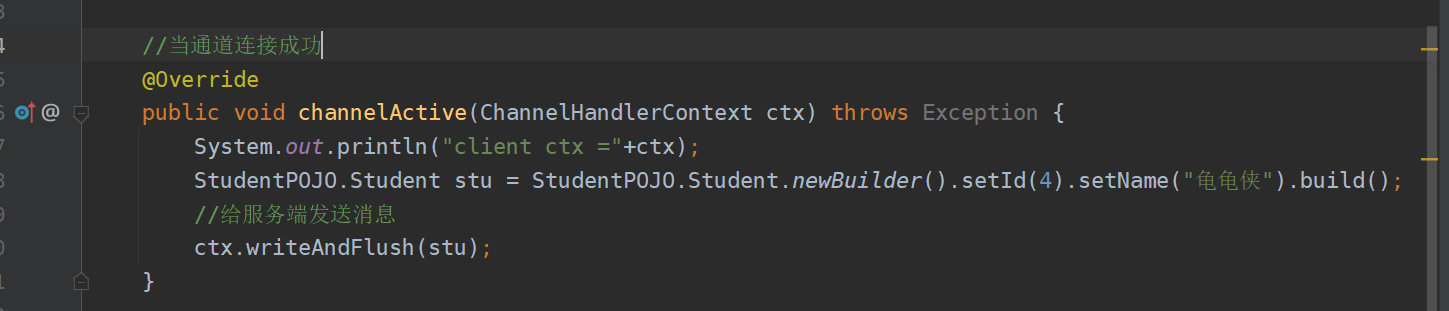
1.4.3、Handler及编解码器
client
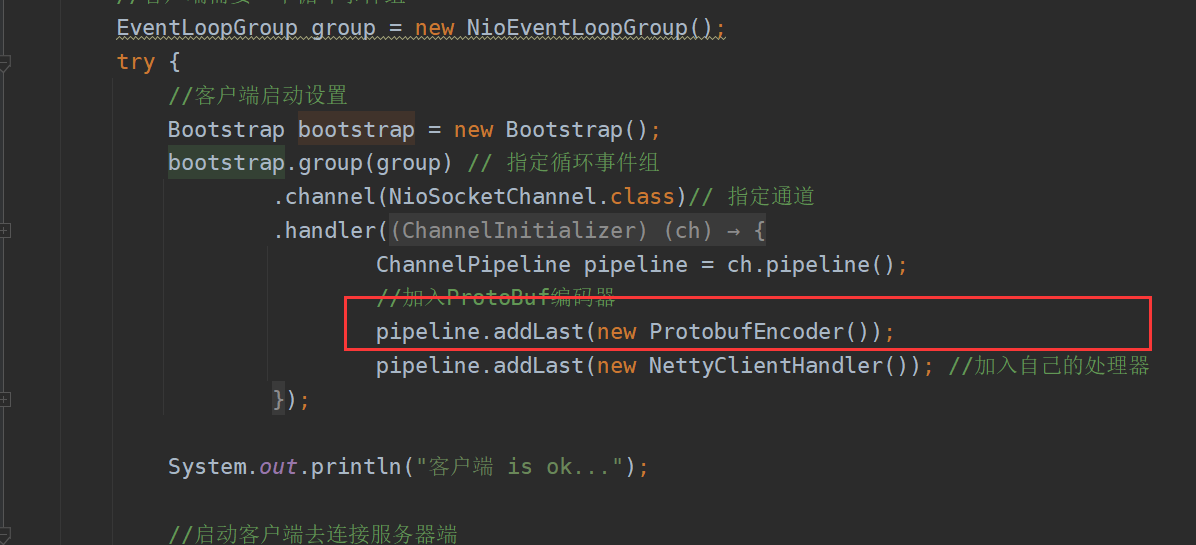
client handler
server
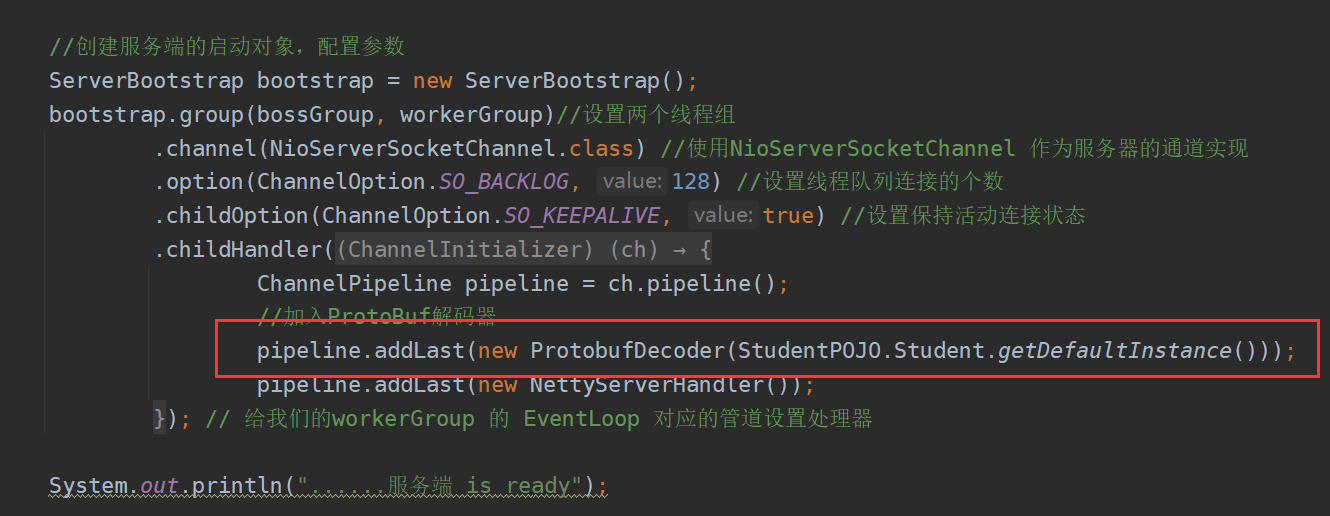
server handler

1.4.2、项目截图
2、Netty编解码器以及handler的调用机制
2.1、基本说明
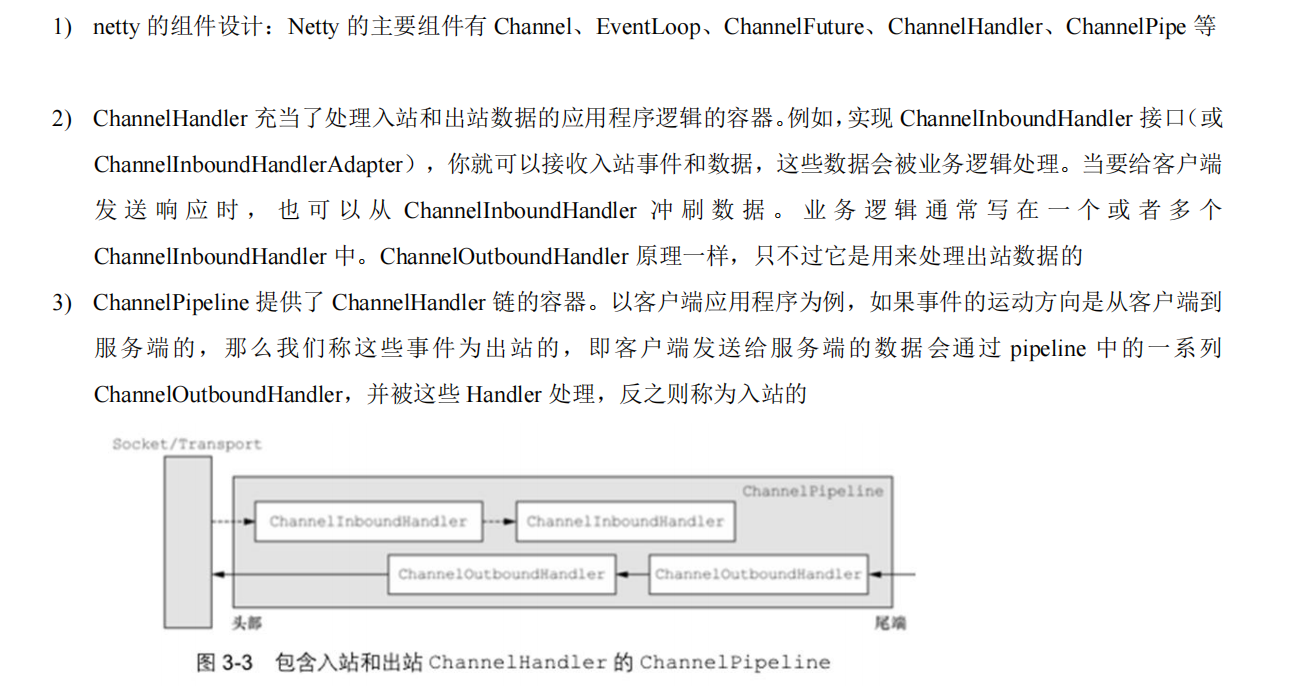
2.2、编解码器
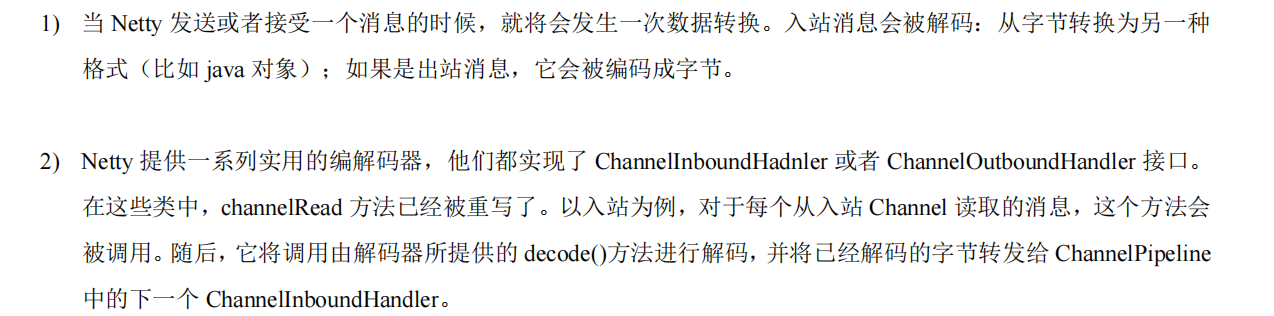
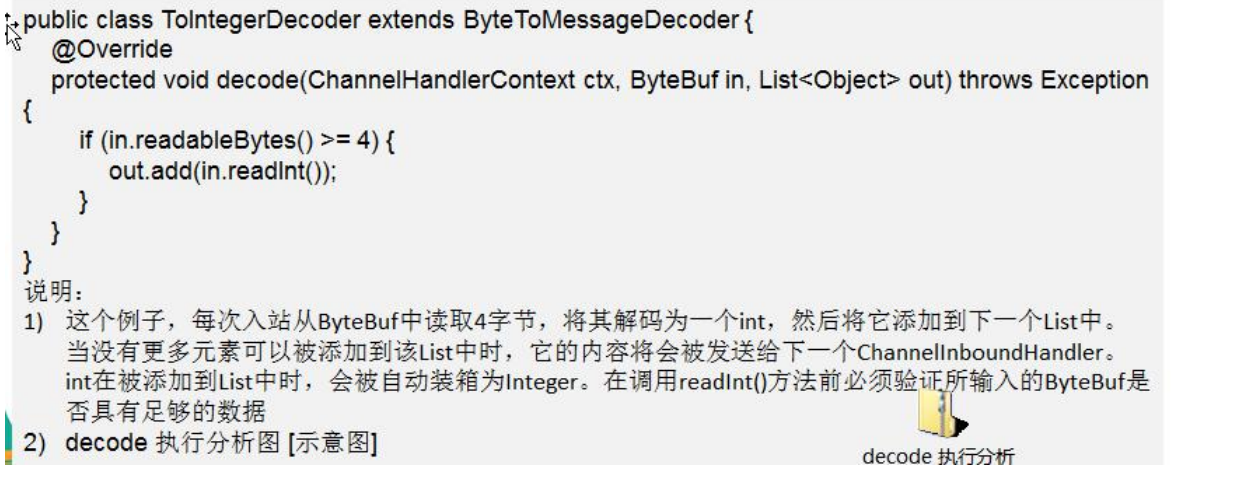
2.3、解码器 ByteToMessageDecoder

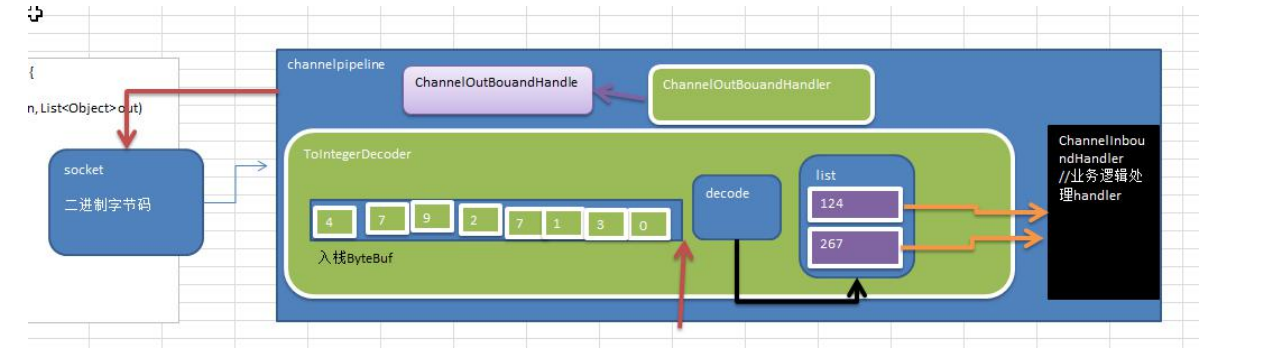
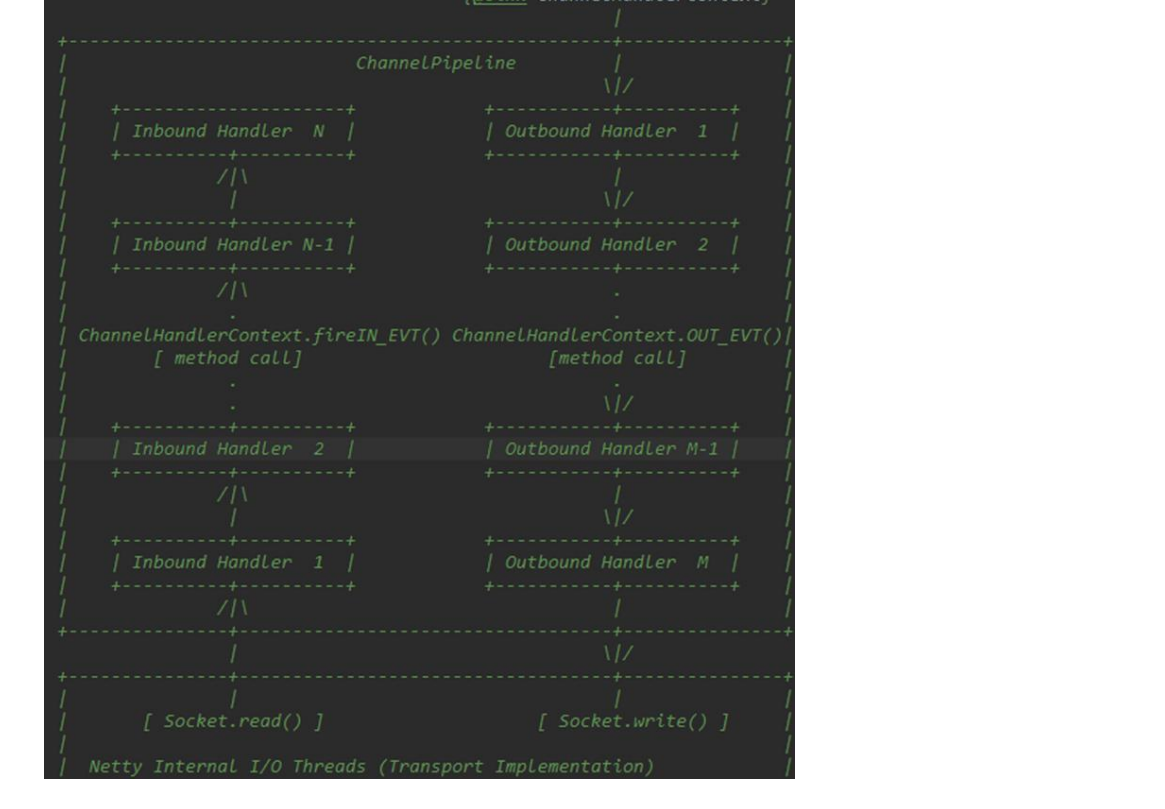
2.4、handler的调用机制


2.5、ReplayingDecoder解码器
/**
 * @author wzcstart
 * @date 2021/7/3 - 13:35
 */
public class MyByteToLongDecoder2 extends ReplayingDecoder<Void> {//使用void表示无状态控制
    @Override
    protected void decode(ChannelHandlerContext ctx, ByteBuf in, List<Object> out) throws Exception {
        System.out.println("MyByteToLongDecoder2 decode 被调用");
        //在 ReplayingDecoder 中不需要进行判读是否足够转换,内部会自行判断
        out.add(in.readLong());
    }
}

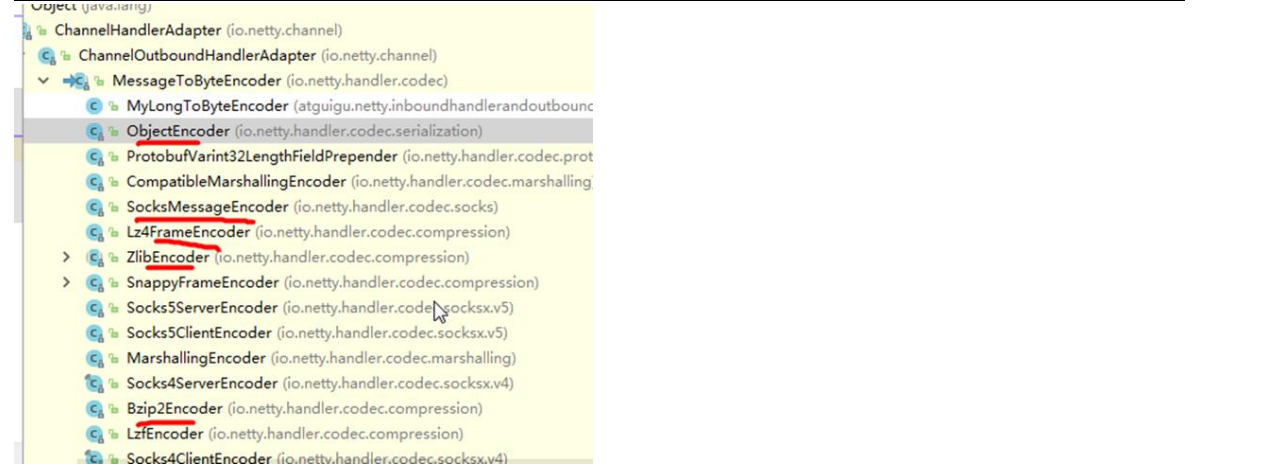
2.6、其他编解码器
2.6.1、其他解码器
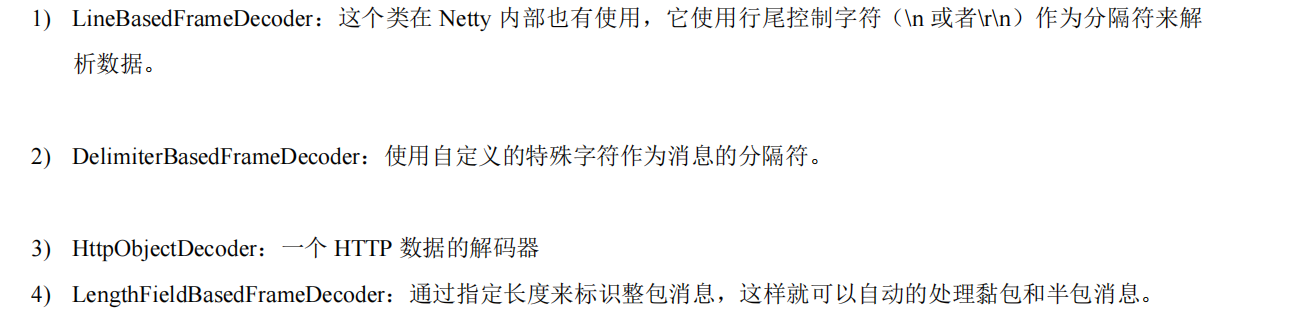
2.6.2、其他编码器
3、TCP 粘包及拆包问题及解决方案
TCP粘包和拆包主要是因为TCP为了更有效的将信息传送给对方,TCP使用Nagle算法优化,将多次间隔较小且数据量小的数据合并成一个大数据块,然后进行封包
主要解决应用层读取数据长度问题
3.1、TCP粘包及拆包基本介绍

3.2、TCP粘包拆包案例演示
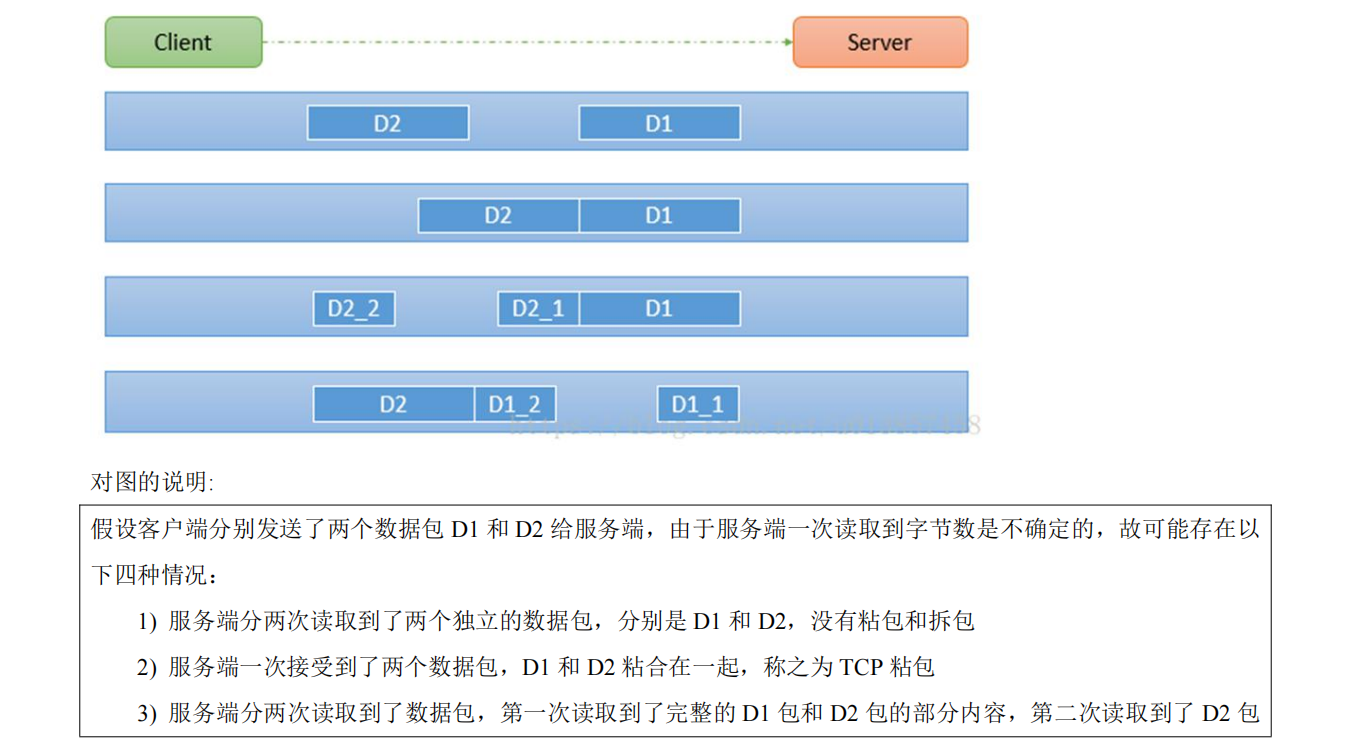
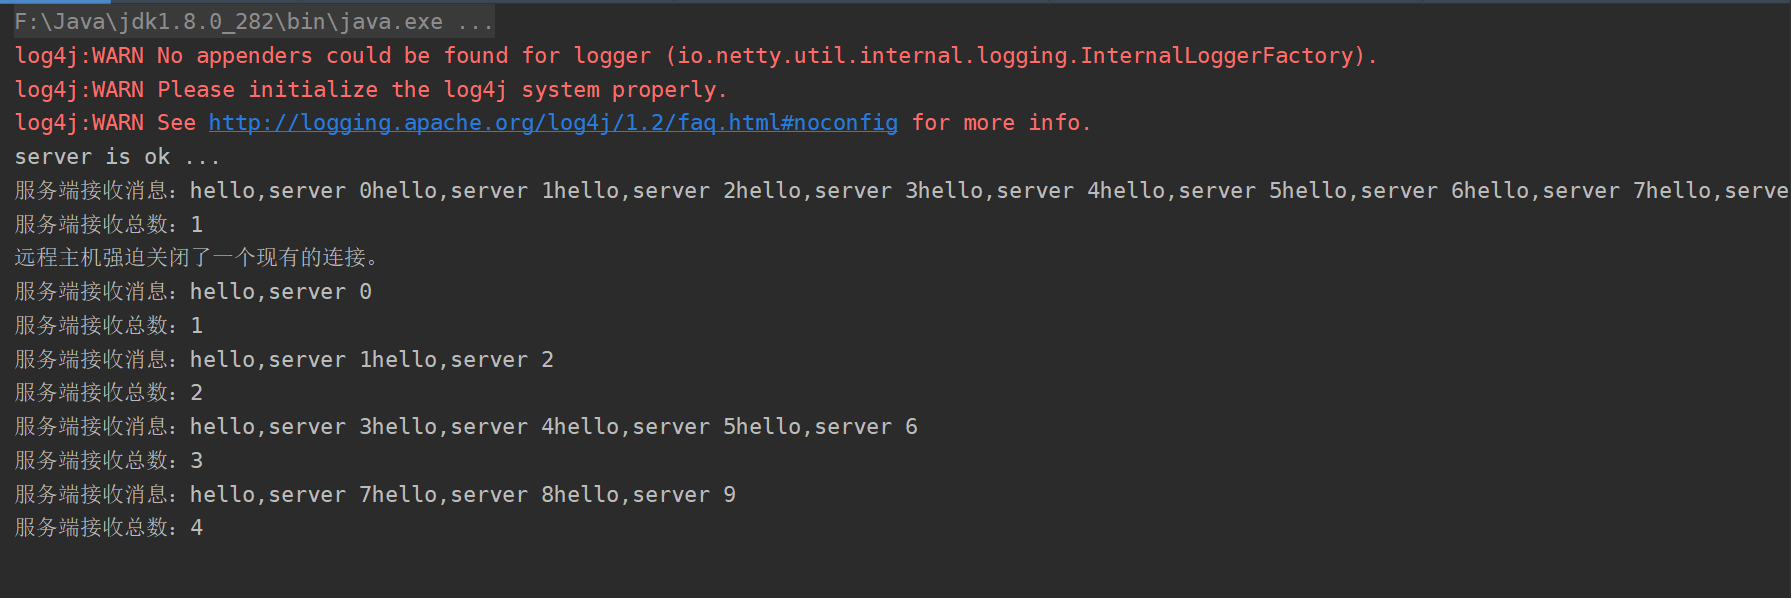
粘包现象
本来发送10条消息,结果第一次合并为了一条,第二次按照四次完成
处理器代码
3.2.1、MyClientHandler
/**
 * @author wzcstart
 * @date 2021/7/3 - 22:46
 */
public class MyClientHandler extends SimpleChannelInboundHandler<ByteBuf> {

    private int count;

    @Override
    public void exceptionCaught(ChannelHandlerContext ctx, Throwable cause) throws Exception {
        cause.printStackTrace();
        ctx.close();
    }

    @Override
    protected void channelRead0(ChannelHandlerContext ctx, ByteBuf msg) throws Exception {
        byte[] bytes = new byte[msg.readableBytes()];
        msg.readBytes(bytes);
        System.out.println("客户端接收消息:"+new String(bytes, StandardCharsets.UTF_8));
        System.out.println("客户端接收总数:"+(++count));
    }

    @Override
    public void channelActive(ChannelHandlerContext ctx) throws Exception {
        //连接建立后发送10个消息
        for (int i = 0; i < 10; i++) {
            ByteBuf buf = Unpooled.copiedBuffer("hello,server " + i, CharsetUtil.UTF_8);
            ctx.writeAndFlush(buf);
        }
    }
}
3.2.2、MyServerHandler
/**
 * @author wzcstart
 * @date 2021/7/3 - 22:46
 */
public class MyServerHandler extends SimpleChannelInboundHandler<ByteBuf> {

    private int count;

    @Override
    public void exceptionCaught(ChannelHandlerContext ctx, Throwable cause) throws Exception {
        System.out.println(cause.getMessage());
        ctx.close();
    }

    @Override
    protected void channelRead0(ChannelHandlerContext ctx, ByteBuf msg) throws Exception {
        //接受消息
        byte[] bytes = new byte[msg.readableBytes()];
        msg.readBytes(bytes);
        System.out.println("服务端接收消息:"+new String(bytes, StandardCharsets.UTF_8));
        System.out.println("服务端接收总数:"+(++count));
        //发送消息
        ctx.writeAndFlush(Unpooled.copiedBuffer(UUID.randomUUID().toString()+"\n",StandardCharsets.UTF_8));
    }


}
3.3、TCP粘包及拆包解决方案
关键是读取数据长度问题

具体案例
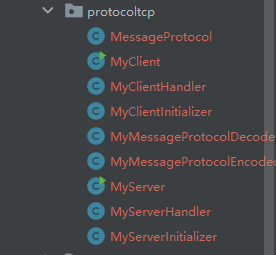
MessageProtocol
/**
 * @author wzcstart
 * @date 2021/7/3 - 23:51
 */
@Data
@AllArgsConstructor
public class MessageProtocol {
    private int length;
    private byte[] content;
}
4、源码分析
参考netty ppt


 1919
1919

 被折叠的 条评论
为什么被折叠?
被折叠的 条评论
为什么被折叠?
 到【灌水乐园】发言


