


 本文介绍了一种在SpringBoot项目中实现自定义版本控制的方法,包括自定义注解、URL匹配逻辑、处理器及WebMvcConfigurationSupport的具体实现,并提供了测试案例。
对比:
1.版本统一:
a.@RequestMapping当前版本是1,有两个接口AB,此时迭代到版本2,新增接口C,这时还有存在1版本的两个接口,因为是通过URI来调用,所以这样做不到版本统一
b.而根据spring配置来自定义版本控制,则会统一成一个版本,比如当前版本是1,有AB两个接口,此时迭代到2,新增C接口,但是在调用时是版本2,而后台会根据当前版本2去找小于等于当前版本的最高版本,也就是说会调用1版本的AB,和2版本的C,这样方便版本统一
2.版本管理:
a.迭代几个版本后,还会有之前多个版本的接口,这时调用则需要传入不同的版本号,这样不方便去管理
b.而自定义版本控制,只需要记住当前版本即可,因为后台则会根据当前版本去找小于等于当前版本的接口,这样方便管理
一、新建spring boot项目
1.新建一个springboot项目,pom.xml的配置如下:
<?xml version="1.0" encoding="UTF-8"?>
<project xmlns="http://maven.apache.org/POM/4.0.0" xmlns:xsi="http://www.w3.org/2001/XMLSchema-instance"
xsi:schemaLocation="http://maven.apache.org/POM/4.0.0 http://maven.apache.org/xsd/maven-4.0.0.xsd">

    <modelVersion>4.0.0</modelVersion>
    <groupId>com.lich</groupId>
    <artifactId>springboot.example</artifactId>
    <version>0.0.1-SNAPSHOT</version>
    <packaging>jar</packaging>
    <name>springboot_version</name>
    <description>Demo project for Spring Boot</description>

    <parent>
        <groupId>org.springframework.boot</groupId>
        <artifactId>spring-boot-starter-parent</artifactId>
        <version>2.0.4.RELEASE</version>
        <relativePath/> <!-- lookup parent from repository -->
    </parent>

    <properties>
        <project.build.sourceEncoding>UTF-8</project.build.sourceEncoding>
        <project.reporting.outputEncoding>UTF-8</project.reporting.outputEncoding>
        <java.version>1.8</java.version>
    </properties>

    <dependencies>
        <dependency>
            <groupId>org.springframework.boot</groupId>
            <artifactId>spring-boot-starter-web</artifactId>
        </dependency>
        <dependency>
            <groupId>org.springframework.boot</groupId>
            <artifactId>spring-boot-starter-test</artifactId>
            <scope>test</scope>
        </dependency>
    </dependencies>

    <build>
        <plugins>
            <plugin>
                <groupId>org.springframework.boot</groupId>
                <artifactId>spring-boot-maven-plugin</artifactId>
            </plugin>
        </plugins>
    </build>
</project>
2.application.yml配置文件如下:
server:
    context-path: /api
    port: 8023
二、实现自定义版本控制的代码
1、自定义版本控制的注解
/**
* 自定义版本号
* @author lich
*
*/
@Target({ElementType.METHOD,ElementType.TYPE})
@Retention(RetentionPolicy.RUNTIME)
@Documented
@Mapping
public @interface ApiVersion {
    /**
    * 标识版本号
    * @return
    */
    int value();
}
2、自定义url匹配逻辑
/**
* 版本控制
* @author lich
*
*/
public class ApiVersionCondition implements RequestCondition<ApiVersionCondition>{

    //路径中的版本前缀,这里用/v[1-9]/的形式
    private final static Pattern VERSION_PREFIX_PATTERN = Pattern.compile("v(\\d+)/");

    //api版本号
    private int apiVersion;


    public ApiVersionCondition(int apiVersion) {
        this.apiVersion = apiVersion;
    }


    /**
    * 将不同的筛选条件进行合并
    */
    @Override
    public ApiVersionCondition combine(ApiVersionCondition other) {
        // 采用最后定义优先原则,则方法上的定义覆盖类上面的定义
        return new ApiVersionCondition(other.getApiVersion());
    }


    /**
    * 版本比对,用于排序
    */
    @Override
    public int compareTo(ApiVersionCondition other, HttpServletRequest request) {
        //优先匹配最新版本号
        return other.getApiVersion() - this.apiVersion;
    }


    /**
    * 根据request的url进行查找匹配的筛选条件
    */
    @Override
    public ApiVersionCondition getMatchingCondition(HttpServletRequest request) {
        Matcher matcher = VERSION_PREFIX_PATTERN.matcher(request.getRequestURI());
        if(matcher.find()){
        Integer version = Integer.valueOf(matcher.group(1));
            if(version >= this.apiVersion){
                return this;
            }
        }
    return null;
    }

    public int getApiVersion() {
        return apiVersion;
    }

}
3、自定义匹配的处理器
/**
* 自定义匹配处理器
* @author lich
*/
public class CustomRequestMappingHandlerMapping extends RequestMappingHandlerMapping{


    @Override
    protected RequestCondition<?> getCustomTypeCondition(Class<?> handlerType) {
        ApiVersion apiVersion = AnnotationUtils.findAnnotation(handlerType, ApiVersion.class);
        return createCondition(apiVersion);
    }

    @Override
    protected RequestCondition<?> getCustomMethodCondition(Method method) {
        ApiVersion apiVersion = AnnotationUtils.findAnnotation(method, ApiVersion.class);
        return createCondition(apiVersion);
    }

    private RequestCondition<ApiVersionCondition> createCondition(ApiVersion apiVersion) {
        return apiVersion == null ? null : new ApiVersionCondition(apiVersion.value());
    }

}
4、自定义WebMvcConfigurationSupport
核心代码如下:
/**
* 注解配置类
* @author lich
*
*/
@SpringBootConfiguration
public class WebConfig extends WebMvcConfigurationSupport {

    /**
    * 注册请求的版本请求方法
    */
    @Override
    public RequestMappingHandlerMapping requestMappingHandlerMapping() {
        RequestMappingHandlerMapping handlerMapping = new CustomRequestMappingHandlerMapping();
        handlerMapping.setOrder(0);
        handlerMapping.setInterceptors(getInterceptors());
        return handlerMapping;
    }

}
三、编写测试的控制器
1、版本1的控制器:
/**
* 版本控制验证1
* @author lich
*
*/
@RestController
@ApiVersion(1)
@RequestMapping("/{version}/hello")
public class ApiTest1Controller {

    @RequestMapping("/world")
    @ResponseBody
    public String helloWorld(){
        System.out.println("版本是1的接口");
        return "hello,world .version is 1";
    }
}
2、版本2的控制器:
/**
* 版本控制验证2
* @author lich
*
*/
@RestController
@ApiVersion(2)
@RequestMapping("/{version}/hello")
public class ApiTest2Controller {

    @RequestMapping("/world")
    @ResponseBody
    //注解也可以放在方法上
    @ApiVersion(3)
    public String helloWorld3(){
        System.out.println("版本是3的接口");
        return "hello,world .version is 3";
    }

    @RequestMapping("/world")
    @ResponseBody
    public String helloWorld(){
        System.out.println("版本是2的接口");
        return "hello,world .version is 2";
    }

}
四、测试demo
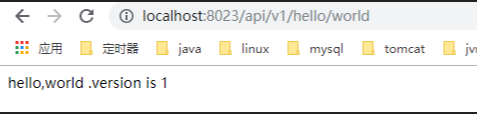
1、测试版本1,:
测试url:http://localhost:8023/api/v1/hello/world
测试结果:
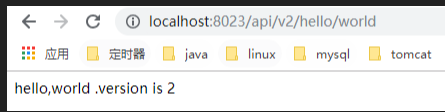
2、测试版本2,:
测试url:http://localhost:8023/api/v2/hello/world
测试结果:
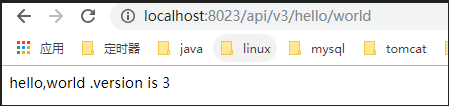
3、测试版本3,:
测试url:http://localhost:8023/api/v3/hello/world
测试结果:
GitHub代码:https://github.com/yslyjbls/springboot.example.apiversion


 1909
1909

 被折叠的 条评论
为什么被折叠?
被折叠的 条评论
为什么被折叠?
 到【灌水乐园】发言


