


 本文介绍了vue-element-admin项目的配置步骤,包括删除多余页面、移除无效路由、配置代理以连接自定义接口、修改request.js中接口返回状态码判断、自定义登录接口逻辑以及在permission.js中设置路由权限和白名单,确保登录成功后的页面跳转。通过这些配置,项目能顺利运行并对接自身后端服务。
1. 将多余的页面删除 剩下以下几个页面;

2. 别忘了将配置路由的页面路由去掉;
3.此时配置代理,用你自己的接口申请数据需要配置的如下:
vue.config.js 文件;配置代理,将mock数据注释掉;

4.request.js里面,更改的是接口的返回的code,你后台根据哪个判断你就写哪个就行
import axios from 'axios'
import { MessageBox, Message } from 'element-ui'
import store from '@/store'
import { getToken } from '@/utils/auth'

// create an axios instance
const service = axios.create({
  baseURL: process.env.VUE_APP_BASE_API, // url = base url + request url
  // withCredentials: true, // send cookies when cross-domain requests
  timeout: 5000 // request timeout
})

// request interceptor
service.interceptors.request.use(
  config => {
    // do something before request is sent

    const TOKEN = localStorage.getItem('Token')
    // const TOKEN = 'sadwsasdasd'
    if(TOKEN){
      config.headers['Content-Type'] = 'application/json';
      config.headers['Authorization'] = TOKEN;
    }
    // showFullScreenLoading()
    return config;
  },
  error => {
    // do something with request error
    console.log(error) // for debug
    return Promise.reject(error)
  }
)

// response interceptor
service.interceptors.response.use(
  /**
   * If you want to get http information such as headers or status
   * Please return  response => response
  */

  /**
   * Determine the request status by custom code
   * Here is just an example
   * You can also judge the status by HTTP Status Code
   */
  response => {
    const res = response.data
    // 未登录统一跳转登录页
    if (res.code === 20004) {
      Message({
        message: res.result,
        type: 'info'
      })
      location.href = '/#/login'
      // alert('cookie失效了')
    }

    if (res.code === 20003) {
      Message({
        message: '账户已冻结,请联系管理员',
        type: 'info'
      })
      location.href = '/#/login'
      // alert('账户已冻结')
    }
    return response
  },
  error => {
    console.log('err' + error) // for debug
    Message({
      message: error.message,
      type: 'error',
      duration: 10 * 1000
    })
    return Promise.reject(error)
  }
)

export default service
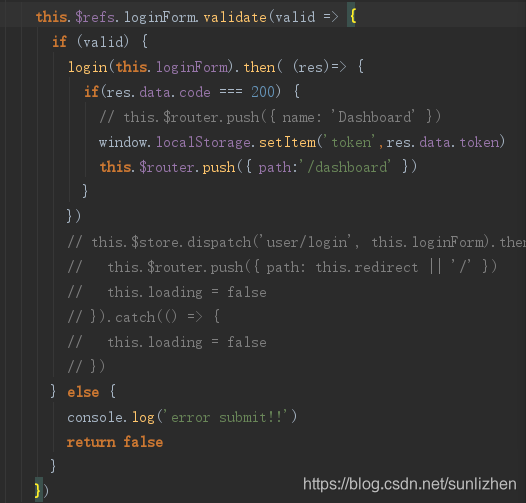
5. 登录页面 的接口跳转,这里我用了自己的接口,没有用框架自带的vuex的判断;login的接口换成自己的就行了;
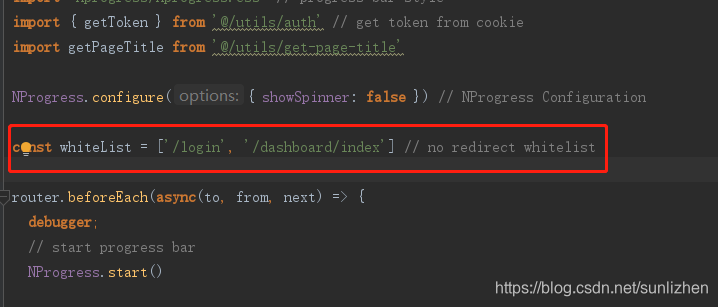
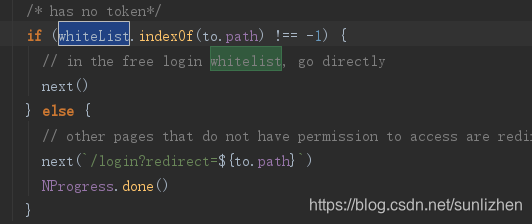
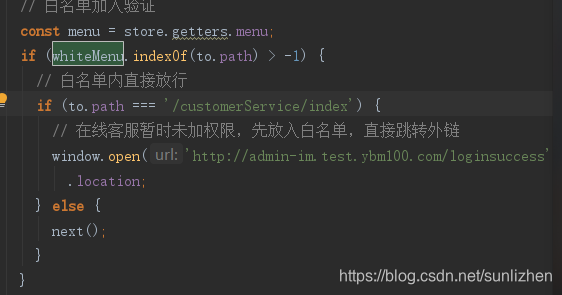
6. 此时我们点击登录即使接口返回成功也不能跳转;需要配置permission.js文件;配置白名单,将你自己的路由写在这上面就行了,注意如果再不跳转就是你路由的问题了,看路由的路径等是否配置正确;如果再有路由的跳转中配置的都可以在这个文件中设置;路由的跳转可以在白名单中配置,可以在第二个途中设置路由的权限;也可以路由直接放行,自由设置,第三个图中是更改的方式;
然后 npm run dev启动即可;


 1627
1627

 被折叠的 条评论
为什么被折叠?
被折叠的 条评论
为什么被折叠?
 到【灌水乐园】发言


