


 本文详细介绍了在Spring Boot项目中进行单元测试的必备步骤,包括如何正确引入依赖,解决Junit4.12未自动导入的问题,以及快速创建单元测试的方法。通过具体代码示例,帮助读者理解并掌握Spring Boot单元测试的实践技巧。
单元测试中遇到的坑
- 引入依赖
       <dependency>
            <groupId>org.springframework.boot</groupId>
            <artifactId>spring-boot-starter-test</artifactId>
            <scope>test</scope>
        </dependency>
- 一般情况下引入以上依赖就行,因为依赖传递会主动把相关依赖下载下来(特别是Junit4.12,如果没有自动下载,需要自己导入Junit4.12依赖)
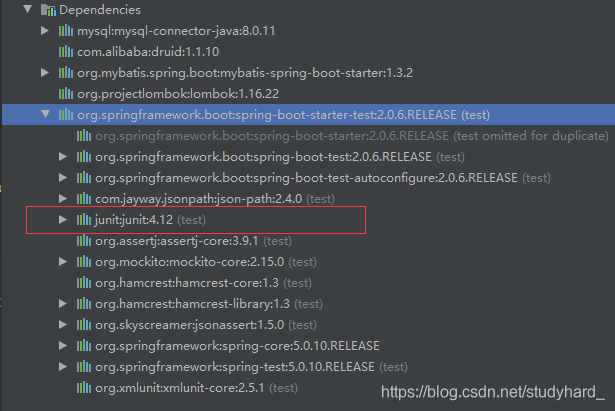
- 如果没有自动导入Junit4.12,则需要自己导入,如已经自动导入请忽略。
       <dependency>
            <groupId>junit</groupId>
            <artifactId>junit</artifactId>
            <version>4.12</version>
            <!-- 去掉scope作用域,使用默认的compile,编译、测试、运行都有效的作用域 -->
            <!--<scope>test</scope>-->
        </dependency>
最后看一下为什么要导入Junit4.12依赖:
import org.junit.Test; //依赖于Junit4.12中的包
import org.junit.runner.RunWith; //依赖于Junit4.12中的包
import org.springframework.beans.factory.annotation.Autowired;
import org.springframework.boot.test.context.SpringBootTest;
import org.springframework.test.context.junit4.SpringRunner;

@RunWith(SpringRunner.class)
@SpringBootTest
public class WhiteScreenSearchTransformerTest {

    @Test
    public void transformRequest() {
    }
}
快速创建单元测试的方法
- 方法一:在要生成测试类的类里面,按ctrl+shift+t –> create new test
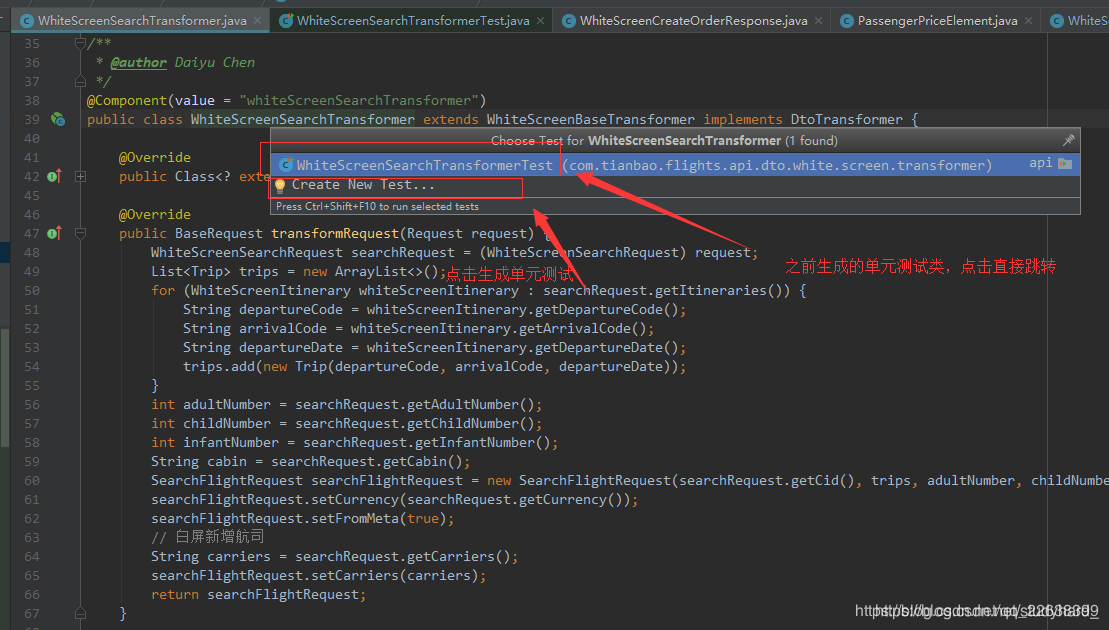
方法二:将鼠标光标放到要生成测试类的类名或者方法名上面,按ctrl + enter –> create test(接口实现类,dao的mapper.xml)

点击创建create test:弹出下面选择框


 311
311

 被折叠的 条评论
为什么被折叠?
被折叠的 条评论
为什么被折叠?
 到【灌水乐园】发言


