


一、软件介绍
文末提供程序和源码下载
PyTorch 是一个 Python 包,提供两个高级功能:具有强大 GPU 加速的张量计算(如 NumPy);基于基于磁带的 autograd 系统构建的深度神经网络;您可以在需要时重复使用自己喜欢的 Python 包(如 NumPy、SciPy 和 Cython)来扩展 PyTorch。
二、在粒度级别上,PyTorch 是一个由以下组件组成的库:
在粒度级别上,PyTorch 是一个由以下组件组成的库:
| Component 元件 | Description 描述 |
|---|---|
| torch 炬 | A Tensor library like NumPy, with strong GPU support 像 NumPy 这样的 Tensor 库,具有强大的 GPU 支持 |
| torch.autograd | A tape-based automatic differentiation library that supports all differentiable Tensor operations in torch 一个基于磁带的自动微分库,支持 torch 中所有可微分的 Tensor 运算 |
| torch.jit 火炬.jit | A compilation stack (TorchScript) to create serializable and optimizable models from PyTorch code 一个编译堆栈 (TorchScript),用于从 PyTorch 代码创建可序列化和可优化的模型 |
| torch.nn 火炬.nn | A neural networks library deeply integrated with autograd designed for maximum flexibility 与 autograd 深度集成的神经网络库,旨在实现最大的灵活性 |
| torch.multiprocessing | Python multiprocessing, but with magical memory sharing of torch Tensors across processes. Useful for data loading and Hogwild training Python 多处理,但具有跨进程的 torch Tensor 的神奇内存共享。用于数据加载和 Hogwild 训练 |
| torch.utils torch.utils 文件 | DataLoader and other utility functions for convenience DataLoader 和其他实用功能,方便使用 |
Usually, PyTorch is used either as:
通常,PyTorch 用作:
- A replacement for NumPy to use the power of GPUs.
NumPy 的替代品,以使用 GPU 的强大功能。 - A deep learning research platform that provides maximum flexibility and speed.
一个深度学习研究平台,可提供最大的灵活性和速度。
Elaborating Further: 进一步阐述:
三、GPU 就绪的 Tensor 库
如果您使用 NumPy,那么您就使用了 Tensors(又名 ndarray)。
PyTorch 提供了可以位于 CPU 或 GPU 上的张量,并极大地加速了计算。
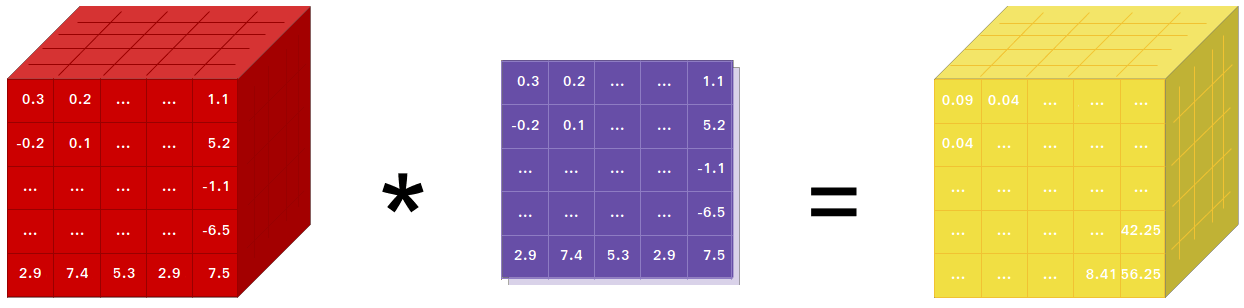
We provide a wide variety of tensor routines to accelerate and fit your scientific computation needs such as slicing, indexing, mathematical operations, linear algebra, reductions. And they are fast!
我们提供各种张量例程来加速和满足您的科学计算需求,例如切片、索引、数学运算、线性代数、归约。而且他们速度很快!
四、动态神经网络:基于磁带的 Autograd
PyTorch 有一种构建神经网络的独特方式:使用和重放磁带录音机。
Most frameworks such as TensorFlow, Theano, Caffe, and CNTK have a static view of the world. One has to build a neural network and reuse the same structure again and again. Changing the way the network behaves means that one has to start from scratch.
大多数框架(如 TensorFlow、Theano、Caffe 和 CNTK)都具有静态的世界视图。必须构建神经网络并一次又一次地重用相同的结构。改变网络的行为方式意味着必须从头开始。
With PyTorch, we use a technique called reverse-mode auto-differentiation, which allows you to change the way your network behaves arbitrarily with zero lag or overhead. Our inspiration comes from several research papers on this topic, as well as current and past work such as torch-autograd, autograd, Chainer, etc.
在 PyTorch 中,我们使用了一种称为反向模式自动微分的技术,该技术允许您任意更改网络的行为方式,而不会出现任何滞后或开销。我们的灵感来自关于这个主题的几篇研究论文,以及现在和过去的工作,如 torch-autograd、autograd、Chainer 等。
While this technique is not unique to PyTorch, it's one of the fastest implementations of it to date. You get the best of speed and flexibility for your crazy research.
虽然这项技术并非 PyTorch 所独有,但它是迄今为止最快的实现之一。您可以为您的疯狂研究获得最大的速度和灵活性。
Python First Python 优先
PyTorch 不是与整体式 C++ 框架的 Python 绑定。它旨在深度集成到 Python 中。您可以像使用 NumPy / SciPy / scikit-learn 等一样自然地使用它。您可以使用自己喜欢的库和 Cython 和 Numba 等软件包,在 Python 本身中编写新的神经网络层。我们的目标是在适当的时候不重新发明轮子。
Imperative Experiences 势在必行的经验
PyTorch is designed to be intuitive, linear in thought, and easy to use. When you execute a line of code, it gets executed. There isn't an asynchronous view of the world. When you drop into a debugger or receive error messages and stack traces, understanding them is straightforward. The stack trace points to exactly where your code was defined. We hope you never spend hours debugging your code because of bad stack traces or asynchronous and opaque execution engines.
PyTorch 设计为直观、线性且易于使用。当您执行一行代码时,它会被执行。没有一个异步的世界观。当您进入调试器或收到错误消息和堆栈跟踪时,理解它们非常简单。堆栈跟踪指向定义代码的确切位置。我们希望您永远不要因为堆栈跟踪错误或异步和不透明的执行引擎而花费数小时调试代码。
Fast and Lean 快速和精益
PyTorch has minimal framework overhead. We integrate acceleration libraries such as Intel MKL and NVIDIA (cuDNN, NCCL) to maximize speed. At the core, its CPU and GPU Tensor and neural network backends are mature and have been tested for years.
PyTorch 的框架开销最小。我们集成了 Intel MKL 和 NVIDIA ( cuDNN, NCCL) 等加速库,以最大限度地提高速度。在核心方面,它的 CPU 和 GPU Tensor 以及神经网络后端已经成熟,并经过多年的测试。
Hence, PyTorch is quite fast — whether you run small or large neural networks.
因此,PyTorch 的速度非常快 — 无论您运行的是小型还是大型神经网络。
The memory usage in PyTorch is extremely efficient compared to Torch or some of the alternatives. We've written custom memory allocators for the GPU to make sure that your deep learning models are maximally memory efficient. This enables you to train bigger deep learning models than before.
与 Torch 或某些替代方案相比,PyTorch 中的内存使用非常有效。我们为 GPU 编写了自定义内存分配器,以确保您的深度学习模型具有最大的内存效率。这使您能够训练比以前更大的深度学习模型。
Extensions Without Pain 无痛的扩展
Writing new neural network modules, or interfacing with PyTorch's Tensor API was designed to be straightforward and with minimal abstractions.
编写新的神经网络模块或与 PyTorch 的 Tensor API 连接旨在简单明了,并且具有最少的抽象。
You can write new neural network layers in Python using the torch API or your favorite NumPy-based libraries such as SciPy.
您可以使用 torch API 或您最喜欢的基于 NumPy 的库(如 SciPy)在 Python 中编写新的神经网络层。
If you want to write your layers in C/C++, we provide a convenient extension API that is efficient and with minimal boilerplate. No wrapper code needs to be written. You can see a tutorial here and an example here.
如果您想用 C/C++ 编写图层,我们提供了一个方便的扩展 API,该 API 高效且样板最少。无需编写包装代码。您可以在此处查看教程,在此处查看示例。
五、Installation 安装
文末提供下载程序
Binaries 二进制文件
Commands to install binaries via Conda or pip wheels are on our website: Get Started
通过 Conda 或 pip wheels 安装二进制文件的命令位于我们的网站上:https://pytorch.org/get-started/locally/
NVIDIA Jetson Platforms NVIDIA Jetson 平台
Python wheels for NVIDIA's Jetson Nano, Jetson TX1/TX2, Jetson Xavier NX/AGX, and Jetson AGX Orin are provided here and the L4T container is published here
此处提供了适用于 NVIDIA Jetson Nano、Jetson TX1/TX2、Jetson Xavier NX/AGX 和 Jetson AGX Orin 的 Python 轮子,L4T 容器在此处发布
They require JetPack 4.2 and above, and @dusty-nv and @ptrblck are maintaining them.
他们需要 JetPack 4.2 及更高版本,@dusty-nv 和 @ptrblck 正在维护它们。
From Source 从源
Prerequisites 先决条件
If you are installing from source, you will need:
如果您从源码安装,您将需要:
- Python 3.9 or later
Python 3.9 或更高版本 - A compiler that fully supports C++17, such as clang or gcc (gcc 9.4.0 or newer is required, on Linux)
完全支持 C++17 的编译器,例如 clang 或 gcc(在 Linux 上需要 gcc 9.4.0 或更高版本) - Visual Studio or Visual Studio Build Tool (Windows only)
Visual Studio 或 Visual Studio 生成工具(仅限 Windows)
* PyTorch CI uses Visual C++ BuildTools, which come with Visual Studio Enterprise, Professional, or Community Editions. You can also install the build tools from Microsoft C++ Build Tools - Visual Studio. The build tools do not come with Visual Studio Code by default.
* PyTorch CI 使用 Visual C++ BuildTools,这些工具随 Visual Studio Enterprise、Professional 或 Community 版本提供。您还可以从 https://visualstudio.microsoft.com/visual-cpp-build-tools/ 安装构建工具。默认情况下,Visual Studio Code 不附带生成工具。
An example of environment setup is shown below:
环境设置示例如下所示:
- Linux: Linux的:
$ source <CONDA_INSTALL_DIR>/bin/activate
$ conda create -y -n <CONDA_NAME>
$ conda activate <CONDA_NAME>
- Windows: 窗户:
$ source <CONDA_INSTALL_DIR>\Scripts\activate.bat
$ conda create -y -n <CONDA_NAME>
$ conda activate <CONDA_NAME>
$ call "C:\Program Files\Microsoft Visual Studio\<VERSION>\Community\VC\Auxiliary\Build\vcvarsall.bat" x64
NVIDIA CUDA Support NVIDIA CUDA 支持
If you want to compile with CUDA support, select a supported version of CUDA from our support matrix, then install the following:
如果您想使用 CUDA 支持进行编译,请从我们的支持列表中选择受支持的 CUDA 版本,然后安装以下内容:
- NVIDIA CUDA
- NVIDIA cuDNN v8.5 or above
NVIDIA cuDNN v8.5 或更高版本 - Compiler compatible with CUDA
编译器与 CUDA 兼容
Note: You could refer to the cuDNN Support Matrix for cuDNN versions with the various supported CUDA, CUDA driver and NVIDIA hardware
注意:您可以参考 cuDNN 支持矩阵,了解具有各种受支持的 CUDA、CUDA 驱动程序和 NVIDIA 硬件的 cuDNN 版本
If you want to disable CUDA support, export the environment variable USE_CUDA=0. Other potentially useful environment variables may be found in setup.py.
如果要禁用 CUDA 支持,请导出环境变量 USE_CUDA=0 .其他可能有用的环境变量可以在 中找到 setup.py 。
If you are building for NVIDIA's Jetson platforms (Jetson Nano, TX1, TX2, AGX Xavier), Instructions to install PyTorch for Jetson Nano are available here
如果您正在为 NVIDIA 的 Jetson 平台(Jetson Nano、TX1、TX2、AGX Xavier)进行构建,请在此处获取安装适用于 Jetson Nano 的 PyTorch 的说明
AMD ROCm Support AMD ROCm 支持
If you want to compile with ROCm support, install
如果要使用 ROCm 支持进行编译,请安装
- AMD ROCm 4.0 and above installation
AMD ROCm 4.0 及以上安装 - ROCm is currently supported only for Linux systems.
ROCm 目前仅支持 Linux 系统。
By default the build system expects ROCm to be installed in /opt/rocm. If ROCm is installed in a different directory, the ROCM_PATH environment variable must be set to the ROCm installation directory. The build system automatically detects the AMD GPU architecture. Optionally, the AMD GPU architecture can be explicitly set with the PYTORCH_ROCM_ARCH environment variable AMD GPU architecture
默认情况下,构建系统希望 ROCm 安装在 /opt/rocm 中。如果 ROCm 安装在其他目录中,则必须将 ROCM_PATH 环境变量设置为 ROCm 安装目录。构建系统会自动检测 AMD GPU 架构。(可选)可以使用 PYTORCH_ROCM_ARCH 环境变量 AMD GPU 架构显式设置 AMD GPU 架构
If you want to disable ROCm support, export the environment variable USE_ROCM=0. Other potentially useful environment variables may be found in setup.py.
如果要禁用 ROCm 支持,请导出环境变量 USE_ROCM=0 .其他可能有用的环境变量可以在 中找到 setup.py 。
Intel GPU Support Intel GPU 支持
If you want to compile with Intel GPU support, follow these
如果您想使用 Intel GPU 支持进行编译,请遵循这些
- PyTorch Prerequisites for Intel GPUs instructions.
Intel GPU 的 PyTorch 先决条件说明。 - Intel GPU is supported for Linux and Windows.
Linux 和 Windows 支持 Intel GPU。
If you want to disable Intel GPU support, export the environment variable USE_XPU=0. Other potentially useful environment variables may be found in setup.py.
如果要禁用 Intel GPU 支持,请导出环境变量 USE_XPU=0 .其他可能有用的环境变量可以在 中找到 setup.py 。
Get the PyTorch Source 获取 PyTorch 源码
git clone https://github.com/pytorch/pytorch
cd pytorch
# if you are updating an existing checkout
git submodule sync
git submodule update --init --recursive
Install Dependencies 安装依赖项
Common 常见
conda install cmake ninja
# Run this command from the PyTorch directory after cloning the source code using the “Get the PyTorch Source“ section below
pip install -r requirements.txt
On Linux 在 Linux 上
pip install mkl-static mkl-include
# CUDA only: Add LAPACK support for the GPU if needed
# magma installation: run with active conda environment. specify CUDA version to install
.ci/docker/common/install_magma_conda.sh 12.4

# (optional) If using torch.compile with inductor/triton, install the matching version of triton
# Run from the pytorch directory after cloning
# For Intel GPU support, please explicitly `export USE_XPU=1` before running command.
make triton
On MacOS 在 MacOS 上
# Add this package on intel x86 processor machines only
pip install mkl-static mkl-include
# Add these packages if torch.distributed is needed
conda install pkg-config libuv
On Windows 在 Windows 上
pip install mkl-static mkl-include
# Add these packages if torch.distributed is needed.
# Distributed package support on Windows is a prototype feature and is subject to changes.
conda install -c conda-forge libuv=1.39
Install PyTorch 安装 PyTorch
On Linux 在 Linux 上
If you're compiling for AMD ROCm then first run this command:
如果要为 AMD ROCm 编译,请首先运行以下命令:
# Only run this if you're compiling for ROCm
python tools/amd_build/build_amd.py
Install PyTorch 安装 PyTorch
export CMAKE_PREFIX_PATH="${CONDA_PREFIX:-'$(dirname $(which conda))/../'}:${CMAKE_PREFIX_PATH}"
python setup.py develop
On macOS 在 macOS 上
python3 setup.py develop
On Windows 在 Windows 上
If you want to build legacy python code, please refer to Building on legacy code and CUDA
如果要构建遗留 python 代码,请参考 在遗留代码和 CUDA 上构建
CPU-only builds 仅 CPU 构建
In this mode PyTorch computations will run on your CPU, not your GPU.
在此模式下,PyTorch 计算将在 CPU 上运行,而不是在 GPU 上运行。
python setup.py develop
Note on OpenMP: The desired OpenMP implementation is Intel OpenMP (iomp). In order to link against iomp, you'll need to manually download the library and set up the building environment by tweaking CMAKE_INCLUDE_PATH and LIB. The instruction here is an example for setting up both MKL and Intel OpenMP. Without these configurations for CMake, Microsoft Visual C OpenMP runtime (vcomp) will be used.
有关 OpenMP 的说明:所需的 OpenMP 实现是 Intel OpenMP (iomp)。为了链接到 iomp,您需要手动下载库并通过调整 CMAKE_INCLUDE_PATH 和 LIB 来设置构建环境。此处的说明是设置 MKL 和 Intel OpenMP 的示例。如果没有 CMake 的这些配置,将使用 Microsoft Visual C OpenMP 运行时 (vcomp)。
CUDA based build 基于 CUDA 的构建
In this mode PyTorch computations will leverage your GPU via CUDA for faster number crunching
在此模式下,PyTorch 计算将通过 CUDA 利用您的 GPU 来加快数字运算速度
NVTX is needed to build Pytorch with CUDA. NVTX is a part of CUDA distributive, where it is called "Nsight Compute". To install it onto an already installed CUDA run CUDA installation once again and check the corresponding checkbox. Make sure that CUDA with Nsight Compute is installed after Visual Studio.
使用 CUDA 构建 Pytorch 需要 NVTX。NVTX 是 CUDA 分发的一部分,称为“Nsight Compute”。要将其安装到已安装的 CUDA 上,请再次运行 CUDA 安装并选中相应的复选框。确保在 Visual Studio 之后安装带有 Nsight Compute 的 CUDA。
Currently, VS 2017 / 2019, and Ninja are supported as the generator of CMake. If ninja.exe is detected in PATH, then Ninja will be used as the default generator, otherwise, it will use VS 2017 / 2019.
目前支持 VS 2017 / 2019 和 Ninja 作为 CMake 的生成器。如果在 ninja.exe 中 PATH 检测到,则 Ninja 将用作默认生成器,否则,它将使用 VS 2017 / 2019。
If Ninja is selected as the generator, the latest MSVC will get selected as the underlying toolchain.
如果选择 Ninja 作为生成器,则最新的 MSVC 将被选为底层工具链。
Additional libraries such as Magma, oneDNN, a.k.a. MKLDNN or DNNL, and Sccache are often needed. Please refer to the installation-helper to install them.
通常需要其他库,例如 Magma、oneDNN(又名 MKLDNN 或 DNNL)和 Sccache。请参考 installation-helper 来安装它们。
You can refer to the build_pytorch.bat script for some other environment variables configurations
您可以参考 build_pytorch.bat 脚本了解其他一些环境变量配置
cmd

:: Set the environment variables after you have downloaded and unzipped the mkl package,
:: else CMake would throw an error as `Could NOT find OpenMP`.
set CMAKE_INCLUDE_PATH={Your directory}\mkl\include
set LIB={Your directory}\mkl\lib;%LIB%

:: Read the content in the previous section carefully before you proceed.
:: [Optional] If you want to override the underlying toolset used by Ninja and Visual Studio with CUDA, please run the following script block.
:: "Visual Studio 2019 Developer Command Prompt" will be run automatically.
:: Make sure you have CMake >= 3.12 before you do this when you use the Visual Studio generator.
set CMAKE_GENERATOR_TOOLSET_VERSION=14.27
set DISTUTILS_USE_SDK=1
for /f "usebackq tokens=*" %i in (`"%ProgramFiles(x86)%\Microsoft Visual Studio\Installer\vswhere.exe" -version [15^,17^) -products * -latest -property installationPath`) do call "%i\VC\Auxiliary\Build\vcvarsall.bat" x64 -vcvars_ver=%CMAKE_GENERATOR_TOOLSET_VERSION%

:: [Optional] If you want to override the CUDA host compiler
set CUDAHOSTCXX=C:\Program Files (x86)\Microsoft Visual Studio\2019\Community\VC\Tools\MSVC\14.27.29110\bin\HostX64\x64\cl.exe

python setup.py develop
Intel GPU builds Intel GPU 构建
In this mode PyTorch with Intel GPU support will be built.
在此模式下,将构建支持 Intel GPU 的 PyTorch。
Please make sure the common prerequisites as well as the prerequisites for Intel GPU are properly installed and the environment variables are configured prior to starting the build. For build tool support, Visual Studio 2022 is required.
请确保正确安装了 Intel GPU 的常见先决条件和先决条件,并在开始构建之前配置了环境变量。对于构建工具支持, Visual Studio 2022 是必需的。
Then PyTorch can be built with the command:
然后可以使用以下命令构建 PyTorch:
:: CMD Commands:
:: Set the CMAKE_PREFIX_PATH to help find corresponding packages
:: %CONDA_PREFIX% only works after `conda activate custom_env`

if defined CMAKE_PREFIX_PATH (
    set "CMAKE_PREFIX_PATH=%CONDA_PREFIX%\Library;%CMAKE_PREFIX_PATH%"
) else (
    set "CMAKE_PREFIX_PATH=%CONDA_PREFIX%\Library"
)

python setup.py develop
Adjust Build Options (Optional)
Adjust Build Options (可选)
You can adjust the configuration of cmake variables optionally (without building first), by doing the following. For example, adjusting the pre-detected directories for CuDNN or BLAS can be done with such a step.
您可以通过执行以下作(无需先构建)选择性地调整 cmake 变量的配置。例如,可以通过这样的步骤调整 CuDNN 或 BLAS 的预先检测到的目录。
On Linux 在 Linux 上
export CMAKE_PREFIX_PATH="${CONDA_PREFIX:-'$(dirname $(which conda))/../'}:${CMAKE_PREFIX_PATH}"
python setup.py build --cmake-only
ccmake build  # or cmake-gui build
On macOS 在 macOS 上
export CMAKE_PREFIX_PATH="${CONDA_PREFIX:-'$(dirname $(which conda))/../'}:${CMAKE_PREFIX_PATH}"
MACOSX_DEPLOYMENT_TARGET=10.9 CC=clang CXX=clang++ python setup.py build --cmake-only
ccmake build  # or cmake-gui build
Docker Image Docker 镜像
Using pre-built images 使用预构建的镜像
You can also pull a pre-built docker image from Docker Hub and run with docker v19.03+
您还可以从 Docker Hub 拉取预构建的 docker 镜像,并使用 docker v19.03+ 运行
docker run --gpus all --rm -ti --ipc=host pytorch/pytorch:latest
Please note that PyTorch uses shared memory to share data between processes, so if torch multiprocessing is used (e.g. for multithreaded data loaders) the default shared memory segment size that container runs with is not enough, and you should increase shared memory size either with --ipc=host or --shm-size command line options to nvidia-docker run.
请注意,PyTorch 使用共享内存在进程之间共享数据,因此如果使用 torch 多处理(例如,用于多线程数据加载器),则容器运行的默认共享内存段大小是不够的,您应该将共享内存大小 with --ipc=host 或 --shm-size command line options 增加到 nvidia-docker run 。
Building the image yourself
自己构建图像
NOTE: Must be built with a docker version > 18.06
注意:必须使用 docker 版本> 18.06 构建
The Dockerfile is supplied to build images with CUDA 11.1 support and cuDNN v8. You can pass PYTHON_VERSION=x.y make variable to specify which Python version is to be used by Miniconda, or leave it unset to use the default.
用于 Dockerfile 构建具有 CUDA 11.1 支持和 cuDNN v8 的映像。您可以传递 PYTHON_VERSION=x.y make 变量来指定 Miniconda 要使用的 Python 版本,或者将其保留为未设置以使用默认值。
make -f docker.Makefile
# images are tagged as docker.io/${your_docker_username}/pytorch
You can also pass the CMAKE_VARS="..." environment variable to specify additional CMake variables to be passed to CMake during the build. See setup.py for the list of available variables.
您还可以传递 CMAKE_VARS="..." 环境变量以指定要在构建期间传递给 CMake 的其他 CMake 变量。有关可用变量的列表,请参阅 setup.py。
make -f docker.Makefile
Building the Documentation
构建文档
To build documentation in various formats, you will need Sphinx and the pytorch_sphinx_theme2.
要构建各种格式的文档,您将需要 Sphinx 和 pytorch_sphinx_theme2。
Before you build the documentation locally, ensure torch is installed in your environment. For small fixes, you can install the nightly version as described in Getting Started.
在本地构建文档之前,请确保 torch 已安装在您的环境中。对于小的修复,您可以按照 入门 中的说明安装 nightly 版本。
For more complex fixes, such as adding a new module and docstrings for the new module, you might need to install torch from source. See Docstring Guidelines for docstring conventions.
对于更复杂的修复,例如添加新模块和新模块的文档字符串,您可能需要从源安装 torch。有关文档字符串约定,请参阅 Docstring Guidelines 。
cd docs/
pip install -r requirements.txt
make html
make serve
Run make to get a list of all available output formats.
运行 make 以获取所有可用输出格式的列表。
If you get a katex error run npm install katex. If it persists, try npm install -g katex
如果收到 katex 错误,请运行 npm install katex 。如果它仍然存在,请尝试 npm install -g katex
Note 注意
If you installed nodejs with a different package manager (e.g., conda) then npm will probably install a version of katex that is not compatible with your version of nodejs and doc builds will fail. A combination of versions that is known to work is node@6.13.1 and katex@0.13.18. To install the latter with npm you can run npm install -g katex@0.13.18
如果您使用不同的包管理器(例如 )进行安装 nodejs ,则 npm 可能会安装 katex 与您的版本不兼容的版本, nodejs 并且文档构建将失败。 conda 已知有效的版本组合是 node@6.13.1 和 katex@0.13.18 。要安装后者, npm 您可以运行 npm install -g katex@0.13.18
Note 注意
If you see a numpy incompatibility error, run:
如果您看到 numpy 不兼容错误,请运行:
<span style="color:#1f2328"><span style="background-color:#ffffff"><span style="background-color:var(--bgColor-muted, var(--color-canvas-subtle))"><span style="color:var(--fgColor-default, var(--color-fg-default))"><span style="background-color:var(--bgColor-muted, var(--color-canvas-subtle))"><code>pip install 'numpy<2'
</code></span></span></span></span></span>
When you make changes to the dependencies run by CI, edit the .ci/docker/requirements-docs.txt file.
当您对 CI 运行的依赖项进行更改时,请编辑 .ci/docker/requirements-docs.txt 该文件。
Building a PDF 构建 PDF
To compile a PDF of all PyTorch documentation, ensure you have texlive and LaTeX installed. On macOS, you can install them using:
要编译所有 PyTorch 文档的 PDF,请确保您已安装 texlive LaTeX。在 macOS 上,您可以使用以下方法安装它们:
<span style="background-color:var(--bgColor-muted, var(--color-canvas-subtle))"><span style="color:#1f2328"><span style="color:var(--fgColor-default, var(--color-fg-default))"><span style="background-color:var(--bgColor-muted, var(--color-canvas-subtle))"><code>brew install --cask mactex
</code></span></span></span></span>
To create the PDF:
要创建 PDF:
-
Run: 跑:
<span style="background-color:var(--bgColor-muted, var(--color-canvas-subtle))"><span style="color:var(--fgColor-default, var(--color-fg-default))"><span style="background-color:var(--bgColor-muted, var(--color-canvas-subtle))"><code>make latexpdf
</code></span></span></span>
This will generate the necessary files in the
build/latexdirectory.
这将在build/latex目录中生成必要的文件。 -
Navigate to this directory and execute:
导航到此目录并执行:<span style="background-color:var(--bgColor-muted, var(--color-canvas-subtle))"><span style="color:var(--fgColor-default, var(--color-fg-default))"><span style="background-color:var(--bgColor-muted, var(--color-canvas-subtle))"><code>make LATEXOPTS="-interaction=nonstopmode" </code></span></span></span>This will produce a
pytorch.pdfwith the desired content. Run this command one more time so that it generates the correct table of contents and index.
这将生成pytorch.pdf具有所需内容的 。再次运行此命令,以便生成正确的目录和索引。
Note 注意
To view the Table of Contents, switch to the Table of Contents view in your PDF viewer.
要查看目录,请在 PDF 查看器中切换到目录视图。
六、软件下载
本文信息来源于GitHub作者地址:https://github.com/pytorch/pytorch


 9630
9630

 被折叠的 条评论
为什么被折叠?
被折叠的 条评论
为什么被折叠?
 到【灌水乐园】发言


