


一、软件介绍
文末提供程序和源码下载
Django 模态作是一个可重用的 Django 应用程序,它提供了一种将基于模态的作添加到您的 Django 管理界面的便捷方式。它允许您创建在模态对话框中打开的自定义作,从而增强 Django 管理员的用户体验和功能。
二、Features 特征
- Easy integration with Django admin
与 Django admin 轻松集成 - Support for both list-view and object-view actions
支持 list-view 和 object-view作 - Customizable modal forms
可定制的模态表单 - AJAX-based form submission
基于 AJAX 的表单提交 - Skip confirmation dialog for immediate action execution
跳过确认对话框以立即执行作
三、Requirements 要求
- Python (>= 3.7) Python (>= 3.7)
- Django (>= 3.2) Django (>= 3.2)
四、Installation 安装
-
Install the package using pip:
使用 pip 安装包:<span style="background-color:var(--bgColor-muted, var(--color-canvas-subtle))"><span style="color:var(--fgColor-default, var(--color-fg-default))"><span style="background-color:var(--bgColor-muted, var(--color-canvas-subtle))"><code>pip install django-modal-actions </code></span></span></span> -
Add
'django_modal_actions'to yourINSTALLED_APPSsetting:
添加到您的'django_modal_actions'INSTALLED_APPS设置中:INSTALLED_APPS = [ ... 'django_modal_actions', ... ]
五、Usage 用法
-
In your
admin.py, import the necessary components:
在 中admin.py,导入必要的组件:from django.contrib import admin from django_modal_actions import ModalActionMixin, modal_action -
Create a custom admin class that inherits from
ModalActionMixinand your base admin class:
创建一个继承自ModalActionMixin基 admin 类的自定义 admin 类:@admin.register(YourModel) class YourModelAdmin(ModalActionMixin, admin.ModelAdmin): list_display = ['name', 'status'] modal_actions = ["approve"] list_modal_actions = ["bulk_approve"] @modal_action( modal_header="Approve Item", modal_description="Are you sure you want to approve this item?" ) def approve(self, request, obj, form_data=None): obj.status = 'approved' obj.save() return f"{obj} has been approved." @modal_action( modal_header="Bulk Approve", modal_description="Are you sure you want to approve the selected items?" ) def bulk_approve(self, request, queryset, form_data=None): count = queryset.update(status='approved') return f"{count} items have been approved." -
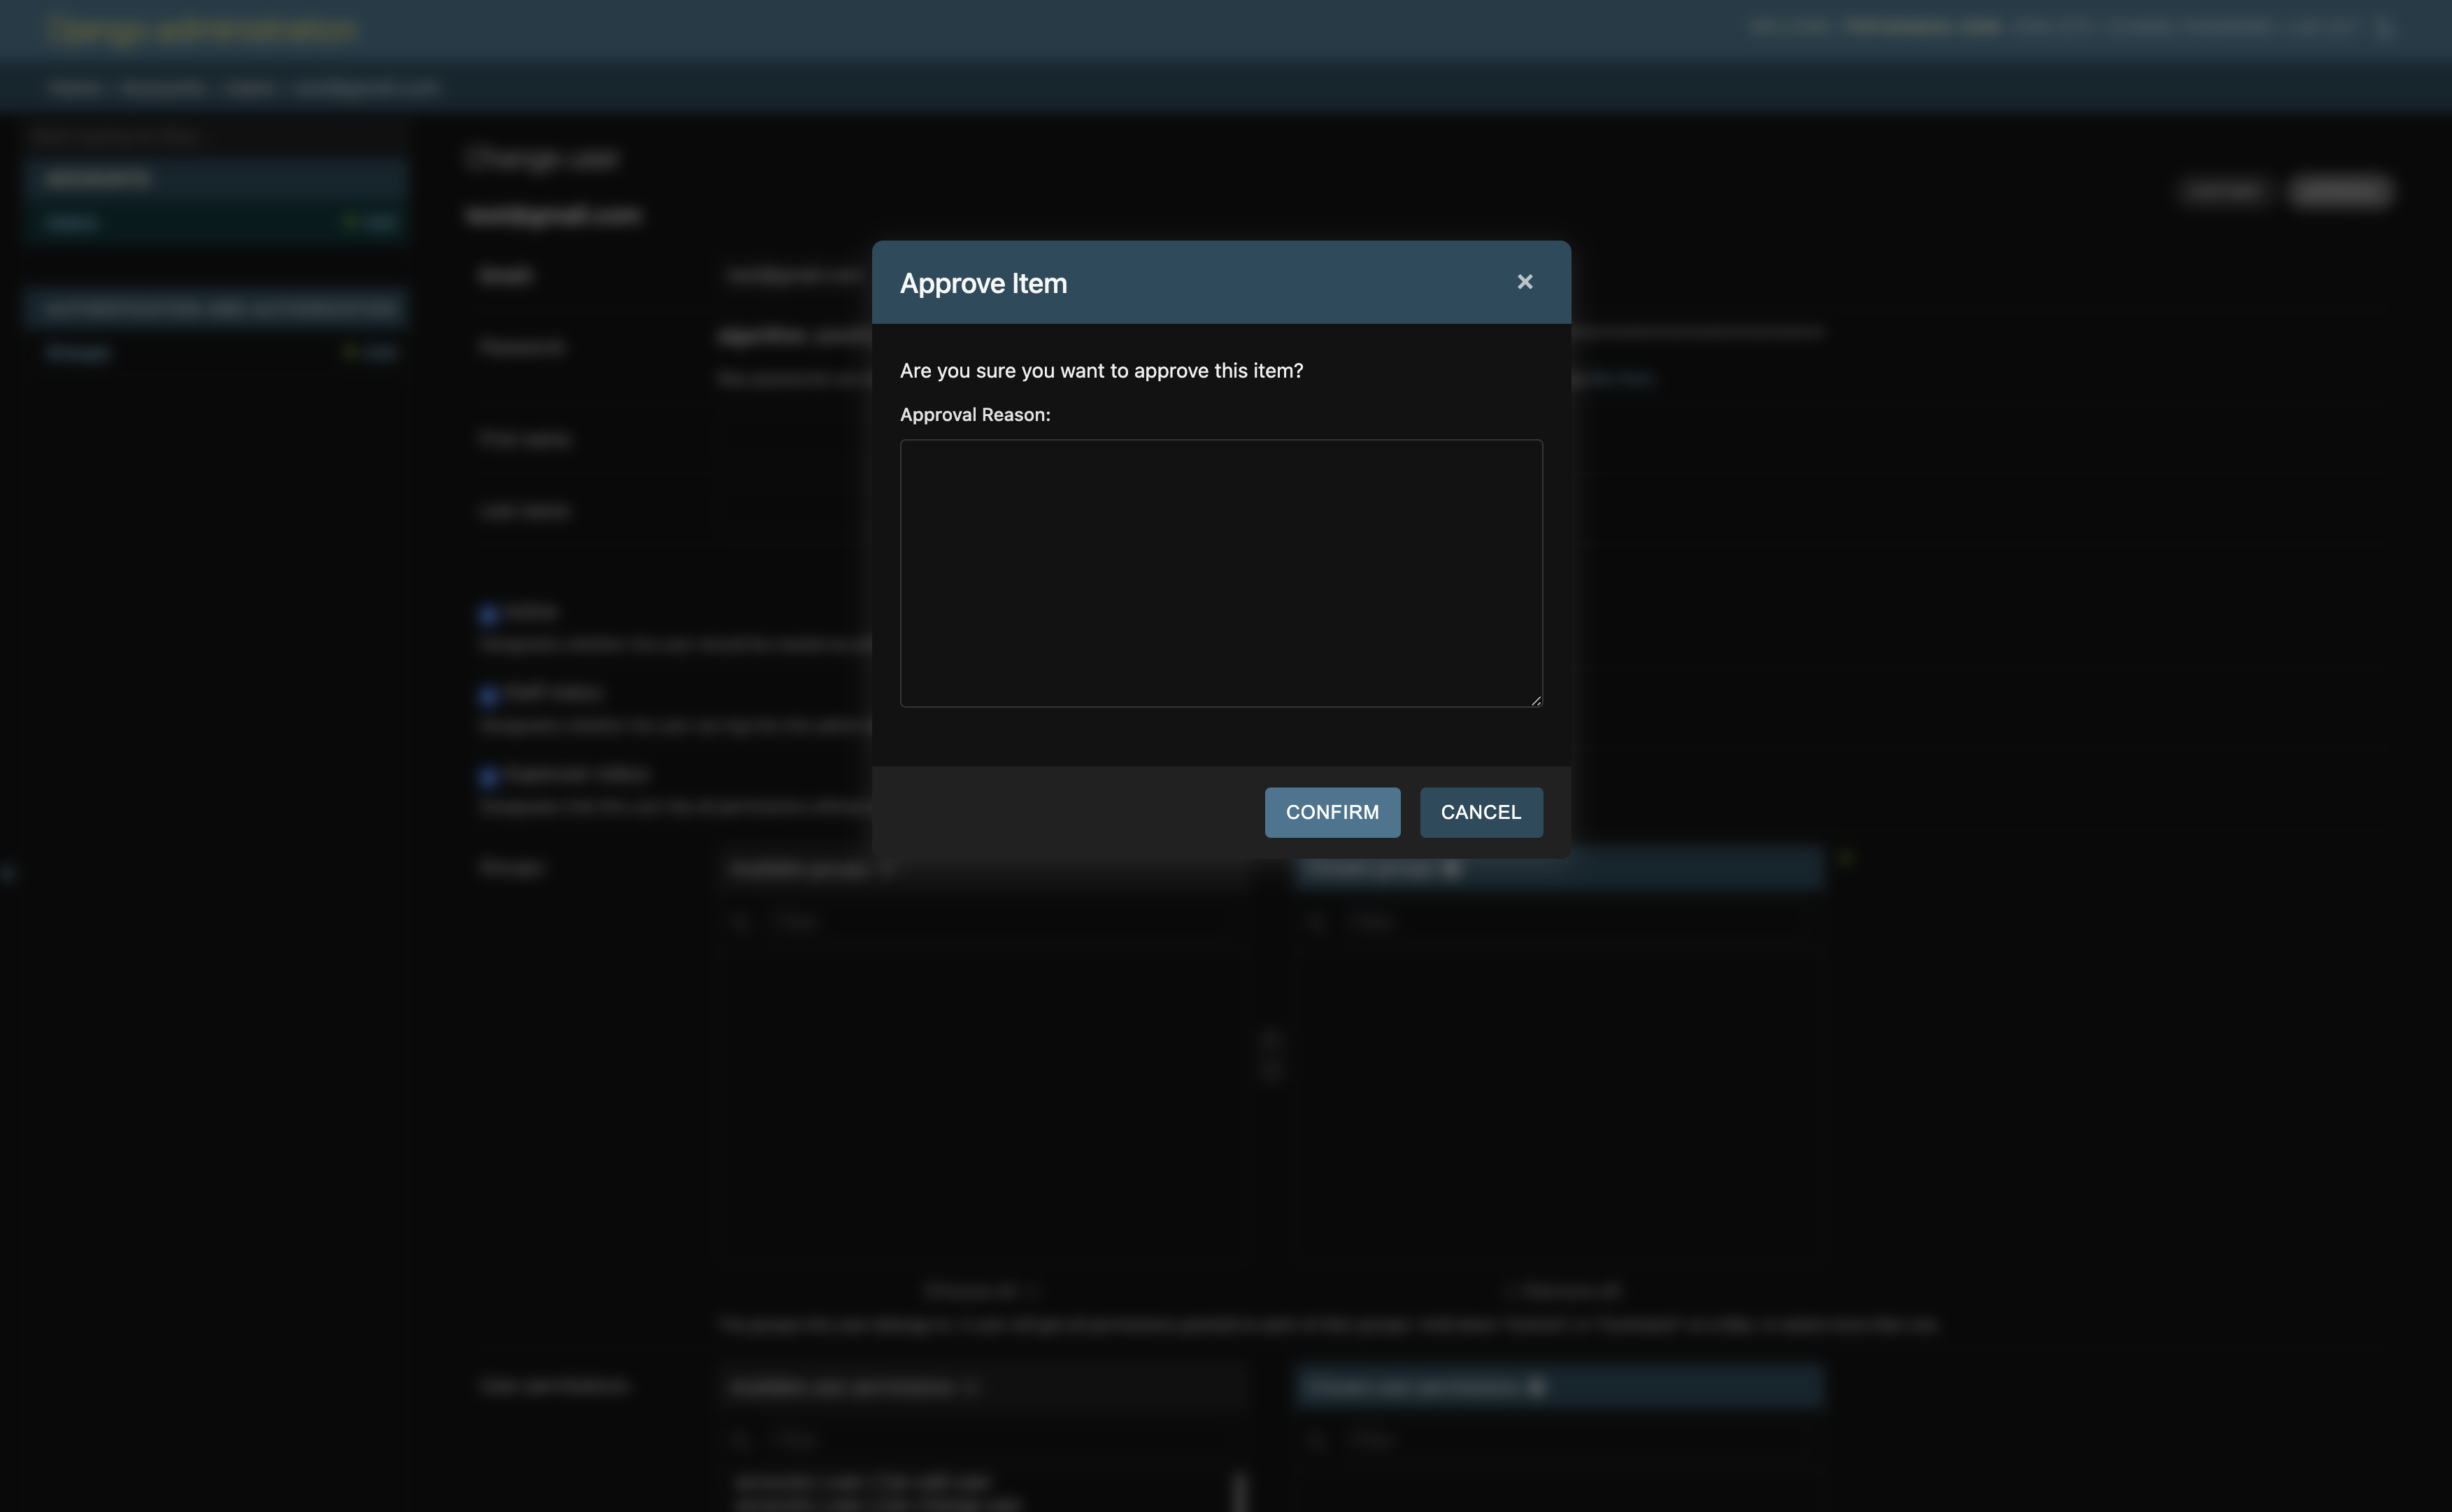
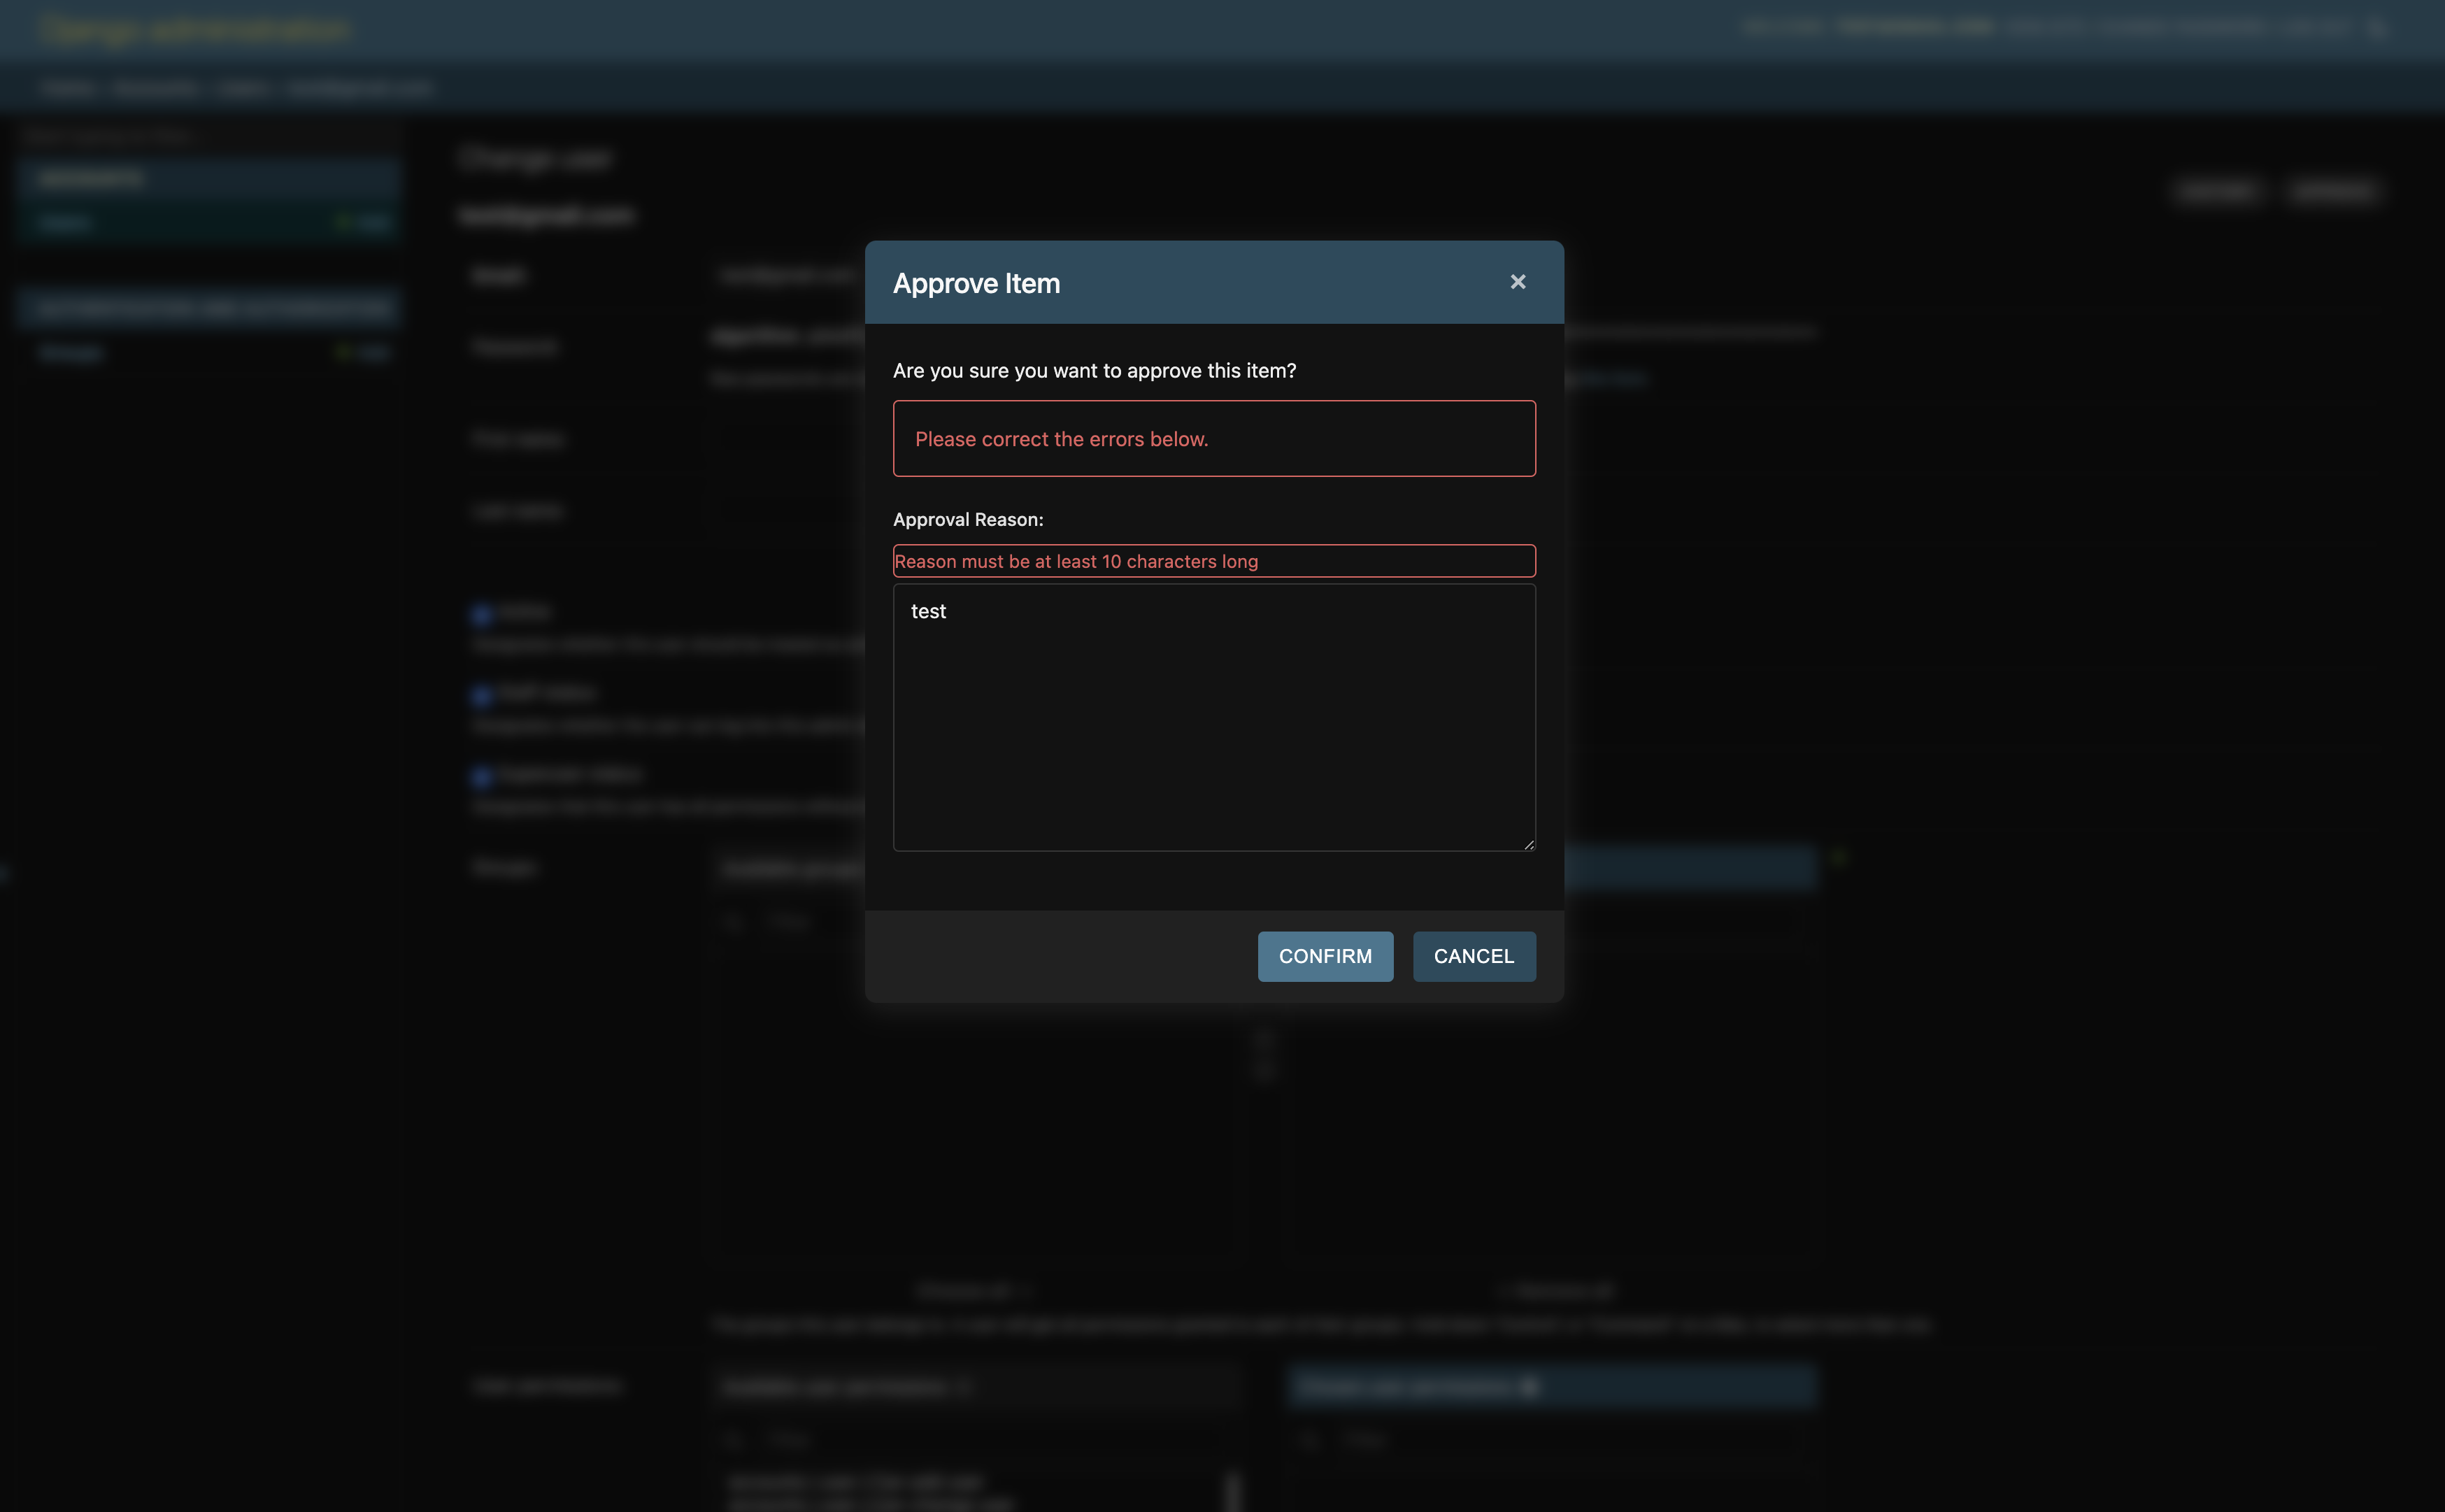
If you need a custom form for your action, create a form class:
如果您的作需要自定义表单,请创建一个表单类:from django import forms class ApprovalForm(forms.Form): reason = forms.CharField(label="Approval Reason", required=True, widget=forms.Textarea) def clean_reason(self): reason = self.cleaned_data["reason"] if len(reason) < 10: raise forms.ValidationError("Reason must be at least 10 characters long") return reasonThen, use it in your action:
然后,在您的作中使用它:@modal_action( modal_header="Approve with Reason", modal_description="Please provide a reason for approval", form_class=ApprovalForm ) def approve_with_reason(self, request, obj, form_data=None): obj.status = 'approved' obj.approval_reason = form_data['reason'] obj.save() return f"{obj} has been approved with reason: {form_data['reason']}"
六、Conditional Fields Example条件字段示例
You can create forms with fields that are shown or hidden based on the value of another field. This is useful for creating dynamic forms that adapt to user input. Here's an example:
您可以创建包含根据另一个字段的值显示或隐藏字段的表单。这对于创建适应用户输入的动态表单非常有用。下面是一个示例:
from django import forms
from django_modal_actions import conditional_field
class NotificationForm(forms.Form):
notification_type = forms.ChoiceField(
label="Notification Type",
choices=[
('email', 'Email'),
('sms', 'SMS'),
('none', 'No notification')
],
initial='none'
)
# This field will only be shown when notification_type is 'email'
email_address = conditional_field(
dependent_field='notification_type',
values=['email']
)(
forms.EmailField(
label="Email Address",
required=False
)
)
# This field will only be shown when notification_type is 'sms'
phone_number = conditional_field(
dependent_field='notification_type',
values=['sms']
)(
forms.CharField(
label="Phone Number",
required=False
)
)
@admin.register(YourModel)
class YourModelAdmin(ModalActionMixin, admin.ModelAdmin):
modal_actions = ['send_notification']
@modal_action(
modal_header="Send Notification",
modal_description="Send a notification to the user",
form_class=NotificationForm
)
def send_notification(self, request, obj, form_data=None):
if form_data['notification_type'] == 'email':
# Send email notification
return f"Email will be sent to {form_data['email_address']}"
elif form_data['notification_type'] == 'sms':
# Send SMS notification
return f"SMS will be sent to {form_data['phone_number']}"
else:
return "No notification will be sent"
Permissions Example 权限示例
You can add custom permission checks to your modal actions using the permissions parameter of the modal_action decorator. Here's an example:
你可以使用 modal_action decorator 的 permissions 参数向模态作添加自定义权限检查。下面是一个示例:
from django.contrib import admin
from django_modal_actions import ModalActionMixin, modal_action
from .models import YourModel
def can_approve(request, obj=None):
return request.user.has_perm('yourapp.can_approve_items')
@admin.register(YourModel)
class YourModelAdmin(ModalActionMixin, admin.ModelAdmin):
list_display = ['name', 'status']
modal_actions = ['approve']
@modal_action(
modal_header="Approve Item",
modal_description="Are you sure you want to approve this item?",
permissions=can_approve
)
def approve(self, request, obj, form_data=None):
obj.status = 'approved'
obj.save()
return f"{obj} has been approved."
In this example, the can_approve function checks if the user has the can_approve_items permission. The approve action will only be available to users who have this permission.
在此示例中,该 can_approve 函数检查用户是否具有权限 can_approve_items 。该 approve 作仅对具有此权限的用户可用。
You can also use multiple permission checks by passing a list of functions:
您还可以通过传递函数列表来使用多个权限检查:
def is_staff(request, obj=None):
    return request.user.is_staff

@modal_action(
    modal_header="Approve Item",
    modal_description="Are you sure you want to approve this item?",
    permissions=[can_approve, is_staff]
)
def approve(self, request, obj, form_data=None):
    obj.status = 'approved'
    obj.save()
    return f"{obj} has been approved."
In this case, the user must both have the can_approve_items permission and be a staff member to see and use the approve action.
在这种情况下,用户必须同时具有 can_approve_items 权限并且是员工才能查看和使用批准作。
Skip Confirmation Dialog 跳过确认对话框
Sometimes you may want to execute an action immediately without showing a confirmation dialog. You can use the skip_confirmation parameter to achieve this:
有时,您可能希望立即执行作而不显示确认对话框。您可以使用该 skip_confirmation 参数来实现此目的:
from django.contrib import admin
from django_modal_actions import ModalActionMixin, modal_action

@admin.register(YourModel)
class YourModelAdmin(ModalActionMixin, admin.ModelAdmin):
    list_display = ['name', 'status']
    modal_actions = ['toggle_status']
    list_modal_actions = ['bulk_toggle_status']

    @modal_action(
        modal_header="Toggle Status",
        skip_confirmation=True
    )
    def toggle_status(self, request, obj, form_data=None):
        if obj.status == 'active':
            obj.status = 'inactive'
        else:
            obj.status = 'active'
        obj.save()
        return f"{obj} status toggled to {obj.status}"

    @modal_action(
        modal_header="Bulk Toggle Status",
        skip_confirmation=True
    )
    def bulk_toggle_status(self, request, queryset, form_data=None):
        for obj in queryset:
            obj.status = 'inactive' if obj.status == 'active' else 'active'
            obj.save()
        return f"Toggled status for {queryset.count()} items"
In this example, both actions will execute immediately when clicked, without showing a confirmation modal. The page will reload automatically after the action completes.
在此示例中,单击这两个作时将立即执行,而不会显示确认模式。作完成后,页面将自动重新加载。
Important Note: You cannot use skip_confirmation=True together with form_class. The skip confirmation feature is designed for actions that don't require any user input. If you need to collect form data, the modal must be shown to display the form.
重要提示:您不能 skip_confirmation=True 与 form_class 一起使用。跳过确认功能专为不需要任何用户输入的作而设计。如果需要收集表单数据,则必须显示模式才能显示表单。
Custom Admin Templates 自定义管理员模板
If you need to customize the admin templates while still using the modal actions, you can override the change_form_template and change_list_template in your ModelAdmin class. Here's how to do it:
如果你需要在使用模态作的同时自定义管理模板,你可以在 ModelAdmin 类中覆盖 change_form_template and change_list_template 。这是如何做到的:
-
In your
admin.py, add thechange_form_templateorchange_list_templateattribute to your ModelAdmin class:
在admin.py中,将change_form_templateorchange_list_template属性添加到您的 ModelAdmin 类中:@admin.register(YourModel) class YourModelAdmin(ModalActionMixin, admin.ModelAdmin): change_form_template = 'admin/yourapp/yourmodel/change_form.html' change_list_template = 'admin/yourapp/yourmodel/change_list.html' # ... rest of your ModelAdmin code -
Create the custom template files in your app's template directory. For example:
在应用程序的 template 目录中创建自定义模板文件。例如:<span style="background-color:var(--bgColor-muted, var(--color-canvas-subtle))"><span style="color:var(--fgColor-default, var(--color-fg-default))"><span style="background-color:var(--bgColor-muted, var(--color-canvas-subtle))"><code>yourapp/ └── templates/ └── admin/ └── yourapp/ └── yourmodel/ ├── change_form.html └── change_list.html </code></span></span></span> -
In your custom templates, extend the default admin templates and add the modal action buttons. Here's an example for
change_form.html:
在自定义模板中,扩展默认管理模板并添加模式作按钮。下面是一个示例:change_form.html{% extends "admin/change_form.html" %} {% load i18n admin_urls %} {% block object-tools %} <ul class="object-tools"> {% block object-tools-items %} {{ block.super }} {% if modal_action_buttons %} <li>{{ modal_action_buttons }}</li> {% endif %} {% endblock %} </ul> {% endblock %}And for
change_list.html: 和 对于change_list.html:{% extends "admin/change_list.html" %} {% load i18n admin_urls %} {% block object-tools %} <ul class="object-tools"> {% block object-tools-items %} {{ block.super }} {% if list_modal_action_buttons %} <li>{{ list_modal_action_buttons }}</li> {% endif %} {% endblock %} </ul> {% endblock %}
These custom templates will include the modal action buttons while allowing you to make other customizations to your admin interface.
这些自定义模板将包括模态作按钮,同时允许您对管理界面进行其他自定义。
Testing 测试
To run the tests, execute:
要运行测试,请执行:
<span style="background-color:var(--bgColor-muted, var(--color-canvas-subtle))"><span style="color:#1f2328"><span style="color:var(--fgColor-default, var(--color-fg-default))"><span style="background-color:var(--bgColor-muted, var(--color-canvas-subtle))"><code>python -m unittest discover django_modal_actions/tests
</code></span></span></span></span>
七、软件下载
本文信息来源于GitHub作者地址:https://github.com/Mng-dev-ai/django-modal-actions


 被折叠的 条评论
为什么被折叠?
被折叠的 条评论
为什么被折叠?
 到【灌水乐园】发言


