


 本文是一篇关于谷歌 Protobuf(Protocol Buffers)的入门教程,首先指导读者从GitHub下载最新protobuf.zip包并配置环境变量。接着,介绍如何创建`test.proto`文件,并在CMD中执行命令进行编译。最后,通过一个main方法测试了protobuf序列化的优点,包括数据压缩和高效传输等特性。
1、先去github上下载最新的protobuf.zip包 地址:https://github.com/google/protobuf/releases

2)配置环境变量:

3)创建 test.proto 的文件
syntax = "proto3";
// 如果使用此注释,则使用proto3; 否则使用proto2
// 生成类的包名
option java_package = "com.protobuf";
//生成的数据访问类的类名,如果没有指定此值,则生成的类名为proto文件名的驼峰命名方法
option java_outer_classname = "test";
message testbuf {
  int32 id = 1;
  string name = 2;
  string email = 3;
  repeated int32 mylist = 4; // List列表
}
4)在当前文件下 cmd 执行命令:
protoc ./student.proto --java_out=./

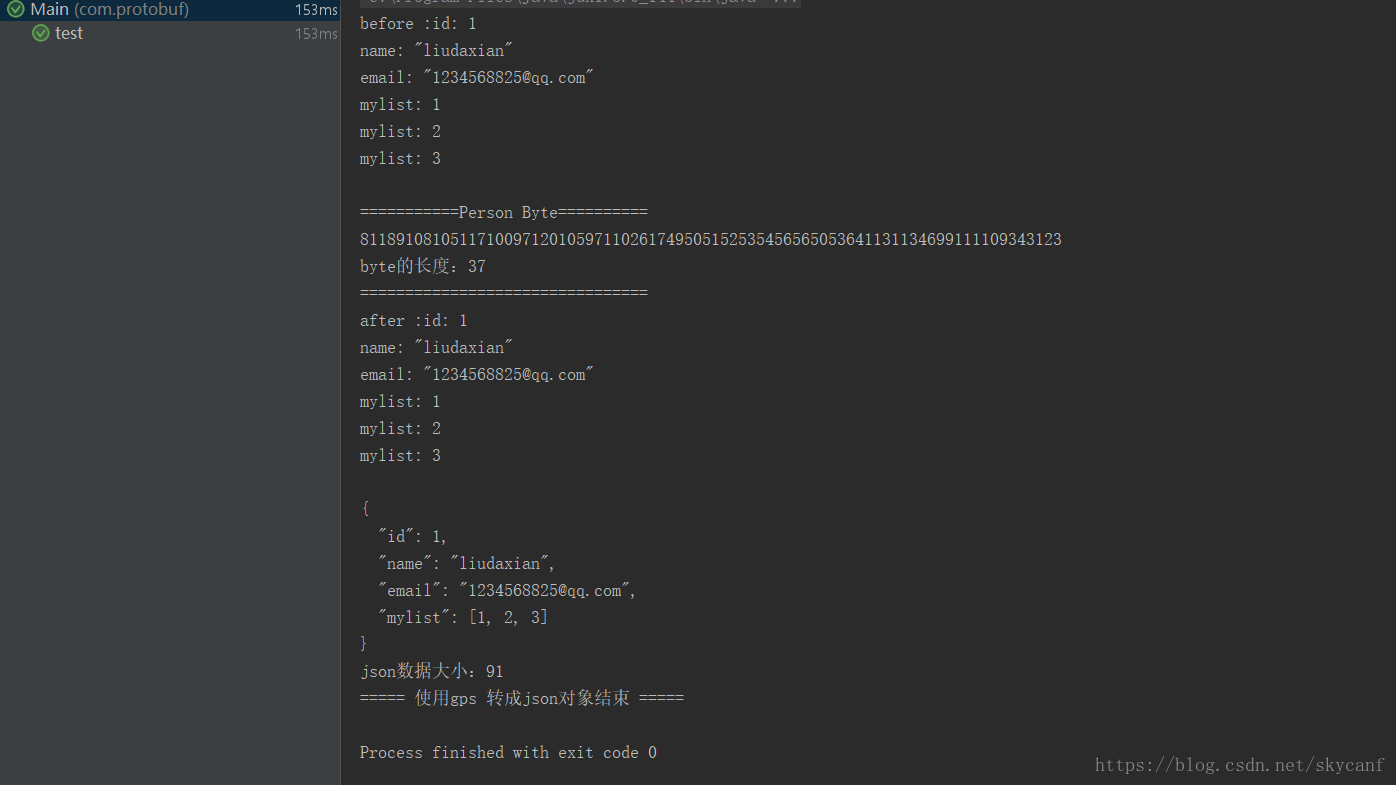
5)main方法来测试protobuf生成类 序列化有何优点:
befo
<dependency>
    <groupId>com.google.protobuf</groupId>
    <artifactId>protobuf-java-util</artifactId>
    <version>3.5.0</version>
</dependency>
start:
@Test
public  void  test() throws InvalidProtocolBufferException {
    test.testbuf.Builder builder = test.testbuf.newBuilder();
    builder.setId(1);
    builder.setName("liudaxian");
    builder.setEmail("1234568825@qq.com");
    builder.addMylist(1);
    builder.addMylist(2);
    builder.addMylist(3);
    test.testbuf build = builder.build();
    System.out.println("before :"+ build.toString());
    System.out.println("===========Person Byte==========");
    for(byte b : build.toByteArray()){
        System.out.print(b);
    }
    System.out.println();
    System.out.println("byte的长度:"+build.toByteString().size());
    System.out.println("================================");

    //模拟接收Byte[],反序列化成Person类
    test.testbuf build2 = builder.build();
    byte[] byteArray =build2.toByteArray();
    test.testbuf testbuf = test.testbuf.parseFrom(byteArray);
    System.out.println("after :" +testbuf.toString());
    String jsonFormatM = "";
    jsonFormatM = JsonFormat.printer().print(testbuf);

    System.out.println(jsonFormatM.toString());
    System.out.println("json数据大小:" + jsonFormatM.getBytes().length);
    System.out.println("===== 使用gps 转成json对象结束 =====");
}
after:


 1200
1200

 被折叠的 条评论
为什么被折叠?
被折叠的 条评论
为什么被折叠?
 到【灌水乐园】发言


