


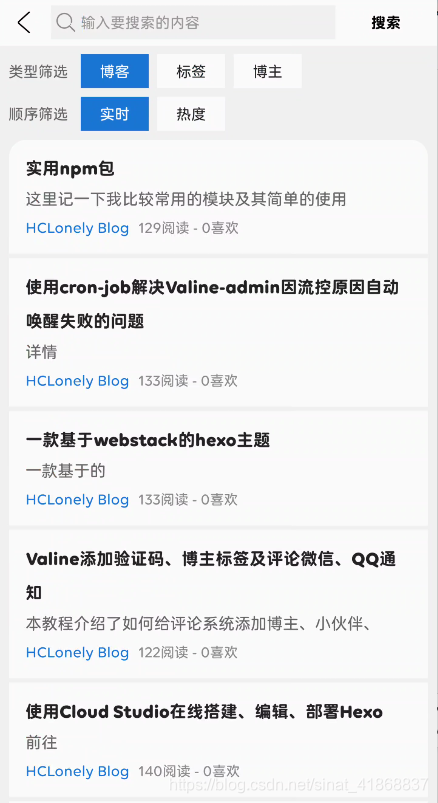
博客搜索页面
布局说明:
1. 顶栏中放置搜索框和搜索按钮,输入内容点击搜索后向后端发起请求并且进行搜索
2. 下方是筛选按钮,可以搜索博客、标签或者博主
3. 然后是顺序筛选,可以选择按照时间顺序或者热度顺序
4. 最下面是相应的搜索结果列表
关于如何设置颜色的变化:
fun setTabClickListener() {
val tab_1: TextView = findViewById(R.id.search_type_1)
val tab_2: TextView = findViewById(R.id.search_type_2)
val tab_3: TextView = findViewById(R.id.search_type_3)
val tab_4: TextView = findViewById(R.id.search_tab_1)
val tab_5: TextView = findViewById(R.id.search_tab_2)
// set tab change listener
val listener_1 = object : View.OnClickListener {
override fun onClick(v: View?) {
refreshTypeTabs()
tab_1.setTextColor(getColor(R.color.uBack))
tab_1.setBackgroundColor(getColor(R.color.bBlue))
fetchArticleData()
}
}
val listener_2 = object : View.OnClickListener {
override fun onClick(v: View?) {
refreshTypeTabs()
tab_2.setTextColor(getColor(R.color.uBack))
tab_2.setBackgroundColor(getColor(R.color.bBlue))
fetchTagData()
}
}
val listener_3 = object : View.OnClickListener {
override fun onClick(v: View?) {
refreshTypeTabs()
tab_3.setTextColor(getColor(R.color.uBack))
tab_3.setBackgroundColor(getColor(R.color.bBlue))
fetchAuthorData()
}
}
val listener_4 = object : View.OnClickListener {
override fun onClick(v: View?) {
refreshOrderTabs()
tab_4.setTextColor(getColor(R.color.uBack))
tab_4.setBackgroundColor(getColor(R.color.bBlue))
}
}
val listener_5 = object : View.OnClickListener {
override fun onClick(v: View?) {
refreshOrderTabs()
tab_5.setTextColor(getColor(R.color.uBack))
tab_5.setBackgroundColor(getColor(R.color.bBlue))
}
}
// set
tab_1.setOnClickListener(listener_1)
tab_2.setOnClickListener(listener_2)
tab_3.setOnClickListener(listener_3)
tab_4.setOnClickListener(listener_4)
tab_5.setOnClickListener(listener_5)
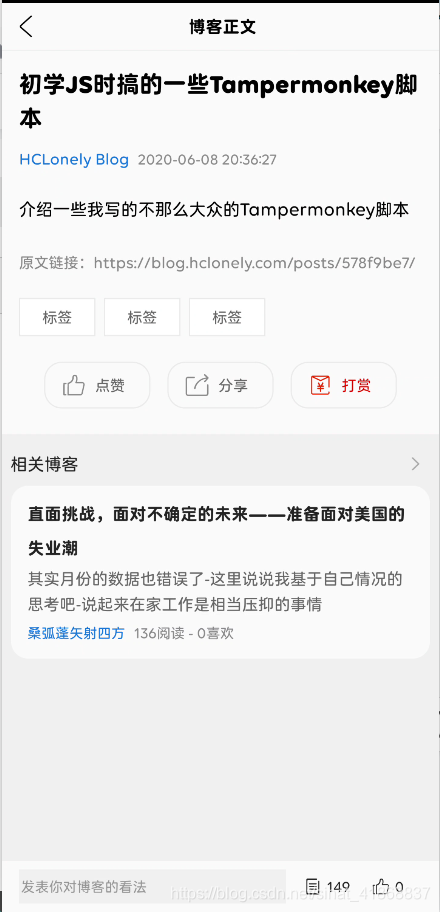
}博客正文页面
布局说明:
1. 最上方显示博客标题
2. 然后显示作者和时间信息,用不同颜色加以区分。
3. 主要部分是正文,这里使用WebView来进行实现,但是因为宽度的问题,需要添加html代码来让宽度变的合适。
4. 正文底部显示博客来源链接,用户可以点击这个链接直接跳转原博客。
5. 然后是显示博客相关的标签信息。
6. 后面暂时设置了三个按钮,点赞、分享等。
7. 然后的内容是相关的博客列表。
8. 底部Bar是固定在页面底部的,会显示浏览量,点赞量等内容。
WebView的相关处理代码:
// 数据处理-html格式处理
val htmlHead = "<head><style>* { line-height: 32px; margin-left: 4px; margin-right: 4px; } img{ max-width: 100%; width:auto; height: auto; }</style></head>";
val resContent = "<html>" + htmlHead + "<body>" + content + "</body></html>";
// 设置view
val tv_blog_content: WebView = findViewById(R.id.blog_content)
tv_blog_content.setBackgroundColor(0)
tv_blog_content.isVerticalScrollBarEnabled = false
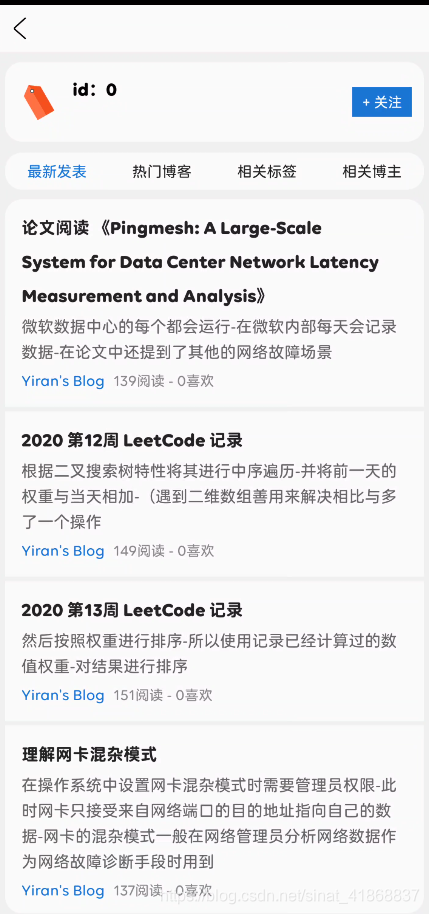
tv_blog_content.isHorizontalScrollBarEnabled = false标签/博主信息页面
布局说明:
1. 首先会显示主要的信息,包括标签名称/博主名称等等,并在右侧放了一个按钮,用户点击可以订阅
2. 下面是四个标签筛选栏,可以选择不同的信息展示:点击后会有颜色区分。
3. 再下方是列表,显示详细的信息。
首页相关跳转的博客列表页面
整体布局说明:顶部是topBar,下面是一个列表,显示相关的博客或者标签列表。
根据传进来的参数进行判定调用哪个函数,显示哪个相应的内容。
XML代码:
<?xml version="1.0" encoding="utf-8"?>
<RelativeLayout xmlns:android="http://schemas.android.com/apk/res/android"
xmlns:app="http://schemas.android.com/apk/res-auto"
xmlns:tools="http://schemas.android.com/tools"
android:layout_width="match_parent"
android:layout_height="match_parent"
android:background="@color/lightgray"
tools:context=".activity.ListActivity">
<LinearLayout
android:id="@+id/list_top_bar"
android:layout_width="match_parent"
android:layout_height="wrap_content"
android:layout_alignParentTop="true"
android:background="@color/uBack"
android:orientation="vertical">
<LinearLayout
android:layout_width="match_parent"
android:layout_height="wrap_content"
android:layout_gravity="center"
android:orientation="horizontal">
<TextView
android:id="@+id/list_back"
android:layout_width="32dp"
android:layout_height="44dp"
android:layout_gravity="center"
android:layout_marginStart="6dp"
android:layout_marginEnd="6dp"
android:drawableStart="@drawable/ic_bar_back"
android:onClick="onBack" />
<TextView
android:layout_width="match_parent"
android:layout_height="44dp"
android:layout_marginEnd="40dp"
android:gravity="center"
android:text="@string/activity_list_tip"
android:textColor="@android:color/black"
android:textSize="16sp"
android:textStyle="bold" />
</LinearLayout>
<View
android:layout_width="match_parent"
android:layout_height="1dp"
android:background="@color/lightgray" />
</LinearLayout>
<ListView
android:id="@+id/list_res_list"
android:layout_width="match_parent"
android:layout_height="wrap_content"
android:layout_below="@id/list_top_bar"
android:layout_marginStart="8dp"
android:layout_marginEnd="8dp"
android:background="@drawable/shape_radius_transparent_border"
android:scrollbars="none" />
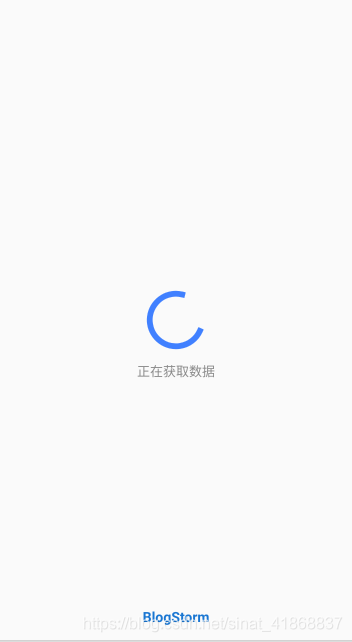
</RelativeLayout>启动页面
这个界面的主要作用就是进行逻辑判定。
1. 首先判断是否已经存储了token
2. 如果有token,带着这个token直接进入主界面
3. 没有token,首先跳转到登录界面来获取相关token再进入主界面


 被折叠的 条评论
为什么被折叠?
被折叠的 条评论
为什么被折叠?
 到【灌水乐园】发言


