


一、docker开启远程端口访问
虚拟机我是在VirtualBox+Vagrant搭建的一个环境,首选要开启docker的远程端口访问:
在/usr/lib/systemd/system/docker.service,配置远程访问修改即可:

修改完成之后重启docker服务:
# systemctl daemon-reload
# systemctl restart docker
看到下图结果说明以上配置OK了。
![]()
二、准备SpringBoot简单的demo工程
写一个简单的HelloWorld:下面给出主要代码:
application.properties 配置:
server.port=9002HelloController:
package com.demo.controller;

import org.springframework.web.bind.annotation.GetMapping;
import org.springframework.web.bind.annotation.RestController;

/**
 * @author leijs
 */
@RestController
public class HelloController {

    @GetMapping(path = "/hello")
    public String sayHello() {
        return "Hello World.";
    }
}
编写dockerfile:
FROM java:8
VOLUME /tmp
ADD *.jar app.jar
EXPOSE 9002
ENTRYPOINT ["java","-Djava.security.egd=file:/dev/./urandom","-jar","/app.jar"]
POM 文件:
<?xml version="1.0" encoding="UTF-8"?>
<project xmlns="http://maven.apache.org/POM/4.0.0"
         xmlns:xsi="http://www.w3.org/2001/XMLSchema-instance"
         xsi:schemaLocation="http://maven.apache.org/POM/4.0.0 http://maven.apache.org/xsd/maven-4.0.0.xsd">
    <modelVersion>4.0.0</modelVersion>

    <groupId>org.example</groupId>
    <artifactId>hello-world</artifactId>
    <version>1.0-SNAPSHOT</version>

    <properties>
        <java.version>1.8</java.version>
        <project.build.sourceEncoding>UTF-8</project.build.sourceEncoding>
        <project.reporting.outputEncoding>UTF-8</project.reporting.outputEncoding>
        <maven.compiler.source>8</maven.compiler.source>
        <maven.compiler.target>8</maven.compiler.target>
        <project.build.sourceEncoding>UTF-8</project.build.sourceEncoding>
        <project.reporting.outputEncoding>UTF-8</project.reporting.outputEncoding>
        <docker.image.prefix>com.demo</docker.image.prefix>
    </properties>

    <parent>
        <groupId>org.springframework.boot</groupId>
        <artifactId>spring-boot-starter-parent</artifactId>
        <version>2.1.3.RELEASE</version>
    </parent>

    <dependencies>
        <dependency>
            <groupId>org.springframework.boot</groupId>
            <artifactId>spring-boot-starter</artifactId>
        </dependency>
        <dependency>
            <groupId>org.springframework.boot</groupId>
            <artifactId>spring-boot-starter-web</artifactId>
        </dependency>
    </dependencies>

    <build>
        <plugins>
            <plugin>
                <groupId>org.springframework.boot</groupId>
                <artifactId>spring-boot-maven-plugin</artifactId>
            </plugin>
            <plugin>
                <groupId>org.springframework.boot</groupId>
                <artifactId>spring-boot-maven-plugin</artifactId>
            </plugin>
            <plugin>
                <!--使用docker-maven-plugin插件-->
                <groupId>com.spotify</groupId>
                <artifactId>docker-maven-plugin</artifactId>
                <version>1.0.0</version>
                <executions>
                    <execution>
                        <id>build-image</id>
                        <!--将插件绑定在package这个phase上。也就是说,用户只需执行mvn package ,就会自动执行mvn docker:build-->
                        <phase>package</phase>
                        <goals>
                            <goal>build</goal>
                        </goals>
                    </execution>
                </executions>
                <configuration>
                    <!--指定生成的镜像名-->
                    <imageName>leijs-hello-world</imageName>
                    <!--指定标签-->
                    <imageTags>
                        <imageTag>latest</imageTag>
                    </imageTags>
                    <!-- 指定 Dockerfile 路径-->
                    <dockerDirectory>${project.basedir}/src/main/docker</dockerDirectory>
                    <resources>
                        <resource>
                            <targetPath>/</targetPath>
                            <directory>${project.build.directory}</directory>
                            <include>${project.build.finalName}.jar</include>
                        </resource>
                    </resources>
                    <!--指定远程 docker api地址-->
                    <dockerHost>http://192.168.56.101:2375</dockerHost>
                </configuration>
            </plugin>
            <plugin>
                <artifactId>maven-antrun-plugin</artifactId>
                <executions>
                    <execution>
                        <phase>package</phase>
                        <configuration>
                            <tasks>
                                <copy todir="src/main/docker" file="target/${project.artifactId}-${project.version}.${project.packaging}"></copy>
                            </tasks>
                        </configuration>
                        <goals>
                            <goal>run</goal>
                        </goals>
                    </execution>
                </executions>
            </plugin>
        </plugins>
    </build>

</project>
三、通过idea插件来进行生成远端镜像
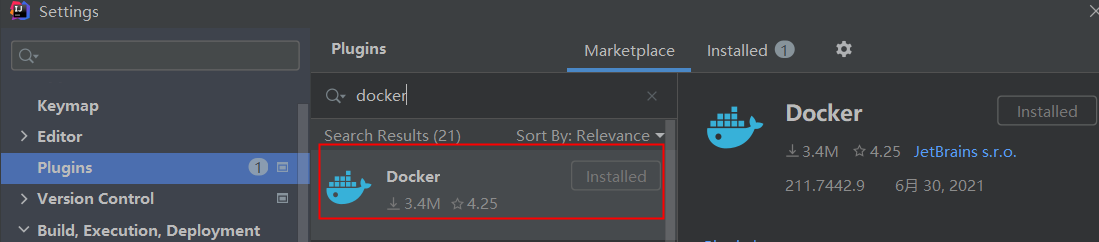
3.1 下载Docker插件
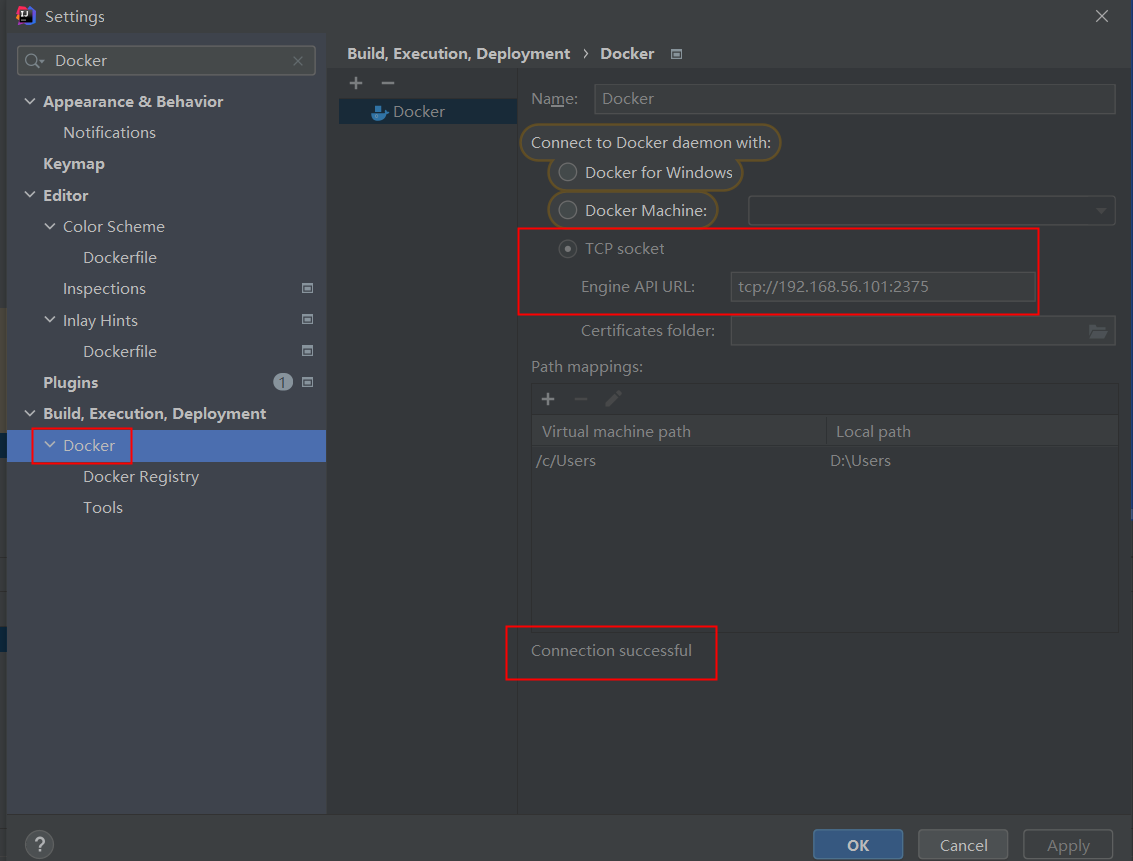
3.2 连接远端Docker环境
通过TCP方式连接,配置好远端虚拟机的ip和第一步开放的端口2375
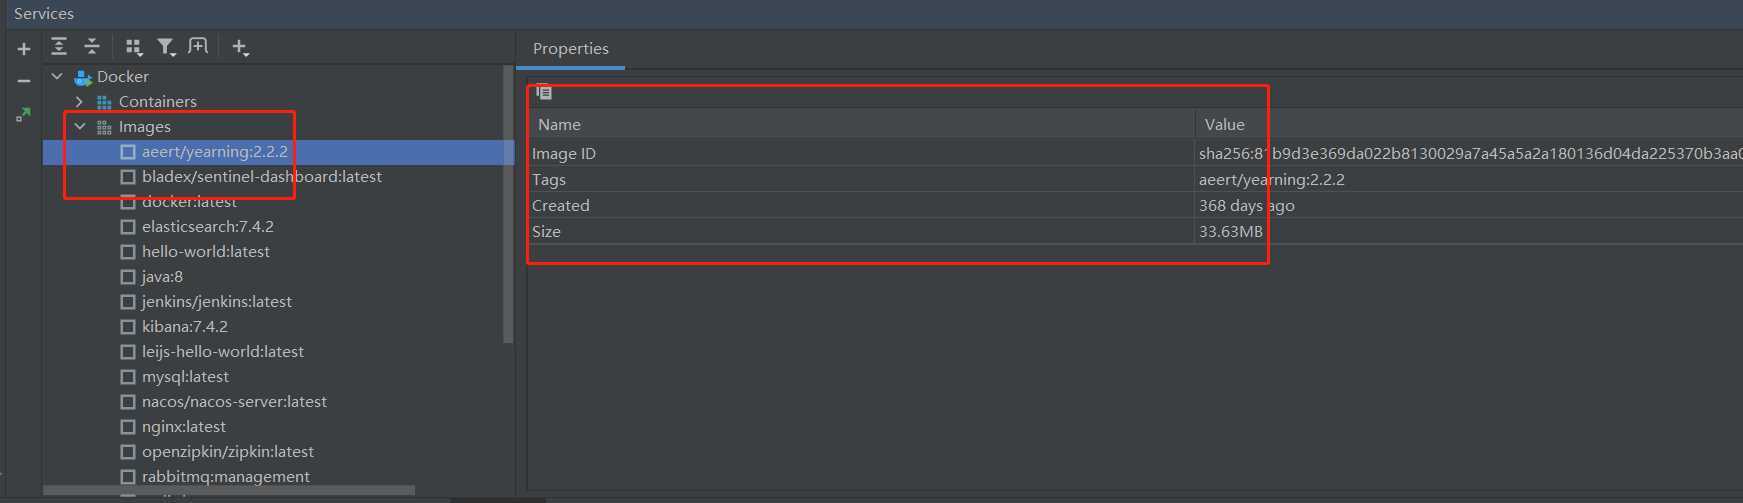
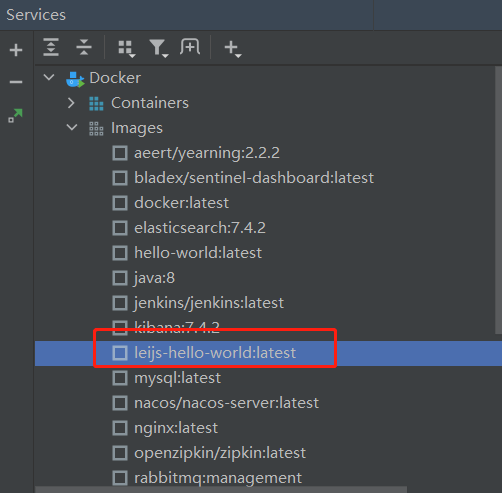
最后,我们能在Services看到我们远程的docker镜像,说明就OK了
3.3 编译我们的代码生成远端镜像
POM文件我们已经进行了相关的配置,只需要mvn install一下就好了,第一次会下载很多依赖的jar包,会比较慢。

之后我们可以远端看到我们的镜像了:

3.4 启动docker容器
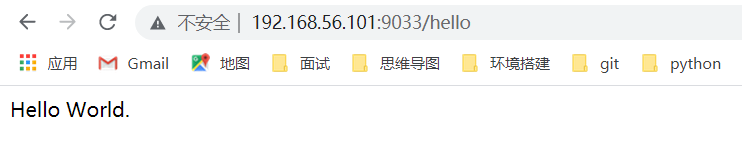
docker run -d -p 9033:9002 leijs-hello-world
容器启动之后,我们再访问我们的HTTP接口:
这是一个本地依赖插件打包的一种方式,实际生产中,我们会依赖Jenkins来做这样的事情。
四、关于Dockerfile
4.1 什么是DockerFile?
是Docker镜像的描述文件,是有一系列命令及参数构成的脚本,用来自定义镜像的构建文件。
4.2 DockerFile文件解析过程

注意:使用dockerfile构建自定义镜像时,最好在一个空目录下构建。
构建指令
# 指定路径
	docker build -f /path/to/a/Dockerfile .
# 当前路径
	docker build -t shykes/myapp .
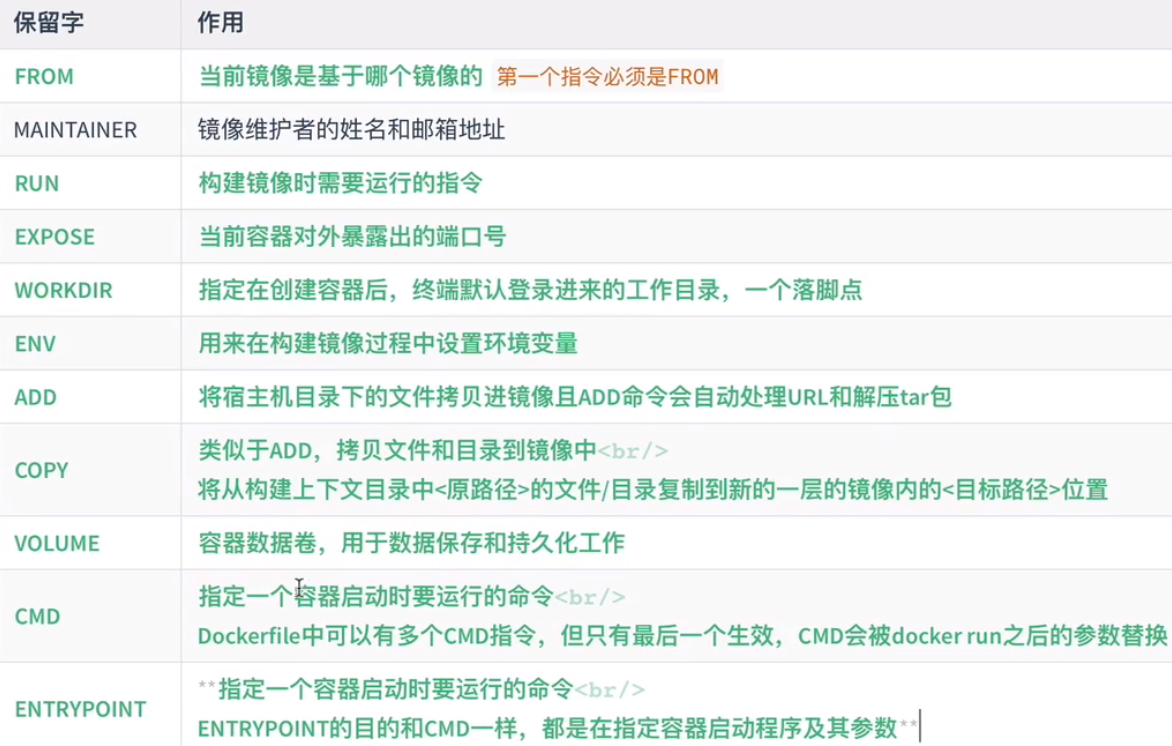
4.3 DockerFile保留指令集
以上就是本篇的主要内容,如果对您有帮助,欢迎评论点赞交流。
本篇文章也发布在博客园:https://www.cnblogs.com/leijisong/p/14965168.html


 1101
1101

 被折叠的 条评论
为什么被折叠?
被折叠的 条评论
为什么被折叠?
 到【灌水乐园】发言


