


逻辑分析:启动项目后,进入到index.jsp页面,点击index.jsp页面的查询员工链接,发出查询员工列表请求,来到empList.jsp页面。
empList.jsp页面使用插件pageHelper完成分页功能。使用pageHelper需要给它几个参数:我要查询第几页;每页查询几条记录;需要连续显示几条记录?
第1步、index.jsp页面如下:
<%@ page language="java" import="java.util.*" pageEncoding="UTF-8"%>
<%
String path = request.getContextPath();
String basePath = request.getScheme()+"://"+request.getServerName()+":"+request.getServerPort()+path+"/";
%>

<!DOCTYPE HTML PUBLIC "-//W3C//DTD HTML 4.01 Transitional//EN">
<html>
  <head>
    <base href="<%=basePath%>">

    <title>My JSP 'index.jsp' starting page</title>


	<link href="static/bootstrap-3.3.7-dist/css/bootstrap.min.css" rel="stylesheet">
 	<!-- 先引入jQuery,再引入js-->
	<script type="text/javascript" src="static/bootstrap-3.3.7-dist/js/jquery.min.js"> </script>
	<script src="static/bootstrap-3.3.7-dist/js/bootstrap.min.js"></script>

  </head>

  <body>
    <a href="empList"><span style="color:red;font-size:24px;">员工查询</span></a> <br/>
    <a href="deptList"><span style="color:red;font-size:24px;">部门查询</span></a>
  </body>
</html>
第2步、在src/main/java下新建包com.cn.controller,然后在该包下新建类EmpController,代码如下:
package com.cn.controller;

import org.springframework.stereotype.Controller;
import org.springframework.web.bind.annotation.RequestMapping;

/**
 * 处理员工CRUD请求的控制层
 * */
@Controller
public class EmpController {
	@RequestMapping("/empList")
	public String toEmpList(){
		return "empList";
	}
}
第3步、在WEB-INF下新建文件夹jsp,然后在jsp下新建empList.jsp页面,页面内容如下:
<%@ page language="java" import="java.util.*" pageEncoding="UTF-8"%>
<!DOCTYPE HTML PUBLIC "-//W3C//DTD HTML 4.01 Transitional//EN">
<html>
<head>
<%
pageContext.setAttribute("path",request.getContextPath());
%>
<title>员工列表</title>
<!-- 推荐以/开始的相对路径(以服务器的根路径为相对路径) -->
<link href="${path}/static/bootstrap-3.3.7-dist/css/bootstrap.min.css" rel="stylesheet" />
<!-- 先引入Jquery,再引入js -->
<script type="text/javascript" src="${path}/static/bootstrap-3.3.7-dist/js/jquery.min.js"></script>
<script src="${path}/static/bootstrap-3.3.7-dist/js/bootstrap.min.js"></script>
</head>
<body>
<div class="container">
<!-- 标题行 -->
<div class="row">
<div class="col-md-12">
<font size="20">SSM-CRUD</font>
</div>
</div>
<!-- 按钮 -->
<div class="row">
<!-- 偏移4列 -->
<div class="col-md-4 col-md-offset-8">
<button type="button" class="btn btn-primary">新增</button>
<button type="button" class="btn btn-danger">删除</button>
</div>
</div>
<!-- 表格 -->
<div class="row">
<div class="col-md-12">
<table class="table table-hover">
<tr>
<th>序号</th>
<th>员工名称</th>
<th>性别</th>
<th>邮箱</th>
<th>所在部门</th>
<th>操作</th>
</tr>
<tr>
<td>1</td>
<td>张三</td>
<td>男</td>
<td>zhangsan@163.com</td>
<td>研发部</td>
<td>
<button type="button" class="btn btn-info btn-sm">
<span class="glyphicon glyphicon-penci" aria-hidden="true"></span>
编辑
</button>
<button type="button" class="btn btn-danger btn-sm">
<span class="glyphicon glyphicon-trash" aria-hidden="true"></span>
删除
</button>
</td>
</tr>
</table>
</div>
</div>
<!-- 分页信息 -->
<div class="row">
<!-- 分页的文字信息 -->
<div class="col-md-6">当前记录数:xxx</div>
<!-- 分页条 -->
<div class="col-md-6">
<nav aria-label="Page navigation">
<ul class="pagination">
<li>
<a href="#">首页</a>
</li>
<li>
<a href="#" aria-label="上一页">
<span aria-hidden="true">«</span>
</a>
</li>
<li><a href="#">1</a></li>
<li><a href="#">2</a></li>
<li><a href="#">3</a></li>
<li><a href="#">4</a></li>
<li><a href="#">5</a></li>
<li>
<a href="#" aria-label="下一页">
<span aria-hidden="true">»</span>
</a>
</li>
<li><a href="#">末页</a></li>
</ul>
</nav>
</div>
</div>
</div>
</body>
</html>
注:逻辑是点击index.jsp页面的员工查询,<a href="empList">会根据empList去Controller中查找名为empList的映射,找到后会执行EmpController中的toEmpList()方法,然后返回empList页面,去/WEB-INF/jsp/empList.jsp返回响应。
执行结果如下:
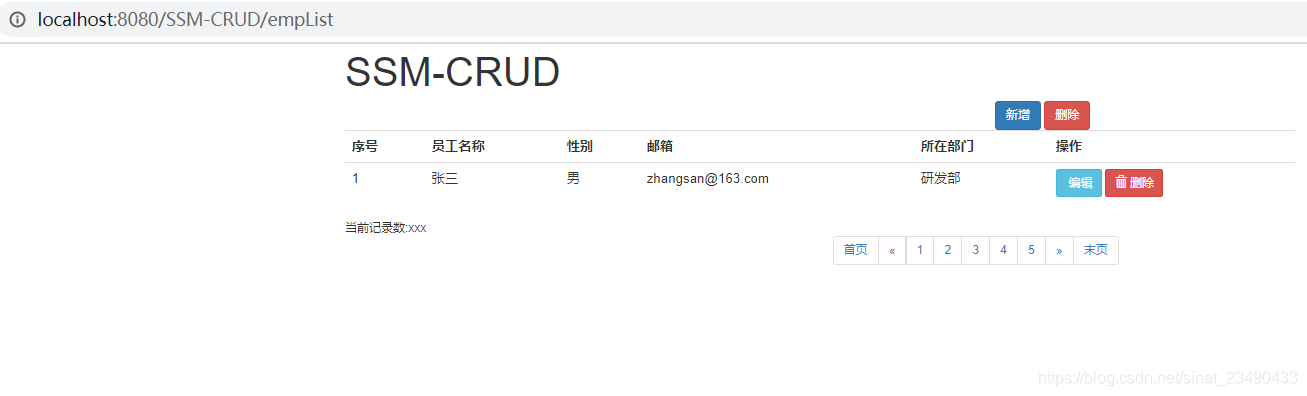
*************************************************************************************************************************************************上面是固定的写法,实际应用中需要去后台查询数据,将后台的数据分页显示到前端页面中
第4步、编写EmpController实现分页,代码如下:
编写前,需要在pom.xml中引入分页插件PageHelper的相关依赖,如下:
    <dependency>
		<groupId>com.github.pagehelper</groupId>
		<artifactId>pagehelper</artifactId>
		<version>5.0.0</version>
	</dependency>
	<dependency>
		<groupId>com.github.miemiedev</groupId>
		<artifactId>mybatis-paginator</artifactId>
		<version>1.2.17</version>
	</dependency>
	<dependency>
		<groupId>com.github.jsqlparser</groupId>
		<artifactId>jsqlparser</artifactId>
		<version>0.9.5</version>
	</dependency>
EmpController分页代码如下:
package com.cn.controller;

import java.util.List;

import org.springframework.beans.factory.annotation.Autowired;
import org.springframework.stereotype.Controller;
import org.springframework.ui.Model;
import org.springframework.web.bind.annotation.RequestMapping;
import org.springframework.web.bind.annotation.RequestParam;

import com.cn.bean.Employee;
import com.cn.service.EmpService;
import com.github.pagehelper.PageHelper;
import com.github.pagehelper.PageInfo;

/**
 * 处理员工CRUD请求的控制层
 * */
@Controller
public class EmpController {
	@Autowired
	private EmpService empService;
	/**
	 * 跳转员工页面
	 * */
	@RequestMapping("/empList")
	public String toEmpList(){
		return "empList";
	}

	/**
	 * 分页查询员工数据
	 * */
	@RequestMapping("/emps")
	public String getEmpByPage(@RequestParam(value="pn",defaultValue="1")Integer pn,Model model){
		//在查询之前传入分页参数:起始页和每页记录数
		PageHelper.startPage(pn, 5);
		//分页查询,需要使用empService
		List<Employee> empList=empService.getAll();
		//使用pageInfo对结果进行包装,只需要将pageInfo交给页面处理即可(pageInfo里面封装了分页的详细信息
		@SuppressWarnings({ "rawtypes", "unchecked" })
		PageInfo pageInfo=new PageInfo(empList,5);
		model.addAttribute("pageInfo", pageInfo);
		//跳转到查询页面
		return "empList";
	}
}
EmpService代码如下:
package com.cn.service;

import java.util.List;

import com.cn.bean.Employee;

/**
 * 员工service
 * */
public interface EmpService {
	//查询所有员工
	public List<Employee> getAll();
}
EmpService实现类EmpServiceImpl代码如下:
package com.cn.service.impl;

import java.util.List;

import org.springframework.beans.factory.annotation.Autowired;
import org.springframework.stereotype.Service;

import com.cn.bean.Employee;
import com.cn.dao.EmployeeMapper;
import com.cn.service.EmpService;

@Service("empService")
public class EmpServiceImpl implements EmpService {

	@Autowired
	private EmployeeMapper empMapper;

	//没有查询条件的,查询所有(带部门信息)
	@Override
	public List<Employee> getAll() {
		return empMapper.selectByExampleWithDept(null);
	}

}
使用mock模拟请求,测试emps是否可以拿到返回值
package com.cn.test;

import java.util.List;

import org.junit.Before;
import org.junit.Test;
import org.junit.runner.RunWith;
import org.springframework.beans.factory.annotation.Autowired;
import org.springframework.test.context.ContextConfiguration;
import org.springframework.test.context.junit4.SpringJUnit4ClassRunner;
import org.springframework.test.context.web.WebAppConfiguration;
import org.springframework.test.web.servlet.MockMvc;
import org.springframework.test.web.servlet.MvcResult;
import org.springframework.test.web.servlet.request.MockMvcRequestBuilders;
import org.springframework.test.web.servlet.setup.MockMvcBuilders;
import org.springframework.web.context.WebApplicationContext;

import com.cn.bean.Employee;
import com.github.pagehelper.PageInfo;

/**
 * 使用spring的单元测试来进行模拟发送请求的测试
 * */
@RunWith(SpringJUnit4ClassRunner.class)
@WebAppConfiguration
@ContextConfiguration(locations={"classpath:applicationContext.xml","classpath:spring-mvc.xml"})
public class MVCTest {
	//springMvc的IOC容器
	@Autowired
	private WebApplicationContext context;
	//模拟mvc请求
	private MockMvc mockMvc;
	@Before
	public void setup(){
		mockMvc=MockMvcBuilders.webAppContextSetup(context).build();
	}
	@Test
	public void testPage() throws Exception{
		//模拟请求拿到返回值
		MvcResult result=mockMvc.perform(MockMvcRequestBuilders.get("/emps").param("pn", "2")).andReturn();
		//请求域中有pageInfo
		PageInfo page=(PageInfo) result.getRequest().getAttribute("pageInfo");
		System.out.println(page.getPageNum());
		System.out.println(page.getTotal());

		//得到员工数据
		List<Employee> empList=page.getList();
		for(Employee employee:empList){
			System.out.println("ID:"+employee.getEmpId()+"员工名称:"+employee.getEmpName());
		}
	}
}
证明pageInfo中拿到值,那么再使用bootstrap的删格系统快速搭建简单的界面,页面empList.jsp代码如下:
<%@ page language="java" import="java.util.*" pageEncoding="UTF-8"%>
<%@ taglib uri="http://java.sun.com/jsp/jstl/core" prefix="c" %>
<!DOCTYPE HTML PUBLIC "-//W3C//DTD HTML 4.01 Transitional//EN">
<html>
<head>
<%
pageContext.setAttribute("path",request.getContextPath());
%>
<title>员工列表</title>
<!-- 推荐以/开始的相对路径(以服务器的根路径为相对路径) -->
<link href="${path}/static/bootstrap-3.3.7-dist/css/bootstrap.min.css" rel="stylesheet" />
<!-- 先引入Jquery,再引入js -->
<script type="text/javascript" src="${path}/static/bootstrap-3.3.7-dist/js/jquery.min.js"></script>
<script src="${path}/static/bootstrap-3.3.7-dist/js/bootstrap.min.js"></script>
</head>
<body>
<div class="container">
<!-- 标题行 -->
<div class="row">
<div class="col-md-12">
<font size="20">SSM-CRUD</font>
</div>
</div>
<!-- 按钮 -->
<div class="row">
<!-- 偏移4列 -->
<div class="col-md-4 col-md-offset-8">
<button type="button" class="btn btn-primary">新增</button>
<button type="button" class="btn btn-danger">删除</button>
</div>
</div>
<!-- 表格 -->
<div class="row">
<div class="col-md-12">
<table class="table table-hover">
<tr>
<th>序号</th>
<th>员工名称</th>
<th>性别</th>
<th>邮箱</th>
<th>所在部门</th>
<th>操作</th>
</tr>
<c:forEach items="${pageInfo.list}" var="emp">
<tr>
<td>${emp.empId}</td>
<td>${emp.empName}</td>
<td>${emp.gender=="M"?"男":"女"}</td>
<td>${emp.email}</td>
<td>${emp.department.deptName}</td>
<td>
<button type="button" class="btn btn-info btn-sm">
<span class="glyphicon glyphicon-penci" aria-hidden="true"></span>
编辑
</button>
<button type="button" class="btn btn-danger btn-sm">
<span class="glyphicon glyphicon-trash" aria-hidden="true"></span>
删除
</button>
</td>
</tr>
</c:forEach>
</table>
</div>
</div>
<!-- 分页信息 -->
<div class="row">
<!-- 分页的文字信息 -->
<div class="col-md-6">
当前第:${pageInfo.pageNum}页,总共:${pageInfo.pages}页,总共:${pageInfo.total}条记录
</div>
<!-- 分页条 -->
<div class="col-md-6">
<nav aria-label="Page navigation">
<ul class="pagination">
<li>
<a href="${path}/emps?pn=1">首页</a>
</li>
<!-- 判断是否有上一页 -->
<c:if test="${pageInfo.hasPreviousPage }">
<li>
<a href="${path}/emps?pn=${pageInfo.pageNum-1}" aria-label="Previous">
<span aria-hidden="true">«</span>
</a>
</li>
</c:if>
<!-- 循环遍历需要连续显示的页数 -->
<c:forEach items="${pageInfo.navigatepageNums }" var="page_Num">
<!-- 判断是否是当前页,如果是赋予li标签active属性 -->
<c:if test="${page_Num==pageInfo.pageNum}">
<li class="active">
<a href="#">${page_Num}</a>
</li>
</c:if>
<c:if test="${page_Num!=pageInfo.pageNum}">
<li>
<a href="${path}/emps?pn=${page_Num}">${page_Num}</a>
</li>
</c:if>
</c:forEach>
<!-- 判断是否有下一页 -->
<c:if test="${pageInfo.hasNextPage}">
<li>
<a href="${path}/emps?pn=${pageInfo.pageNum+1}" aria-label="Next">
<span aria-hidden="true">»</span>
</a>
</li>
</c:if>
<li><a href="${path}/emps?pn=${pageInfo.pages}">末页</a></li>
</ul>
</nav>
</div>
</div>
</div>
</body>
</html>
注意:一定要在mybatis的配置文件mybatis-conf.xml中配置分页插件
<?xml version="1.0" encoding="UTF-8"?>
<!DOCTYPE configuration
  PUBLIC "-//mybatis.org//DTD Config 3.0//EN"
  "http://mybatis.org/dtd/mybatis-3-config.dtd">
<configuration>
    <settings>
        <!-- 开启驼峰命名规则,详细请参见官方文档 -->
        <setting name="mapUnderscoreToCamelCase" value="true"/>
    </settings>
    <typeAliases>
        <!-- 为类起别名 -->
        <package name="com.cn.pojo"/>
    </typeAliases>

    <!-- 分页插件 -->
	<plugins>
		<!-- com.github.pagehelper为PageHelper类所在包名 -->
		<plugin interceptor="com.github.pagehelper.PageInterceptor">

		</plugin>
	</plugins>
</configuration>
运行项目后,页面效果如下

*************************************************************************************************************************************************至此,页面的查询功能基本完成,分页查询也已实现


 被折叠的 条评论
为什么被折叠?
被折叠的 条评论
为什么被折叠?
 到【灌水乐园】发言


