


1、装备工作
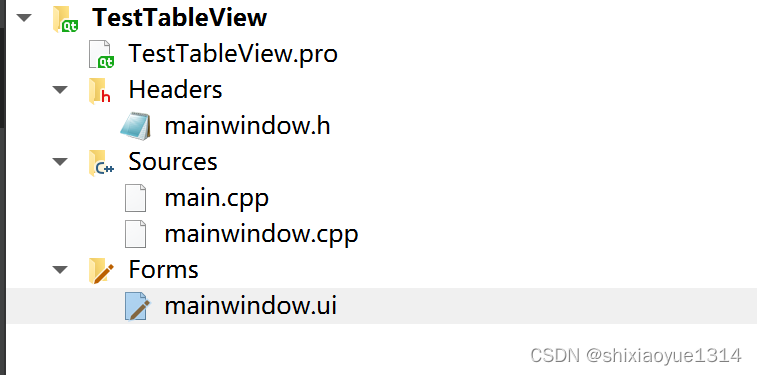
1.1、创建一个Qt工程
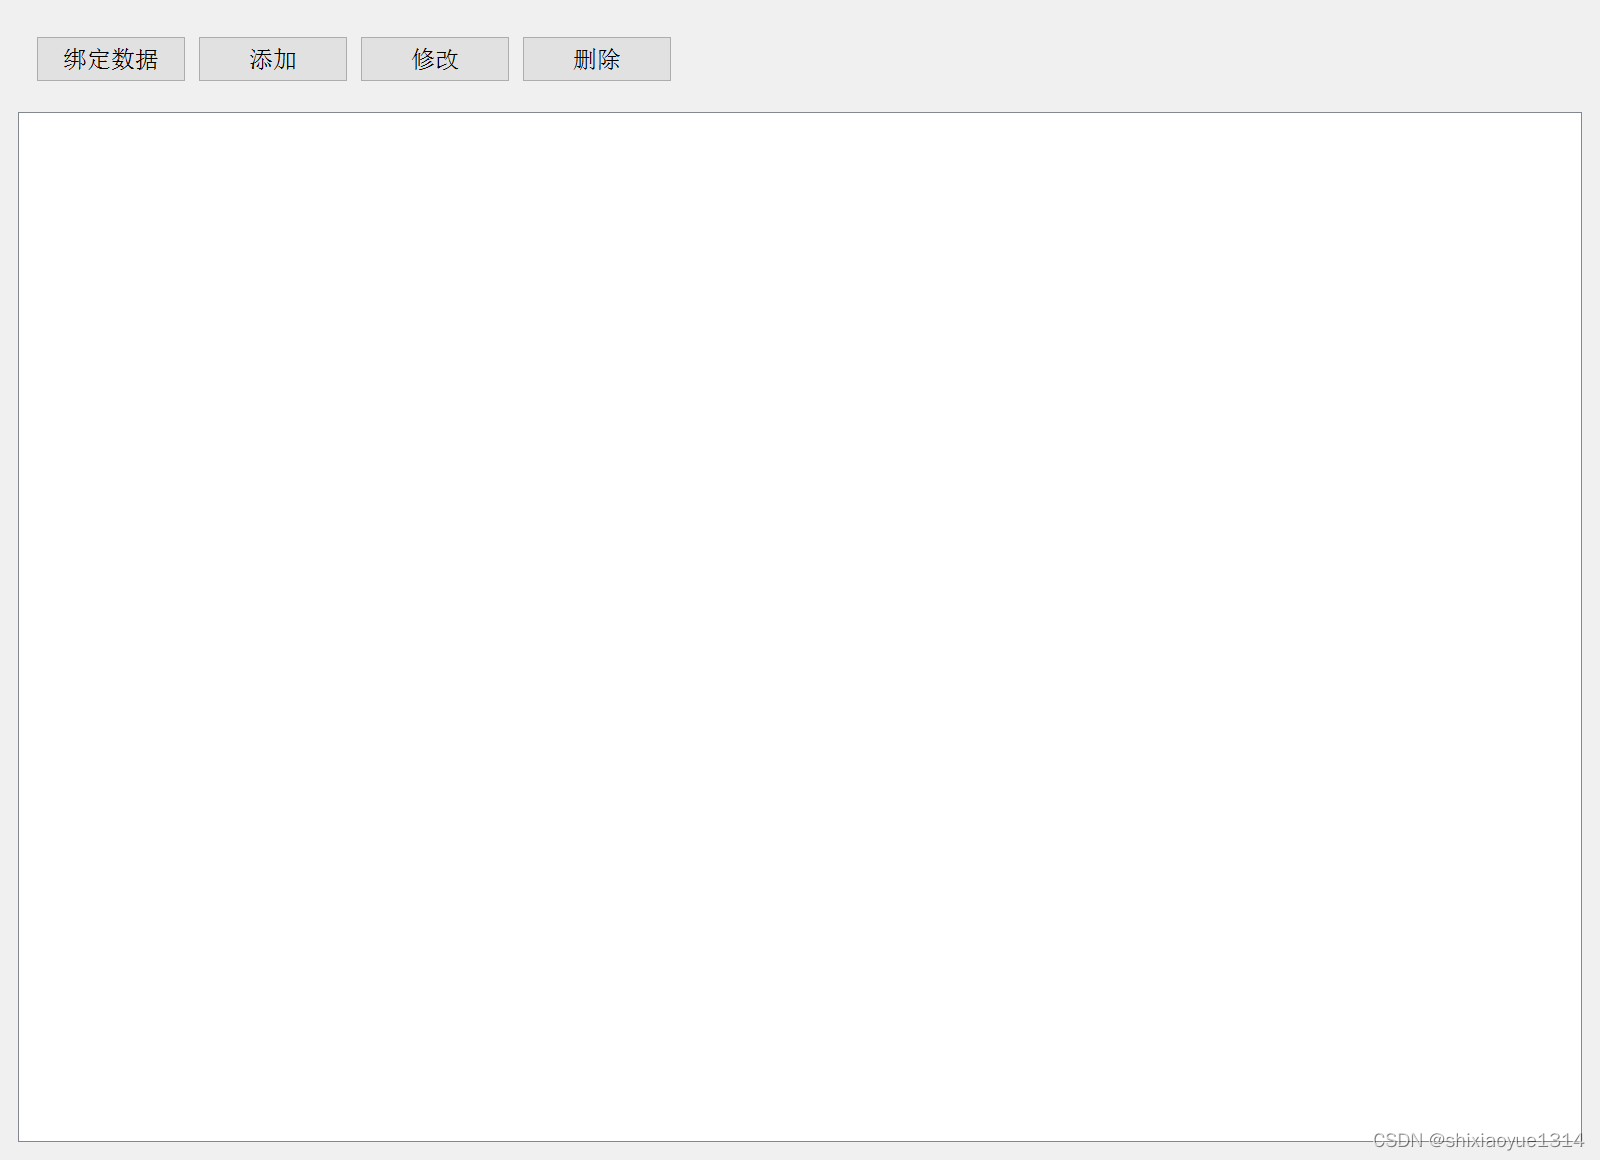
1.2、在mainwindow.ui中添加控件

运行效果:
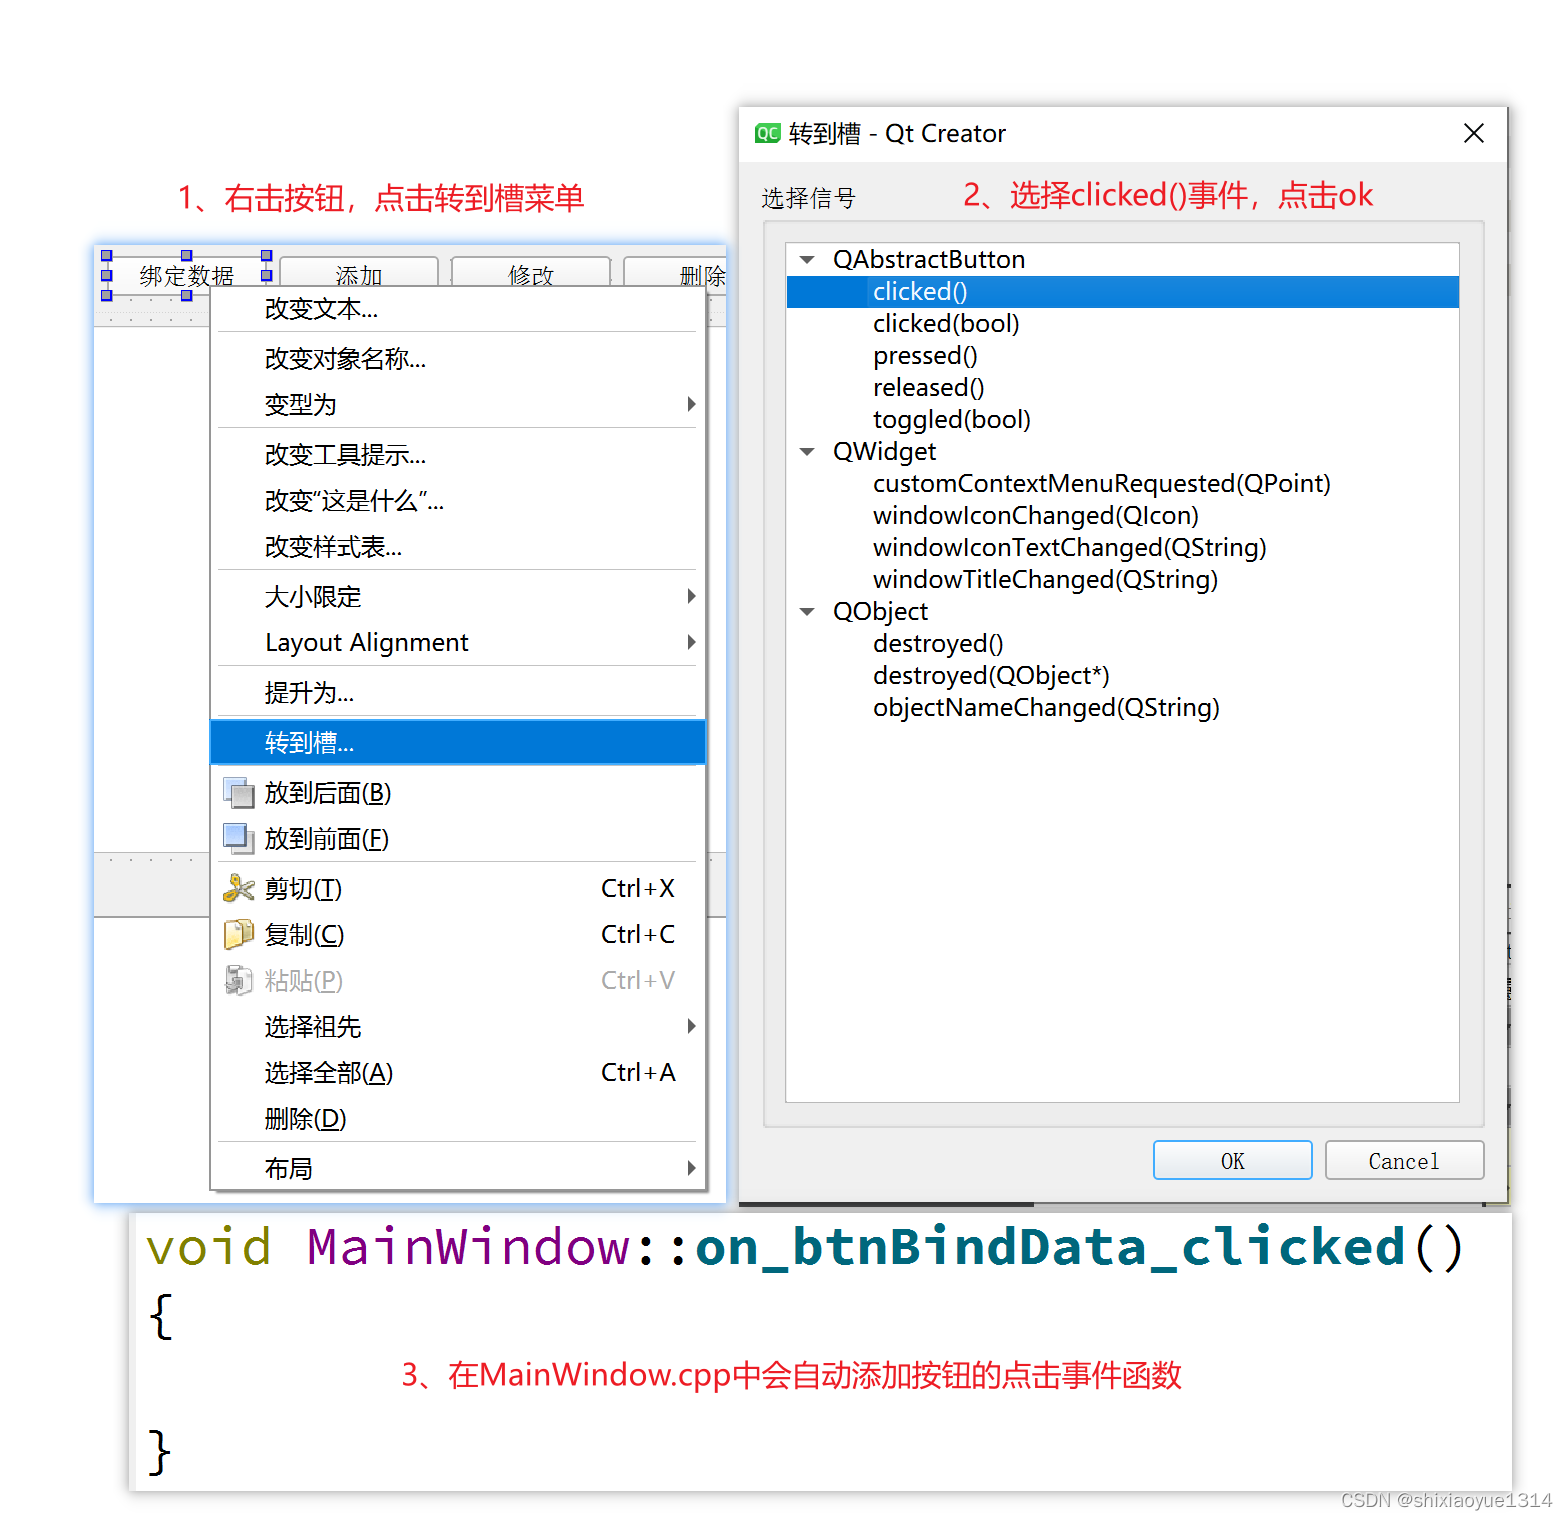
1.3、给按钮添加点击事件
给四个按钮都加上点击事件
 2、创建数据结构
使用结构体或类定义自己的数据结构
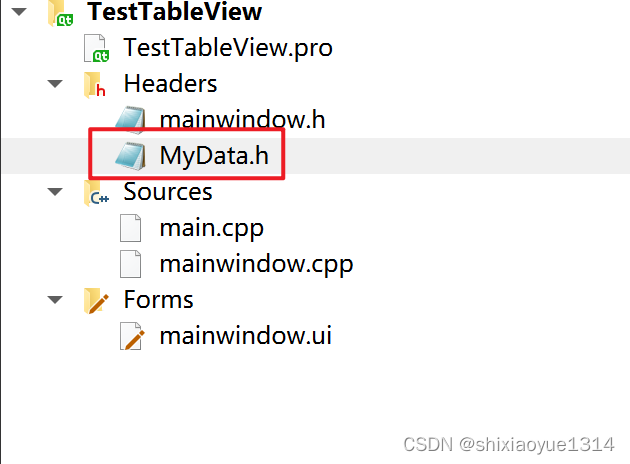
2.1、新建MyData.h文件
2.2、声明数据结构体
在MyData.h中添加如下代码
#ifndef MYDATA_H
#define MYDATA_H
#include<QString>
struct MyData{
    int index;
    QString name;
    QString sex;
};
#endif // MYDATA_H
3、创建TableModel
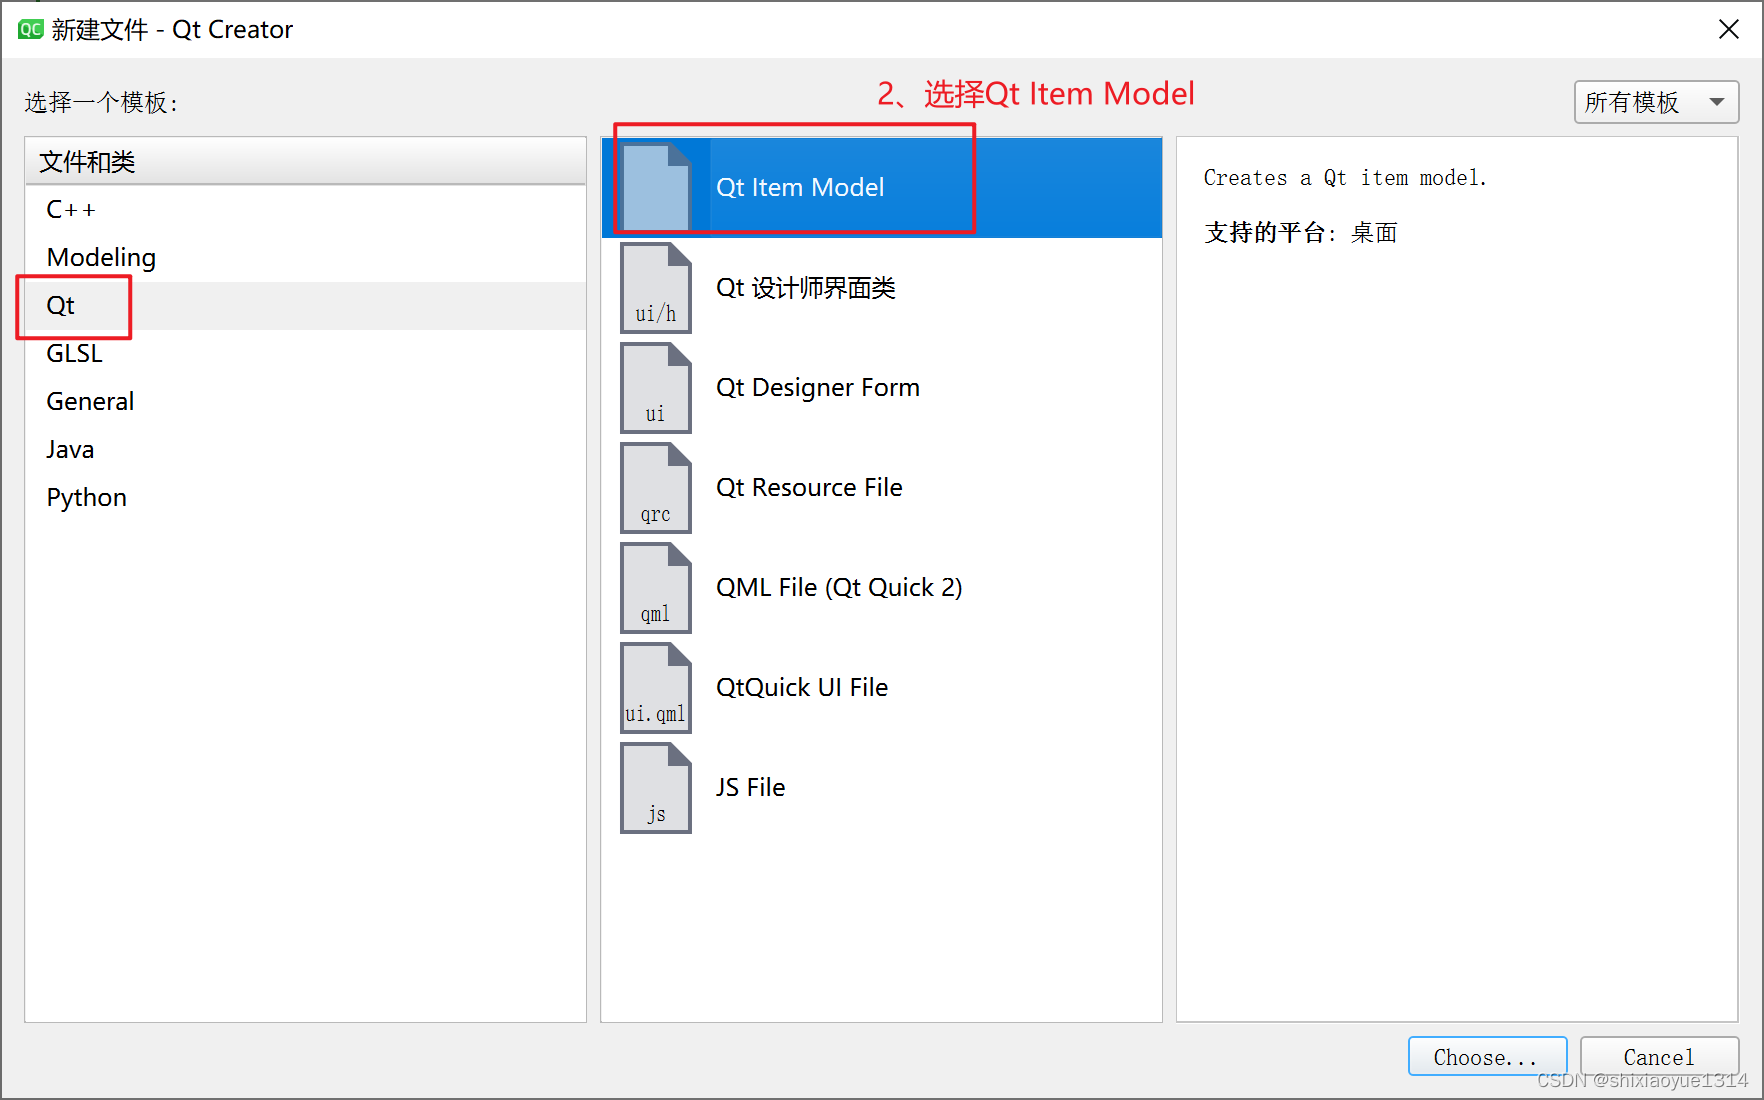
3.1、新建Model类
新建model类文件,并继承
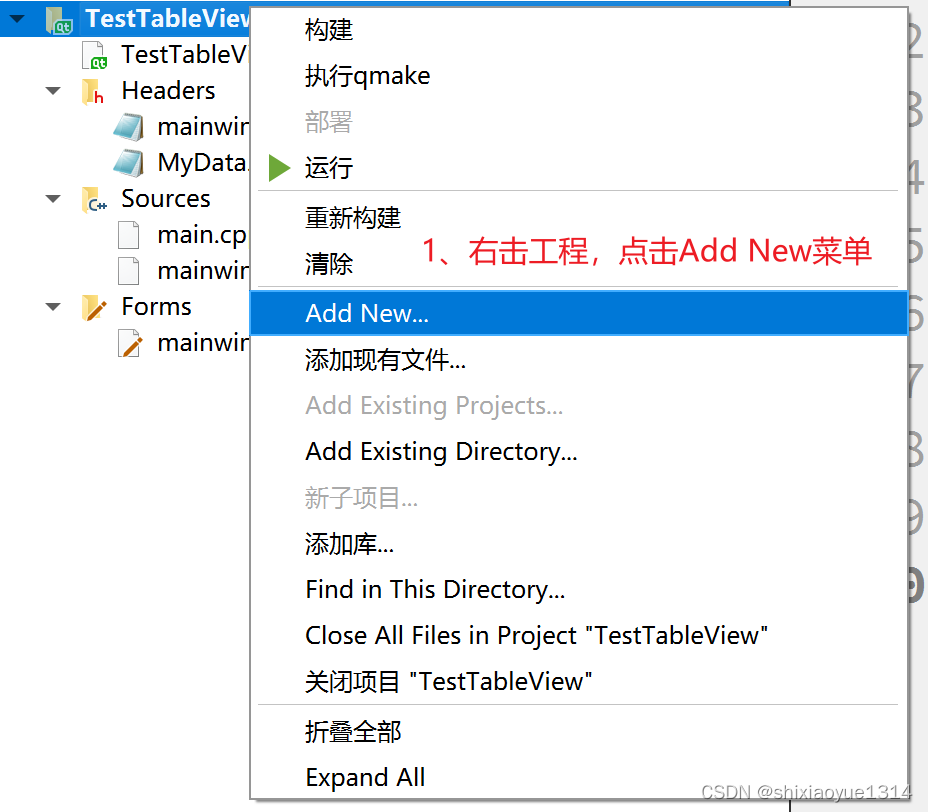
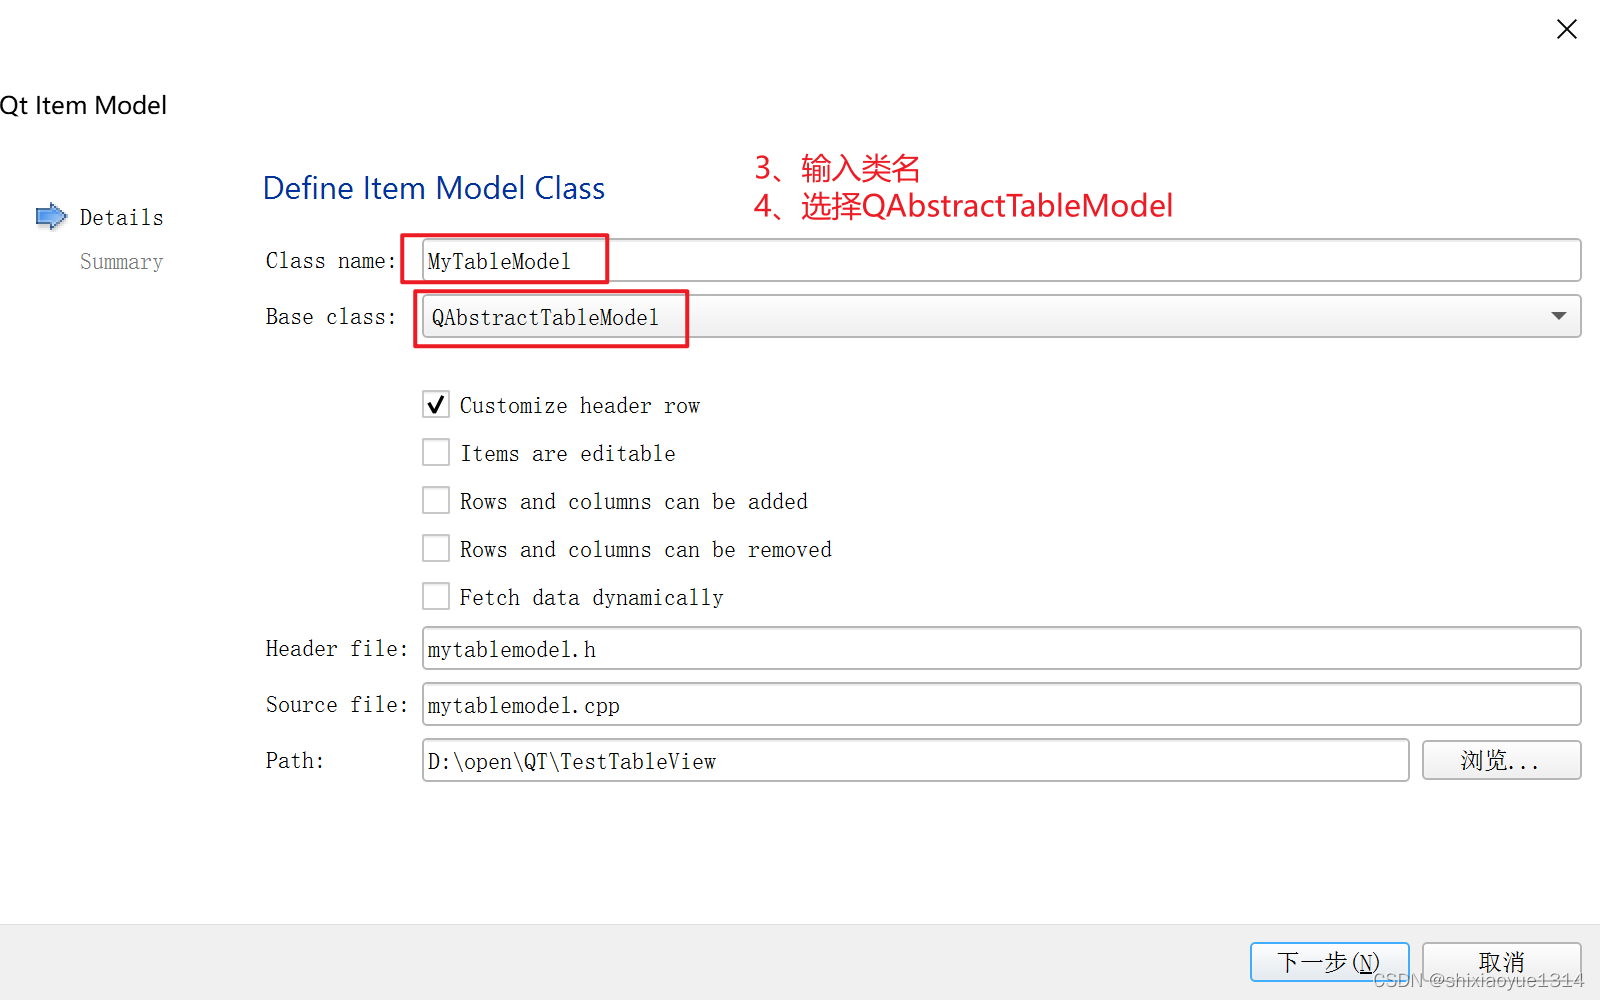
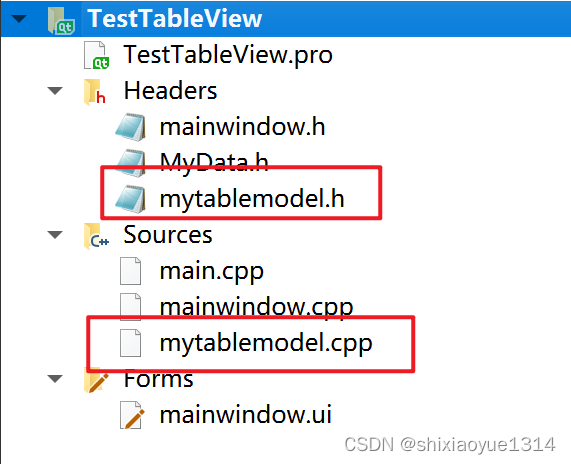
工程目录中会新增mytablemodel.h和mytablemodel.cpp文件
3.2、引用MyData
在mydatablemodel.h中引用MyData.h文件,并声明数据集合
#ifndef MYTABLEMODEL_H
#define MYTABLEMODEL_H

#include <QAbstractTableModel>
#include "MyData.h"
class MyTableModel : public QAbstractTableModel
{
    Q_OBJECT

public:
    explicit MyTableModel(QObject *parent = nullptr);

    // Header:
    QVariant headerData(int section, Qt::Orientation orientation, int role = Qt::DisplayRole) const override;

    // Basic functionality:
    int rowCount(const QModelIndex &parent = QModelIndex()) const override;
    int columnCount(const QModelIndex &parent = QModelIndex()) const override;

    QVariant data(const QModelIndex &index, int role = Qt::DisplayRole) const override;

private:
    QVector<MyData> m_list;
};

#endif // MYTABLEMODEL_H
3.3、重写函数
3.3.1、重写 headerData函数
QVariant MyTableModel::headerData(int section, Qt::Orientation orientation, int role) const
{
    // FIXME: Implement me!
    if (role == Qt::SizeHintRole)
            return QSize(0, 0);
        return QVariant();
}
3.3.2、重写rowCount
int MyTableModel::rowCount(const QModelIndex &parent) const
{
    if (parent.isValid())
        return 0;

    // FIXME: Implement me!
    return m_list.count();
}
3.3.3、重写columnCount
int MyTableModel::columnCount(const QModelIndex &parent) const
{
    if (parent.isValid())
        return 0;

    // FIXME: Implement me!
    return 4; // 返回列数,和结构体属性个数相关
}
3.3.4、重写data
QVariant MyTableModel::data(const QModelIndex &index, int role) const
{
    if (!index.isValid())
        return QVariant();

    // FIXME: Implement me!
    if(role == Qt::DisplayRole || role == Qt::EditRole)
    {

        //DisplayRole返回显示的文本值
        const int row = index.row();
        switch(index.column())
        {
          case 0: return m_list.at(row).index; //序号
          case 1: return m_list.at(row).name;  //名字
          case 2: return m_list.at(row).sex;   //性别
          case 3: return m_list.at(row).age;   //年龄
        }

    }
    return QVariant();
}
3.4、新增绑定数据函数
在MyTableModel类中添加bindData函数
mytablemodel.h中声明:
void bindData(QVector<MyData> list);mytablemodel.cpp中实现:
void MyTableModel::bindData(QVector<MyData> list){
    beginResetModel();
    m_list=list;
    endResetModel();
}
4、使用自定义TableModel
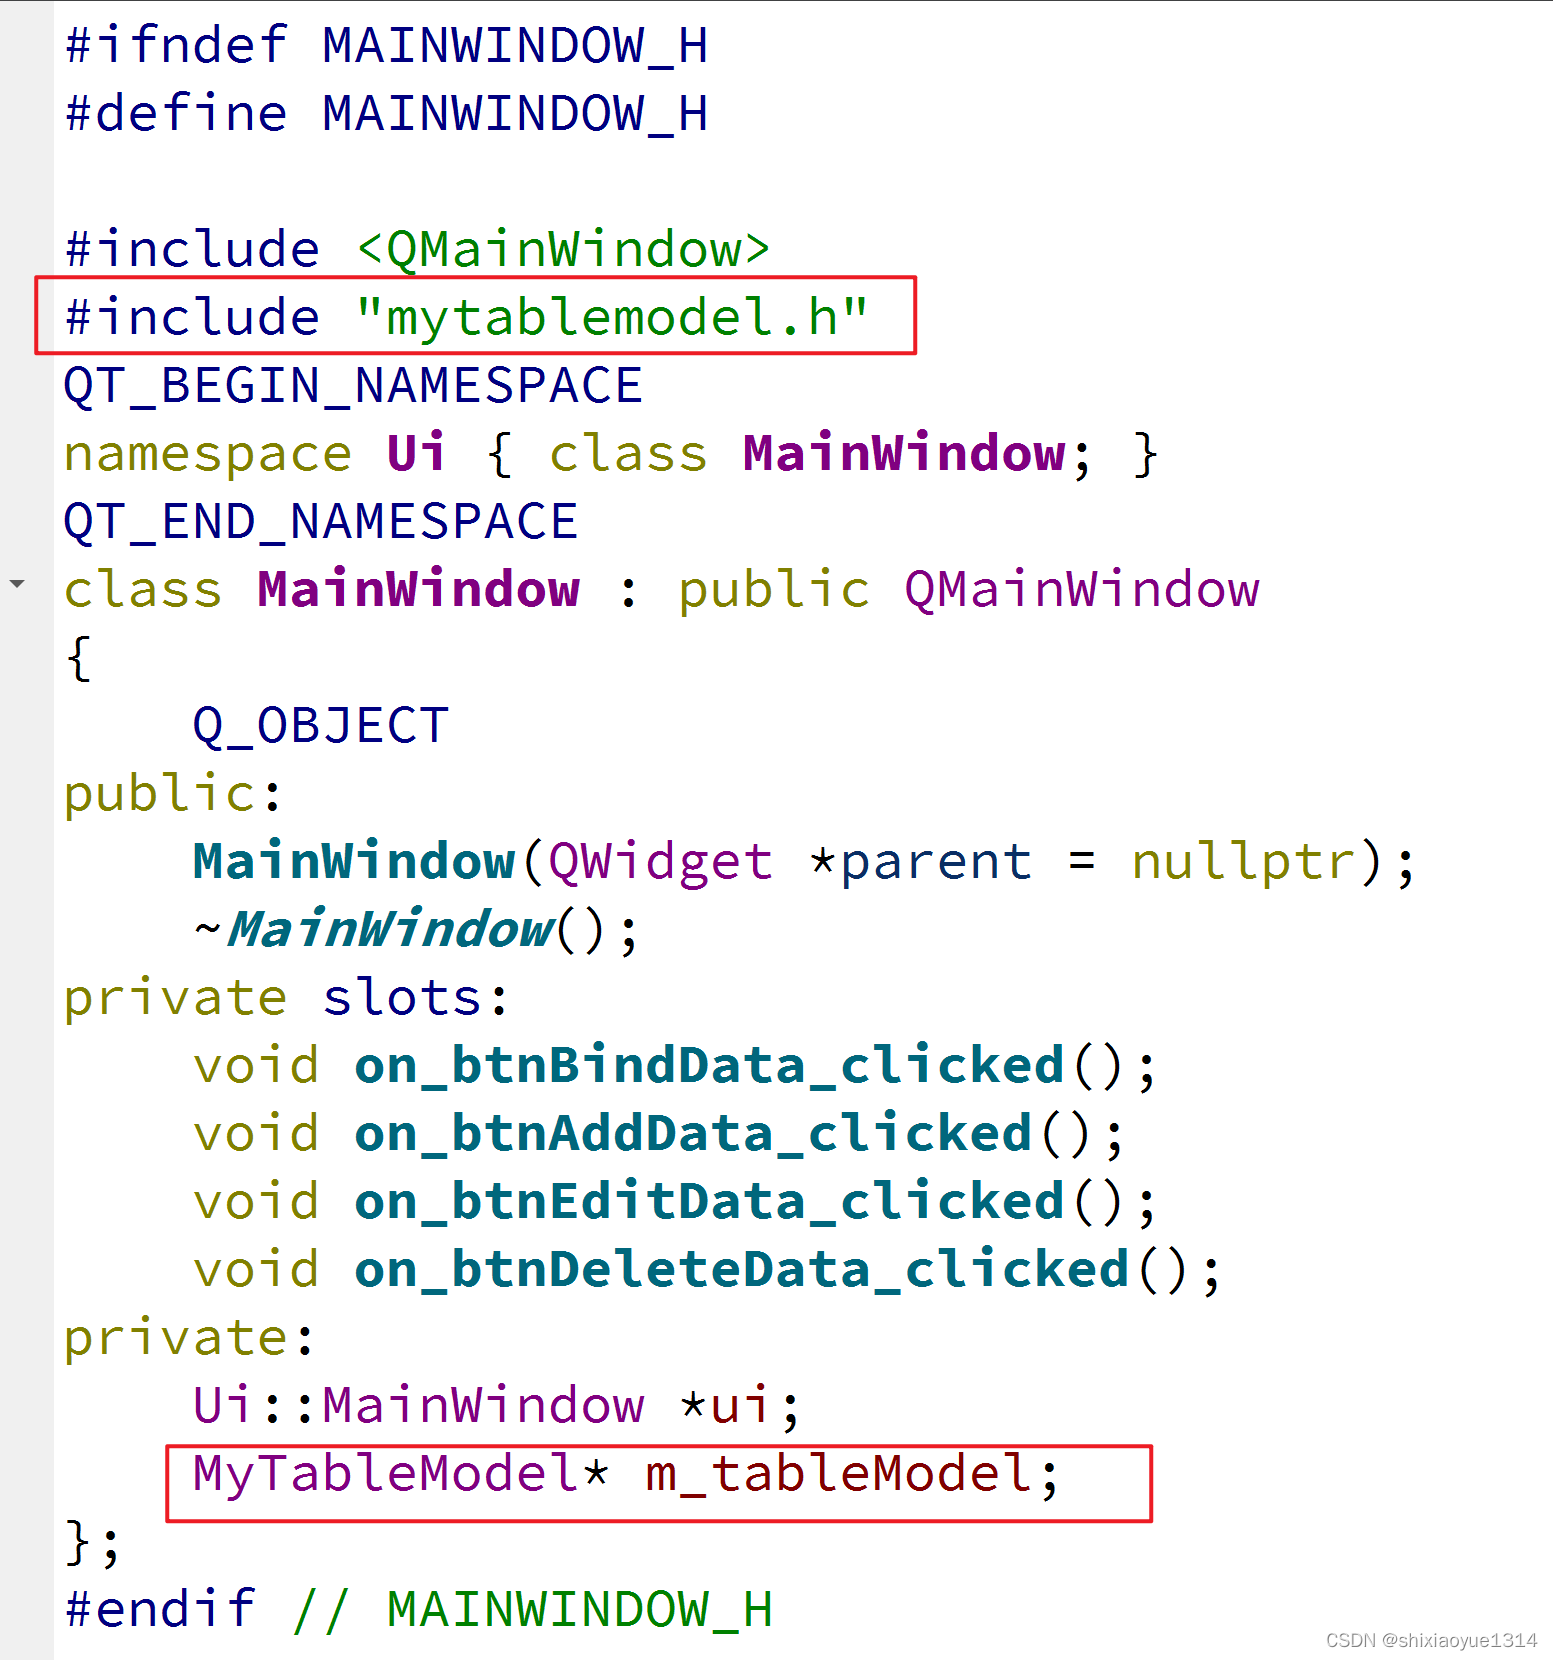
4.1、引用MyTableModel
在mainwindow.h文件中引用MyTableModel头文件,并声明MyTableModel对象。
4.2、创建并绑定TableModel
在MainWindow构造函数中创建MyTableModel对象,并绑定的UI的tableView对象上。
MainWindow::MainWindow(QWidget *parent)
    : QMainWindow(parent)
    , ui(new Ui::MainWindow)
{
    ui->setupUi(this);
    //创建MyTableModel对象
    m_tableModel = new MyTableModel(this);
    //绑定的UI上
    ui->tableView->setModel(m_tableModel);
}
4.3、创建模拟数据并绑定
在绑定数据的按钮事件中,创建模拟数据。并把数据设置到TableMode对象上。
void MainWindow::on_btnBindData_clicked()
{
QVector<MyData> list;
for(int i=0;i<10;i++){
MyData data;
data.index = i+1;
data.name = "张三";
data.age = 18+i;
data.sex = "男";
list.push_back(data);
}
m_tableModel->bindData(list);
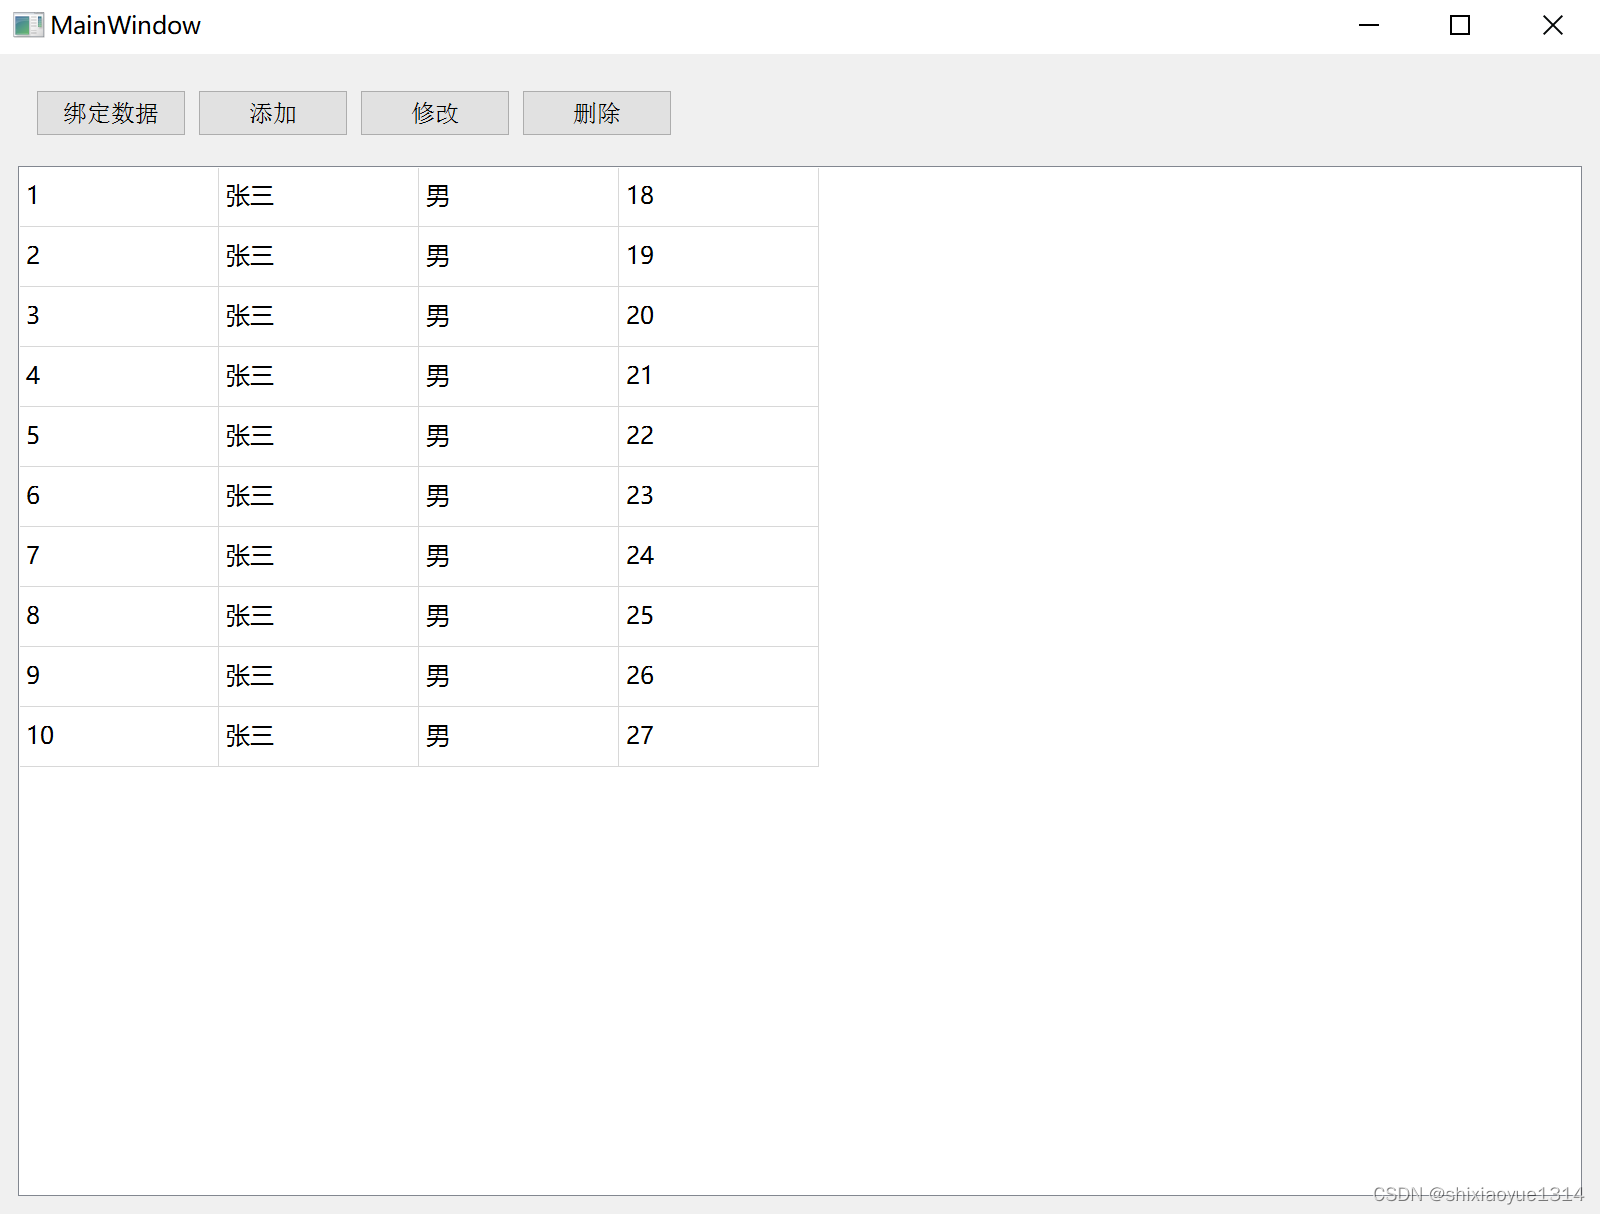
}运行程序,点击【绑定数据】按钮:
5、其它
5.1、设置表头
5.1.1、声明表头集合
在MyTableModel.h文件中声明:
QList<QString> m_headers;5.1.2、重写setHeaderData函数
在MyTableModel.h文件中声明:
bool setHeaderData(int section, Qt::Orientation orientation, const QVariant &value, int role = Qt::EditRole) override;在MyTableModel.cpp文件中实现:
bool MyTableModel::setHeaderData(int section, Qt::Orientation orientation, const QVariant &value, int role)
{
    if (orientation == Qt::Horizontal && section>=0 && section<m_headers.count()) {
        m_headers[section] = value.toString();
        emit headerDataChanged(orientation, section, section);
        return true;
    }
    return false;
}
5.1.3、声明另一个setHeaderData函数
在MyTableModel.h文件中声明:
void setHeaderData(const QList<QString> &headers);在MyTableModel.cpp文件中实现:
void MyTableModel::setHeaderData(const QList<QString> &headers){

    m_headers = headers;
    emit headerDataChanged(Qt::Horizontal, 0, m_headers.count()-1);
}
5.1.4、修改headerData函数
修改MyTableModel.cpp文件中headerData函数:
QVariant MyTableModel::headerData(int section, Qt::Orientation orientation, int role) const
{
    // FIXME: Implement me!
    //注意,如果用了sortproxymodel,这个section是实际数据的index,不是界面看到的index
        //区分横表头和竖表头
    if(orientation == Qt::Horizontal){
        //这里我们只设置居中对齐和文本
        if (role == Qt::DisplayRole){
            //这里把横项列表头的文本设计为可以设置的
            if(section>=0 && section<m_headers.count())
                return m_headers.at(section);
            return QString("Col %1").arg(section + 1);
        }else if(role == Qt::TextAlignmentRole){
            return Qt::AlignCenter;
        }
    }else{
        if (role == Qt::DisplayRole)
            return QString("%1").arg(section + 1);
        else if(role == Qt::TextAlignmentRole)
            return Qt::AlignCenter;
    }
    return QVariant();
}
5.1.5、修改columnCount函数
int MyTableModel::columnCount(const QModelIndex &parent) const
{
if (parent.isValid())
return 0;
// FIXME: Implement me!
return m_headers.count(); // 返回列数,和结构体属性个数相关
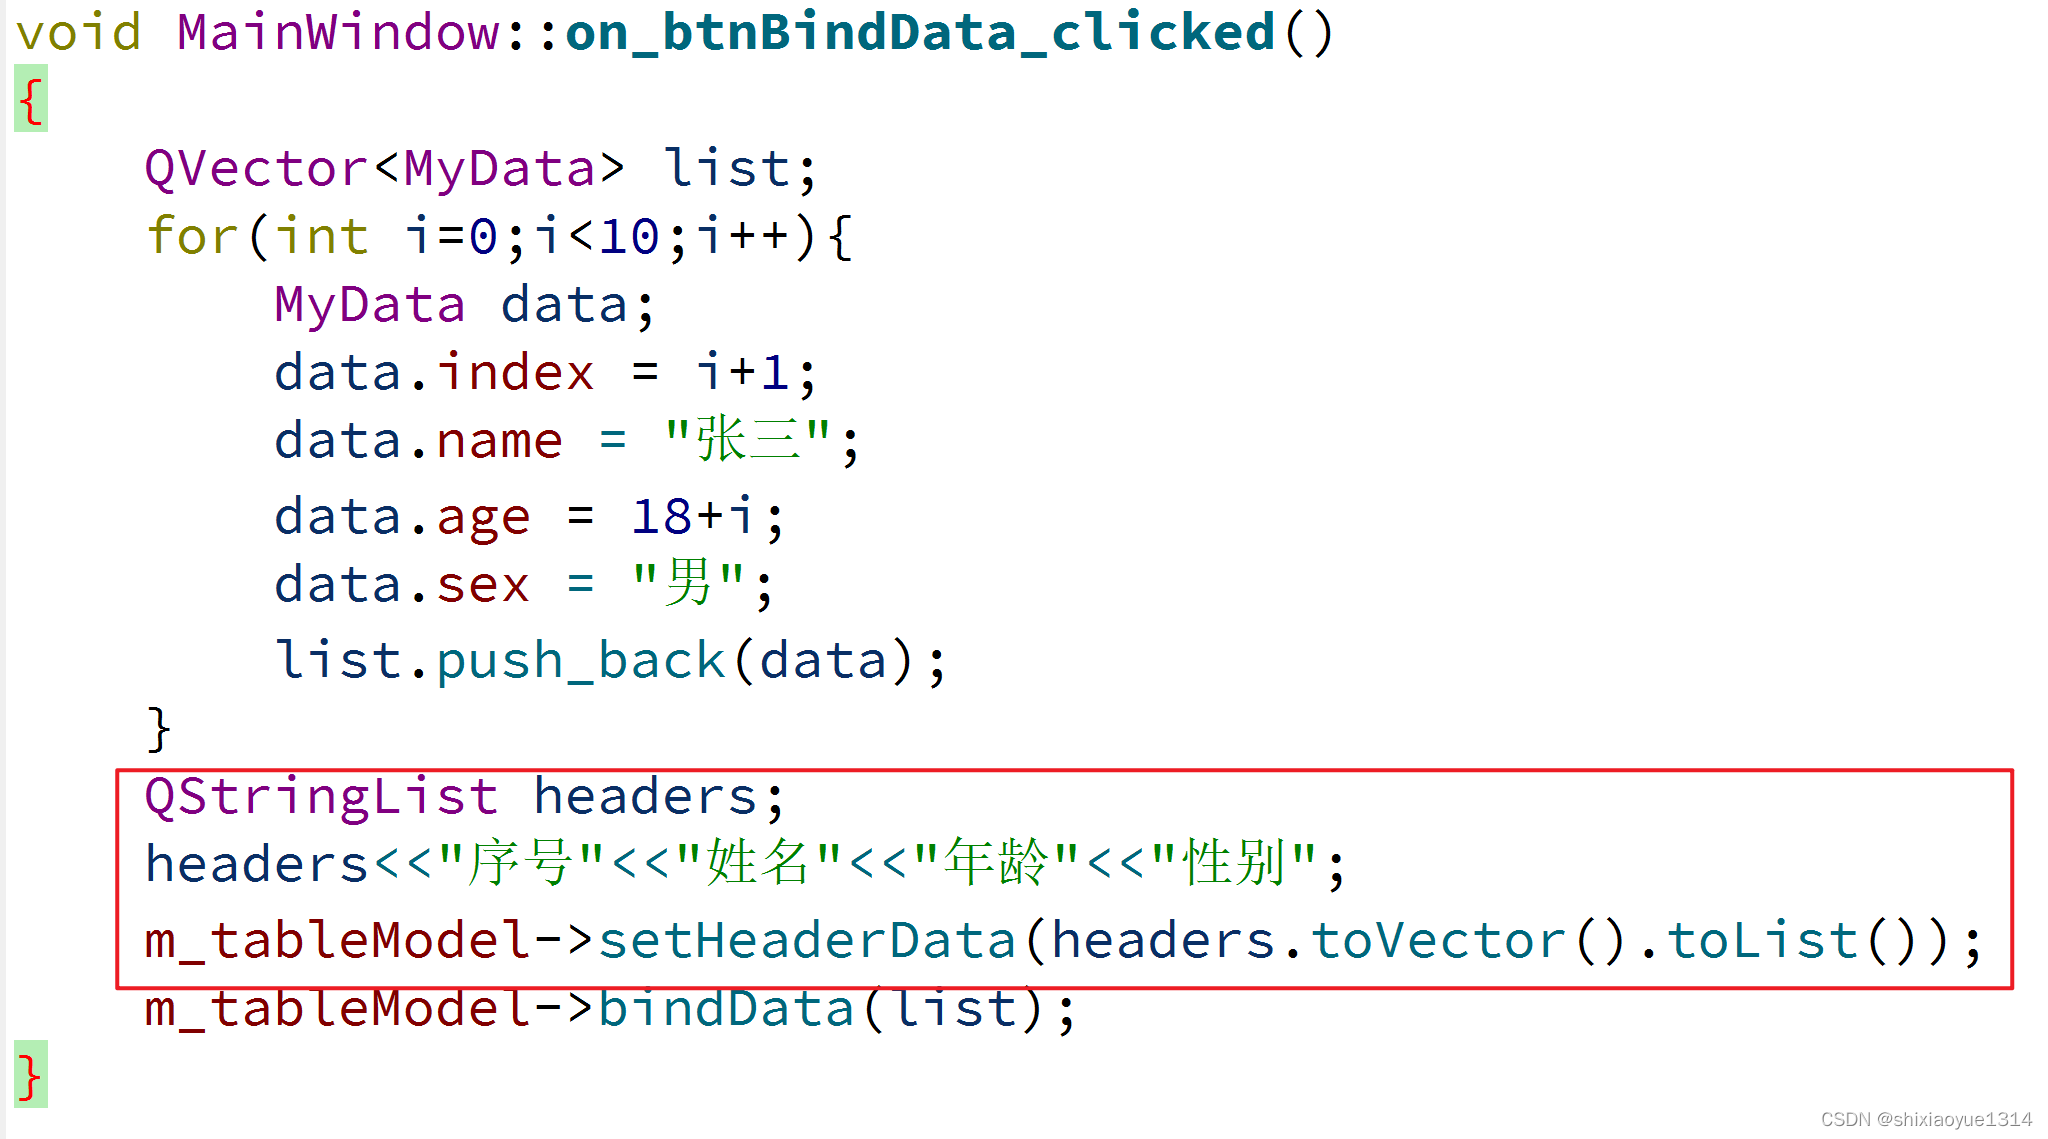
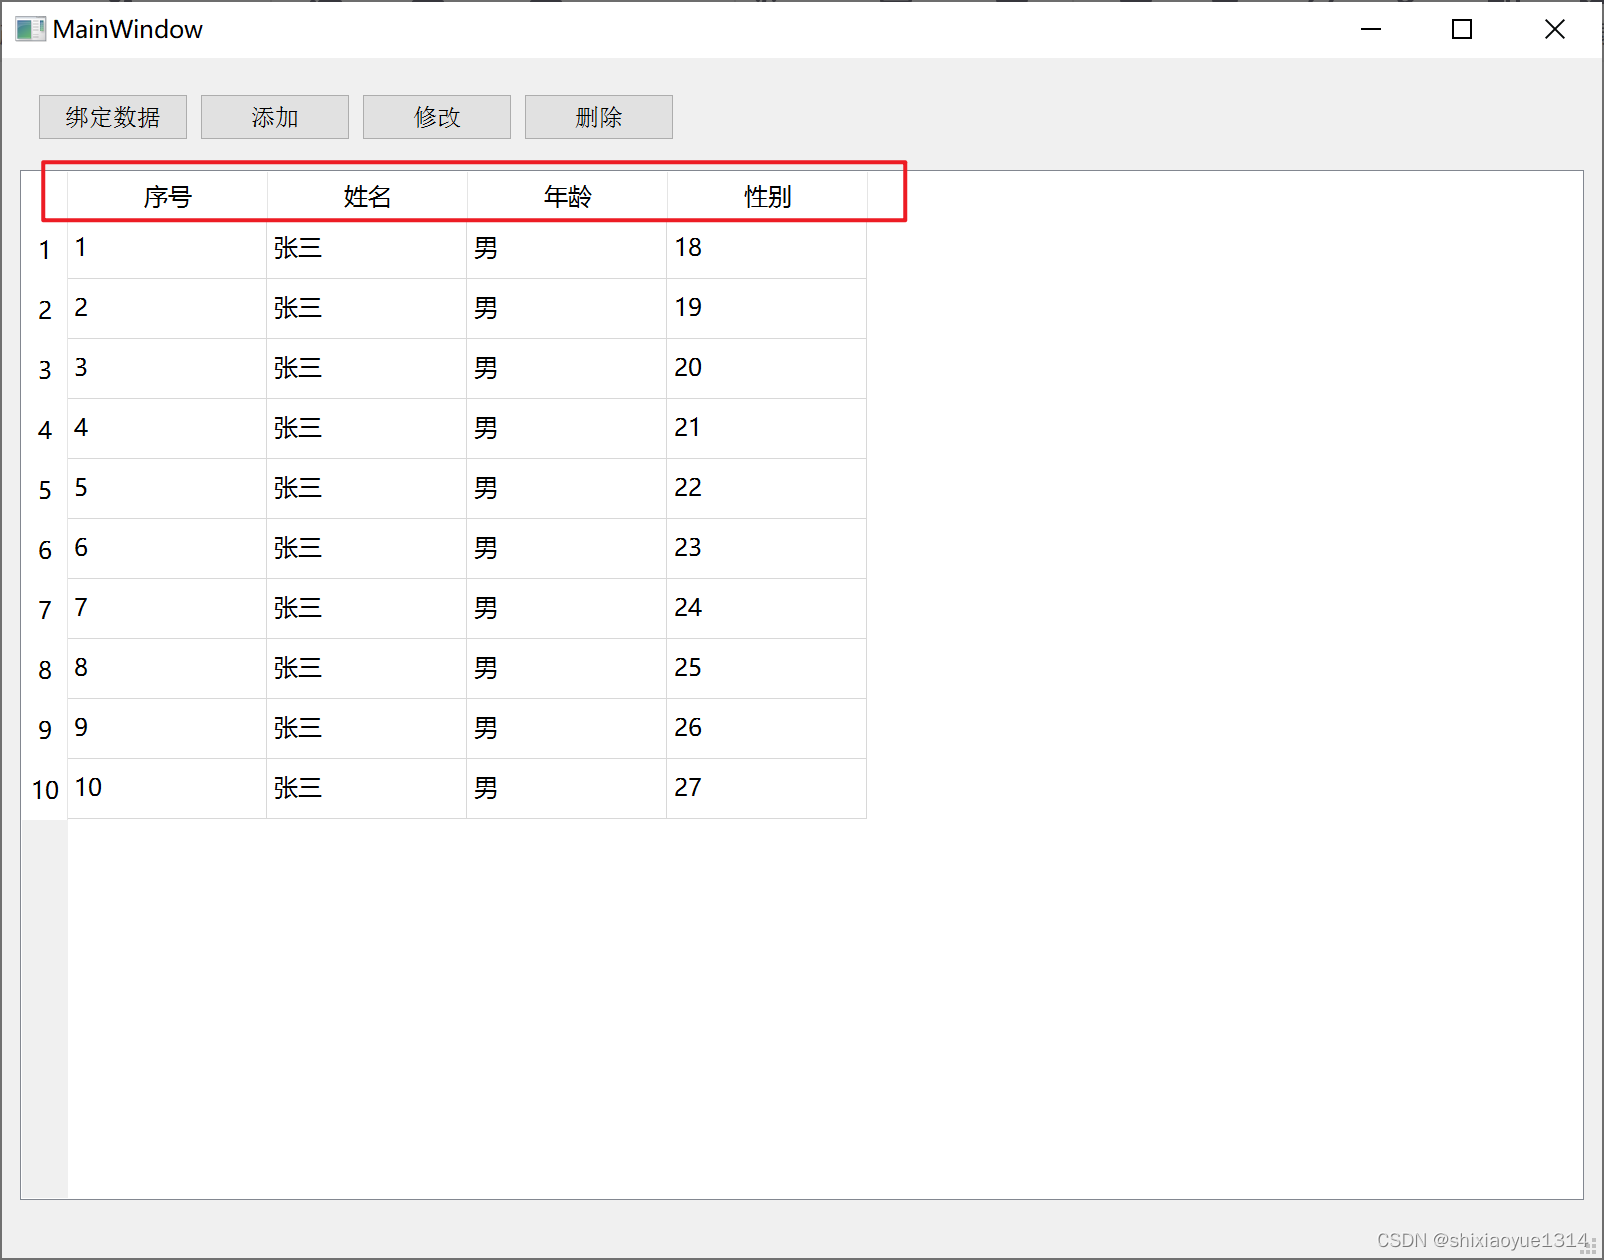
}5.1.6、设置表头数据
在绑定数据时,调用setHeaderData函数设置表头
void MainWindow::on_btnBindData_clicked()
{
    QVector<MyData> list;
    for(int i=0;i<10;i++){
        MyData data;
        data.index = i+1;
        data.name = "张三";
        data.age = 18+i;
        data.sex = "男";
        list.push_back(data);
    }
    QStringList headers;
    headers<<"序号"<<"姓名"<<"年龄"<<"性别";
    m_tableModel->setHeaderData(headers.toVector().toList());
    m_tableModel->bindData(list);
}
5.2、添加一行数据
5.2.1、添加addData函数
在MyTableModel.h文件中声明:
void addData(MyData& data);在MyTableModel.cpp文件中实现:
void MyTableModel::addData(MyData& data){
beginResetModel();
m_list.push_back(data);
endResetModel();
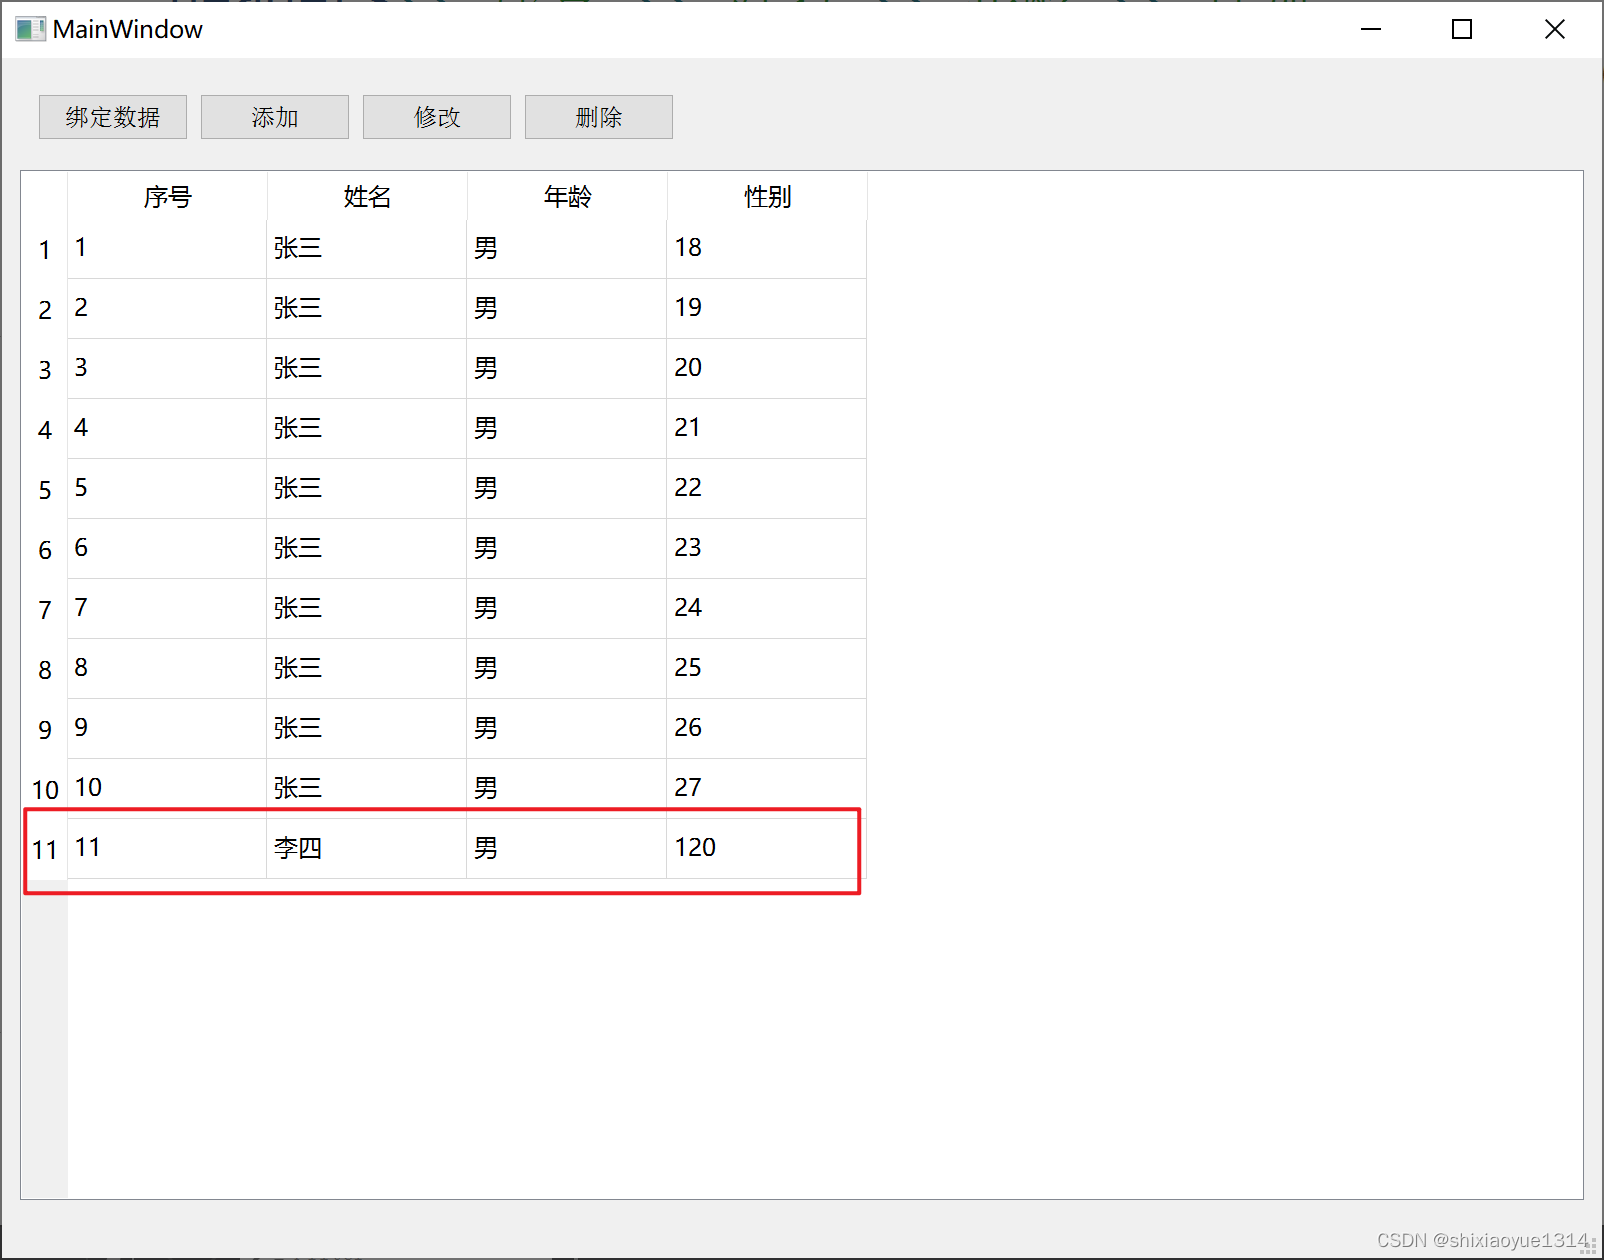
}5.2.2、调用addData添加数据
void MainWindow::on_btnAddData_clicked()
{
    MyData data;
    data.index = 11;
    data.name = "李四";
    data.age = 120;
    data.sex = "男";
    m_tableModel->addData(data);
}
运行点击添加按钮:
5.3、修改一行数据
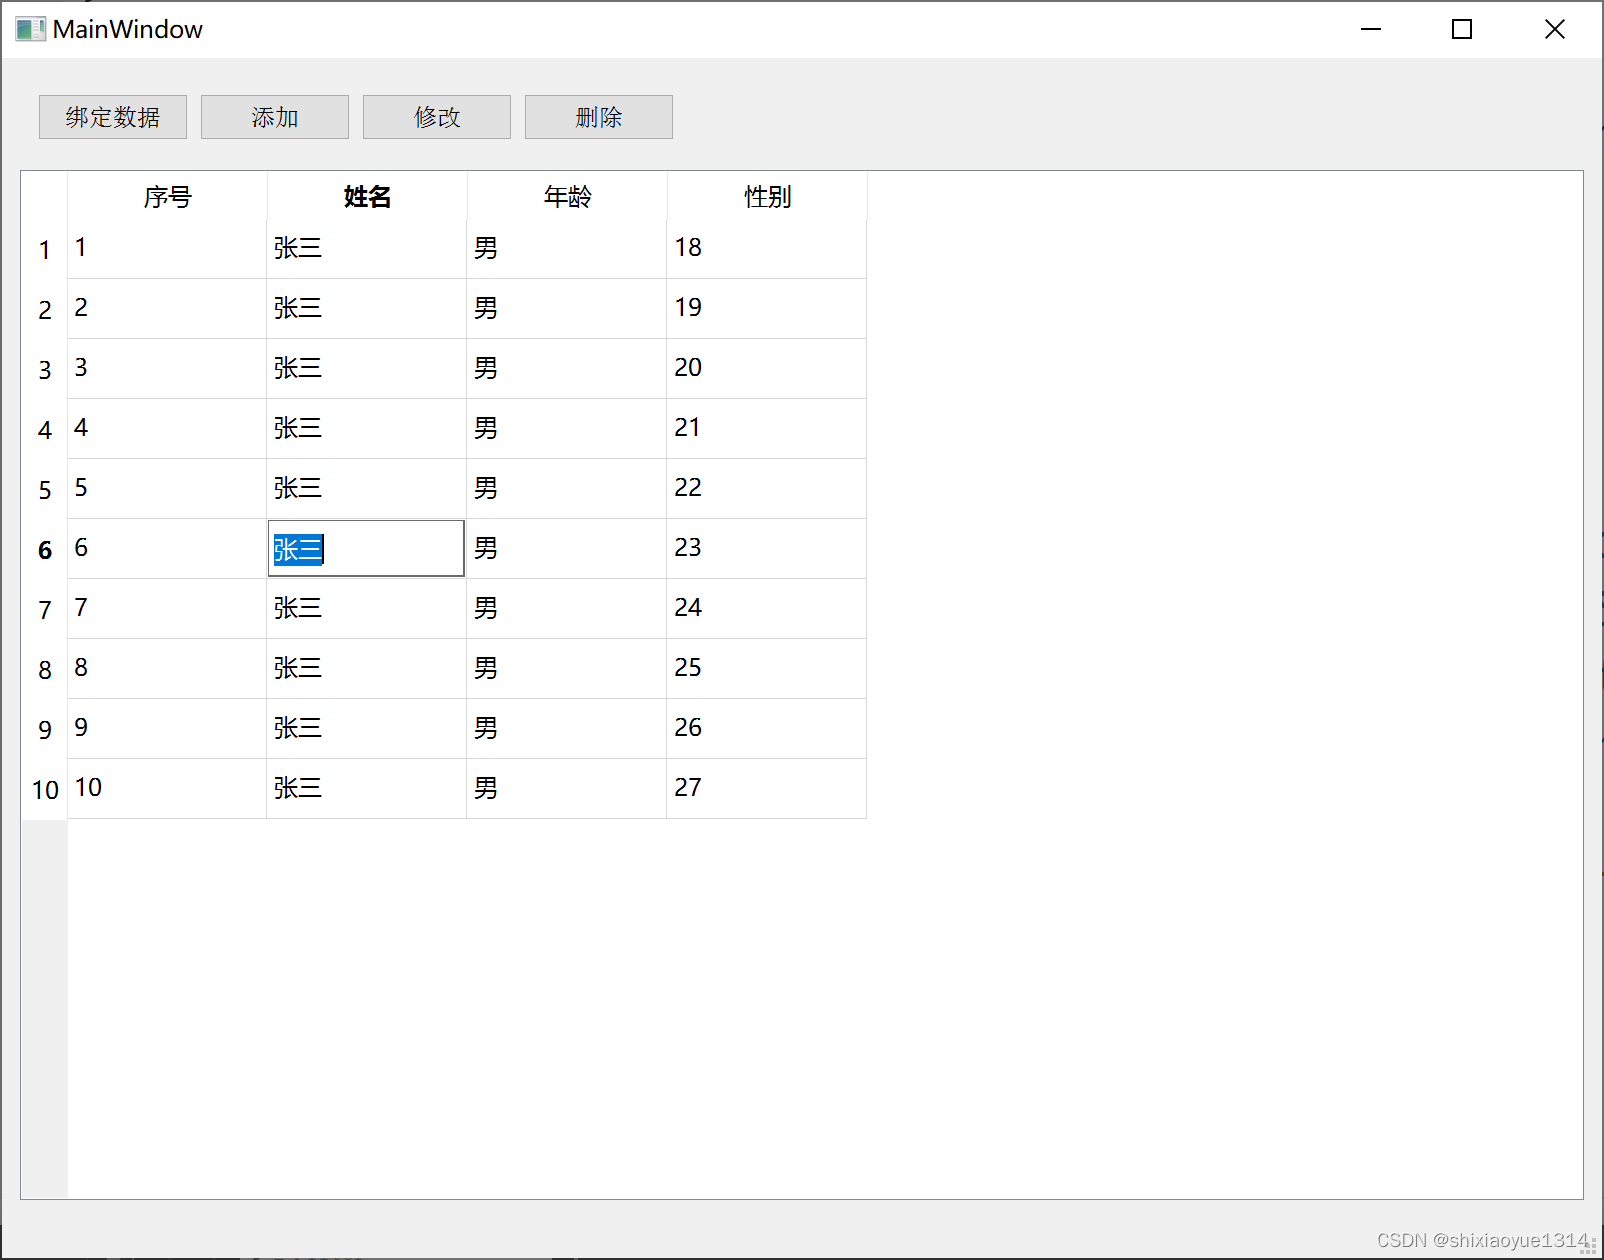
5.3.1、设置单元格为可修改
重写flag函数,在MyTableModel.h文件中声明:
Qt::ItemFlags flags(const QModelIndex& index) const override;重写flag函数,在MyTableModel.cpp文件中实现:
Qt::ItemFlags MyTableModel::flags(const QModelIndex &index) const
{
    if (!index.isValid())
        return Qt::NoItemFlags;
            //可用的、可选中的、可编辑的
    return Qt::ItemIsEnabled|Qt::ItemIsSelectable|Qt::ItemIsEditable;

}
双击单元格,单元格就进入可编辑状态啦。 此时修改的数据并不会同步到数据模型中。
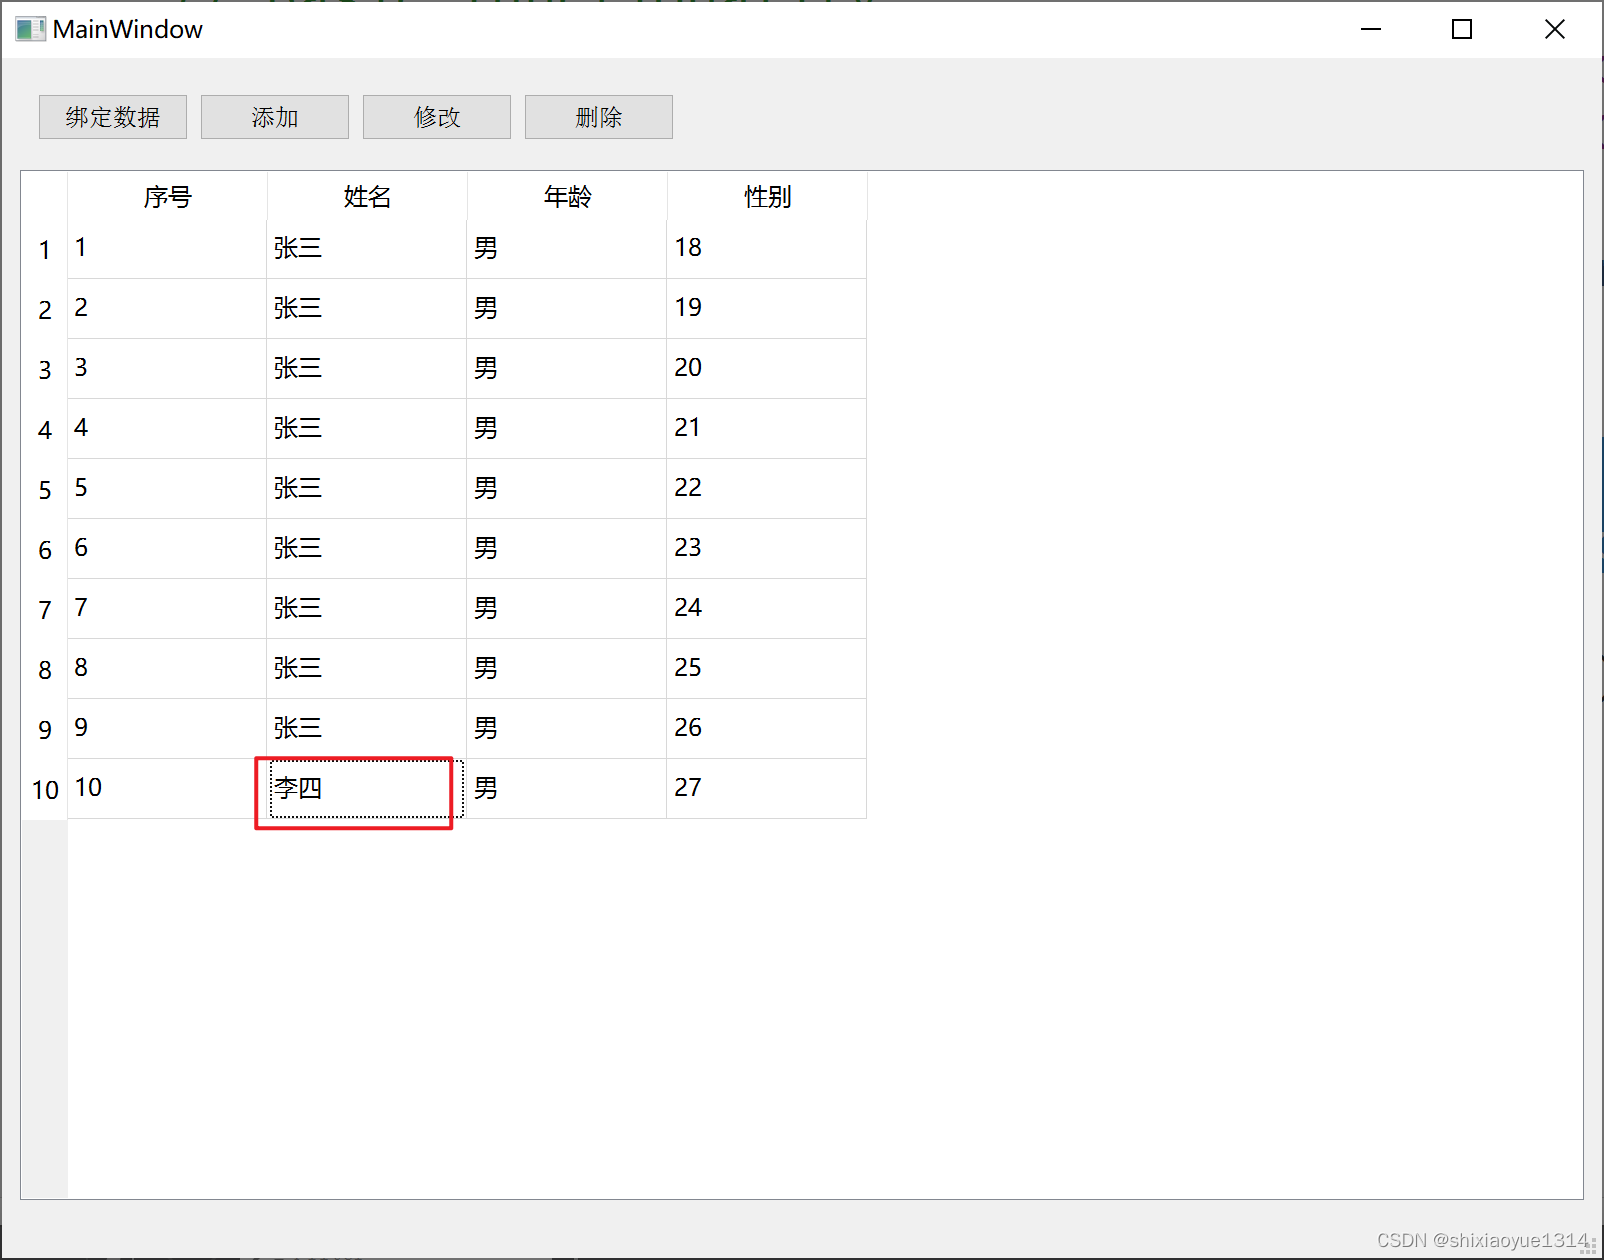
5.3.2、界面修改时更新数据
重写setData函数,在MyTableModel.h文件中声明:
bool setData(const QModelIndex &index, const QVariant &value,
                 int role = Qt::EditRole) override;
重写setData函数,在MyTableModel.cpp文件中实现:
bool MyTableModel::setData(const QModelIndex &index, const QVariant &value, int role)
{
    if (data(index, role) != value) {
        const int row = index.row();
        switch(index.column())
        {
            case 0: m_list[row].index = value.toInt(); break;
            case 1: m_list[row].name = value.toString(); break;
            case 2: m_list[row].sex = value.toString(); break;
            case 3: m_list[row].age = value.toInt(); break;
        }
        emit dataChanged(index, index, QVector<int>() << role);
        return true;
    }
    return false;
}
这样在界面上修改数据后,就会同步更改数据集合(m_list)中的数据啦
5.4、删除一行数据
5.4.1、重写removeRows函数
重写removeRows函数,在MyTableModel.h文件中声明:
bool removeRows(int row, int count, const QModelIndex &parent = QModelIndex()) override;重写removeRows函数,在MyTableModel.cpp文件中实现:
bool MyTableModel::removeRows(int row, int count, const QModelIndex &parent)
{
if(row<0||count<1||row+count>rowCount())
return false;
beginRemoveRows(parent, row, row + count - 1);
for(int i=row+count-1;i>=row;i--)
{
//移除该行数据
m_list.removeAt(i);
}
endRemoveRows();
return true;
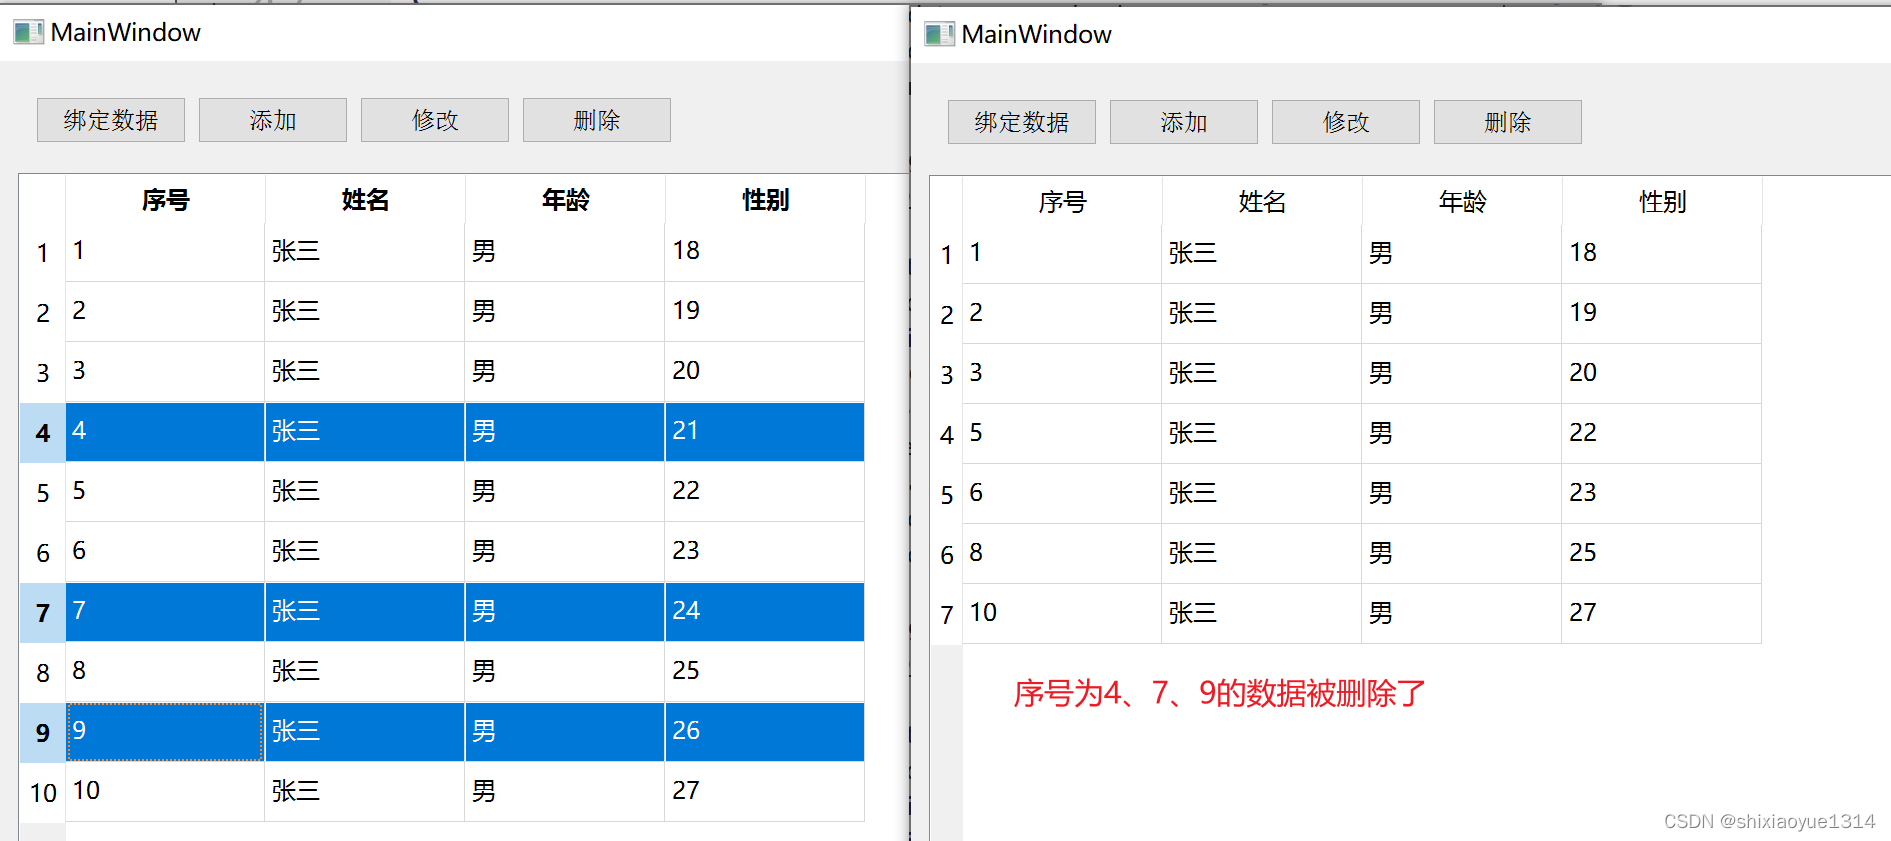
}5.4.2、删除选中行
在MainWindow.cpp中实现删除按钮事件
void MainWindow::on_btnDeleteData_clicked()
{
    //获取选中的行
    QList<QModelIndex> indexs = ui->tableView->selectionModel()->selectedRows();

    int rowCount = indexs.count();
    int a=0;
    for(int i=rowCount-1;i>=0;i--){
        a++;
        m_tableModel->removeRow(indexs[i].row());
    }
}
运行程序,选中需要删除的行,点击删除按钮,就可以删除数据啦
5.5、性别下拉框
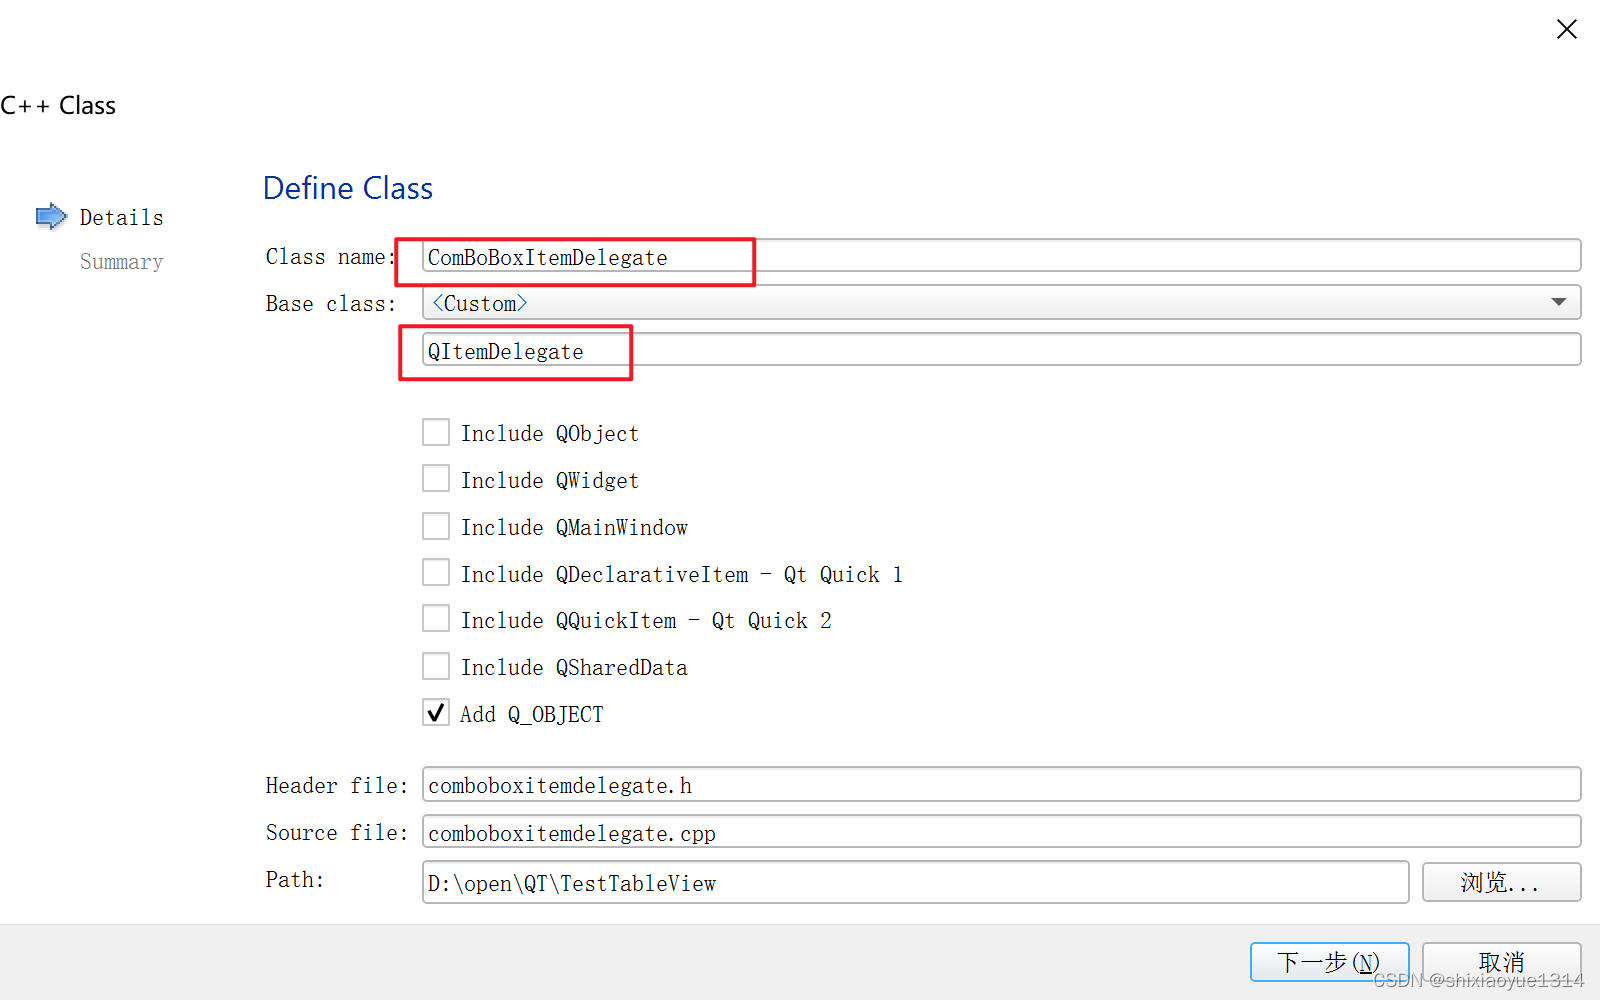
5.5.1、自定义委托类
新建ComBoBoxItemDelegate类,继承于QItemDelegate
 5.5.2、委托类代码
comboboxitemdelegate.h:
#ifndef COMBOBOXITEMDELEGATE_H
#define COMBOBOXITEMDELEGATE_H

#include <QItemDelegate>
#include <QComboBox>
class ComBoBoxItemDelegate : public QItemDelegate
{
    Q_OBJECT
public:
    ComBoBoxItemDelegate();
    ComBoBoxItemDelegate (QStringList list, QItemDelegate *parent = nullptr);
    // 创建编辑器
    virtual QWidget *createEditor(QWidget *parent, const QStyleOptionViewItem &option, const QModelIndex &index) const override;
    // 设置编辑器数据
    virtual void setEditorData(QWidget *editor, const QModelIndex &index) const override;
    // 更新编辑器集合属性
    virtual void updateEditorGeometry(QWidget *editor, const QStyleOptionViewItem &option, const QModelIndex &index) const override;
    // 设置模型数据
    virtual void setModelData(QWidget *editor, QAbstractItemModel *model, const QModelIndex &index) const override;

private:
    // 存储下拉框选择项的数据
    QStringList m_list;
};

#endif // COMBOBOXITEMDELEGATE_H
comboboxitemdelegate.cpp:
#include "comboboxitemdelegate.h"

ComBoBoxItemDelegate::ComBoBoxItemDelegate()
{

}
ComBoBoxItemDelegate::ComBoBoxItemDelegate(QStringList list, QItemDelegate *parent) : QItemDelegate(parent)
{
    m_list = list;
}

// 创建编辑器
QWidget *ComBoBoxItemDelegate::createEditor(QWidget *parent, const QStyleOptionViewItem &option, const QModelIndex &index) const{
    Q_UNUSED(option);
    Q_UNUSED(index);
    // 返回QComboBox
    return new QComboBox(parent);
}

// 设置编辑器数据
void ComBoBoxItemDelegate::setEditorData(QWidget *editor, const QModelIndex &index) const {
    Q_UNUSED(index);
    // 将参数editor转换为对应创建的控件,再进行数据初始设置就行
    QComboBox *cob = static_cast<QComboBox *>(editor);
    cob->addItems(m_list);
}

// 更新编辑器集合属性
void ComBoBoxItemDelegate::updateEditorGeometry(QWidget *editor, const QStyleOptionViewItem &option, const QModelIndex &index) const {
    Q_UNUSED(index);
    // 将编辑器设置为矩形属性
    editor->setGeometry(option.rect);
}

// 设置模型数据
void ComBoBoxItemDelegate::setModelData(QWidget *editor, QAbstractItemModel *model, const QModelIndex &index) const {
    // 类型转换
    QComboBox *comboBox = static_cast<QComboBox *>(editor);
    // 模型(单元格)显示的数据
    model->setData(index, comboBox->currentText());
}
5.5.3、使用委托
在MainWindow构造函数中添加代码:
//基于QItemDelegate的单元格下拉框
    QStringList sexs;
    sexs << "男" << "女" ;
    ComBoBoxItemDelegate* m_cBoxDelegate = new ComBoBoxItemDelegate(sexs);
    // 将一列单元格设置为该委托
    ui->tableView->setItemDelegateForColumn(2,m_cBoxDelegate);
    //setItemDelegateForRow 将一行单元格设置为委托
    //setItemDelegate 将全部单元格设置为委托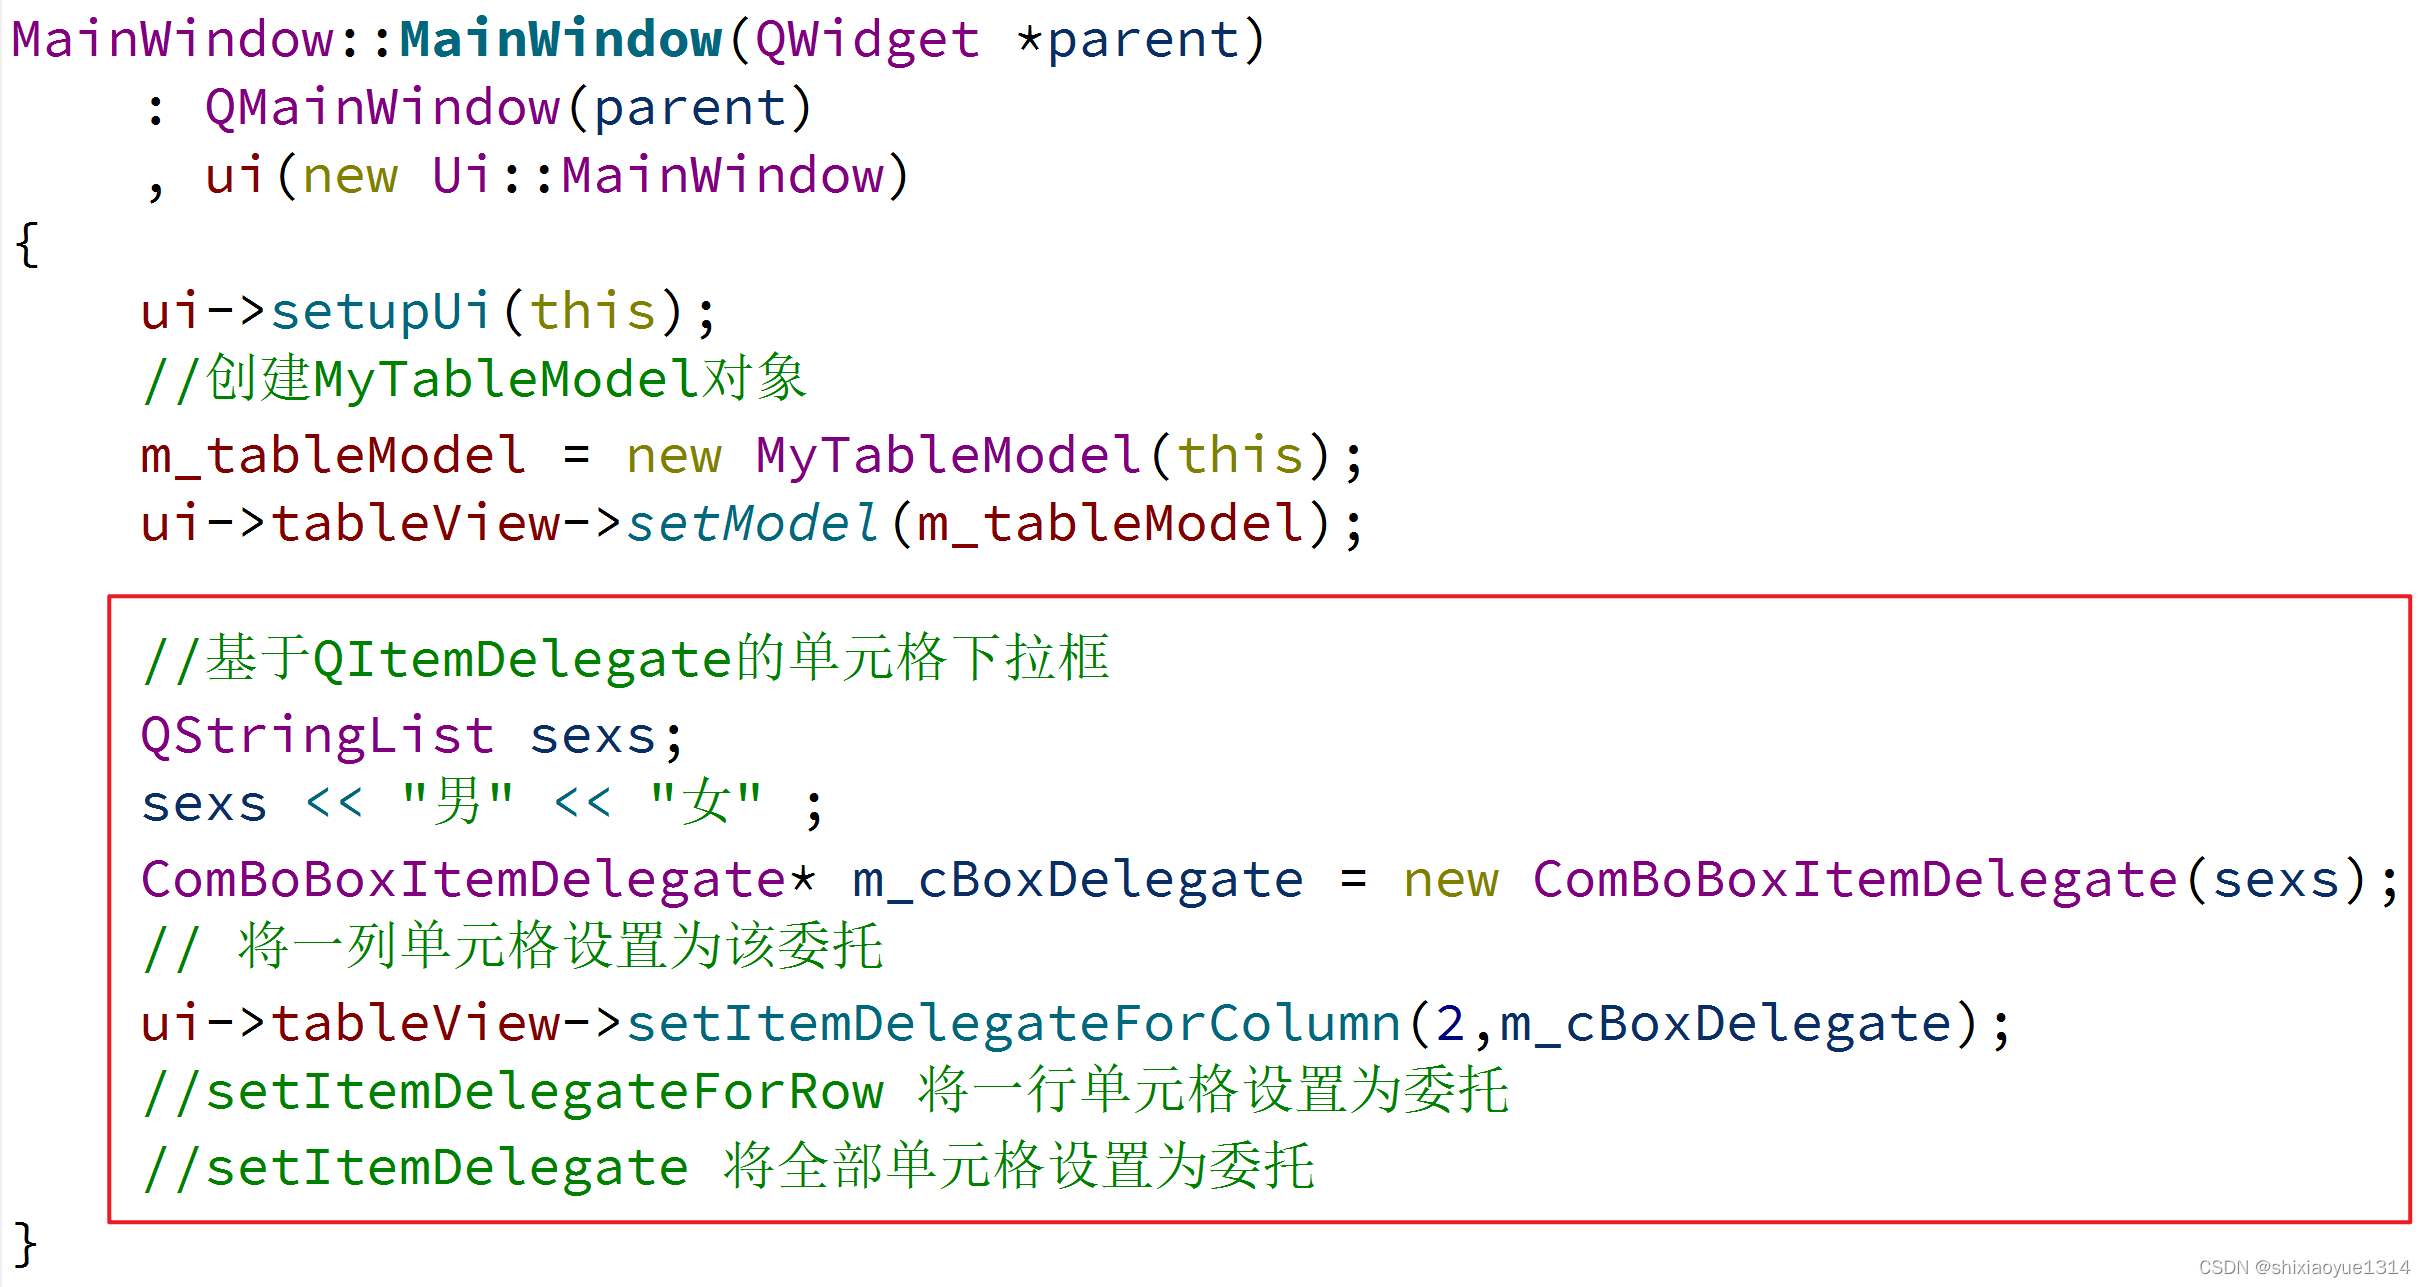
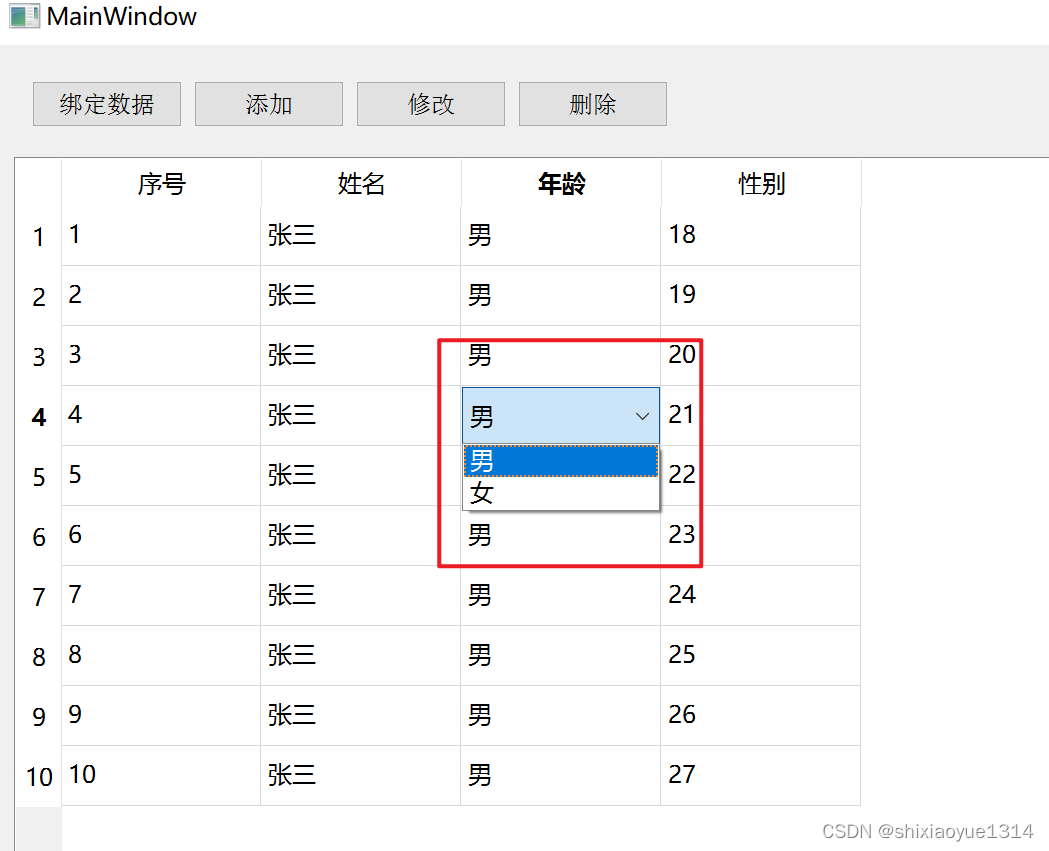
运行后,双击性别列的单元格,就可以看见下拉框啦 :


 6289
6289

 被折叠的 条评论
为什么被折叠?
被折叠的 条评论
为什么被折叠?
 到【灌水乐园】发言


