


 本文介绍了LVS+Keepalived高可用群集,剖析了Keepalived实现原理。还详细阐述了LVS负载均衡DR模式群集的部署,包括搭建环境、部署共享存储、配置节点服务器和负载调度器,最后通过客户机访问验证,关闭主调度服务器Keepalived服务再次验证。
LVS之高可用群集DR+Keepalived
一、LVS+Keepalived 高可用群集
1、LVS

2、Keepalived

3、Keepalived实现原理剖析

二、LVS负载均衡DR模式群集部署
搭建环境:
DR 服务器(主负载调度器)192.168.221.30
DR 服务器(备负载调度器)192.168.221.40
NFS服务器 CentOS7 192.168.221.20
Web节点服务器1 192.168.221.109 | lo:0 (VIP):192.168.221.100
Web节点服务器2 192.168.221.110 | lo:0 (VIP):192.168.221.100
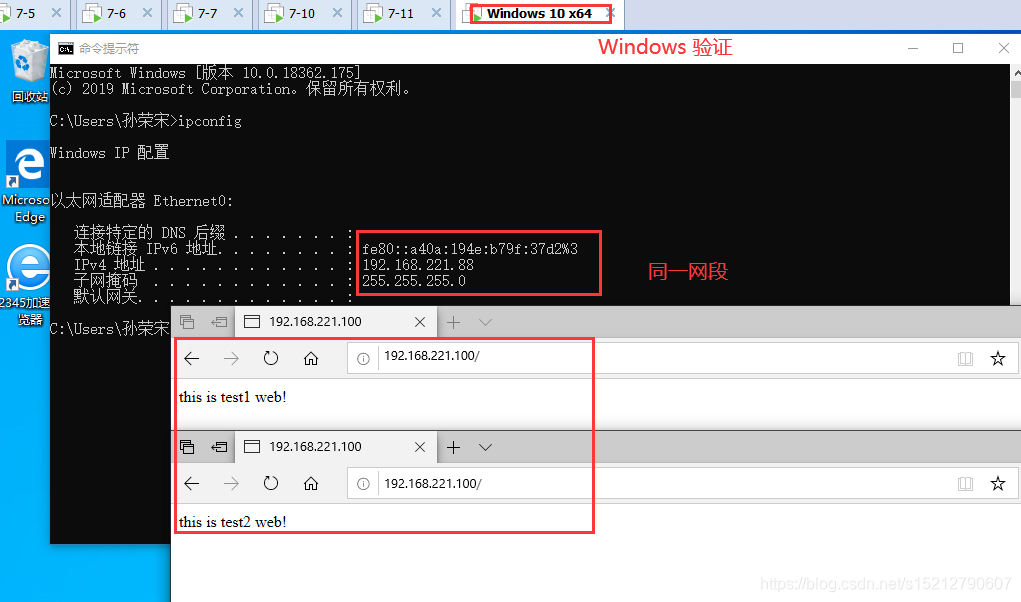
客户端 Windows10 192.168.221.88
1、部署共享存储
NFS服务器:192.168.221.20

systemctl stop firewalld.service
systemctl disable firewalld.service
setenforce 0

yum -y install nfs-utils rpcbind

systemctl start rpcbind.service
systemctl start nfs.service
systemctl enable nfs.service
systemctl enable rpcbind.service

mkdir /opt/test1
mkdir /opt/test2

chmod 777 /opt/test1
chmod 777 /opt/test2

vim /etc/exports
/opt/test1 192.168.221.0/24(rw,sync)
/opt/test2 192.168.221.0/24(rw,sync)

exportfs -rv


2、配置节点服务器
Web节点服务器1:ens33:192.168.221.109 lo:0 (VIP):192.168.221.100
Web节点服务器2:ens33:192.168.221.110 lo:0 (VIP):192.168.221.100
接下来是两台服务器相同的配置
systemctl stop firewalld.service
systemctl disable firewalld.service
setenforce 0

(1)web1和web2配置虚拟 IP 地址(VIP:192.168.221.100)
#此地址仅用做发送 Web 响应数据包的源地址,并不需要监听客户机的访问请求(改由调度器监听并分发)。
#因此使用虚接口 lo:0 来承载 VIP 地址,并为本机添加一条路有记录,将访问 VIP 的数据限制在本地,以避免通信紊乱。

vim /etc/sysconfig/network-scripts/ifcfg-lo:0
DEVICE=lo:0
IPADDR=192.168.221.100
NETMASK=255.255.255.255
ONBOOT=yes

ifup lo:0
ifconfig lo:0

#设置临时的路由,重启失效;禁锢路由
route add -host 192.168.221.100 dev lo:0
#查看路由
route -n

#开机自动添加路由,生产环境应该用这个
vim /etc/rc.local
/sbin/route add -host 192.168.221.100 dev lo:0
chmod +x /etc/rc.d/rc.local


(2)调整内核的ARP 响应参数以阻止更新 VIP 的MAC 地址,避免发生冲突
vim /etc/sysctl.conf
......
net.ipv4.conf.lo.arp_ignore = 1 #系统只响应目的IP为本地IP的ARP请求
net.ipv4.conf.lo.arp_announce = 2 #系统不使用IP包的源地址来设置ARP请求的源地址,而选择发送接口的IP地址
net.ipv4.conf.all.arp_ignore = 1
net.ipv4.conf.all.arp_announce = 2

sysctl -p

yum install -y nfs-utils rpcbind httpd
systemctl start rpcbind
systemctl enable rpcbind
systemctl start httpd.service
systemctl enable httpd.service


下面两个服务器设置有点不一样了
Web节点服务器1:ens33:192.168.221.109 lo:0 (VIP):192.168.221.100
showmount -e 192.168.221.20
mount.nfs 192.168.221.20:/opt/test1 /var/www/html
echo 'this is test1 web!' > /var/www/html/index.html

Web节点服务器2:ens33:192.168.221.110 lo:0 (VIP):192.168.221.100(同web1差不多)
showmount -e 192.168.221.20
mount.nfs 192.168.221.20:/opt/test2 /var/www/html
echo 'this is test2 web!' > /var/www/html/index.html

3、配置负载调度器
主负载调度器:192.168.221.30
副负载调度器:192.168.221.40
前4步一样,主备配置负载调度器内容略有不同
(1)关防火墙,加载ip_vs模块
systemctl stop firewalld.service
systemctl disable firewalld.service
setenforce 0

#加载ip_vs模块,并安装ipvsadm工具
modprobe ip_vs
cat /proc/net/ip_vs
yum install -y ipvsadm

(2)调整 proc 响应参数
#由于 LVS 负载调度器和各节点需要共用 VIP 地址,应该关闭Linux 内核的重定向参数响应,不充当路由器,
vim /etc/sysctl.conf
net.ipv4.conf.all.send_redirects = 0
net.ipv4.conf.default.send_redirects = 0
net.ipv4.conf.ens33.send_redirects = 0

sysctl -p

(3)配置负载分配策略
ipvsadm-save > /etc/sysconfig/ipvsadm
或者
ipvsadm --save > /etc/sysconfig/ipvsadm

systemctl start ipvsadm.service

#清除原有策略
ipvsadm -C
ipvsadm -A -t 192.168.221.100:80 -s rr
ipvsadm -a -t 192.168.221.100:80 -r 192.168.221.109:80 -g #如果这里是隧道模式,直接将-g替换成-i即可
ipvsadm -a -t 192.168.221.100:80 -r 192.168.221.110:80 -g

#查看节点状态,Route代表 DR模式
ipvsadm -ln

(4)配置keeplived
主负载调度器1:192.168.221.30
副负载调度器2:192.168.221.40
yum -y install keepalived
cd /etc/keepalived/
cp keepalived.conf keepalived.conf.bak

vim keepalived.conf
systemctl start keepalived
ipvsadm -ln

keepalived.conf内容,主备略有不同
! Configuration File for keepalived

global_defs {
   notification_email {
     acassen@firewall.loc
     failover@firewall.loc
     sysadmin@firewall.loc
   }
   notification_email_from Alexandre.Cassen@firewall.loc
   smtp_server 127.0.0.1
   smtp_connect_timeout 30
   router_id LVS_01
   vrrp_skip_check_adv_addr
   #vrrp_strict
   vrrp_garp_interval 0
   vrrp_gna_interval 0
}

vrrp_instance VI_1 {
    state MASTER
    interface ens33
    virtual_router_id 10
    priority 100
    advert_int 1
    authentication {

        auth_type PASS
        auth_pass 123
    }
    virtual_ipaddress {
        192.168.221.100
    }
}

virtual_server 192.168.221.100 80 {
    delay_loop 6
    lb_algo rr
    lb_kind DR
    persistence_timeout 50
    protocol TCP

    real_server 192.168.221.109 443 {
        weight 1
            TCP_CHECK {
                connect_port 80
                connect_timeout 3
                nb_get_retry 3
                delay_before_retry 4
        }
}

    real_server 192.168.221.110 80 {
        weight 1
            TCP_CHECK {
                connect_port 80
                connect_timeout 3
                nb_get_retry 3
                delay_before_retry 4
        }
}
}


4、客户机访问
访问192.168.221.100,隔一段时间进行刷新,轮询显示
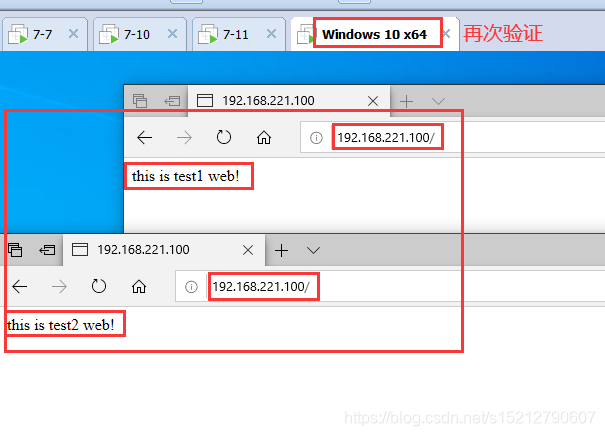
将主调度服务器keepalived服务关闭,再次验证
systemctl stop keepalived


 1266
1266

 被折叠的 条评论
为什么被折叠?
被折叠的 条评论
为什么被折叠?
 到【灌水乐园】发言


